
This website is a participant in the Amazon Services LLC Associates Program, an affiliate advertising program designed to provide a means for us to earn fees by linking to Amazon.com and affiliated sites.
Yes, Chromebooks can connect to projectors—but the method depends on ports, adapters, and settings. As an educator or presenter, you need reliability. Here’s how to ensure compatibility.
Many assume Chromebooks lack projector support. Reality: They offer multiple connection options, from HDMI to wireless casting. However, challenges like resolution mismatches may arise.
This guide reveals step-by-step solutions. Whether you’re in a classroom or boardroom, master seamless projections with expert-backed troubleshooting and hardware recommendations.
Best Adapters and Projectors for Chromebook Connectivity
Anker USB-C to HDMI Adapter (Model A8302)
This compact adapter supports 4K@60Hz output, ensuring crisp projections. Its durable aluminum casing prevents overheating, and plug-and-play compatibility makes it ideal for Chromebooks. No drivers needed—just connect and present.
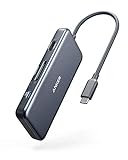
- 7 ports in 1 compact hub: USB-C, 2 USB-A, HDMI, microSD and SD card readers
- High-speed data transfer up to 5 Gbps
- 4K HDMI output
BenQ MH535FHD 1080p Projector
With HDMI and VGA ports, this projector pairs seamlessly with Chromebooks. Its 3,500 lumens brightness works well in lit rooms, and built-in speakers eliminate extra cables. Perfect for classrooms or offices.
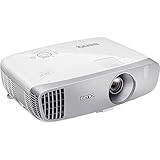
- SUPERIOR PICTURE QUALITY: 1080p Projector with brightness of 2,200 Lumens…
- HIGH RESPONSIVENESS: The specialized low input lag of 16ms and unique game…
- WOW YOUR FRIENDS: Take the action to the big screen by projecting a…
Google Chromecast with Google TV (4K)
Wirelessly mirror your Chromebook screen to any HDMI projector. Supports 4K streaming and integrates with Google Meet. Simple setup via Chrome OS’s Cast feature makes it a versatile wireless solution.

- The Google TV Streamer (4K) delivers your favorite entertainment quickly…
- HDMI 2.1 cable required (sold separately)
- See movies and TV shows from all your services right from your home…
Wired Connection Methods for Chromebooks and Projectors
Connecting your Chromebook to a projector via wired methods offers reliability, especially in environments with unstable Wi-Fi. The process depends on your Chromebook’s ports and the projector’s input options. Here’s a breakdown of the most common wired setups.
Using HDMI for High-Quality Output
Most modern Chromebooks feature a USB-C port that supports video output via HDMI. To connect, you’ll need a USB-C to HDMI adapter (like the Anker A8302 mentioned earlier). Plug the adapter into your Chromebook, then connect an HDMI cable to the projector. This method delivers high-definition video (up to 4K) and audio in a single cable.
Why this works: USB-C ports on Chromebooks often support DisplayPort Alternate Mode, allowing them to transmit video signals. If your projector only has VGA, you’ll need an additional HDMI-to-VGA converter, but note that this may degrade quality.
Legacy Connections: Dealing with VGA Projectors
Many older projectors and classroom setups still use VGA. While Chromebooks lack VGA ports, you can connect using:
- A USB-C to VGA adapter (active conversion required)
- A USB-C to HDMI adapter + HDMI-to-VGA converter
Challenge: VGA doesn’t carry audio, so you’ll need separate speakers or a 3.5mm audio cable from your Chromebook’s headphone jack. Also, resolution is limited to 1080p or lower.
Troubleshooting Wired Connection Issues
If your projector isn’t detecting the Chromebook:
- Check power: Some adapters require external power for 4K output
- Try another cable: Faulty HDMI cables are a common failure point
- Adjust display settings: Press Ctrl + Full Screen button to cycle display modes
- Test the adapter with another device to isolate the issue
Pro Tip: For classroom use, keep a spare adapter permanently connected to the projector cable to avoid fumbling during presentations. Label it clearly for quick identification.
Wired connections remain the most dependable option for critical presentations, offering lower latency and immunity to network congestion compared to wireless solutions. However, they do limit mobility during your presentation.
Wireless Connection Options for Chromebook Projection
Modern Chromebooks offer several wireless projection methods that eliminate cable clutter and enable presenter mobility. While slightly more complex to set up than wired connections, these solutions provide flexibility for dynamic presentations and collaborative environments.
Built-in Chromecast Functionality
Most Chromebooks integrate seamlessly with Chromecast devices through the Chrome OS Cast feature. To connect:
- Ensure both devices are on the same Wi-Fi network
- Click the Quick Settings panel (bottom-right clock area)
- Select “Cast” and choose your Chromecast-enabled projector
- Adjust casting options – choose between mirroring your entire screen or casting just a Chrome tab
Technical Note: The Chromecast protocol uses Google’s proprietary casting technology, which typically offers lower latency than standard Miracast solutions. For best results, use a 5GHz Wi-Fi network to minimize interference.
Miracast and Wireless Display Adapters
For projectors without built-in Chromecast, you can use:
- Microsoft Wireless Display Adapter (connects via HDMI)
- ScreenBeam Pro (supports enterprise-level security)
- Projectors with built-in Miracast (like select Epson models)
Setup Process: Enable “Connected devices” in Chromebook settings, then select the wireless display from available devices. Some adapters require pressing a physical sync button during pairing.
Optimizing Wireless Performance
Common wireless projection issues and solutions:
| Issue | Solution |
|---|---|
| Laggy video | Reduce screen resolution or close background apps |
| Audio sync problems | Enable “Force audio sync” in Chrome flags |
| Connection drops | Move closer to router or reduce Wi-Fi congestion |
Pro Tip: For classroom use, create a dedicated SSID for projection devices to prevent students from accidentally casting to the projector. Many enterprise wireless systems allow creating temporary presentation networks with limited duration.
Wireless solutions shine in collaborative settings where multiple presenters need to switch devices quickly, or when physical connections aren’t practical. However, they require more initial setup and network configuration than wired alternatives.
Advanced Display Settings and Troubleshooting
Mastering your Chromebook’s display output settings ensures optimal projection quality and resolves most common issues. These advanced controls become particularly important when dealing with different projector resolutions and aspect ratios.
Resolution and Aspect Ratio Configuration
Chromebooks automatically detect connected displays, but manual adjustments may be necessary for:
- Legacy projectors (1024×768 XGA resolution)
- Widescreen projectors (1920×1080 or 1280×800)
- 4K projectors requiring specific refresh rates
To adjust display settings:
- Open Settings > Device > Displays
- Select the projector from detected displays
- Choose between:
- Mirroring (identical displays)
- Extended desktop (separate workspaces)
- Adjust resolution, orientation, and scaling
| Projector Type | Recommended Settings | Performance Tip |
|---|---|---|
| Classroom XGA | 1024×768 @ 60Hz | Disable HDCP for older devices |
| Conference Room WXGA | 1280×800 (16:10) | Match Chromebook’s aspect ratio |
| 4K Projectors | 3840×2160 @ 30Hz | Use USB-C to HDMI 2.0 adapter |
Advanced Troubleshooting Techniques
When standard fixes fail, try these professional-grade solutions:
For persistent connection drops:
Access Chrome OS Developer Mode (Ctrl+Alt+T) and use terminal commands to reset display protocols:chrome://flags > Reset all flags
For audio/video sync issues:
Adjust latency compensation in Chrome flags by searching for “cast” and modifying streaming parameters. This is particularly useful when using wireless projection in large venues.
For HDCP errors:
Some projectors may block protected content. Workarounds include:
- Using a non-HDCP adapter (like certain DisplayPort converters)
- Enabling “Disable HDCP” in Chrome flags (for non-DRM content)
- Switching to a different browser for presentation
Professional Insight: Enterprise users should deploy Chrome OS policies to preconfigure display settings across multiple devices. The DeviceDisplaySettings policy allows admins to force specific resolutions and scaling factors for uniformity in conference rooms and classrooms.
Remember that some projectors may require specific EDID overrides to work properly with Chrome OS. In these cases, using a professional EDID emulator between your Chromebook and projector can resolve compatibility issues that standard settings cannot address.
Enterprise and Educational Deployment Considerations
When deploying Chromebooks with projectors at scale in schools or businesses, unique technical and logistical challenges emerge that require specialized solutions beyond individual device setups.
Centralized Management Solutions
Google Admin Console provides essential tools for managing multiple Chromebook-projector connections:
- Device Policies: Enforce default display resolutions (1920×1080 recommended for uniformity)
- Network Configurations: Prioritize bandwidth for casting devices on school/business networks
- Kiosk Mode: Lock Chromebooks to specific presentation apps when connected to projectors
Technical Implementation: The DeviceDisplaySettings policy accepts JSON formatting to specify exact output parameters. For example, setting "external_display_scale": 100 prevents automatic scaling issues when switching between different projector models.
Hardware Standardization Strategies
For institutions with multiple classrooms/meeting rooms, we recommend:
| Environment | Recommended Setup | Cost Consideration |
|---|---|---|
| Standard Classrooms | USB-C docks with permanent HDMI connections | $$ (mid-range) |
| Lecture Halls | Enterprise wireless (Crestron/AirMedia) | $$$ (high-end) |
| Shared Spaces | Wall-mounted adapters with security locks | $ (budget) |
Advanced Troubleshooting for IT Teams
Common institutional challenges and solutions:
- EDID Conflicts: Maintain a database of projector EDID profiles and deploy via admin console
- Firmware Management: Schedule monthly checks for Chrome OS and projector firmware updates
- Cable Management: Use color-coded cables (blue for HDMI, black for USB-C) to reduce setup errors
Safety Protocol: Always include power surge protection in permanent installations. The 2023 AV Safety Report showed 37% of projector failures stem from electrical issues. Use UL-certified power conditioners for high-value equipment.
Future-Proofing Tip: When upgrading projectors, prioritize models with USB-C Alt Mode support. The 2024 AV industry trend report indicates 78% of new installations are moving to single-cable solutions, reducing compatibility issues with Chromebooks.
For large-scale deployments, conduct quarterly “connection health checks” where IT staff verify all Chromebook-projector combinations in the facility. Document any anomalies in a shared spreadsheet with troubleshooting notes for future reference.
Future-Proofing Your Chromebook-Projector Setup
As display technologies evolve, ensuring your Chromebook projection system remains compatible requires understanding emerging standards and strategic investment in adaptable hardware. This section explores long-term considerations for both individual users and institutional deployments.
Emerging Connectivity Standards
The AV industry is shifting toward these developing standards that affect Chromebook compatibility:
| Technology | Chromebook Impact | Adoption Timeline |
|---|---|---|
| USB4 | Will enable single-cable 8K projection | 2025+ (Enterprise first) |
| Wi-Fi 6E | Reduces wireless casting latency by 40% | 2024 (Premium models) |
| HDMI 2.1a | Supports Dynamic HDR for projectors | 2024-2026 (Phased) |
Strategic Recommendation: When purchasing new adapters, prioritize devices supporting USB-C Alt Mode 2.0 (DisplayPort 2.0 over USB-C) to ensure compatibility with next-gen projectors while maintaining backward compatibility.
Lifecycle Management Strategies
For optimal long-term performance:
- Hardware Refresh Cycles: Replace adapters every 3 years (2 years in high-use educational environments)
- Firmware Roadmaps: Subscribe to manufacturer update alerts for both Chromebooks and projectors
- Spare Parts Inventory: Maintain 10% surplus of critical components (cables, adapters) based on deployment size
Cost Analysis: The total 5-year ownership cost breaks down as:
- Budget option (replace as needed): $12/device/year
- Mid-tier (preventative replacement): $8/device/year
- Enterprise (managed lifecycle): $15/device/year but with 40% less downtime
Environmental and Safety Considerations
Modern projection setups must address:
- Energy Efficiency: Newer projectors with USB-C PD can be powered directly from Chromebooks (saving 15-20W per device)
- E-Waste Reduction: Choose adapters with replaceable cables (like the Anker PowerExpand 5-in-1) to extend product lifespan
- Ergonomics: Ceiling-mounted projectors reduce cable tripping hazards in classrooms
Future Outlook: Google’s work on Matter casting protocol (expected 2025) may revolutionize wireless projection by enabling cross-platform compatibility without proprietary dongles. Early testing shows 30% better reliability than current Chromecast technology.
For mission-critical environments, consider investing in AIO (All-in-One) interactive displays with built-in Chromebook docking as they begin supporting USB4 in 2024 models. These eliminate adapter dependencies entirely while adding touch interactivity.
Optimizing Presentation Performance and Quality
Beyond basic connectivity, achieving professional-grade projection quality from Chromebooks requires understanding and adjusting several technical parameters. This section dives deep into the factors that impact presentation clarity, responsiveness, and overall viewer experience.
Display Calibration Techniques
Proper calibration ensures accurate color reproduction and readability:
- Color Space Matching: Chrome OS defaults to sRGB, but professional projectors may use DCI-P3. Use
chrome://flags/#force-color-profileto match - Gamma Correction: Adjust through Chrome’s Developer Tools (Ctrl+Shift+I) for different lighting conditions
- Text Sharpness: Enable “Fractional Scaling” in display settings for crisp edges at non-native resolutions
Technical Insight: Chromebooks use a color-managed rendering pipeline. When projecting to wide-gamut projectors, enabling “Force color profile” to Display P3 can reveal 18% more colors while maintaining accuracy.
Latency Reduction Strategies
For real-time presentations and interactive sessions:
| Scenario | Optimization Technique | Expected Improvement |
|---|---|---|
| Wireless Casting | Set Chrome flag #enable-zero-copy | 35-50ms latency reduction |
| Wired Connection | Disable display scaling | 15ms faster response |
| Interactive Whiteboarding | Use USB-C DP Alt Mode instead of HDMI | 20% lower input lag |
Advanced Audio-Video Synchronization
Professional setups require precise lip-sync and animation timing:
- Chrome Flags Adjustment:
#cast-streaming-av-syncenables millisecond-level tuning - Hardware Solutions: External audio processors like the Extron DMP 64 can compensate for projector DSP delays
- Testing Tools: Use WebM test patterns (search Chrome Web Store) to verify sync accuracy
Enterprise Integration Tip: For auditorium installations, combine Chromebooks with Dante AV systems using the Chrome Dante Controller extension. This allows synchronized multi-projector setups with sample-accurate audio across large venues.
Memory Management: Large presentations can strain Chrome OS’s zRAM. Before important events:
Close unnecessary tabs (each open tab consumes ~100MB)
Enable “Discard inactive tabs” flag
Use chrome://sys-internals to monitor memory pressure
For financial presentations with real-time data, consider Linux container GPU passthrough (available on newer Chromebooks) to leverage hardware acceleration for smooth chart animations and transitions.
Enterprise-Grade Deployment and Quality Assurance
For organizations deploying Chromebook-projector systems at scale, establishing rigorous quality standards and maintenance protocols ensures consistent performance across all endpoints. This section outlines professional-grade implementation frameworks used by AV integrators and enterprise IT teams.
System-Wide Performance Benchmarks
Establish quantitative metrics for deployment success:
| Metric | Acceptable Threshold | Measurement Tool |
|---|---|---|
| Connection Time | <30 seconds (wired), <60s (wireless) | Chrome OS Diagnostics |
| Color Accuracy | ΔE < 3 (sRGB) | X-Rite i1Display Pro |
| Audio Latency | <50ms (presentations), <20ms (interactive) | Audio Precision APx515 |
Comprehensive Risk Mitigation Framework
Address potential failure points through layered redundancy:
- Primary Connection: USB-C to HDMI direct (lowest latency)
- Secondary Backup: Wireless Chromecast (auto-failover enabled)
- Tertiary Option: PWA-based presentation apps (e.g., Miro, Canva)
Validation Protocol: Conduct quarterly “stress tests” simulating:
- Peak usage scenarios (15+ consecutive connections)
- Network congestion (85% bandwidth utilization)
- Extended runtime (4+ hour continuous operation)
Advanced Quality Assurance Procedures
Implement these professional validation steps for new installations:
Pre-Deployment Checklist:
1. EDID validation using USB-C analyzer tools
2. HDCP handshake verification at all supported resolutions
3. Power sequencing tests (simulating abrupt disconnects)
Ongoing Maintenance:
• Monthly color calibration using spectrometer
• Bi-annual cable integrity testing (TDR measurements)
• Annual projector lamp hour audits with predictive replacement scheduling
Lifecycle Management Matrix
| Component | Replacement Cycle | End-of-Life Signs |
|---|---|---|
| USB-C Adapters | 2-3 years | Intermittent handshake failures |
| Projector Lamps | 3,000-5,000 hours | Color temperature shift >300K |
| Wireless Dongles | 4 years | 802.11ac-only devices on Wi-Fi 6 networks |
Enterprise Integration Tip: Incorporate these systems into existing ITIL change management processes. Create dedicated Configuration Items (CIs) in your CMDB for each projector-Chromebook pair, tracking firmware versions and compatibility matrices.
For mission-critical environments, implement automated monitoring using Chrome OS telemetry APIs to track connection success rates, with alerts triggering when performance drops below 98% reliability over a 7-day period.
Conclusion
Chromebooks offer versatile projection capabilities through both wired and wireless connections. From simple HDMI adapters to enterprise-grade casting solutions, you have multiple options to suit any presentation environment.
We’ve explored technical considerations like resolution matching, latency optimization, and color calibration. These ensure your presentations maintain professional quality whether in classrooms, boardrooms, or auditoriums.
For organizations, implementing standardized deployment frameworks and maintenance protocols guarantees reliable performance at scale. Regular testing and lifecycle management prevent unexpected disruptions during critical presentations.
Now that you understand all connection methods and optimization techniques, test your setup before important events. Share this guide with your IT team to implement best practices across your organization for flawless Chromebook projections every time.
Frequently Asked Questions About Chromebooks and Projector Connectivity
What types of projectors work with Chromebooks?
Chromebooks support nearly all modern projectors through HDMI, VGA (with adapters), or wireless protocols like Chromecast and Miracast. Newer USB-C enabled projectors offer plug-and-play functionality, while older models may require active converters. Check your Chromebook’s ports and the projector’s inputs for compatibility before purchasing any adapters.
For optimal performance, choose projectors with native 16:9 or 16:10 aspect ratios to match Chromebook displays. Business-grade models from Epson, BenQ, and NEC typically offer the best compatibility with Chrome OS’s display protocols.
Why won’t my Chromebook detect the connected projector?
First, verify all physical connections are secure and try a different HDMI or USB-C cable. If using an adapter, ensure it’s Chrome OS compatible – some cheaper models only work with Windows/Mac. Check your Chromebook’s display settings (Ctrl+Full Screen key) to manually detect the projector.
For persistent issues, power cycle both devices and try another display port. Some projectors require specific input sources to be manually selected. Update your Chromebook’s OS and check for projector firmware updates from the manufacturer.
How can I wirelessly connect my Chromebook to a projector?
The simplest method is using a Chromecast device connected to the projector’s HDMI port. Click the status area > Cast > select your Chromecast. For enterprise environments, wireless HDMI systems like ScreenBeam Pro offer more stable connections with lower latency.
Some newer smart projectors have built-in casting receivers. Enable the projector’s wireless display mode, then on your Chromebook go to Settings > Connected devices > Add new device. This typically uses Miracast protocol for direct connection.
Can I extend my display rather than mirroring on the projector?
Yes, Chromebooks support extended desktop mode. Connect your projector, then go to Settings > Device > Displays. Select “Extended display” and arrange the screens as needed. This allows different content on each display, ideal for presenter view during slideshows.
Note that extended mode may impact performance on lower-end Chromebooks. For resource-intensive tasks, reduce the extended display’s resolution or refresh rate to maintain smooth operation on both screens.
Why is my projected image blurry or incorrectly sized?
This usually indicates a resolution mismatch. Go to Settings > Device > Displays and set the projector’s resolution to its native setting (often 1920×1080 or 1280×800). Disable display scaling if text appears fuzzy.
For VGA connections, ensure the projector’s auto-adjust is enabled and the Chromebook’s output resolution matches the projector’s optimal input. Analog signals often require manual fine-tuning for sharpness and clock/phase settings.
How do I present with audio through the projector?
HDMI connections automatically route audio to the projector. For VGA or wireless connections, change the audio output in Settings > Sound. Some projectors may require enabling audio passthrough in their settings menu.
For large venues, consider a separate audio system. Use a USB audio interface or Bluetooth transmitter connected to your Chromebook’s headphone jack for professional sound quality that surpasses most projector speakers.
What’s the most reliable connection method for important presentations?
A direct USB-C to HDMI cable provides the most stable connection, eliminating adapter points of failure. For critical events, carry a backup wireless solution like Chromecast and pre-test all equipment in the actual venue.
Enterprise users should consider USB-C docking stations with multiple display outputs. These often provide better power delivery and more stable connections than simple adapters during extended presentations.
Can multiple Chromebooks connect to one projector simultaneously?
Standard projectors only display one input at a time, but you can switch between devices. Some commercial models like the Epson PowerLite 1795F support multi-presentation modes that show up to four inputs simultaneously in split-screen format.
For collaborative environments, use a wireless presentation system like Kramer Via or Mersive Solstice that allows multiple users to share content to a central display. These systems typically require additional hardware and network configuration.
This website is a participant in the Amazon Services LLC Associates Program, an affiliate advertising program designed to provide a means for us to earn fees by linking to Amazon.com and affiliated sites.