
This website is a participant in the Amazon Services LLC Associates Program, an affiliate advertising program designed to provide a means for us to earn fees by linking to Amazon.com and affiliated sites.
Looking for a secure and versatile mounting solution? The Drsn Universal Ceiling Mount with Tray is designed for projectors, speakers, and other AV equipment. It provides a stable, space-saving installation that keeps your gear organized and accessible.
This mount solves the problem of cluttered floors and unstable setups. Its adjustable design and integrated cable management ensure a clean, professional installation for your home theater or commercial space.
This complete guide will walk you through its key features, weight capacity, and installation process. You’ll learn expert tips for a perfect setup and how to maximize your equipment’s performance.
Best Ceiling Mounts for AV Equipment – Detailed Comparison
Drsn Universal Ceiling Mount with Tray – Best Overall Choice
The Drsn Universal Ceiling Mount with Tray is our top pick for most users. It features a universal VESA pattern up to 330x330mm and a sturdy metal tray. This model is ideal for projectors up to 33 lbs, offering excellent stability and integrated cable management for a clean setup.

- Universal Projector Mount: The tray of the projector mount has a usable…
- Projector Mount Ceiling Adjustable: This is a 2-in-1 projector ceiling…
- Premium Carbon Steel: The ceiling section and telescoping pole of the…
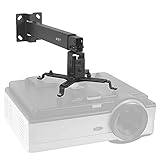
Peerless-AV PRG-UNV – Best for Heavy-Duty Projectors
For heavier, professional-grade equipment, choose the Peerless-AV PRG-UNV. It supports an impressive load capacity of 125 lbs with a precision gear-driven lift system. This mount is the best option for large venues, classrooms, or commercial installations requiring robust support and micro-adjustments.

- 50 lb. Weight load capacity
- Patent pending precision gear provides accurate projector image alignment
- Two adjustment knobs control projector image alignment
VIVO Steel PROJECTOR-02 – Best Value Budget Mount
The VIVO Steel PROJECTOR-02 delivers reliable performance at an affordable price. It includes a universal mounting plate, 10-foot extension poles, and all necessary hardware. This model is ideal for home theaters and small offices looking for a cost-effective, easy-to-install ceiling solution.
- Solid Steel Construction makes this universal ceiling and wall projector…
- Universal Mounting Design enables this bracket to fit the majority of…
- Adjustable Features include -15° to +15° tilt and 16° swivel offering…
Key Features and Technical Specifications of the Drsn Mount
Understanding the technical details is crucial for a successful installation. The Drsn Universal Ceiling Mount with Tray is packed with features designed for versatility and durability. This section breaks down its core components and capabilities.
Build Quality and Design Specifications
The mount is constructed from high-grade, powder-coated steel. This ensures long-term reliability and resistance to wear. Its sleek black finish blends seamlessly with most ceiling colors and room decors.
The design includes a low-profile central column and a wide, flat equipment tray. This provides a stable platform while minimizing visual intrusion. The universal VESA compatibility is a major advantage for various devices.
- Material: Heavy-duty steel with anti-corrosion coating.
- VESA Compatibility: Supports patterns from 50x50mm up to 330x330mm.
- Weight Capacity: Rated for loads up to 15 kilograms (33 pounds).
- Tray Dimensions: Provides ample space for the projector body and cable organization.
Adjustability and Installation Flexibility
One of the standout features is its multi-axis adjustability. This allows for precise leveling and alignment of your projector or speaker. You can achieve a perfectly squared image without straining the device’s internal lens shift.
The mount offers a generous extension range from the ceiling. This is essential for positioning the lens at the correct throw distance for your screen. Fine-tuning after installation is simple and tool-free.
Integrated Cable Management System
Messy cables can ruin a clean installation and pose a safety hazard. This mount solves that problem with a built-in cable management solution. Wires are neatly routed through the central column, keeping them out of sight.
The tray also features strategic cut-outs and clips. This allows you to secure power cords, HDMI cables, and control wires separately. The result is a professional-looking setup that enhances safety and aesthetics.
How to Install Your Drsn Universal Ceiling Mount
A proper installation is key to safety and optimal performance. This step-by-step guide will help you securely mount your projector or speaker. Always consult your equipment’s manual and ensure you have the right tools before starting.
Pre-Installation Planning and Safety Checks
First, identify a suitable ceiling joist or solid wooden beam. This is non-negotiable for supporting the weight. Use a stud finder to locate the center of the joist for maximum stability.
Next, plan your projector’s positioning relative to the screen. Consider the lens offset and throw distance specified in your projector’s manual. Mark the desired mounting point on the ceiling with a pencil.
- Essential Tools: Stud finder, drill, screwdriver, wrench, level, measuring tape.
- Safety First: Turn off power to the room. Have a helper assist with holding the mount and equipment.
- Check Weight: Verify your projector’s weight is under the mount’s 33 lb (15 kg) capacity.
Step-by-Step Mounting Process
Follow this numbered sequence for a secure and level installation. Rushing any step can compromise the entire setup.
- Attach the Mounting Plate: Align the base plate with your ceiling mark on the joist. Drill pilot holes and secure it firmly using the provided lag bolts.
- Assemble the Extension Column: Connect the central pole to the ceiling plate. Adjust it to your desired length and tighten all locking collars securely.
- Install the VESA Plate: Attach the universal mounting plate to your projector using the correct screws. Ensure it is centered and tight.
- Final Connection: Hook the projector (with VESA plate attached) onto the tray’s mounting arm. Use the safety screw to lock it in place permanently.
Post-Installation Cable Management
With the equipment secure, neatly route all cables through the central column. Use the provided cable ties or clips to bundle wires together. This prevents strain on the ports and creates a clean, professional look.
Finally, plug in your device and power it on. Make any final micro-adjustments to the mount’s tilt, pan, and extension to perfect the image alignment. Your installation is now complete and ready for use.
Benefits and Ideal Use Cases for the Drsn Mount
Choosing the right ceiling mount impacts your entire AV experience. The Drsn Universal Ceiling Mount with Tray offers distinct advantages over shelf or table placement. Understanding these benefits helps you maximize your investment.
Primary Advantages Over Alternative Setups
Ceiling mounting provides a permanent, space-saving solution. It removes equipment from valuable floor and table space. This creates a cleaner room layout and reduces the risk of accidental bumps or damage.
The mount’s central positioning ensures an optimal, unobstructed projection path. It allows for perfect screen alignment from the ideal throw distance. This is superior to off-center table placement which can cause keystone distortion.
- Enhanced Safety: Secures expensive gear away from children, pets, and high-traffic areas.
- Superior Cable Management: Conceals wires completely, eliminating tripping hazards and visual clutter.
- Professional Aesthetics: Creates a dedicated, integrated home theater or presentation room look.
- Improved Acoustics: For speakers, ceiling placement can provide better sound dispersion throughout the room.
Who Should Use This Mount? Target Applications
This mount is incredibly versatile for both residential and light commercial use. It is an excellent fit for several common scenarios where a reliable, adjustable solution is needed.
| Use Case | Why It’s Ideal |
|---|---|
| Home Theater Enthusiasts | Provides the perfect front-row, centered viewing experience for movie nights. The tray holds media streamers or small AV receivers. |
| Gaming Setups | Frees up desk space and allows for a larger projected screen. The stable mount prevents image shake during intense gameplay. |
| Small Business & Classrooms | Keeps the projector safely out of reach while ensuring a clear view for presentations or lessons. The universal fit works with various shared devices. |
| House of Worship / Event Spaces | Its discreet design and high weight capacity suit permanent installations for live streams or displaying lyrics/sermons. |
Common Issues and Troubleshooting Guide
Even with a quality product like the Drsn mount, you may encounter minor issues. This troubleshooting section addresses the most common problems users face. These solutions can save you time and frustration during or after installation.
Solving Installation and Alignment Problems
Image misalignment is a frequent post-installation complaint. This is often due to an unlevel ceiling or incorrect initial positioning. The mount’s multi-axis adjustments are designed specifically to correct this.
If the projected image is crooked, first loosen the tilt and pan adjustment knobs. Physically adjust the projector until the image is square on the screen. Then, retighten the knobs firmly to lock the position.
- Mount Feels Unstable: Double-check that the base plate is anchored directly into a ceiling joist, not just drywall. Ensure all bolts and locking collars are fully tightened.
- VESA Plate Doesn’t Fit: Verify your projector’s VESA pattern. Use the provided adapter plates and assortment of screws to find the correct combination for your device.
- Cannot Achieve Focus: This is usually a throw distance issue, not a mount problem. Consult your projector’s manual and adjust the mount’s extension pole to move the projector closer to or farther from the screen.
Maintenance and Long-Term Care Tips
Regular maintenance ensures your mount operates smoothly for years. A simple check every six months can prevent issues. Focus on points of movement and connection.
- Check for Looseness: Gently attempt to wobble the installed projector. If there’s movement, identify and tighten the specific joint (ceiling plate, column, or tilt mechanism).
- Inspect Cable Strain: Ensure cables are not pulling on the projector’s ports. Re-secure cable ties if they have stretched or slipped.
- Clean the Tray: Use a dry or slightly damp cloth to dust the equipment tray. Avoid harsh chemicals that could damage the powder coating.
When to Consider Professional Help
Some situations warrant calling an expert. If your ceiling is made of concrete, has unusual construction, or you lack the necessary tools, professional installation is wise. This ensures structural integrity and safety.
Also, if you experience persistent vibration in the image or hear unusual creaking sounds, consult an installer. They can assess if the mount is properly rated for your specific ceiling type and equipment weight.
Frequently Asked Questions (FAQs)
This section answers the most common questions about the Drsn Universal Ceiling Mount with Tray. Quick, clear answers help you make informed decisions and solve problems faster. Find your query below for immediate guidance.
Compatibility and Technical Questions
Users often wonder if their specific equipment will work with this mount. Compatibility is a key concern before purchase. These answers clarify the technical limits.
- Q: Is this mount compatible with my specific projector model?
A: Yes, if your projector has a standard VESA mounting pattern (50x50mm to 330x330mm) and weighs under 33 lbs (15 kg). Check your projector’s manual for its VESA specification. - Q: Can it be installed on a sloped or vaulted ceiling?
A: The standard kit is for flat ceilings. For sloped ceilings, you may need an additional sloped ceiling adapter kit, which is often sold separately. - Q: What is the maximum extension length from the ceiling?
A: Extension varies by model, but the Drsn typically extends between 12 to 20 inches. Measure your required throw distance before purchasing.
Installation and Purchase Queries
Practical questions about the setup process and sourcing are very common. Knowing what to expect simplifies your project planning from start to finish.
- Q: Does the mount come with all necessary hardware?
A: Yes, it includes lag bolts for the ceiling, a full set of VESA screws, and washers. You will need to provide basic tools like a drill, stud finder, and wrench. - Q: Where is the best place to buy the Drsn Universal Ceiling Mount?
A> It is widely available from major online retailers like Amazon, Walmart, and specialty AV stores. Always purchase from authorized sellers to ensure warranty validity. - Q: Can I use this mount for a surround sound speaker?
A> Absolutely. Its universal design and sturdy tray make it an excellent choice for mounting center-channel or satellite speakers, provided they are within the weight limit.
Warranty and Support Information
Understanding the product’s support policy provides peace of mind. The Drsn mount typically comes with a standard manufacturer’s warranty against defects in materials and workmanship.
Warranty periods can vary, so check the product listing or packaging. For support, contact the retailer where you made the purchase or seek out the manufacturer’s official customer service channels online.
Final Verdict and Buying Decision Checklist
After reviewing all aspects of the Drsn Universal Ceiling Mount with Tray, it’s time for a final assessment. This section provides a clear verdict and a practical checklist to guide your purchase. Use this to confirm it’s the right solution for your needs.
Overall Assessment and Value Proposition
The Drsn mount offers exceptional value for most home and small business users. It strikes an ideal balance between robust construction, user-friendly adjustability, and a reasonable price point. The integrated tray and cable management are standout features that elevate the installation.
While not suited for ultra-heavy professional projectors, its 33 lb capacity handles the vast majority of home theater and office models. Its universal compatibility means it will likely serve you through several equipment upgrades.
Pre-Purchase Checklist: Is This Mount Right For You?
Answer these questions before clicking “buy.” This ensures the Drsn mount aligns perfectly with your specific project requirements and environment.
- Weight Check: Is your projector or speaker under 33 lbs (15 kg)?
- VESA Match: Does your device have a VESA pattern between 50x50mm and 330x330mm?
- Ceiling Type: Do you have a flat, solid ceiling with accessible wooden joists?
- Throw Distance: Does the mount’s extension range fit your room size and desired screen placement?
- Tool Access: Do you have (or can you get) a stud finder, drill, and basic hand tools?
- Aesthetic Goal: Are you seeking a permanent, discreet installation with hidden cables?
Next Steps After Your Decision
If you answered “yes” to most checklist items, the Drsn mount is an excellent fit. Proceed by purchasing from a reputable retailer to ensure you receive a genuine product with full warranty support.
Once it arrives, carefully read the manual before starting. Gather your tools and plan your installation time. Following the steps outlined in this guide will lead to a successful, professional-looking setup that enhances your AV experience for years to come.
Essential Accessories and Complementary Products
Maximize your mounting setup with the right accessories. The right add-ons can enhance functionality, safety, and convenience. This section covers recommended products that pair perfectly with your Drsn ceiling mount.
Cable Management and Power Solutions
While the mount has built-in cable channels, additional products create a flawless finish. Properly managing power and signal cables is crucial for a professional installation. These items help you achieve a completely wire-free look.
- In-Wall Rated HDMI/Power Cables: For running cables through walls or ceilings to the projector, use CL2/CL3 rated cables for fire safety compliance.
- Cable Raceway Kit: If you cannot run cables in-wall, paintable plastic raceways neatly conceal wires along the wall and ceiling edge.
- Smart Plug or Power Strip: A ceiling-mounted smart plug allows you to control the projector’s power via voice or app. Choose a low-profile model that fits on the tray.
Mounting Enhancements and Safety Gear
Some situations require extra hardware for optimal results. These accessories address specific installation challenges or add an extra layer of security for your valuable equipment.
| Accessory | Purpose & Benefit |
|---|---|
| Sloped Ceiling Adapter | Allows installation on angled/vaulted ceilings. It adjusts to keep the projector level, ensuring a rectangular image. |
| Security Locking Screw Kit | Replaces standard screws with unique-keyed ones. This deters theft in public or shared spaces like classrooms or offices. |
| Laser Level | Essential for precise alignment. Projects a straight line on the wall/ceiling to mark perfect mounting points and ensure the mount is perfectly level. |
| Extra Long HDMI Cable | Always buy a cable longer than you think you need (e.g., 25-50 ft). This allows for routing flexibility and avoids tension on the ports. |
Maintenance and Cleaning Supplies
Keeping your equipment clean ensures longevity and optimal performance. Use the right tools to maintain both the mount and the projector without causing damage.
A can of compressed air is perfect for blowing dust out of the projector’s vents and off the mount’s adjustment points. Use a microfiber cloth for cleaning the projector lens and the mount’s tray, avoiding scratches.
Conclusion: Elevate Your AV Setup with the Drsn Universal Ceiling Mount
The Drsn Universal Ceiling Mount with Tray is a robust and versatile solution. It transforms your viewing or listening experience by providing secure, space-saving installation. Its adjustable design and integrated cable management deliver a professional finish.
For optimal results, always mount into a ceiling joist and follow the step-by-step guide. This ensures safety and perfect image alignment for your projector or speaker.
Ready to upgrade your space? Use the buying checklist to confirm compatibility. Then, purchase your mount from a trusted retailer to begin your installation.
You now have all the knowledge for a successful setup. Enjoy your new, clean, and high-performance AV environment.
Frequently Asked Questions about the Drsn Universal Ceiling Mount with Tray
What is the maximum weight capacity of the Drsn Universal Ceiling Mount?
The Drsn Universal Ceiling Mount with Tray has a maximum weight capacity of 15 kilograms or approximately 33 pounds. This rating includes the weight of your projector or speaker and any small accessories placed on the tray. It is designed to support most mid-sized home theater and business projectors safely.
Always verify your specific equipment’s weight before installation. Exceeding this limit can compromise safety and potentially damage both the mount and your expensive AV gear. The rating accounts for static weight and minor adjustments.
How do I install the Drsn mount on a sloped or vaulted ceiling?
The standard Drsn mount kit is designed for flat ceilings. For sloped or vaulted ceilings, you will need to purchase an additional sloped ceiling adapter kit separately. This accessory attaches between the ceiling plate and the extension column.
The adapter allows you to adjust the angle so the projector remains level, ensuring a perfectly rectangular image on your screen. Installation steps are similar, but you must factor in the extra hardware and follow the adapter’s specific instructions.
Can this mount be used for speakers as well as projectors?
Yes, absolutely. The Drsn Universal Ceiling Mount is excellent for mounting surround sound speakers, particularly center-channel or satellite models. Its sturdy tray and universal VESA compatibility make it a versatile choice for various AV equipment.
Ensure your speaker has a compatible mounting pattern and, crucially, that its weight is under the 33-pound limit. The integrated cable management is also ideal for neatly concealing speaker wire runs.
What is the best way to hide cables with this ceiling mount?
The mount features a hollow central column designed for internal cable routing. Feed your HDMI and power cables up through this column from the projector to the ceiling plate. Use the provided cable ties to secure wires and prevent strain.
For the cleanest look, pair this with in-wall rated (CL2/CL3) cables that you can run inside your ceiling or walls to your source equipment. Alternatively, use paintable cable raceways along the wall-ceiling edge.
Why is my projector image still crooked after installation?
A crooked image is usually due to the mount not being perfectly level or the projector not being square on the tray. First, use a bubble level to check that the mount’s base plate is level on the ceiling. Loosen the tilt and pan adjustment knobs on the mount itself.
Physically adjust the projector until the image is square on your screen, then retighten all knobs. Avoid using excessive digital keystone correction in your projector’s menu, as this can degrade image quality.
What tools do I need to install the Drsn ceiling mount?
You will need a standard set of household tools for a successful installation. Essential items include a stud finder to locate ceiling joists, a power drill with bits, a screwdriver, a wrench, a measuring tape, and a level.
The mount includes all necessary mounting hardware (lag bolts, VESA screws). Having a helper to hold the mount and projector during alignment is also highly recommended for safety and ease.
Is the Drsn mount compatible with ultra-short-throw projectors?
Compatibility depends on the specific ultra-short-throw (UST) projector model and its unique mounting requirements. Many UST projectors have non-standard brackets or require precise placement that a universal mount may not provide.
Always check your UST projector’s manual for its specific mounting specifications and recommended bracket. Using the manufacturer’s dedicated mount is often the safest and most effective solution for UST models.
Where can I buy genuine replacement parts for my Drsn mount?
For genuine replacement parts like specific screws or adjustment knobs, your first point of contact should be the retailer where you purchased the mount. Major online retailers often have parts support or can direct you to the manufacturer.
You can also search for the official manufacturer or brand website for customer service contact information. Using non-genuine parts may affect the stability and safety of your installation.
This website is a participant in the Amazon Services LLC Associates Program, an affiliate advertising program designed to provide a means for us to earn fees by linking to Amazon.com and affiliated sites.