This website is a participant in the Amazon Services LLC Associates Program, an affiliate advertising program designed to provide a means for us to earn fees by linking to Amazon.com and affiliated sites.
Changing your BMW’s LED door projectors is a simple DIY upgrade. This guide provides the complete, step-by-step process. You can personalize your car’s welcome lighting quickly.
This modification solves dim or broken OEM projectors. It enhances style and visibility at night. You gain a premium, custom look for a fraction of dealer cost.
You will learn the essential tools and safety steps. We cover removal, installation, and expert alignment tips. Follow our proven methods for flawless results on your first try.
Best LED Door Projectors for BMW – Detailed Comparison
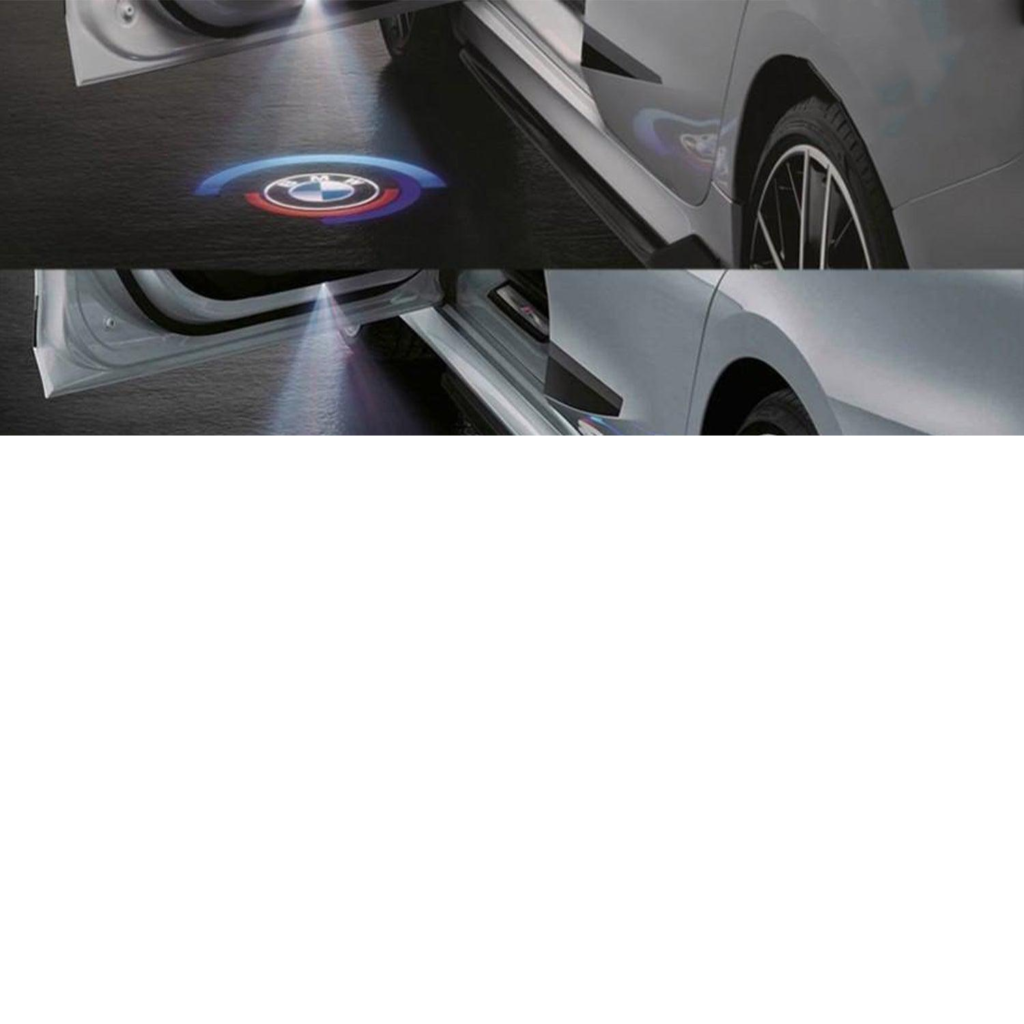
BMW Genuine LED Door Projector – OEM Replacement
This is the official BMW part for a perfect factory match. It ensures plug-and-play compatibility with no error codes. Ideal for owners who want to restore original functionality with guaranteed fit and finish. It provides the classic BMW logo with crisp, reliable illumination.
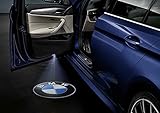
- Suitable For: 1′ E81, 1′ E82, 1′ E87, 1′ E87 LCI, 1′ E88, 1′ F20, 1′ F…
- Represented by part number 1 in the diagram.
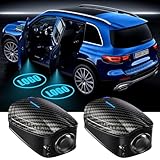
iJDMTOY RGBW Wireless Remote LED Logo Projector
This aftermarket option offers full customization with multiple colors and patterns. It features a wireless remote to switch between 20+ images and colors. Best for drivers wanting a unique, personalized look. The kit includes all necessary adapters for a straightforward BMW installation.
- Compatible with 2013-2015 Lexus GS with F-Sport package only!
- A complete set of driver and passenger side projector full LED integrated…
- Full LED fog lights with aluminum housing, optical glass projector lens…
AUXITO Custom Logo LED Door Light Projector
AUXITO projectors are known for exceptional brightness and clear image projection. You can upload a custom logo or choose from many pre-designed templates. This is the ideal choice for creating a truly one-of-a-kind welcome light. They are built with high-quality LEDs for long-lasting performance.
- 【Customize your unique car】: there are 2 purchase options to upload…
- 【Smart Sensor Technology】: The car door projector lights adopts…
- 【Enhance the style of your car】: The car door projector adopts…
Essential Tools and Safety Precautions for the Job
Gathering the right tools is the first critical step. This ensures a smooth, damage-free installation process. Proper preparation prevents frustration and protects your vehicle’s interior.
Safety is paramount when working with electronics and door panels. Taking a few simple precautions safeguards both you and your BMW’s sensitive systems. Always disconnect the battery before starting any electrical work.
Required Tools and Materials Checklist
You do not need professional mechanic tools for this project. Most items are common in a basic DIY toolkit. Having everything ready before you start is a key pro tip.
- Trim Removal Tools: Plastic pry tools are essential to prevent scratches or damage to your door card and trim pieces. Metal tools can easily mar the interior.
- Small Screwdrivers: A Torx bit set (often T20 or T25) is typically needed to remove the door handle screw. A small flathead can also be useful.
- New LED Projectors: Ensure you have your chosen replacement units ready. Check they are specifically compatible with your BMW model and year.
Critical Safety Steps Before You Begin
Ignoring these steps can lead to electrical shorts or airbag deployment. Modern vehicles have complex systems integrated into the doors. A careful approach is non-negotiable.
- Disconnect the Vehicle Battery: Always disconnect the negative terminal first. Wait at least 15 minutes for systems to fully power down before proceeding.
- Handle Door Panels Gently: Door cards have plastic clips that can break. Use steady, even pressure when prying, and work your way around the panel slowly.
- Mind the Wiring: When the panel is off, note how wiring connectors are attached. Most use a simple clip or lever; never pull on the wires themselves.
Step-by-Step Guide to Removing the Old Projector
This section details the precise removal process. Following these steps prevents damage to your door panel. We break it down into clear, manageable phases.
Patience is your greatest asset during removal. Rushing can lead to broken clips or stripped screws. Work methodically from the outside in.
Accessing the Door Projector Housing
The projector is housed inside the door’s lower exterior panel. You must carefully remove the small trim piece covering it. This is often called the “door handle bowl” or “puddle light housing.”
- Locate the Trim Piece: Find the small, rectangular plastic cover on the bottom of your door. It sits just below the door handle on the exterior.
- Insert Your Pry Tool: Gently wedge a plastic trim tool into the seam on the long side of the cover. Apply steady pressure to pop the first clip.
- Work Around the Cover: Move the tool along the edge to release the remaining clips. The cover should come free, revealing the projector unit and its wiring connector.
Disconnecting and Removing the Old Unit
With the housing exposed, you can now access the projector itself. Handle the wiring connector with care to avoid damage. This is a straightforward disconnection.
- Unplug the Connector: Find the wiring harness plugged into the back of the projector. Most BMWs use a simple push-clip connector; press the tab and pull straight back.
- Remove the Projector: The unit may be held in by friction fit, a small screw, or plastic tabs. Note its orientation before pulling it free from the housing.
- Inspect the Housing: Before installing the new one, check the empty housing for debris or moisture. A quick clean ensures optimal performance for your new lights.
Installing and Aligning Your New BMW Projectors
Installation is the rewarding reversal of the removal process. This phase brings your new custom lighting to life. Proper alignment is crucial for a sharp, professional-looking projection.
A successful install depends on careful handling and testing. Do not reassemble everything until you have verified the projection works correctly. This saves time and frustration.
Connecting and Securing the New Unit
Begin by placing the new LED projector into the empty housing. Ensure it is oriented exactly as the old one was removed. A correct fit is usually obvious and snug.
- Reconnect the Wiring: Plug the vehicle’s wiring harness into the back of your new projector. You should hear and feel a firm positive click when it’s fully seated.
- Test Before Finalizing: Before snapping the exterior cover back on, temporarily reconnect the car battery. Open the door to test the new projector’s function and ensure it lights up.
- Secure the Housing: Once confirmed working, disconnect the battery again. Press the trim cover firmly back into place, ensuring all its plastic clips snap home securely.
How to Achieve Perfect Projector Alignment
A misaligned projector casts a blurry or skewed image on the ground. Fine-tuning the focus and angle takes just a moment. This step maximizes the visual impact of your upgrade.
- Locate the Focus Lens: Many projectors have a rotatable outer lens or a dial on the side. This adjusts the sharpness of the projected logo or pattern.
- Adjust on a Flat Surface: Park on level ground at night or in a dark garage. Open the door and slowly rotate the lens until the image is crisp and clear.
- Check the Projection Angle: The image should be centered and upright relative to the door. If the whole unit is crooked, you may need to slightly reposition it within its housing.
Troubleshooting Common BMW Projector Issues
Even with careful installation, minor issues can arise. This section solves the most frequent problems DIYers encounter. Most fixes are simple and do not require professional help.
Diagnosing an issue starts with identifying the symptom. Common problems include no light, flickering, or a blurry image. Systematic troubleshooting will find the root cause quickly.
Solving Electrical and Connection Problems
If your new projector doesn’t light up, the issue is almost always electrical. Start your diagnosis with the simplest potential causes first. This method is efficient and effective.
- No Power/No Light: Double-check that the wiring connector is fully seated and clicked in. Reconnect the car battery firmly. Test the door switch by checking if the interior dome light comes on.
- Flickering or Intermittent Operation: This usually indicates a poor connection. Remove the projector and inspect the connector pins for corrosion or bending. Ensure the connector is clean and secure.
- Error Codes on Dashboard: Some aftermarket projectors can trigger a “check control” message for door lights. Coding with a BMW-specific scanner (like BimmerCode) may be required to disable the cold-check monitoring.
Fixing Physical and Image Quality Issues
Physical installation problems affect the projected image’s quality and position. These are typically easy to correct with minor adjustments. A perfect result is within reach.
- Blurry or Distorted Image: Use the focus adjustment lens on the projector. Rotate it slowly while observing the projection on the ground until the logo becomes sharp.
- Image is Crooked/Upside Down: The projector unit is rotated incorrectly in its housing. Remove the trim cover, take out the projector, and re-insert it in the proper orientation.
- Water or Condensation Inside: Ensure the rubber seal on the exterior trim cover is intact and seated properly. A small packet of silica gel inside the housing can prevent future fogging.
Maintenance and Long-Term Care for LED Projectors
Proper maintenance ensures your new projectors last for years. A little routine care prevents common failures and keeps the image crisp. This is about protecting your investment.
LEDs are durable, but their housing and lenses need attention. Environmental factors like dirt, moisture, and physical impact are the main threats. Simple habits make a big difference.
Routine Cleaning and Inspection Protocol
Incorporate projector checks into your regular car washing routine. A visual inspection takes only seconds. Catching a small issue early prevents a major failure later.
- Clean the Lens Cover: Gently wipe the exterior plastic lens with a soft, microfiber cloth during each wash. Remove dirt and road grime that can diffuse light and blur the projection.
- Check for Moisture Ingress: Look for condensation or water droplets inside the housing. If present, dry the area and ensure the seal on the trim cover is intact and debris-free.
- Verify Image Clarity: Periodically view the projection at night. If it becomes blurry, use the focus adjustment lens to re-sharpen it. This compensates for minor lens shifts over time.
Protecting Your Projectors from Damage
Proactive protection is more effective than reactive repair. Understanding the risks helps you avoid them. Most damage is preventable with mindful behavior.
- Avoid High-Pressure Washers: Never directly spray a pressure washer nozzle at the projector housing on the door’s underside. The force can damage seals and force water inside.
- Mind Door Dings and Curbs: The projector’s location makes it vulnerable. Be cautious when opening doors near obstacles and avoid scraping the door bottom on high curbs.
- Use Quality Replacement Parts: If a seal or clip breaks, replace it with a quality part. A worn seal is the primary cause of water damage and internal fogging.
Advanced Customization and Professional Tips
Once you’ve mastered the basic swap, exciting customization options await. This section explores pro-level modifications and expert advice. Elevate your project from a simple replacement to a standout feature.
These techniques require more confidence but offer greater rewards. They allow for truly unique personalization of your BMW. Always prioritize electrical safety and reversible modifications.
Creating Fully Custom Projector Images
Many aftermarket projectors allow for custom logo uploads. This transforms your door light into a personal signature. The process involves digital design and precise template alignment.
- Use the Correct Template: Manufacturers provide specific file templates (size, DPI, file type). Adhering to these guidelines ensures your image projects clearly without distortion.
- Design for High Contrast: Custom images work best as simple black and white silhouettes. Intricate color details or shading will not project well onto the ground.
- Test and Iterate: Print your design on paper first to check clarity. Upload the final file to the projector and test it at night. Be prepared to adjust the design for optimal results.
Expert Installation and Coding Advice
Professionals use specific tricks to achieve flawless, long-lasting results. This knowledge helps DIYers avoid common pitfalls. It also opens doors to more integrated functionality.
- Apply Dielectric Grease: A small dab on the electrical connector pins prevents corrosion and ensures a perfect connection. This is crucial for reliability in all weather conditions.
- Consider Wiring for Always-On: For a “welcome light” effect that turns on with approach, you can wire the projector to the footwell light circuit. This requires more advanced electrical knowledge.
- Use BMW Coding Software: Tools like BimmerCode or Carly can code out “bulb out” warnings for non-OEM projectors. They can also adjust the illumination duration after the door is closed.
Cost Analysis: DIY vs. Professional Installation
Understanding the cost breakdown helps justify the DIY approach. This section compares the financial investment of doing it yourself versus paying a dealer or shop. The savings are often substantial.
The primary costs are parts and labor. DIY eliminates labor charges, which are typically the most expensive component. You also gain valuable hands-on experience with your vehicle.
Detailed DIY Cost Breakdown
When you perform the installation yourself, your total cost is simply the price of the parts. There is a wide range depending on brand and features. You control the budget and quality.
- Replacement Projectors: Cost ranges from $50 for a basic pair to over $200 for high-end custom units. OEM BMW projectors are at the premium end of this scale.
- Tools: A basic plastic trim tool set costs around $10-$20. This is a one-time purchase useful for many future interior projects on your BMW.
- Time Investment: The first-time installation takes about 30-60 minutes per door. Subsequent doors are much faster, often under 20 minutes each.
Professional Service Price Estimates
Dealerships and independent shops charge for both parts and labor. Their markup on parts and hourly rates significantly increase the total. Getting a quote beforehand is essential.
- Dealership Service: This is the most expensive option. Expect to pay $300-$500+ for parts and labor to replace both door projectors with OEM units.
- Independent BMW Specialist: Costs are typically 20-30% lower than a dealership. They may also be more willing to install quality aftermarket parts you provide.
- Labor Time Charges: Shops generally book a minimum of 1 hour of labor for this job, even if it takes less time. Their hourly rate can range from $120 to $200.
| Option | Estimated Cost (Pair) | Key Consideration |
|---|---|---|
| DIY with Aftermarket Parts | $50 – $150 | Maximum savings, full control, requires your time & effort. |
| DIY with OEM Parts | $150 – $250 | Factory fit and finish, still significant savings over dealer. |
| Professional Installation | $300 – $500+ | Convenience and warranty on labor, but highest total cost. |
Conclusion: Enjoy Your Personalized BMW Welcome
Changing your BMW LED door projectors is a highly rewarding DIY upgrade. You gain a personalized look and enhanced nighttime visibility. The process is straightforward with the right tools and guidance.
The key takeaway is to prioritize safety and patience. Always disconnect the battery and use plastic trim tools. Test the lights before fully reassembling the door panels.
Now, select your preferred projectors and gather your tools. Follow this guide step-by-step for a flawless installation. Transform your car’s entrance into a signature statement.
You have the knowledge to complete this project confidently. Enjoy the professional results and the satisfaction of a job well done. Your upgraded BMW awaits.
Frequently Asked Questions About Changing BMW LED Door Projectors
What tools do I need to change my BMW door projector?
You primarily need a set of plastic trim removal tools and a small Torx screwdriver (often T20 or T25). These prevent damage to your door’s interior panels and allow you to remove the necessary screw. A flathead screwdriver can also be helpful for prying in tight spaces.
Having a flashlight and your new projector units ready is also essential. Always ensure you have a safe workspace and disconnect your vehicle’s battery before starting any electrical work for safety.
How long does it take to replace BMW puddle lights?
For a first-time DIYer, the entire process takes about 30-60 minutes per door. This includes time for tool gathering, careful removal, installation, and testing. The second door is always much faster.
If you are experienced with interior trim work, you can complete both doors in under an hour total. The most time-consuming part is carefully prying off the exterior trim cover without breaking its clips.
Can I install custom logo projectors on any BMW model?
Most modern BMWs from the last 15+ years use a similar door projector housing design. This makes aftermarket custom projectors widely compatible. You must verify the specific fit for your model year and series before purchasing.
Universal kits often include various adapters to ensure a proper connection. Always check product listings or contact the seller to confirm compatibility with your exact BMW, such as a 3 Series F30 or an X5 G05.
Why is my new BMW door projector not turning on?
The most common cause is an electrical connector that isn’t fully seated. Double-check that the wiring harness is clicked securely into the back of the projector unit. Also, ensure you have properly reconnected the car battery.
If the connection is good, test the door switch functionality. Open the door and see if your interior dome light activates. If not, the issue may be with the door switch or fuse, not the projector itself.
What is the best way to align BMW logo door projectors?
The best method is to adjust the projectors at night or in a dark garage. Park on a flat surface and open the door. Rotate the focus lens on the projector until the logo appears sharp and clear on the ground.
If the entire image is crooked, the projector unit may be rotated in its housing. You will need to remove the trim cover again and adjust the physical orientation of the unit for a perfectly upright projection.
Do aftermarket LED projectors cause BMW error codes?
Some aftermarket projectors can trigger a “check control” message for door lights. This happens because their LED resistance differs from the original bulb. Not all vehicles or projectors will cause this issue.
You can often code out this warning using BMW-specific apps like BimmerCode or Carly. This disables the cold-check monitoring for the puddle light circuit, eliminating the false error message.
How do I prevent moisture inside my door projector housing?
Ensure the rubber seal on the exterior trim cover is clean, intact, and seated properly when you snap it back on. Avoid directing high-pressure car wash jets directly at the housing, as this can force water past the seal.
If you live in a very humid climate, a small silica gel packet placed inside the housing (away from the lens) can help absorb residual moisture and prevent internal fogging on the lens.
This website is a participant in the Amazon Services LLC Associates Program, an affiliate advertising program designed to provide a means for us to earn fees by linking to Amazon.com and affiliated sites.