This website is a participant in the Amazon Services LLC Associates Program, an affiliate advertising program designed to provide a means for us to earn fees by linking to Amazon.com and affiliated sites.
Changing the star color on your astronaut projector is a simple customization that enhances its ambiance. You can typically achieve this by using colored filters or adjusting the LED unit.
This modification lets you create the perfect mood, from calming blue nebulas to vibrant red galaxies. It personalizes your celestial display to match any room’s theme or occasion.
Our complete guide provides expert tips and proven methods. You will learn step-by-step instructions, tool recommendations, and creative ideas for stunning results.
Best Astronaut Projectors for Custom Star Colors
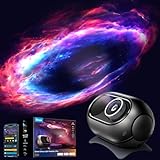
BlissLights Sky Lite 2.0 – Best Overall for Color Customization
The BlissLights Sky Lite 2.0 features a dedicated green laser nebula and adjustable blue LED stars. Its primary benefit is the ability to dim the blue stars independently, creating a layered color effect. This model is ideal for users seeking a simple, high-quality base for adding external color filters.

SOAIY Astronaut Galaxy Projector (Model A80 Pro) – Best Built-in Color Options
The SOAIY A80 Pro stands out with its built-in RGB LED star field. You can cycle through 16 pre-set colors or set a static hue via remote control. This is the best option for those who want maximum color variety without any DIY modification or extra accessories.
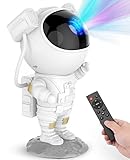
- [Astronaut Star Projector Galaxy Night Light] The galaxy projector supports…
- [Remote Control & Auto-off Timer] This starlight projector with timer and…
- [Projection Angle Adjustable] This night light starry projector is designed…
LE Star Projector (Model LSP-06) – Best for Advanced Customization
This projector offers a white light base for stars and nebula clouds, making it a perfect blank canvas. It is ideal for applying custom colored gels or filters to achieve precise, unique colors. Recommended for hobbyists who enjoy hands-on personalization of their lighting effects.
- 4MP High-Definition Lens with True-to-Life Rendering: Govee star projector…
- Upgraded 90° Wide-Angle Design: The enlarged lens increases the projection…
- Enhanced Brightness for Better Visibility: With 230 lux brightness, this…
How to Change Star Color: Step-by-Step Methods
Changing your astronaut projector’s star color can be done in several ways. The best method depends on your specific projector model and technical comfort level. We will cover the three most effective and popular techniques.
Method 1: Using Colored Gels or Filters
This is the simplest, non-invasive approach suitable for most projectors. You place a thin, colored translucent film over the projector’s lens. This tints the entire projected image, including stars and nebula clouds.
- Materials Needed: Roscolux or Lee Filters gel swatch book, scissors, clear tape.
- Process: Cut a small piece of your chosen color gel. Secure it over the projector’s main lens with a small piece of clear tape on the edges.
- Pro Tip: Layer multiple gels to create unique colors. For example, blue and red gels layered create a deep purple hue.
Method 2: Adjusting Internal LED Units
For projectors with white LEDs, you can replace them with colored LEDs. This method is more permanent and requires opening the unit. Always ensure the projector is unplugged before attempting.
- Disassemble: Carefully open the projector casing using a small screwdriver.
- Identify: Locate the LED board responsible for the star field projection.
- Replace: Desolder the existing white LEDs and solder in your chosen color LEDs (e.g., warm white, blue, red).
Method 3: Utilizing Smart Features & RGB Models
Many modern projectors, like the SOAIY A80 Pro, have built-in RGB capabilities. You change colors via a remote control or a companion mobile app. This offers the most convenience and variety.
Navigate the menu using the provided remote. Look for settings labeled “Color,” “RGB,” or “Star Mode.” You can typically select from a fixed palette or use a color cycle function for dynamic effects.
Choosing the Right Color for Your Star Projector
Selecting the perfect star color impacts the mood and functionality of your room. Different colors evoke different psychological responses and serve various purposes. This guide helps you match the color to your desired atmosphere.
Color Psychology for Ambient Lighting
The hue you choose directly influences the feeling in your space. Cool tones are calming, while warm tones are energizing. Consider the primary use of the room when selecting your star color.
- Blue & Indigo: Promotes relaxation and sleep. Ideal for bedrooms and meditation spaces.
- Red & Orange: Creates a warm, energizing vibe. Perfect for living rooms or social areas.
- Green & Purple: Fosters creativity and balance. Excellent for home offices or studios.
Technical Considerations and Light Output
Not all colors work the same way with every projector. The method you use to change the color can affect brightness and clarity. Understanding this ensures you get the best visual result.
Using a colored gel will slightly reduce overall light intensity. Replacing white LEDs with colored ones may change brightness based on the LED’s lumen output. Built-in RGB LEDs typically maintain consistent brightness across colors.
| Color | Best For | Brightness Impact |
|---|---|---|
| Blue | Sleep, Calm | Low (Perceived as dimmer) |
| Warm White | Realistic Stars | High |
| Red | Night Vision | Medium (Preserves night vision) |
| Green | Vivid Contrast | High (Eyes are most sensitive to green) |
Troubleshooting Common Star Color Issues
Even with the right method, you might encounter issues with your customized star colors. These problems are usually easy to diagnose and fix. This section addresses the most frequent challenges and their solutions.
Fixing Dim or Uneven Color Projection
If your stars appear dim or the color is patchy, the issue often lies with the modification technique. This is common when using DIY filters or after internal modifications.
- Gel/Filter Problems: Ensure the gel is clean, wrinkle-free, and fully covering the lens. Wrinkles or dust scatter light unevenly.
- LED Alignment: After replacing LEDs, check they are seated correctly and facing the lens directly. A misaligned LED creates dark spots.
- Power Issues: Colored LEDs may have different voltage requirements. Verify your new LEDs are compatible with your projector’s circuit board.
When Colors Don’t Match Expectations
Sometimes the projected color looks different than the gel or LED color. This is due to the interaction of light with the projector’s internal optics and the projection surface.
The white base light from your projector can mix with your chosen color filter. A blue gel over a very warm white LED may create a teal or greenish tint. Test colors on a white wall in a dark room for the most accurate result.
Maintaining Your Custom Color Setup
Preserving your new star color requires simple maintenance. Proper care ensures long-lasting vibrancy and prevents future issues. Follow these tips for ongoing performance.
- Clean Gently: Dust the projector lens and any external gels with a soft, dry microfiber cloth. Avoid harsh chemicals.
- Check Connections: Periodically ensure any taped filters are secure and internal solder points remain solid if you performed a modification.
- Monitor Heat: Ensure the projector has good ventilation. Excessive heat can warp plastic gels and degrade LED lifespan.
Creative Ideas and Advanced Customization Tips
Once you’ve mastered basic color changes, you can explore more creative applications. These advanced ideas transform your projector into a unique centerpiece. They combine color techniques with other simple materials.
Theming Your Room with Colored Stars
Sync your astronaut projector’s star color with holidays, seasons, or movie nights. This creates an immersive, thematic experience that goes beyond standard room decor. It’s a simple way to elevate any occasion.
- Seasonal Themes: Use icy blue for winter, lush green for spring, warm orange for autumn, and vibrant red/blue for patriotic holidays.
- Movie Nights: Match the color to the film’s genre—eerie green for sci-fi, deep blue for adventure, or soft pink for romance.
- Gaming Sessions: Set the color to match your favorite game’s logo or atmosphere for an enhanced gaming cave setup.
Combining Colors for Multi-Tone Effects
Why settle for one color? Advanced users can create stunning multi-colored star fields. This requires a bit more planning but delivers spectacular results.
For projectors with multiple LED clusters, you can replace different clusters with different colored LEDs. Alternatively, use a split gel filter. Tape two different colored gel halves over the lens to project two distinct colored zones.
| Effect Goal | Method | Difficulty |
|---|---|---|
| Swirling Nebula | Use a slowly rotating colored gel in front of the lens. | Intermediate |
| Dual-Tone Sky | Apply a blue gel to the top half of the lens and an orange to the bottom. | Beginner |
| Twinkling Colors | Use a programmable RGB LED strip wired to the star circuit (for experts). | Advanced |
Integrating with Other Smart Home Lights
For a fully synchronized smart room, pair your color-modified projector with other RGB lighting. Use a central hub or app like Google Home or Philips Hue to control all lights together. Set all devices to the same color for a cohesive, immersive ambient glow.
Essential Tools and Materials for DIY Color Changes
Having the right tools makes the modification process smooth and successful. This section details everything you need for each method. Proper preparation prevents damage to your valuable astronaut projector.
Basic Toolkit for Non-Invasive Methods
For using colored gels or external filters, you only need a few simple items. These are safe, affordable, and perfect for beginners. You can find most at craft or theater supply stores.
- Colored Gels: Roscolux or Lee Filters sample swatch books offer many colors. They are heat-resistant and designed for lighting.
- Precision Tools: Sharp scissors or a craft knife for cutting gels. Microfiber cloth to clean the lens before application.
- Adhesives: Painter’s tape or clear cellophane tape. Avoid strong adhesives that could leave residue on the lens.
Advanced Kit for Internal LED Modification
Modifying the internal LEDs requires electronics tools and components. This method is for users comfortable with soldering and basic circuitry. Always prioritize safety.
- Electronics: Colored LEDs (5mm or SMD, correct voltage), soldering iron, fine solder, and a desoldering pump.
- Hardware Tools: Small Phillips and flathead screwdrivers, plastic spudger to open the casing without scratches.
- Safety Gear: Anti-static wrist strap to protect circuits, and safety glasses for eye protection.
Where to Source Quality Materials
Finding reliable components ensures longevity and good results. Avoid cheap, no-name electronics that may fail or damage your device. Use reputable suppliers for critical parts.
For LEDs and electronic components, use suppliers like Adafruit, SparkFun, or Digi-Key. For professional-grade gels, visit a theatrical lighting supplier’s website. Local hardware stores are good for basic tools like screwdrivers and scissors.
Safety Precautions and Warranty Considerations
Customizing your projector involves important safety and legal factors. Protecting yourself and your device should be the top priority. Ignoring these aspects can lead to injury or void your warranty.
Electrical Safety for Internal Modifications
Any work inside the projector’s casing involves risk. Mismanaging electricity can cause shock, fire, or permanent damage to the unit. Follow these critical rules without exception.
- Always Unplug: Disconnect the projector from power before opening it. Do not just turn it off; remove the plug from the outlet.
- Discharge Capacitors: Wait several minutes after unplugging. Internal components can hold a charge even when the unit is off.
- Work in a Dry Area: Ensure your workspace is clean, dry, and well-lit. Keep liquids far away from electronic components.
Understanding Warranty Implications
Most manufacturers void the warranty if you open the casing or modify internal components. It’s crucial to know what you’re agreeing to before you start. This is a key trade-off for customization.
Non-invasive methods like external gels typically do not affect warranty. The “warranty void if removed” sticker, while legally contested in some regions, is a clear signal from the manufacturer. Consider if your projector is new or still under coverage.
| Modification Type | Warranty Impact | Risk Level |
|---|---|---|
| External Gel/Filters | Likely No Impact | Low |
| Opening Casing (No soldering) | Voided | Medium |
| Soldering Internal Components | Definitely Voided | High |
Post-Modification Safety Checks
After completing any modification, perform a safety inspection before regular use. This ensures your projector operates safely and won’t pose a hazard. Never skip this final verification step.
- Visual Inspection: Look for loose wires, exposed solder points, or misplaced components inside the casing.
- Smell Test: When you first plug it in, be alert for any burning smell. If detected, unplug immediately.
- Monitor Heat: Run the projector for 15 minutes. Feel the casing for unusual or excessive heat buildup.
Frequently Asked Questions (FAQs)
This section answers the most common questions about changing star colors. These quick answers provide clarity on frequent concerns and technical details. They help you make informed decisions quickly.
Can I Change the Color on Any Astronaut Projector?
Most projectors can be modified, but the ease varies greatly. Projectors with white or single-color LEDs are the best candidates for gel filters or LED replacement.
- Yes, Easily: Models with a white star field (like many BlissLights or basic models).
- Yes, with Built-in Feature: RGB projectors (like the SOAIY A80 Pro) change color via remote.
- Difficult/No: Projectors where stars are part of a fixed-image slide or film.
Will Colored Gels Damage My Projector Lens?
No, high-quality theatrical gels will not damage the lens if applied correctly. They are designed to withstand heat from stage lighting. The key is to avoid adhesive directly on the glass.
Use a frame of tape around the edges of the gel, not on the lens itself. Ensure the gel does not block any ventilation holes on the projector. This prevents heat buildup and adhesive residue.
How Do I Revert Back to the Original White Stars?
Reverting is simple for external modifications but permanent for internal ones. Always plan for how you might want to restore the original look.
- For Gels: Simply peel off the tape and remove the colored filter.
- For Internal LEDs: You must reopen the unit and re-solder the original white LEDs back into place. Keep your original parts.
- For RGB Models: Use the remote control to select the white or neutral color setting from the menu.
Conclusion: Mastering Your Custom Starry Night Sky
Changing your astronaut projector’s star color unlocks a new level of personalization. You can now create any mood, from serene blue to vibrant red. This guide provided all the methods, from simple gels to advanced LED swaps.
The key takeaway is to start with the simplest, non-invasive method first. Match your ambition to your technical skill to avoid damaging your device. Always prioritize safety and check your warranty.
Gather your chosen materials and experiment tonight. Transform your room’s ambiance with your newly customized galaxy. Share your creative results with other enthusiasts online.
Your perfect starry night, in the exact color you imagine, is now within reach. Enjoy the endless possibilities of your personalized cosmos.
Frequently Asked Questions about Changing Star Colors
What is the easiest way to change star colors on a projector?
The easiest method is using colored theatrical gels or filters. Simply cut a piece to size and tape it over the projector’s lens. This requires no technical skill and is completely reversible.
This non-invasive approach works on most models with a white light source. It allows for instant experimentation with different colors without any risk to your device.
How do I change the star color on a BlissLights Sky Lite?
For the BlissLights Sky Lite, use the external gel method. Its blue LED stars and green laser nebula provide a great base for color filters. A red or amber gel will create stunning purple or orange effects.
Do not attempt to open the sealed BlissLights unit, as this is difficult and voids the warranty. External modification is the recommended and safest path for this popular model.
Can I make my stars multiple colors at once?
Yes, you can create multi-colored star fields. One technique is using a split gel filter, taping two different colors over different halves of the lens. Another is replacing specific LED clusters inside the projector with different colored LEDs.
This advanced customization requires careful planning. It produces a stunning, unique effect that mimics a more complex galaxy projection.
Why are my DIY colored stars dim after modification?
Dim stars are usually caused by the material used. Thick or low-quality gels block significant light. Also, colored LEDs often have a lower lumen output than bright white ones.
To fix this, use professional, thin theatrical gels. If using LEDs, source high-lumen, wide-viewing angle components. Ensure nothing is obstructing the projector’s lens or light path.
What is the best color for sleep in a bedroom projector?
Warm, dim red or deep amber is scientifically best for sleep. These colors have the least impact on melatonin production. They also preserve night vision if you need to get up.
Avoid bright blue or cool white tones before bed. These can disrupt your circadian rhythm and make it harder to fall asleep in a room with a star projector.
Which method preserves my projector’s warranty?
Only external methods, like using removable gels or filters, reliably preserve your warranty. These do not require opening the casing or altering internal components.
Any internal modification, including opening the unit to look inside, typically voids the manufacturer’s warranty. Always check your warranty terms before proceeding with any disassembly.
How do I safely remove adhesive residue from a gel filter?
Use a small amount of isopropyl alcohol (70% or higher) on a cotton swab. Gently rub the residue until it dissolves, then wipe clean with a dry microfiber cloth.
Never use harsh chemicals like acetone or window cleaner on plastic lenses. They can cause clouding or permanent damage to the optical surface.
What’s the best projector for built-in color changing features?
Projectors with built-in RGB LEDs are best for hassle-free color changes. Models like the SOAIY A80 Pro or Encalife Atmos offer remote-controlled color cycling. They provide maximum variety with no DIY effort.
When shopping, look for “RGB,” “color changing,” or “16+ colors” in the product description. This ensures the feature is integrated from the factory for reliable operation.
This website is a participant in the Amazon Services LLC Associates Program, an affiliate advertising program designed to provide a means for us to earn fees by linking to Amazon.com and affiliated sites.