This website is a participant in the Amazon Services LLC Associates Program, an affiliate advertising program designed to provide a means for us to earn fees by linking to Amazon.com and affiliated sites.
Connecting external audio to your BenQ projector is simple and dramatically improves your experience. The built-in speakers often lack power and depth for movies or presentations.
This upgrade solves that problem, delivering rich, room-filling sound. You can use soundbars, home theater systems, or portable Bluetooth speakers.
Our complete guide provides expert tips for every connection type. You will learn about audio ports, cable selection, and proven setup methods for flawless audio.
Best Audio Systems for Your BenQ Projector
Sonos Beam (Gen 2) – Best Overall Soundbar
The Sonos Beam (Gen 2) is the best overall choice for its compact size and powerful, room-filling sound. It connects via HDMI ARC for a simple, high-quality single-cable setup. This soundbar is ideal for movies and music, featuring Dolby Atmos support for immersive audio.

- Enjoy vibrant bass, crystal clear dialogue, and a panoramic soundstage.
- Experience a 3D surround sound effect with Dolby Atmos.
- Stream music, radio, podcasts, and audiobooks from all your favorite…
JBL Charge 5 – Best Portable Bluetooth Speaker
For ultimate portability, the JBL Charge 5 is the best option. It connects wirelessly to your projector via a Bluetooth transmitter. You get powerful bass and up to 20 hours of battery life. This speaker is ideal for backyard movie nights or presentations on the go.

- Surprisingly rich, powerful bass & crisp higher frequencies give the Charge…
- Up to 28 hours of playtime: Keep the mood alive for 24 hours on a single…
- Wouldn’t it be great to share the vibes with our tribe? Now we can. With…
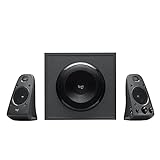
Logitech Z623 – Best Budget 2.1 Speaker System
The Logitech Z623 THX-Certified system offers exceptional value. It delivers 200 watts of rich, powerful audio through a straightforward 3.5mm or RCA connection. This 2.1 setup is ideal for gamers and movie lovers seeking a significant audio upgrade without a complex installation.
- Just testing
- The 200 Watts RMS/400 Watts Peak power of Logitech Z625 2.1 speaker system…
- Z625 Powerful THX Sound 2.1 speaker system provides a versatile setup by…
Understanding Your BenQ Projector’s Audio Output Ports
Before connecting any speakers, you must identify the audio output ports on your specific BenQ projector model. These ports are your gateway to external sound. Common locations are on the back or side panel near the HDMI inputs.
Knowing which ports you have determines the cables and adapters you’ll need. This step ensures compatibility and prevents frustration during setup. Let’s break down the most common audio output options.
HDMI ARC: The Modern Digital Standard
HDMI ARC (Audio Return Channel) is the preferred connection for modern setups. It transmits high-quality digital audio and video through a single cable. This port is typically labeled “HDMI ARC” or “HDMI 1 (ARC)”.
- Primary Benefit: Delivers the highest quality audio formats, including Dolby Digital and DTS.
- Best For: Connecting to soundbars, AV receivers, or home theater systems that also support ARC.
- Key Requirement: Both your projector and audio device must have an HDMI ARC port for this to function.
3.5mm Audio Out: The Universal Analog Option
The 3.5mm audio jack, also called a headphone or AUX jack, is the most universal port. It provides a simple analog stereo connection. Almost all external speakers and soundbars have a compatible input.
This is a reliable fallback if your audio device lacks HDMI. Sound quality is good for most uses, though not as pristine as digital HDMI. You will need a standard 3.5mm male-to-male audio cable.
Optical Audio (Toslink): High-Quality Digital Alternative
An Optical Audio output sends a pure digital signal via a fiber optic cable. It is often found on higher-end BenQ projector models. Look for a small, square port covered by a protective flap.
- Audio Quality: Excellent, comparable to HDMI for most formats (supports Dolby Digital 5.1).
- Connection Note: Requires a specific Toslink cable; the connection clicks into place.
- Limitation: Does not support the newest high-bandwidth formats like Dolby TrueHD or DTS-HD Master Audio.
Step-by-Step Guide to Connecting Your Audio System
Once you’ve identified your ports and chosen your speakers, it’s time to connect them. The process varies slightly depending on your chosen connection type. Follow these clear, step-by-step instructions for a flawless setup.
Always power off both your BenQ projector and the audio device before connecting cables. This prevents potential damage from electrical surges and ensures proper device recognition when powered on.
How to Connect via HDMI ARC
This method provides the most integrated experience with a single cable. It often allows you to control the speaker volume with your projector remote.
- Locate the HDMI ARC port on both your projector and soundbar/receiver.
- Connect a High-Speed HDMI cable between these two specific ARC-labeled ports.
- Power on both devices and navigate your projector’s audio settings (usually under “Sound” or “Audio”).
- Select “HDMI ARC” or “Audio Out (HDMI)” as the primary audio output source.
How to Connect via 3.5mm Audio Cable
The analog 3.5mm connection is universally simple. It’s perfect for basic stereo speakers and many portable systems.
First, insert one end of the cable into your projector’s 3.5mm Audio Out jack. Then, connect the other end to the AUX or Line In port on your external speakers.
Finally, power on the devices. You must manually set the audio output on your projector to “Audio Out” or “Headphone” in the sound menu. Control the volume using your speaker’s remote or controls.
How to Connect Bluetooth Speakers Wirelessly
For Bluetooth, you need a separate Bluetooth transmitter if your BenQ projector lacks built-in Bluetooth audio. This enables a cable-free connection.
- Step 1: Plug the Bluetooth transmitter into your projector’s 3.5mm or Optical audio output port.
- Step 2: Put your Bluetooth speaker into pairing mode (refer to its manual).
- Step 3: Press the pairing button on the transmitter. The devices should link automatically.
Note: Some audio delay (lip-sync issues) can occur. Use a transmitter with low latency (aptX LL) codec support to minimize this.
Troubleshooting Common BenQ Projector Audio Issues
Even with a correct connection, you might encounter audio problems. These common issues have straightforward solutions. Don’t worry—most can be fixed in minutes with basic troubleshooting.
Always start by checking the simplest potential causes first. This includes cable connections, volume levels, and input settings. Systematic troubleshooting will quickly isolate the problem.
No Sound from External Speakers
This is the most frequent issue. If your speakers are powered on but silent, follow this checklist.
- Check the Audio Output Setting: On your BenQ projector, press the Menu button. Navigate to Sound > Audio Output and ensure it’s set to “Audio Out,” “HDMI,” or “SPDIF,” not “Internal Speaker.”
- Verify Physical Connections: Ensure all cables are fully seated in the correct ports. Try a different audio cable to rule out a faulty wire.
- Confirm Source Audio: Play a different video file or source. The problem might be with the original media file, not your setup.
Audio Lag or Lip-Sync Problems
Audio delay, where sound doesn’t match the video, is common with Bluetooth or certain processing chains. The sound arrives later than the picture.
First, check if your projector has an Audio Delay or Lip-Sync adjustment in its sound settings. You can manually delay the video to match the audio.
For Bluetooth, use a low-latency transmitter and speaker. For HDMI connections, ensure all devices have the latest firmware updates, as this often improves synchronization.
Poor Sound Quality or Static Noise
Hissing, buzzing, or low-quality audio usually points to an analog interference issue or a faulty connection.
| Symptom | Likely Cause | Quick Fix |
|---|---|---|
| Constant buzzing/hum | Ground loop or poor cable shielding | Use a ground loop isolator on the 3.5mm connection. |
| Crackling or static | Loose cable or damaged port | Reseat cables firmly. Try a different port or cable. |
| Low, muffled volume | Incorrect source or projector setting | Ensure projector volume is maxed and control level on the speaker. |
Optimizing Audio Settings on Your BenQ Projector
After a successful connection, fine-tuning your projector’s audio settings unlocks the best performance. These built-in controls shape the sound to match your room and content. Proper optimization is key for a cinematic or professional audio experience.
Access these settings by pressing the Menu button on your projector remote. Then, navigate to the Sound or Audio settings menu. The exact layout varies by model but follows similar principles.
Essential Audio Output Configuration
This is the most critical setting. It tells the projector where to send the audio signal. An incorrect setting here will result in no sound from your external system.
- Audio Out: Select this for 3.5mm or Optical connections. It routes all audio to the external port.
- HDMI (or HDMI ARC): Choose this when using an HDMI ARC cable to a compatible soundbar or receiver.
- Internal Speaker: Set to this only if you want to use the projector’s built-in speakers again.
Remember to set the projector’s internal volume to maximum after selecting an external output. Then, use your external speaker’s controls for primary volume adjustment.
Adjusting Sound Modes and Equalization
BenQ projectors often include preset sound modes tailored for different content. These presets adjust bass, treble, and other parameters automatically.
| Sound Mode | Best Use Case | Effect |
|---|---|---|
| Movie/Cinema | Films, TV shows | Enhances dialogue clarity and bass for impact. |
| Music | Streaming music, concerts | Balances frequencies for a richer, fuller sound. |
| Game | Gaming | Often emphasizes directional cues and sound effects. |
| User | Custom fine-tuning | Allows manual adjustment of Bass, Treble, and Balance. |
Advanced Settings: Lip-Sync and Dynamic Range
For advanced users, two settings can refine the experience further. These are especially useful for home theater setups.
Audio Delay (Lip-Sync): If you notice the audio is out of sync with the video, use this slider to delay the audio in milliseconds until they match perfectly.
Dynamic Range Compression: This setting reduces the difference between loud and quiet sounds. It’s useful for late-night viewing to prevent loud explosions while still hearing whispers.
Choosing the Right Cables and Adapters for Audio
The correct cable is the physical lifeline between your projector and speakers. Using the wrong type can lead to no sound, poor quality, or compatibility issues. This guide ensures you select the perfect cable for your specific setup.
Always opt for cables from reputable brands that offer good shielding. This minimizes interference and ensures a reliable signal transfer for clear audio.
HDMI Cables: Ensuring ARC Compatibility
For HDMI ARC connections, not just any HDMI cable will do. You need one that supports the necessary bandwidth and features.
- Look for “High-Speed HDMI” Certification: This guarantees the cable can handle the audio return channel data. Avoid older “Standard” HDMI cables.
- Consider an “Ultra High-Speed” Cable for Future-Proofing: If your equipment supports 4K@120Hz or 8K, this is the best choice.
- Length Matters: For runs over 15 feet, consider an active HDMI cable or fiber optic HDMI to prevent signal degradation.
Remember, a single High-Speed HDMI cable carries both video to the projector and audio to the sound system.
Analog and Digital Audio Cable Guide
For non-HDMI connections, you’ll need a dedicated audio cable. The type depends entirely on the ports you are using.
| Connection Type | Cable Required | Key Feature |
|---|---|---|
| 3.5mm Audio (AUX) | 3.5mm Male-to-Male Stereo Cable | Universal; look for gold-plated connectors and thick shielding. |
| Optical Audio (Toslink) | Digital Optical Audio Cable (Toslink) | Fragile glass fibers inside; avoid sharp bends during installation. |
| RCA (L/R Audio) | Dual RCA to 3.5mm Cable | Used if your speaker only has red/white RCA inputs. |
Essential Adapters for Flexible Setups
Adapters solve compatibility problems when your devices have mismatched ports. They are small, inexpensive, and incredibly useful.
- Optical to 3.5mm (or RCA) DAC Converter: This digital-to-analog converter is essential for connecting an Optical output to analog-only speakers.
- 3.5mm to Bluetooth Transmitter: Enables wireless audio to Bluetooth speakers if your projector lacks Bluetooth.
- HDMI Audio Extractor: A specialized device that pulls the audio signal from an HDMI input and outputs it via Optical or 3.5mm. Useful for projectors without ARC.
Pro Tips for an Immersive Home Theater Experience
Connecting audio is just the first step. To create a truly captivating home theater with your BenQ projector, you need to consider the entire environment. These expert tips will elevate your setup from functional to phenomenal.
Great audio is about more than just the speakers. It involves placement, room treatment, and system calibration. Small adjustments can make a massive difference in immersion.
Optimal Speaker Placement for Projector Setups
Where you place your speakers dramatically affects sound quality. The goal is to create a cohesive soundstage that matches the on-screen action.
- Center Your Soundbar or Main Speaker: Position it directly below or above the projection screen. This anchors dialogue to the image.
- Create Separation for Stereo Systems: Place left and right speakers at least 6-8 feet apart, angled slightly toward the main listening position.
- Manage the Subwoofer: Bass is non-directional. Experiment with corner placement to enhance low-frequency response, but avoid areas that cause excessive booming.
Ensure no objects are blocking the path between the speakers and your seating area.
Managing Wires and Creating a Clean Setup
A tangle of cables can ruin the aesthetic of your home theater. A clean installation looks professional and is safer.
Use cable management sleeves, raceways, or conduit to bundle and hide wires along walls or baseboards. For temporary setups, reusable velcro cable ties are perfect.
Plan your cable routes before connecting everything. Measure the distance and add a little extra slack for flexibility, but avoid excessive coiled cable which can cause interference.
Advanced Calibration with Test Tones
For the ultimate audio precision, use test tones to balance your system. Many streaming services and Blu-rays include dedicated setup soundtracks.
- Play a test tone (often pink noise) through each speaker individually.
- Use a sound level meter app on your smartphone at the main listening position.
- Adjust the volume of each speaker on your receiver or soundbar so the meter reads the same decibel level for each one.
This ensures sound effects move seamlessly across the speakers, creating a perfectly balanced surround field.
Maintaining Your BenQ Projector Audio Connection
A reliable audio connection requires occasional maintenance. Proper care prevents future issues and ensures long-term performance. These simple habits will keep your home theater sounding its best.
Maintenance involves both physical care of components and software management. A few minutes of attention can save hours of troubleshooting later.
Regular System Checks and Updates
Technology evolves, and firmware updates often improve compatibility and fix bugs. Keeping your system updated is crucial for stability.
- Check for Projector Firmware: Visit the official BenQ support website. Enter your model number to see if new firmware is available for download.
- Update Your Audio Device: Many modern soundbars and AV receivers receive updates via Wi-Fi or a USB stick. Check the manufacturer’s app or website.
- Test Your Connection Monthly: Play audio from different sources (streaming, gaming console, USB) to ensure all inputs work correctly through your external speakers.
Always follow the manufacturer’s instructions precisely when updating firmware to avoid bricking your device.
Cleaning and Protecting Audio Ports
Dust and debris are the enemies of electrical connections. They can cause static, intermittent sound, or complete failure.
Regularly inspect the audio ports on your projector and speakers. Use a can of compressed air to gently blow out any loose dust from the ports.
For the metal connectors on cables, use a dry, soft microfiber cloth. If there is visible corrosion, lightly dampen the cloth with isopropyl alcohol and wipe carefully. Let it dry completely before reconnecting.
Long-Term Storage and Setup Preservation
If you need to disconnect your system for moving or storage, do it methodically. This makes reinstallation quick and error-free.
- Label Your Cables: Use masking tape and a marker to label each cable (e.g., “HDMI to Soundbar,” “Optical from Projector”).
- Take Photos: Snap pictures of the back of your projector and speakers before disconnecting. This serves as a perfect wiring diagram.
- Store Cables Properly: Loosely coil cables and secure them with a twist-tie. Avoid tight bends that can damage internal wires.
Store all components in a cool, dry place away from direct sunlight and extreme temperatures.
Conclusion: Transform Your BenQ Projector with Superior Sound
Connecting external audio to your BenQ projector is a straightforward upgrade with dramatic results. You can now enjoy powerful, immersive sound that matches your stunning visuals. This guide has provided all the steps, from port identification to advanced optimization.
The key takeaway is to identify your projector’s output ports first. Then, choose the right cable and speaker for your needs. Follow the step-by-step connection guide for a flawless setup.
We encourage you to revisit the troubleshooting section if you encounter any issues. Now, power on your system, play your favorite content, and experience the transformative difference.
Your perfect home theater experience is just a connection away. Enjoy the show!
Frequently Asked Questions about Connecting Audio to BenQ Projectors
What is the best way to connect external audio to a BenQ projector?
The best way is using an HDMI ARC connection if both your projector and soundbar support it. This single cable delivers the highest quality audio and allows volume control with one remote. It’s the simplest and most integrated solution for modern home theaters.
If HDMI ARC isn’t available, use the 3.5mm audio output jack. This analog connection is universally compatible with almost all speakers and provides reliable, good-quality stereo sound for most users.
How do I get sound from my BenQ projector to Bluetooth speakers?
Most BenQ projectors lack built-in Bluetooth audio transmission. You need a separate Bluetooth transmitter. Plug this small device into your projector’s 3.5mm or Optical audio output port.
Then, put your Bluetooth speaker into pairing mode and sync it with the transmitter. For the best experience, choose a transmitter that supports a low-latency codec like aptX LL to minimize audio delay.
Why is there no sound from my external speakers after connecting?
The most common cause is an incorrect audio output setting on the projector. Press the Menu button, navigate to Sound Settings, and ensure the Audio Output is set to “Audio Out,” “HDMI,” or “SPDIF,” not “Internal Speaker.”
Also, check all physical cable connections are secure. Ensure your external speakers are powered on and the volume is turned up on the speaker itself, not just the projector remote.
What should I do if the audio is out of sync with the video?
This lip-sync issue is common with Bluetooth or certain video processing. First, check your BenQ projector’s audio menu for an Audio Delay or Lip-Sync adjustment setting. You can manually delay the audio to match the picture.
For persistent Bluetooth delay, ensure you are using a low-latency transmitter and speaker. For HDMI connections, try a different High-Speed HDMI cable and update your devices’ firmware.
Which is better: Optical audio or HDMI ARC for sound quality?
HDMI ARC is generally better as it supports newer, high-bandwidth audio formats like Dolby TrueHD and DTS-HD Master Audio. It also allows for easier control via a single remote (CEC).
Optical audio (Toslink) is an excellent digital alternative but has bandwidth limitations. It supports core Dolby Digital 5.1 and DTS but not the latest object-based formats like Dolby Atmos. For most users, both provide excellent sound.
Can I connect a home theater receiver to my BenQ projector?
Yes, connecting a home theater receiver is an excellent option. Use an HDMI cable from the projector’s HDMI ARC port to a receiver’s HDMI ARC input. This sends audio to the receiver while passing the video signal back to the projector.
Alternatively, use a Digital Optical cable from the projector to the receiver. You would then need separate HDMI cables from your media sources (Blu-ray player, game console) directly into the receiver.
What is the purpose of the 3.5mm audio jack on my projector?
The 3.5mm audio jack is a universal analog stereo output. Its primary purpose is to send audio to external speakers, soundbars, or headphones that have a compatible AUX input. It’s the most versatile and foolproof connection available.
This port is also used to connect a Bluetooth transmitter for wireless audio setups. It provides a simple, reliable signal that works with virtually any audio device, making it a crucial fallback option.
How can I improve poor sound quality or eliminate buzzing noise?
A constant buzzing or humming often indicates a ground loop. Solve this by using a ground loop isolator on your 3.5mm audio connection. This inexpensive device filters out the electrical interference causing the noise.
For generally poor quality, ensure you are using high-quality, shielded cables. Check that the cables are not running parallel to power cords, as this can cause interference. Also, verify your source material is of high quality.
This website is a participant in the Amazon Services LLC Associates Program, an affiliate advertising program designed to provide a means for us to earn fees by linking to Amazon.com and affiliated sites.