This website is a participant in the Amazon Services LLC Associates Program, an affiliate advertising program designed to provide a means for us to earn fees by linking to Amazon.com and affiliated sites.
Connecting your MacBook Air on Monterey to a projector is straightforward with the right cables and settings. This guide provides the complete steps to establish a flawless connection for presentations or media. You’ll learn expert tips to troubleshoot common display and audio issues quickly.
We cover every method, from using modern USB-C adapters to configuring your display mirroring preferences. Follow our proven methods to get your presentation or movie showing perfectly on the big screen. Let’s get your MacBook Air and projector working together seamlessly.
Best Adapters for MacBook Air Monterey Projector Connection
Apple USB-C Digital AV Multiport Adapter – Best Overall Choice
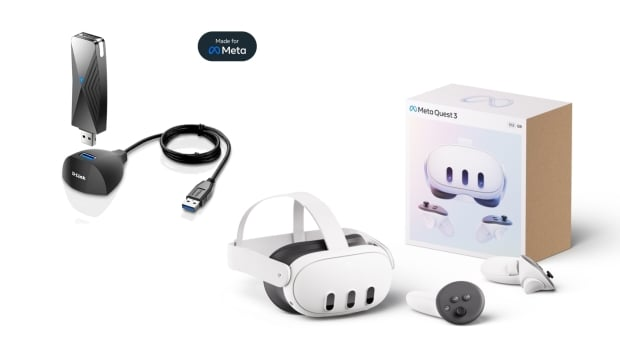
This official Apple adapter (Model: MUF82AM/A) provides the most reliable HDMI connection for your MacBook Air. It features an HDMI port, USB-A port, and USB-C charging port simultaneously. It’s the ideal for guaranteed compatibility with Monterey, ensuring seamless video and audio output to any modern projector.

- The USB-C digital AV multiport adapter lets you connect your USB-C enabled…
- Simply connect the adapter to a USB-C or Thunderbolt 3 (USB-C) port on your…
- Use the standard USB port to connect devices such as your flash drive or…
Anker 7-in-1 USB C Hub – Best Value & Versatility
The Anker 555 USB-C Hub (8K HDMI) offers excellent value with multiple ports. Beyond the crucial 4K HDMI port for projectors, it adds USB-A, Ethernet, and SD card readers. This model is highly recommended for users who need a versatile docking solution for presentations and everyday use.

- Sleek 7-in-1 USB-C Hub: Features an HDMI port, two USB-A 3.0 ports, and a…
- Flawless 4K@60Hz Video with HDMI: Delivers exceptional clarity and…
- Double Up on Efficiency: The two USB-A 3.0 ports and a USB-C port support a…
Satechi USB-C Multi-Port Adapter V2 – Best Premium Design
For a sleek, aluminum build that matches your MacBook, choose the Satechi adapter. It includes an HDMI port supporting up to 4K at 60Hz, perfect for high-resolution presentations. Its compact, durable design makes it the best option for professionals who prioritize both aesthetics and performance.

- Enhanced Functionality & Style – Featuring Micro/SD card slots in a compact…
- High-Fidelity 4K Connectivity – By seamlessly connecting a HDMI cable…
- 8-in-1 Connectivity – Featuring an Ethernet for stable networking, HDMI…
How to Connect Your MacBook Air to a Projector: Step-by-Step Guide
Connecting your MacBook Air on Monterey to a projector is a simple process. The method depends on your projector’s available ports. Follow this step-by-step guide for a successful setup every time.
Step 1: Choose and Connect the Correct Adapter
First, identify the video input on your projector. Most modern projectors use HDMI, while older models may have VGA. Select the appropriate adapter for your MacBook Air’s USB-C ports.
- For HDMI Projectors: Use a USB-C to HDMI adapter or multiport hub.
- For VGA Projectors: Use a USB-C to VGA adapter. Note that VGA carries only video, not audio.
- For Wireless Connection: Some projectors support AirPlay or Miracast for a cable-free setup.
Step 2: Configure Your MacBook’s Display Settings
Once physically connected, configure macOS Monterey’s display settings. Click the Apple menu and go to System Preferences > Displays. The projector should appear as a second display.
You will see several arrangement and mirroring options. Choose the one that best suits your presentation needs.
Step 3: Select the Right Display Mode
Your MacBook Air offers two primary display modes for projectors. Each serves a different purpose during your presentation or viewing session.
- Mirror Displays: This mode shows the same content on both your MacBook screen and the projector. It is the default and best for most presentations.
- Extended Display: This mode turns the projector into a second, independent desktop. You can drag windows between screens, keeping notes private on your laptop.
Key Takeaway: Always test your connection and chosen display mode before starting your actual presentation to avoid technical delays.
Troubleshooting Common MacBook Air Projector Connection Issues
Even with the right adapter, you might encounter problems. This section solves the most common issues when connecting a MacBook Air on Monterey to a projector. Follow these targeted fixes to get back on track quickly.
No Signal or Blank Screen on Projector
A blank projector screen is a frequent frustration. The problem often lies with the display detection or cable connection. Start with these basic checks before diving deeper.
- Check Physical Connections: Ensure the adapter is fully seated in the USB-C port and the HDMI/VGA cable is secure at both ends.
- Force Detect Displays: Go to System Preferences > Displays. Hold the Option key and click “Detect Displays.”
- Try a Different Port: If your MacBook Air has multiple USB-C ports, try plugging the adapter into a different one.
Audio Not Playing Through Projector
If video works but audio still comes from your laptop, the output device is misconfigured. HDMI carries both audio and video, but macOS must be told to use it.
Click the volume icon in your menu bar or go to System Preferences > Sound > Output. Select the HDMI or external display option from the list. Ensure your projector’s volume is turned up as well.
Resolution and Scaling Problems
Sometimes the image fits poorly or looks blurry on the projector. This is usually a resolution mismatch. The Displays preference pane is your control center for fixing this.
- Access Display Settings: With the projector connected, open System Preferences > Displays.
- Select the “Display” Tab: Click on the arrangement window that represents your projector.
- Choose “Default for display”: This automatically selects the projector’s native, sharpest resolution. Avoid scaled options unless necessary.
Pro Tip: For persistent “No Signal” errors, restart both your MacBook Air and the projector with the cable connected. This often resets the handshake between devices.
Advanced Tips for a Flawless MacBook Air Presentation
Mastering the basic connection is just the start. Use these advanced tips to optimize your setup and deliver a professional, distraction-free presentation. These strategies leverage built-in macOS Monterey features for superior control.
Optimizing Display Arrangement and Mirroring
Proper display arrangement is crucial when using extended desktop mode. In System Preferences > Displays > Arrangement, you see blue rectangles representing your screens.
- Align Screens Physically: Drag the white menu bar to the rectangle representing your projector. This makes it the primary display for your audience.
- Match Screen Edges: Arrange the rectangles so their edges align with how the screens are physically placed. This makes moving the cursor between them intuitive.
- Toggle Mirroring Quickly: Use the Mirror Displays checkbox in the Display settings or press Command + F1 as a keyboard shortcut.
Using Presenter View and Keyboard Shortcuts
Applications like Keynote and PowerPoint offer a Presenter View. This powerful tool shows your notes and next slides on your MacBook while the projector displays only the clean slide.
Enable it in your presentation software’s settings before you begin. Combine this with macOS shortcuts for seamless control during your talk.
Essential Presentation Mode Shortcuts
Memorize these keyboard shortcuts to navigate your presentation smoothly without touching your mouse. They work in most presentation apps and system-wide.
| Shortcut | Action | Benefit |
|---|---|---|
| Command + F1 | Toggle Display Mirroring | Instantly switch between extended and mirrored modes. |
| Option + Brightness Up/Down | Open Displays Preferences | Quick access to resolution and arrangement settings. |
| Spacebar | Play/Pause Media | Control embedded videos without fumbling. |
Expert Advice: Before your event, close all non-essential apps and notifications. Enable Do Not Disturb in macOS to prevent alerts from popping up on the projected screen.
Wireless Connection Options for MacBook Air and Projectors
Eliminate cables entirely by connecting your MacBook Air to a projector wirelessly. This method offers greater mobility and a cleaner setup. Success depends on your projector’s capabilities and network environment.
Using AirPlay with Compatible Projectors
Many modern smart projectors and Apple TV devices support AirPlay. This is the most seamless wireless method for macOS. Ensure your MacBook Air and the projector are on the same Wi-Fi network.
- Initiate Connection: Click the Control Center icon (or Screen Mirroring) in your menu bar.
- Select Your Device: Choose the AirPlay-compatible projector or Apple TV from the list.
- Enter Code if Prompted: A screen code may appear on the projector for a one-time verification.
Third-Party Wireless HDMI Solutions
If your projector lacks built-in wireless, use a wireless HDMI transmitter and receiver kit. These devices create a direct wireless link, often more reliable than standard Wi-Fi.
Popular brands include MiraScreen and J-Tech Digital. Plug the transmitter into your MacBook’s USB-C port and the receiver into the projector’s HDMI port.
Comparing Wireless Connection Methods
Choose the right wireless method based on your equipment and needs. Each option has distinct advantages and potential drawbacks to consider.
| Method | Best For | Key Consideration |
|---|---|---|
| AirPlay / Apple TV | Apple ecosystem users; projectors with built-in AirPlay. | Requires a stable, robust Wi-Fi network for smooth video. |
| Wireless HDMI Kit | Older projectors; environments with poor or congested Wi-Fi. | Adds minimal latency, ideal for video playback and live demos. |
| Software Solutions (e.g., LonelyScreen) | Windows PCs acting as AirPlay receivers for your Mac. | Useful workaround when hardware options are limited. |
Pro Tip: For critical presentations, always have a physical adapter and cable as a backup. Wireless connections can be susceptible to interference or network lag.
Essential Pre-Presentation Checklist for MacBook Air Users
Avoid last-minute panic by running through this definitive checklist before your presentation. Proper preparation ensures your MacBook Air and projector work together flawlessly. This covers both hardware and software readiness.
Hardware and Connection Verification
Start with a physical check of all your gear. Verify every component is present, functional, and compatible with your specific MacBook Air model and macOS Monterey.
- Adapter & Cables: Pack the correct USB-C adapter (HDMI/VGA) and a long-enough, high-quality cable. Test them beforehand.
- Power Management: Ensure your MacBook is fully charged and bring its charger. Consider the projector’s power cord location.
- Port Check: Confirm which USB-C port on your MacBook works reliably with video out. Some ports may be data-only.
Software and System Settings Review
Software glitches can derail a presentation. Configure these system settings on your MacBook Air well in advance of your start time.
Update macOS to the latest compatible version for Monterey to ensure stability. Close all unnecessary applications to free up system resources and prevent notifications.
On-Site Setup and Final Test
Arrive early to set up and perform a live test in the actual environment. This is your final opportunity to catch and fix any issues.
- Connect Everything: Power on the projector first, then connect it to your MacBook Air with your adapter and cable.
- Boot and Configure: Turn on your MacBook. Open System Preferences > Displays and select your preferred arrangement (Mirror or Extend).
- Run a Full Test: Open your presentation file. Advance through several slides, play any embedded video, and test the audio output.
Critical Final Step: After testing, do not put your MacBook to sleep. Set it to “Never” sleep in Energy Saver preferences, or simply leave it awake until you begin.
MacBook Air Monterey Projector FAQs and Quick Fixes
This section answers the most frequently asked questions for a smooth experience. Find direct solutions to specific, common problems users encounter. These quick fixes address persistent Monterey-specific issues.
Why Won’t My MacBook Air Detect the Projector?
If your projector isn’t detected, the issue is often a handshake failure. Follow this escalation path to resolve it, starting with the simplest solution.
- Restart Everything: Power cycle your MacBook Air and the projector with the cable connected.
- Check Adapter Power: Some active adapters require external power. Ensure yours is plugged in if needed.
- Reset NVRAM/PRAM: Shut down your Mac. Turn it on and immediately press and hold Option + Command + P + R for 20 seconds. This can reset display settings.
How to Fix Blurry or Incorrect Resolution
A blurry image means your MacBook is not using the projector’s native resolution. This is easily corrected in the Displays system preference.
Go to System Preferences > Displays. Select the “Display” tab. Hold the Option key and click “Scaled” to see all resolutions. Choose the one marked “(Recommended)”.
Solving Audio and Video Sync Issues
Lag between audio and video is distracting. This is typically caused by processing delays in the adapter or wireless connection.
- Wired Connection: Try a different, higher-quality HDMI cable or a powered USB-C adapter.
- Wireless Connection: Audio lag is common. Switch to a wired connection or ensure you are using a low-latency wireless HDMI kit.
- Software Check: In QuickTime Player, go to Window > Show Movie Inspector to check for decoding issues with your video file.
Remember: If a specific adapter worked before but suddenly doesn’t, try cleaning the USB-C port on your MacBook Air with compressed air. Dust can prevent a proper connection.
Maintaining Your MacBook Air for Reliable Projector Use
Long-term reliability depends on proper maintenance of your MacBook and its accessories. Proactive care prevents common connection failures before they happen. This ensures your setup is always presentation-ready.
Keeping macOS and Drivers Updated
Regular software updates are crucial for hardware compatibility. Apple frequently releases updates that improve external display support and fix bugs.
- Check for Updates: Go to System Preferences > Software Update regularly.
- Update Security: Install all recommended updates, especially security patches that can affect system stability.
- Adapter Firmware: Some advanced hubs have their own firmware. Check the manufacturer’s website for updates.
Caring for Your Adapters and Ports
Physical damage to ports or adapters is a leading cause of failure. Handle your connection points with care to ensure a long lifespan.
Avoid putting strain on cables plugged into your MacBook. Never force a connector into a port. Gently clean USB-C ports with compressed air to remove lint and debris.
Creating a Reliable Presentation Kit
Assemble a dedicated kit so you’re never missing a critical component. This saves time and eliminates stress before important meetings or events.
| Essential Item | Purpose | Pro Tip |
|---|---|---|
| Primary Adapter | Your go-to USB-C to HDMI/VGA connector. | Choose a reputable brand from the recommended list. |
| Backup Adapter | A spare in case the primary fails or is lost. | Can be a simpler, less expensive model. |
| High-Quality HDMI Cable | Ensures stable signal over longer distances. | Look for cables certified for 4K or “High Speed.” |
| USB-C Charger | Powers your MacBook during long sessions. | Keep it in your kit, not with your daily charger. |
Final Maintenance Tip: Every few months, do a full test of your entire kit—adapter, cable, and projector—outside of a high-pressure situation. This proactive check identifies aging components.
Conclusion: Mastering Your MacBook Air and Projector Setup
Connecting your MacBook Air on Monterey to a projector is simple with the right knowledge. You can now handle any connection, from basic HDMI to advanced wireless setups. Troubleshooting common issues ensures a smooth presentation every time.
The key takeaway is preparation and testing. Always run through your checklist before any important event. Keep your adapters and macOS updated for long-term reliability.
Put these steps into practice for your next meeting or movie night. Share this guide with colleagues who might struggle with their setup.
You have all the tools for a flawless, professional connection. Go ahead and present with confidence.
Frequently Asked Questions about MacBook Air Monterey Projector Connections
What is the best adapter for a MacBook Air to connect to a projector?
The Apple USB-C Digital AV Multiport Adapter is the most reliable choice for guaranteed compatibility. For more versatility, the Anker 7-in-1 USB C Hub offers excellent value with extra ports. Choose based on whether you need a simple HDMI pass-through or a full docking station for your presentation setup.
How do I mirror my MacBook Air screen to a projector?
Connect your MacBook to the projector with the correct adapter and cable. Then, open System Preferences and click on Displays. Check the box labeled “Mirror Displays” in the Arrangement tab. You can also toggle mirroring instantly by pressing the Command + F1 keyboard shortcut.
Why is my projector not showing the correct resolution from my Mac?
This usually happens when macOS isn’t using the projector’s native resolution. Go to System Preferences > Displays. Select the “Display” tab and hold the Option key while clicking “Scaled.” Choose the resolution marked as “(Recommended)” for the sharpest, properly scaled image on your projector.
Can I connect my MacBook Air to a projector without an adapter?
Yes, but only if both devices support wireless projection. If your projector has built-in AirPlay or you have an Apple TV connected to it, you can use screen mirroring over Wi-Fi. For projectors without this, a wireless HDMI transmitter/receiver kit can create a cable-free link.
What should I do if there’s no audio through the projector?
First, ensure you’re using an HDMI connection, as VGA does not carry audio. Then, click the volume icon in your menu bar or go to System Preferences > Sound > Output. Select the HDMI or external display option from the list to route audio through the projector.
How do I use my MacBook Air as a second screen for a projector?
This setup, called extended desktop mode, is configured in the Displays preferences. After connecting, go to System Preferences > Displays > Arrangement. Uncheck “Mirror Displays.” You can then drag the white menu bar to the screen you want as your primary (likely the projector) and arrange them spatially.
Why does my MacBook Air keep disconnecting from the projector?
Intermittent disconnections are often caused by a faulty cable, a dirty USB-C port, or an underpowered adapter. Try a different HDMI cable and clean your MacBook’s port with compressed air. If using a hub, ensure it’s connected to power if required, as video output can be demanding.
What are the best settings for presenting with a MacBook Air?
Enable “Do Not Disturb” to silence notifications. Set your Energy Saver preferences to prevent the display from sleeping. Use your presentation software’s Presenter View to see notes privately. Finally, always perform a full audio/video test with the exact projector before your audience arrives.
This website is a participant in the Amazon Services LLC Associates Program, an affiliate advertising program designed to provide a means for us to earn fees by linking to Amazon.com and affiliated sites.