
This website is a participant in the Amazon Services LLC Associates Program, an affiliate advertising program designed to provide a means for us to earn fees by linking to Amazon.com and affiliated sites.
Installing a BenQ projector ceiling mount is a straightforward DIY project that ensures a perfect, permanent viewing setup. This guide provides the complete, step-by-step process for a secure and professional installation. Follow our expert tips to avoid common pitfalls and achieve optimal projection alignment.
A properly mounted projector eliminates clutter and provides an immersive, theater-like experience. Our proven methods will help you tackle ceiling types, find the ideal placement, and ensure a rock-solid mount. You’ll learn the essential tools and safety checks required for success.
This comprehensive guide covers everything from pre-installation planning to final calibration. You will master locating ceiling studs, safely mounting the bracket, and fine-tuning your BenQ projector’s position. Let’s begin your journey to a flawless home theater installation.
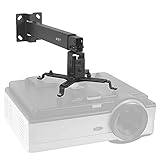
Best Ceiling Mounts for Your BenQ Projector
Chief Manufacturing CMA1U – Best Universal Fit
The Chief CMA1U is a highly versatile universal mount compatible with most BenQ projector models. Its robust construction supports up to 30 lbs and features a 15-inch telescoping pole for flexible height adjustment. This is the best overall choice for its reliable security and easy micro-adjustments for perfect alignment.

Peerless-AV PRG-UNV – Best for Heavy-Duty Projectors
Ideal for larger, heavier BenQ models, the Peerless-AV PRG-UNV offers exceptional stability with a 50 lb capacity. It includes a unique extension column and a quick-release system for easy projector installation and removal. This is the recommended option for premium home theaters requiring maximum support.

- Supports Projectors up to 50 lb (22.7 kg)
- Geared Precision Adjustments: Tool-less pitch and roll tuning for perfect…
- Universal Mounting Arms: Compatible with a wide range of projector brands…
Vivo MOUNT-PROJ02 – Best Value Option
The Vivo MOUNT-PROJ02 provides excellent quality at an affordable price point. It features a low-profile design, 22 lb capacity, and a 10-inch extension pole. This mount is ideal for standard BenQ projectors in home offices or classrooms, offering a simple, secure installation without complexity.
- Solid Steel Construction makes this universal ceiling and wall projector…
- Universal Mounting Design enables this bracket to fit the majority of…
- Adjustable Features include -15° to +15° tilt and 16° swivel offering…
Essential Tools and Pre-Installation Planning
Proper preparation is the key to a successful BenQ projector ceiling mount installation. This phase ensures you have everything needed and helps avoid mid-project delays. Careful planning also guarantees optimal screen alignment and a safe mounting process.
Gathering Your Required Tools and Hardware
You will need both common household tools and specific hardware. Most quality mounts include the necessary screws and bolts. Always double-check your specific BenQ model’s weight and mounting pattern.
- Power Drill & Bits: For drilling pilot holes into ceiling joists and, if necessary, concrete.
- Stud Finder: Critical for locating solid wooden joists to secure the mount safely.
- Measuring Tape, Level, and Pencil: For precise marking and ensuring a perfectly flat installation.
- Wrench or Socket Set: To tighten mounting bolts securely for a vibration-free hold.
Choosing the Perfect Mounting Location
Selecting the right spot involves more than just centering the mount on the ceiling. You must consider throw distance, screen alignment, and power source accessibility. This planning prevents the need for repositioning later.
First, consult your BenQ projector’s manual for its throw distance ratio. Measure the distance from your screen to determine the projector’s ideal placement zone. Account for the mount’s extension length in this calculation.
Next, use the stud finder to map the ceiling joists within your desired placement zone. The strongest mounting point is where your ideal location intersects with a solid joist. Mark the exact center point for your mount’s main plate.
Safety Precautions Before You Begin
Your safety and the protection of your equipment are paramount. Always disconnect power and enlist a helper for the physical installation step.
- Turn Off Power: Ensure the circuit for the room’s ceiling electricity is switched off at the breaker.
- Clear the Area: Move furniture and cover floors to protect from dust and debris.
- Use a Helper: Projectors are delicate. A second person is essential for holding the mount or projector during assembly.
Step-by-Step Ceiling Mount Installation Guide
This section provides the core process for securely attaching your mount to the ceiling. Follow these steps in order for a professional and stable result. Rushing this phase can lead to misalignment or an unsafe installation.
Step 1: Attaching the Mounting Plate
Begin by holding the mount’s base plate against the ceiling on your pre-marked spot. Ensure it is aligned with the joist and perfectly level. Use your pencil to mark the exact locations of the mounting holes through the plate.
- Drill Pilot Holes: Using a drill bit slightly smaller than your mounting bolts, drill pilot holes at each mark. This prevents the wood from splitting.
- Secure the Plate: Align the plate with the holes. Insert the provided lag bolts or screws and tighten them firmly with a wrench. Do not overtighten.
- Double-Check Stability: Apply gentle downward pressure to test the plate’s hold. It should feel completely solid with no movement.
Step 2: Assembling the Mount and Extension Pole
Most mounts require you to attach the extension pole or arms to the base plate before mounting the projector. Refer to your specific model’s instructions for the correct assembly order.
Typically, you will thread the extension pole into the secured ceiling plate. Hand-tighten it first, then use the provided wrench for a final secure fit. Ensure any adjustable arms or joints are loosely attached for now, as you will fine-tune them later.
Step 3: Mounting the Projector Securely
This is a two-person job. One person should hold the projector aligned with the mount, while the other secures it. Connect the projector to the mount’s interface or arms.
- Lift and Connect: Carefully lift the BenQ projector and engage it with the mount’s attachment point.
- Secure Fasteners: Insert and hand-tighten all safety screws or bolts. Ensure the projector is sitting flush and stable.
- Final Tightening: Once positioned, use your tools to give all fasteners a final, firm tightening. Confirm the projector cannot wobble or slip.
Final Alignment, Calibration, and Cable Management
With your BenQ projector securely mounted, the final phase involves perfecting the image and organizing cables. Proper calibration ensures a sharp, rectangular picture, while good cable management creates a clean, professional look. This transforms your installation from functional to flawless.
How to Align and Square Your Projector Image
Power on your projector and display a test grid or alignment image. You will now use the mount’s adjustment features to fine-tune the picture. Most mounts offer tilt, pan, and roll adjustments.
- Adjust Keystone First: Use the projector’s digital keystone correction sparingly to make the image roughly rectangular. Optical adjustments are always preferable for image quality.
- Fine-Tune with Mount: Loosen the mount’s adjustment knobs slightly. Physically tilt or rotate the projector until the image is perfectly square and centered on your screen.
- Re-tighten and Lock: Once aligned, carefully tighten all adjustment knobs on the mount. Ensure the image does not shift during this process.
Essential Calibration Settings for Optimal Quality
After physical alignment, dial in the image settings for the best viewing experience. Your mounted position may affect how the projector’s default settings appear.
- Focus and Zoom: Use the lens rings to achieve a razor-sharp focus. Adjust the zoom to fill your screen without overspill.
- Lens Shift: If your BenQ model has it, use optical lens shift to center the image. This is superior to digital keystone and preserves quality.
- Picture Mode: Select the appropriate mode (e.g., Cinema, Game) for your content. Perform basic brightness and contrast adjustments for your room’s lighting.
Professional Cable Management Solutions
Exposed wires are a safety hazard and ruin aesthetics. A clean install involves routing cables neatly from the projector to the wall.
Use cable raceways or conduit to run wires along the ceiling and down the wall. For a truly seamless look, you can run cables inside the ceiling before mounting, though this is more complex. Always leave a little slack near the projector connection to avoid strain.
| Management Method | Best For | Difficulty |
|---|---|---|
| Cable Sleeve (Cord Cover) | Simple, non-permanent solutions; grouping multiple cables. | Easy |
| Adhesive-backed Raceway | Clean look on walls/ceilings without drilling. | Moderate |
| In-Wall Conduit | Professional, invisible installation; requires more work. | Advanced |
Troubleshooting Common Ceiling Mount Issues
Even with careful installation, you may encounter minor issues. This section addresses the most common problems and provides clear solutions. Identifying the root cause is the first step to a perfect, stable projection.
Fixing a Wobbly or Unstable Projector Mount
A shaky mount ruins image stability and is often a safety concern. The cause is typically insufficient support or loose components. Systematically check each connection point from the ceiling down.
- Check Ceiling Attachment: Ensure all lag bolts into the joist are fully tightened. If mounted into drywall only, you must relocate to a joist.
- Tighten Joints: Every adjustable knob, swivel, and bolt on the mount itself must be firmly secured. Use the correct tool for a final pass.
- Verify Weight Limit: Confirm your projector’s weight does not exceed the mount’s rated capacity. An overloaded mount will always sag or vibrate.
Solving Image Alignment and Keystone Problems
A skewed or blurry image after mounting is frustrating. Avoid overusing digital correction, as it degrades picture quality. Follow this hierarchy for the best results.
- Prioritize Physical Alignment: Loosen the mount and physically adjust the projector’s tilt, pan, and roll until the image is as square as possible.
- Use Optical Lens Shift: If your BenQ model has this feature, use it to fine-tune vertical/horizontal positioning without quality loss.
- Minimize Digital Keystone: Only use the projector’s digital keystone correction for minor final tweaks. High values cause distortion and pixelation.
Addressing Cable and Access Challenges
Managing cables and accessing ports on a ceiling-mounted projector can be difficult. Planning ahead solves most of these hassles. Consider long-term maintenance needs during installation.
For cable access, use flexible conduit with a service loop behind the projector. This allows you to pull new cables through later. For projector ports, ensure the mount allows enough clearance to plug in HDMI and power cables comfortably. A mount with a quick-release plate can make future maintenance much simpler.
Maintenance and Long-Term Care for Your Mounted Projector
Proper maintenance ensures your ceiling-mounted BenQ projector performs flawlessly for years. Regular care prevents dust buildup, maintains image quality, and verifies safety. A simple routine is all that’s needed to protect your investment.
Regular Cleaning and Dust Prevention
Dust is the primary enemy of projectors, especially when mounted overhead where heat rises. Accumulation can block vents, cause overheating, and dim your image. Establish a safe cleaning schedule.
- Lens Cleaning: Use a soft, dry microfiber cloth designed for optics. Gently wipe the lens in a circular motion. Only use lens fluid sparingly if necessary.
- Vent and Filter Maintenance: Power off and unplug the projector. Use a can of compressed air to blow dust out of intake and exhaust vents. Clean or replace any air filters as per the manual.
- Mount and Housing: Wipe down the mount arms and projector casing with a dry cloth to prevent dust accumulation, which can fall into the lens.
Periodic Safety and Stability Checks
Vibrations and temperature changes can gradually loosen hardware. Conduct a bi-annual inspection to ensure everything remains secure. This prevents accidents and maintains perfect alignment.
- Check All Fasteners: Gently test-tighten the lag bolts in the ceiling and all adjustment knobs on the mount. Do not overtighten.
- Inspect for Sagging: Look at the mount from the side. Ensure there is no new downward tilt or bending in the arms or pole.
- Tug Test: Apply very gentle upward pressure on the projector to confirm it is still firmly locked to the mount’s attachment plate.
When to Consider Professional Service or Recalibration
While DIY maintenance covers basics, some situations warrant expert help. Knowing when to call a professional protects your equipment and ensures optimal performance.
| Situation | DIY or Pro? | Reason |
|---|---|---|
| Persistent blurry spot on lens | Professional | May require internal cleaning to avoid damaging delicate optics. |
| Unfixable color uniformity issues | Professional | Could indicate aging lamp or internal component needing calibration. |
| Mount feels loose in the ceiling joist | DIY/Pro | You may need to relocate to a new joist, which is a full re-install. |
For complex electrical issues, strange noises, or if the projector is still under warranty, always contact BenQ support or a certified technician. They have the tools and expertise for safe, internal repairs.
Advanced Tips and Pro Installer Secrets
Elevate your installation from good to exceptional with these advanced techniques. Professional installers use these methods to achieve perfect, reliable results in any room. Implementing these tips can solve tricky layout problems and enhance longevity.
Optimizing for Different Room Types and Ceilings
Not all ceilings are standard drywall with accessible joists. Your approach must adapt to the material and room architecture. The core principle remains: find solid structural support.
- Vaulted or Sloped Ceilings: Use a mount specifically designed with a sloped-ceiling adapter. This allows you to keep the projector level while attaching to an angled surface.
- Concrete Ceilings: You will need a hammer drill, concrete anchors (wedge or sleeve anchors), and a masonry bit. Mark and drill carefully, as mistakes are permanent.
- Rooms with Beams or Ducts: Use a longer extension pole to drop the projector below the obstruction. Ensure the pole is rated for the extra leverage and weight.
Ensuring Perfect Throw Distance and Offset
Professional results come from precise calculations, not guesswork. Your BenQ projector’s manual contains critical numbers for throw distance and lens offset. Use these to plan your mount’s exact placement.
First, calculate the exact distance from the lens to the screen using the projector’s throw ratio. Next, account for lens offset, which is how much higher or lower the image appears relative to the lens center. This tells you exactly where to place the mount’s lens relative to your screen’s top or bottom edge.
Future-Proofing Your Installation
A great install considers future upgrades and maintenance. Simple foresight during the initial setup saves significant time and effort later.
- Run Conduit, Not Just Cables: Install a smurf tube (flexible conduit) from the projector location to your media source. You can easily pull new HDMI cables through it in the future.
- Add a Power Outlet: Consider having an electrician install a dedicated outlet in the ceiling near the mount. This eliminates the need for a long, visible power cable.
- Document Your Setup: Take photos of the mount’s attachment to the joist and your cable routes before closing up walls or raceways. This is invaluable for future troubleshooting or upgrades.
Frequently Asked Questions (FAQ)
This section answers the most common questions about installing a BenQ projector ceiling mount. Clear, direct answers help solve last-minute doubts and ensure confidence before you begin. These FAQs consolidate expert advice into quick, actionable insights.
Can I install a projector mount by myself?
Yes, a one-person installation is possible with careful planning and the right tools. However, having a helper is strongly recommended for at least two key steps.
- Solo Possible: Mounting the plate to the ceiling and routing cables can be done alone.
- Helper Needed: Lifting and securing the projector to the mount is much safer and easier with a second person. They can hold the projector while you fasten it.
- Safety First: Always use a stable ladder and never overreach. If your projector is heavy or the mount is complex, don’t hesitate to get assistance.
What if my ceiling joists don’t align with my ideal spot?
This is a common challenge. You have two safe solutions; mounting only into drywall is not an option.
- Use a Mounting Crossbar: Install a wooden crossbar (like a 2×4) between two joists. Securely screw the crossbar into the joists, then attach your mount to the crossbar anywhere along its length.
- Use Heavy-Duty Toggle Bolts: For concrete ceilings or when a crossbar isn’t feasible, use heavy-duty metal toggle bolts rated for at least 4x your projector’s weight. Ensure they are designed for ceiling load.
How do I hide the cables professionally?
Professional cable management is about using the right products for a clean, safe look. The best method depends on your room and willingness to make modifications.
| Method | Tools Needed | Best For |
|---|---|---|
| Paintable Cable Raceway | Raceway kit, measuring tape, adhesive | Renters or those avoiding in-wall work; blends with wall color. |
| In-Wall Cable Kit (with pass-through wall plates) | Drywall saw, fish tape, low-voltage brackets | Homeowners wanting a truly invisible, professional installation. |
| Cord Cover and Cable Sleeves | Sleeves, zip ties | Quick, non-permanent solutions to group and neaten cables along a single path. |
Is digital keystone correction bad for picture quality?
Yes, excessive digital keystone correction degrades image quality. It digitally warps the image to make it rectangular, which can cause pixelation, blurring, and reduced resolution. Always prioritize physical alignment and optical lens shift first. Use digital keystone only for minor final adjustments of a few degrees.
Conclusion: Mastering Your BenQ Projector Ceiling Mount Installation
Successfully installing your BenQ projector ceiling mount creates a clean, professional home theater. You gain an immersive viewing experience free from clutter and misalignment. This guide has provided the complete process from planning to calibration.
The key takeaway is to always secure the mount to a ceiling joist for safety and stability. Proper planning and using the right tools make the project straightforward. Double-check your throw distance and lens offset calculations before drilling.
Now, gather your tools, review the steps, and begin your installation with confidence. Refer back to the troubleshooting section if you encounter any minor issues. Your perfect, cinema-quality setup is within reach.
Enjoy the exceptional, big-screen experience that only a properly mounted projector can deliver. Your dedication to a correct installation ensures years of reliable, high-quality entertainment.
Frequently Asked Questions about Installing a BenQ Projector Ceiling Mount
What is the most important step when installing a projector ceiling mount?
The most critical step is locating and securely attaching the mount to a ceiling joist. Never rely on drywall alone to support the weight. This ensures absolute safety and prevents the mount from pulling loose over time, which could damage your projector and ceiling.
Use a quality stud finder to accurately map your ceiling’s joists. If your ideal spot doesn’t align with a joist, install a mounting crossbar between two joists to create a secure anchor point.
How do I find the exact placement for my ceiling mount?
Determine placement by calculating your BenQ projector’s throw distance and lens offset. Consult your projector’s manual for its specific throw ratio formula. Measure the distance from your screen to find the ideal lens position range.
Account for the mount’s extension length in your calculation. For precision, temporarily place the projector at the proposed height using a table to test the image size and alignment before making any permanent holes.
Can I use any universal ceiling mount for my BenQ projector?
Most universal mounts are compatible, but you must verify three key specifications: weight capacity, mounting pattern (VESA), and extension range. Ensure the mount supports more than your projector’s weight and that its adapter plate matches your model’s screw pattern.
Check BenQ’s website or your manual for the recommended mount types. Using a mount not rated for your projector’s weight or size is a significant safety risk.
What should I do if my projector image is tilted after mounting?
First, try to correct the tilt physically using the mount’s adjustments before using digital tools. Loosen the mount’s tilt, pan, and roll knobs to square the image manually. Use a bubble level on the projector’s top to ensure it’s flat.
Only use the projector’s digital keystone correction for minor final tweaks. Heavy digital correction degrades image sharpness and can cause pixelation, so physical alignment is always superior.
What is the best way to manage cables for a clean look?
The best method is to run cables inside the wall or ceiling using a low-voltage in-wall kit. This involves installing a pass-through wall plate and using flexible conduit (smurf tube) for a truly professional, invisible result.
For a simpler, non-permanent solution, use paintable plastic cable raceways. They adhere to your wall and ceiling, can be painted to match your décor, and neatly conceal all wires.
How often should I check and maintain my ceiling-mounted projector?
Perform a basic safety and cleaning check every six months. Inspect all mount fasteners for tightness and clean the projector’s air filters and lens with appropriate tools. Dust buildup is the primary cause of overheating and image dimming.
Also, check that the image alignment hasn’t shifted. Environmental vibrations and temperature changes can gradually loosen components, so periodic tightening maintains performance and safety.
Why is my ceiling mount wobbling or vibrating?
Wobbling is usually caused by loose connections or insufficient support. Systematically check and tighten every bolt, from the lag screws in the joist to the adjustment knobs on the arms. Ensure the mount is not overloaded beyond its weight rating.
If the mount is secured to a crossbar, verify the crossbar itself is firmly screwed into the joists. In rare cases, a ceiling fan or subwoofer in the room can cause sympathetic vibration.
What is the difference between lens shift and keystone correction?
Lens shift is a superior optical adjustment that physically moves the lens element to reposition the image without degrading quality. Keystone correction is a digital process that warps the image to make it rectangular, often reducing sharpness and resolution.
Always use optical lens shift first if your BenQ model has it. Rely on digital keystone only for minor final adjustments after maximizing physical alignment and lens shift.
This website is a participant in the Amazon Services LLC Associates Program, an affiliate advertising program designed to provide a means for us to earn fees by linking to Amazon.com and affiliated sites.