This website is a participant in the Amazon Services LLC Associates Program, an affiliate advertising program designed to provide a means for us to earn fees by linking to Amazon.com and affiliated sites.
You can make a homemade star projector with simple household items. This fun DIY project transforms any room into a personal planetarium. It’s a perfect activity for families and space enthusiasts.
A DIY star projector solves the problem of expensive commercial models. You gain a customizable, magical night light for a fraction of the cost. It’s an educational craft that sparks creativity and wonder.
This expert guide will walk you through the entire process. You’ll learn the best materials, step-by-step assembly, and pro tips for the most realistic starry effect. Let’s build your own cosmos.
Best Star Projector Products for a DIY Setup
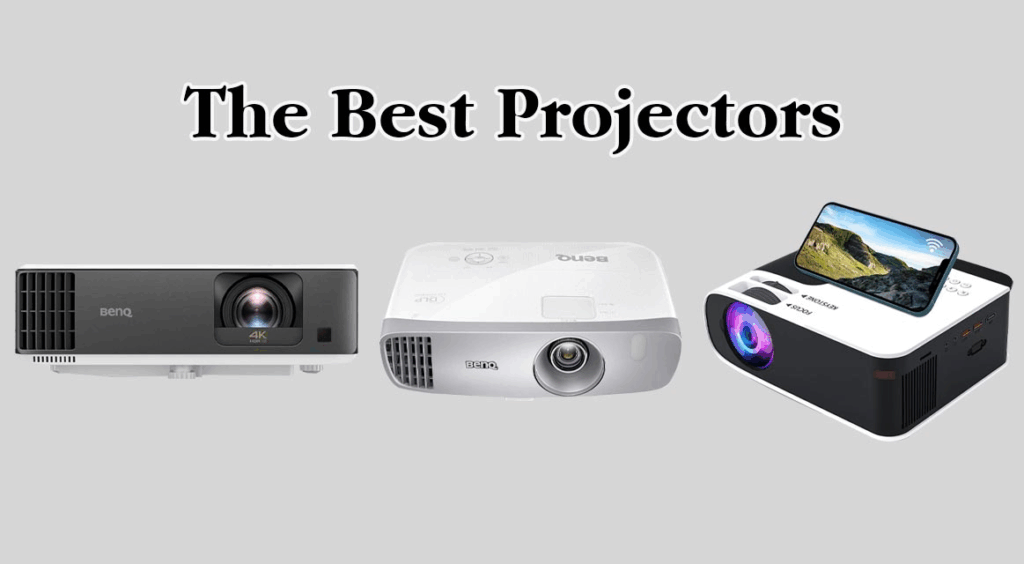
While building your own is rewarding, these commercial projectors offer advanced features. They are ideal for those seeking a polished, feature-rich night sky experience without the DIY effort. Here are three top-rated models to consider.
BlissLights Sky Lite 2.0 – Best for Ease of Use
The BlissLights Sky Lite 2.0 creates an instant nebula cloud with laser stars. It’s plug-and-play simple with a compact design. This model is ideal for quick ambiance in bedrooms or meditation spaces, offering a mesmerizing blend of color and light with minimal setup.

Sega Homestar Flux – Best for Authenticity
For genuine starfield accuracy, the Sega Homestar Flux uses real astronomical slides. It projects over 60,000 documented stars from official star charts. This is the best option for astronomy enthusiasts who want an educational and highly realistic celestial display on their ceiling.

- Project 60,000 twinkling high definition stars onto your rooms ceiling or…
- Christmas 2021: Order till Friday December 17 and usually receive in time.
- Leading brand with 5-watt warm white LED technology
Uncle Milton Star Theater Pro – Best for Families
The Uncle Milton Star Theater Pro is a durable, feature-packed projector built for learning. It includes multiple image discs and a guided audio tour. This model is ideal for families, making it an engaging educational tool that combines constellations, deep-space objects, and narration.

- You can set the constellation of favorite time of day, 365 days a year from…
- You can project the constellations of their birthday 365 days and
- Can be projected on a ceiling or wall, circular range is 60 ~ 300cm…
Essential Materials for Your DIY Star Projector
Gathering the right materials is the first critical step. This project uses common, affordable items you may already own. Having everything prepared makes the building process smooth and enjoyable.
Core Components You Will Need
Every homemade star projector requires a few fundamental parts. These create the light source, housing, and starry effect. Precision here dramatically improves your final result.
- Light Source: A bright, focused LED flashlight or a small, high-lumen LED bulb. Avoid diffuse or dim lights.
- Projection Canister: A clean, empty Pringles can, oatmeal container, or coffee tin. This forms the main body.
- Star Template: Thick black paper or cardstock to create your constellation pattern.
Tools and Supplementary Supplies
The right tools ensure clean cuts and secure assembly. These supplementary items add polish and functionality to your basic design.
- Cutting Tools: A sharp craft knife, box cutter, or precision scissors for detailed work.
- Adhesive: Strong tape (electrical or duct tape) and glue for securing components.
- Creation Tools: A push pin, needle, or small drill bit to poke star holes. A ruler and pencil are also essential.
Choosing Your Light Source
The light is the heart of your projector. Your choice affects brightness, clarity, and color. Consider these options for different effects.
| Light Type | Best For | Consideration |
|---|---|---|
| White LED Flashlight | Crisp, bright white stars | Ensure it fits snugly inside your canister. |
| RGB Color-Changing LED | Dynamic, multi-colored nebula effects | Often requires a power source. |
| Tea Light Candle (LED) | A soft, warm, flickering glow | Less bright; creates a cozy ambiance. |
Pro Tip: For a sharper projection, use a single, point-source LED. Diffused lights will create blurry, undefined stars on your ceiling.
Step-by-Step Guide to Building Your Projector
Follow this clear, step-by-step process to assemble your homemade star projector. Working methodically ensures a stable build and a stunning final projection. Let’s transform your materials into a personal planetarium.
Preparing the Projection Canister
This phase creates the main body and light chamber. A properly prepared canister is crucial for directing light effectively.
- Clean and Dry: Completely empty and clean your chosen canister. Remove any inner lining or labels for a smooth interior.
- Create the Light Port: Trace your flashlight’s head on the canister’s closed end. Carefully cut out this circle to create a snug socket for the light.
- Ensure a Dark Interior: Paint the inside of the canister flat black or line it with black paper. This prevents light scatter for sharper stars.
Designing and Creating Your Star Chart
The star template is your custom night sky. This is where you can replicate real constellations or design your own galaxy.
Cut a circle of black cardstock to fit snugly inside the open end of the canister. This will be your projection screen. Secure it temporarily with tape for the next step.
- Use a Real Map: For accuracy, tape a printout of a constellation map onto the cardstock. Poke holes directly over the star points.
- Vary Hole Sizes: Use different needle sizes to create bright and dim stars. Larger holes represent brighter celestial bodies.
- Get Creative: Feel free to design your own star patterns or spell out initials for a personalized touch.
Final Assembly and Testing
Bring all components together and test your creation. Fine-tuning at this stage makes a significant difference.
Permanently secure your finished star chart over the canister’s open end. Use strong tape around all edges to block any light leaks. Insert your flashlight firmly into the port you created.
Key Takeaway: Turn off all lights and point your projector at a white wall or ceiling. The distance from the wall affects size and focus. Adjust the flashlight’s position inside the canister for the clearest image.
Advanced Tips and Creative Customizations
Master the basics? Elevate your DIY star projector with these pro techniques. Customization unlocks a truly unique and professional-looking result. Transform your simple build into a stunning centerpiece.
Enhancing Your Projection Quality
Small adjustments can dramatically improve star clarity and brightness. Focus on controlling light and refining your template for the best effect.
- Use a Lens: Place a simple magnifying glass in front of your star chart. This helps focus the light for sharper, more defined star points on the ceiling.
- Layer for Nebulas: Add a second template with colored cellophane (blue, red, purple) behind your star chart. This creates beautiful, diffuse nebula clouds around your stars.
- Control Light Leaks: Seal every seam with black electrical tape. Any stray light will wash out your projection, reducing contrast.
Creative Themed Projector Ideas
Move beyond standard constellations with these engaging themes. This makes the project perfect for holidays, parties, or personalized decor.
| Theme | How to Achieve It | Best Use Case |
|---|---|---|
| Holiday Magic | Poke holes in shapes of snowflakes, trees, or stars. Use green or red cellophane. | Christmas bedroom ambiance or party decor. |
| Solar System Model | Create a large sun and orbiting planets on your chart. Vary hole sizes drastically. | An educational tool for teaching planetary orbits. |
| Personalized Night Sky | Replicate the exact constellation map from a special date (e.g., birthday). | A deeply meaningful and custom gift. |
Maintenance and Troubleshooting
Keep your projector working perfectly and solve common issues. Proper care extends its life and ensures consistent performance.
Dust inside the canister will show up in your projection. Use a can of compressed air to gently clean the interior periodically. Store the projector in a dry place to prevent cardboard warping.
- Problem: Blurry Stars – Solution: Ensure your light source is a single-point LED and is pushed firmly against the star template.
- Problem: Dim Projection – Solution: Use a brighter flashlight or ensure your interior is perfectly non-reflective (flat black).
- Problem: Uneven Star Brightness – Solution: Repoke smaller holes with a larger needle or pin to standardize their size.
Educational Benefits and Activity Ideas
Your homemade star projector is more than a night light. It’s a powerful tool for learning and family bonding. Unlock its full potential with these structured activities.
Turning Your Projector into a Learning Tool
Use your creation to teach astronomy, mythology, and science in an engaging way. Interactive lessons under the stars make concepts memorable.
- Constellation Stories: Project a specific constellation. Research and tell its associated myth from Greek, Roman, or other cultures.
- Seasonal Sky Changes: Create different star charts for summer and winter. Discuss why visible constellations change with Earth’s orbit.
- Planetarium Show: Narrate a tour of the night sky. Use a laser pointer to identify “stars” and share fun facts about each one.
Engaging DIY Projects for Kids and Families
Involve children in the process to foster creativity and STEM skills. Adapt the build for different age groups and interests.
| Activity | Age Group | Skills Developed |
|---|---|---|
| Decorate the Canister | 4-7 years | Fine motor skills, creativity. Let them paint the outside with space themes. |
| Poke the Star Holes | 8-12 years | Pattern recognition, precision, following a map or creating their own. |
| Full Design & Build | Teens+ | Planning, engineering, problem-solving, and electronics if adding LEDs. |
Hosting a Starry Night Event
Transform your living room into a community planetarium. This creates lasting memories and shares the wonder of the cosmos.
Build multiple projectors with different star charts. Arrange them around the room to create a 360-degree immersive experience. Play ambient space music and provide blankets for floor seating.
Key Takeaway: Combine the projector with other activities for a full event. Serve “space-themed” snacks, read astronomy books under the stars, or have guests draw the constellations they see. The goal is hands-on, interactive learning.
Safety Precautions and Best Practices
Safety is paramount when building any DIY electronics or craft project. Following these guidelines ensures a fun and risk-free experience for everyone. Protect yourself and your home while creating your starry masterpiece.
Essential Electrical Safety for DIY Lights
If you modify lights or use powered components, caution is critical. Even low-voltage LEDs require careful handling to prevent hazards.
- Use Battery-Power When Possible: Opt for battery-operated flashlights or LED tea lights. This eliminates any risk of mains electric shock.
- Inspect Cords and Plugs: If using a plug-in light, check for frayed wires or damaged plugs before embedding it in your project.
- Never Overheat Components: Ensure your light source has adequate ventilation inside the canister. Do not use incandescent bulbs, as they get extremely hot.
Safe Tool Usage and Construction Tips
Sharp tools and adhesives are common in this build. Proper handling prevents accidents and ensures a clean final product.
- Supervise Children: Always supervise kids when using craft knives, push pins, or hot glue guns. Provide age-appropriate tools like safety scissors.
- Cut Away from Yourself: When using a box cutter to modify the canister, always cut on a stable surface and push the blade away from your body.
- Choose Safe Adhesives: Use low-temperature glue guns. Work in a well-ventilated area when using strong adhesives or spray paint.
Fire Prevention and Material Safety
Your projector will be on for extended periods. Choosing the right materials prevents fire risks and ensures longevity.
Critical Rule: Never use a real candle or any open flame inside your projector. The cardboard body and paper templates are highly flammable. Only use cool, battery-operated LED lights.
Safety Summary Box:
- Power Source: Use battery-operated LEDs only.
- Tool Use: Supervise children, cut on stable surfaces.
- Materials: Avoid heat sources and ensure good ventilation when painting or gluing.
- Operation: Do not leave the projector unattended for very long periods.
Common Troubleshooting Questions
These solutions address the most frequent issues builders encounter. A simple fix can dramatically improve your results.
- Why are my stars blurry and not sharp points? This is usually caused by a diffuse light source. Use a single, focused LED flashlight. Also, ensure the star template is pressed flat against the open end of the canister.
- My projection is too dim. How can I make it brighter? First, use a higher-lumen flashlight. Second, ensure the interior of your canister is perfectly non-reflective (flat black paint is best). Any light scatter reduces brightness.
- The stars are uneven in size and shape. What went wrong? You likely used different tools or pressures to poke the holes. Use the same pin or drill bit for all holes, applying consistent pressure for uniform stars.
Material and Design Questions
Get advice on choosing alternatives and enhancing your design. Flexibility is key to a personalized project.
| Question | Expert Answer |
|---|---|
| Can I use a soda can instead of a Pringles can? | Yes, but a soda can is smaller. This will create a wider, less focused beam of light, resulting in a fainter, more diffuse starfield. |
| How can I make the stars different colors? | Place small pieces of colored cellophane over specific holes on the back of your star template. Use tape to secure them without covering the hole. |
| Is there a way to make the stars twinkle? | For a twinkling effect, loosely attach a piece of crinkled clear plastic wrap between the light and the star chart. The uneven surface will refract the light randomly. |
Usage and Application Questions
Learn how to get the most out of your finished projector. These tips enhance the user experience.
How far from the wall should I place the projector? Experiment with distance. Typically, 3-6 feet works well. Greater distance makes the starfield larger but dimmer. Closer distance makes it brighter but smaller.
Can I use this outdoors? You can, but it will only be effective in total darkness. Even ambient city lights will wash out the projection. Battery-powered models are best for outdoor use.
Bringing Your Night Sky to Life
You now possess all the knowledge to create a stunning homemade star projector. This journey from simple materials to a magical personal planetarium is complete. The final step is to enjoy the cosmos you’ve built.
Reflecting on the DIY Journey
Building your own projector offers rewards beyond a beautiful light. It combines creativity, basic engineering, and hands-on learning. You’ve created a functional piece of art with your own vision.
- Cost-Effective Magic: You achieved a captivating night sky effect for a fraction of the cost of commercial models.
- Personalized Design: Your star chart is unique, whether it mirrors real constellations or your imagination.
- Empowering Skill Building: You’ve gained practical skills in planning, construction, and problem-solving.
Your Next Steps and Project Evolution
Consider this project a foundation. Your first build opens the door to more advanced and intricate creations. Let your success inspire further exploration.
| If you enjoyed… | Consider trying next… |
|---|---|
| The basic mechanics | Building a motorized base to slowly rotate your starfield for a dynamic show. |
| The artistic design | Creating multiple, interchangeable canisters for different seasons or themed skies. |
| The educational aspect | Pairing the projector with a telescope night or a deep-dive into astrophysics podcasts. |
A Final Word of Encouragement
Every expert was once a beginner. Your first projector might have minor imperfections, and that’s perfectly fine. The true value lies in the experience and the wonder it creates.
Share your creation with friends and family. Teach a child how to build their own. Most importantly, take a moment to relax under your handmade stars. You’ve not just built a projector; you’ve captured a piece of the universe at home.
Key Takeaway: The process of making is as rewarding as the final product. You have the blueprint for endless cosmic creativity. Now, turn off the lights, switch on your projector, and enjoy the show.
Conclusion: Your Guide to a Perfect Homemade Star Projector
You now have a complete guide to making a stunning homemade star projector. This DIY project offers a magical, budget-friendly night sky. It’s a rewarding craft for all skill levels.
The key takeaway is to start simple and personalize. Use a bright LED and a dark canister for the best results. Experiment with different star patterns and colors.
Gather your materials and begin building tonight. Share your creation online to inspire others. The process is as enjoyable as the final glowing display.
Your personal cosmos awaits. Enjoy the stars you brought home.
Frequently Asked Questions about Homemade Star Projectors
What is the best light source for a DIY star projector?
A focused, single-point LED flashlight is the best light source. It creates sharp, distinct star points. Avoid diffused or frosted bulbs which cause blurry projections.
For brightness, choose a high-lumen LED. Battery-powered options are safest. This ensures clear, crisp stars on your ceiling without heat risk.
How can I make my star projector show different constellations?
Create multiple interchangeable star charts. Cut separate black cardstock circles with different constellation patterns. Label each disc for easy identification.
Secure these discs with removable tape or a slot system. This lets you switch between summer and winter skies. It transforms your projector into a versatile learning tool.
Why are my projected stars blurry instead of sharp points?
Blurry stars usually mean your light source is too diffuse. The LED should be a single, small point. Also, ensure your star template is perfectly flat against the canister opening.
Check for light leaks in the canister seams. Any stray light washes out the image. Seal all edges with black tape for maximum contrast.
What is the best material for the projector body?
A sturdy cardboard cylinder like a Pringles can or oatmeal container works best. These are easy to cut, readily available, and the right shape. They effectively channel light.
For a more permanent build, use a PVC pipe or black plastic canister. These are durable and offer superior light blocking compared to cardboard.
How do I create a nebula effect with my homemade projector?
Layer colored cellophane behind your star template. Use blues, purples, and reds. Cut the cellophane into cloud-like shapes for a realistic nebula background.
You can also lightly scratch the interior of the canister with sandpaper. This scatters a small amount of light, creating a subtle, hazy galactic cloud effect around your stars.
Can I use a smartphone as the light source for my projector?
Yes, but with limitations. Use a bright white screen or flashlight app. The light is often too diffuse, leading to softer stars. It also drains your phone battery quickly.
For better results, place your phone in a dark box with a small hole. This creates a more focused point source. It improves star definition significantly.
What is the safest way for kids to help build a star projector?
Assign age-appropriate tasks. Young children can decorate the outside of the canister. Older kids can help poke star holes under supervision using a blunt push pin.
Always use cool, battery-operated LEDs. Avoid all cutting tools and hot glue guns for young builders. Focus on the design and assembly fun.
How can I make the stars in my projector twinkle?
Create a simple rotating disc with uneven clear material. Place a piece of crinkled plastic wrap or a textured acetate sheet between the light and star chart.
Gently rotate this disc or let it hang loosely. The moving, uneven surface refracts the light randomly. This mimics the atmospheric twinkling effect of real stars.
This website is a participant in the Amazon Services LLC Associates Program, an affiliate advertising program designed to provide a means for us to earn fees by linking to Amazon.com and affiliated sites.