
This website is a participant in the Amazon Services LLC Associates Program, an affiliate advertising program designed to provide a means for us to earn fees by linking to Amazon.com and affiliated sites.
A universal projector ceiling mount with extendable arms is the ultimate mounting solution for a perfect, flexible home theater setup. It securely installs your projector to the ceiling while offering crucial positioning adjustments.
This hardware solves the common problem of projector misalignment. The extendable arms allow for precise forward/backward and side-to-side fine-tuning after installation. You achieve a perfectly centered image on your screen every time.
Our complete guide covers expert tips for selection, a step-by-step installation walkthrough, and proven methods for calibration. You will learn how to choose the best mount and achieve a flawless, professional projection.
Best Universal Projector Ceiling Mounts with Extendable Arms – Detailed Comparison
VIVO Universal Projector Mount STAND-V002R – Best Overall Choice
The VIVO STAND-V002R is our top recommendation for most home theaters. It features robust 39-inch extendable arms and a versatile universal mounting plate. This mount supports projectors up to 44 pounds, offering exceptional stability and a wide range of positioning adjustments for a perfectly centered image.

- Universal Ceiling Projector Tray Mount: This ceiling-mounted platform is…
- Height Adjustment: The arm extends 12.3” to 20.4” from the ceiling to…
- Compatibility: The 13.8” x 8.7” steel tray holds up to 11 lbs of…
Chief Manufacturing RPMAU Universal Projector Mount – Best Premium Option
For commercial or high-end installations, the Chief RPMAU is the ideal choice. It boasts micro-adjustable extension arms with precise, tool-free fine-tuning. Its professional-grade construction ensures vibration-free performance and long-term reliability, making it perfect for demanding environments.
VideoSecu MP101B Projector Ceiling Mount – Best Value Pick
The VideoSecu MP101B delivers outstanding flexibility at an affordable price. It includes adjustable arms extending up to 20 inches and a universal quick-release plate. This model is ideal for budget-conscious users who still require essential extension and tilt capabilities for their setup.

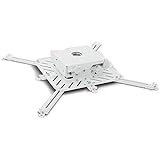
- High quality steel construction with glossy white finish
- 4 fully adjustable arms to fit various mounting patterns
- Removeable extension pole included, this mount extends from the ceiling…
Key Benefits and Advantages of an Extendable Ceiling Mount
Choosing a universal mount with extendable arms transforms your installation process. It provides critical flexibility that fixed mounts simply cannot offer. This solves the most common and frustrating projector setup challenges.
Solving Projector Alignment and Placement Issues
Perfect projector placement is rarely directly above your screen’s center point. Extendable arms bridge this gap effortlessly. They allow for significant post-installation adjustments to center your image.
- Horizontal and Vertical Adjustment: Slide the projector forward, backward, or side-to-side after the pole is fixed to the ceiling. This corrects for off-center ceiling joists or awkward room layouts.
- Eliminating Keystone Correction: Proper physical alignment reduces or removes the need for digital keystone correction. This preserves maximum image quality and projector resolution.
- Future-Proof Flexibility: If you upgrade your projector or screen later, the extendable arms allow for easy repositioning without moving the ceiling plate.
Universal Compatibility and Installation Versatility
A true universal mount is designed to fit an enormous range of projector models. This is achieved through adaptable mounting hardware and weight capacity.
The key is the universal mounting plate. It typically features multiple threaded holes and adjustable brackets. This system accommodates the varying screw patterns found on different projector brands.
| Feature | Benefit |
|---|---|
| Adjustable Brackets | Fits projectors of different widths and depths securely. |
| Multiple Hole Patterns | Matches the specific VESA or proprietary screw layouts on your device. |
| High Weight Capacity | Safely supports both lightweight and heavy, high-lumen professional models. |
This versatility makes it a one-time purchase. You can confidently use the same mount for future projector upgrades.
How to Choose the Right Universal Mount for Your Setup
Selecting the perfect mount requires evaluating your specific projector and room. Not all universal mounts are created equal. Focus on these critical specifications to ensure a compatible and secure installation.
Critical Specifications to Check Before Buying
Always verify your projector’s specifications against the mount’s capabilities. This prevents installation failures and safety hazards. The three non-negotiable specs are weight, extension range, and compatibility.
- Projector Weight & Mount Capacity: Find your projector’s weight in its manual. Choose a mount with a maximum load capacity at least 25% higher for a safety margin and stability.
- Extension Arm Length: Measure the horizontal distance needed from the ceiling anchor to your screen’s center. Ensure the mount’s fully extended length meets or exceeds this measurement.
- Universal Plate Compatibility: Check that the mounting plate’s hole pattern or adjustable brackets can physically attach to your projector’s bottom. Most universal plates are designed to fit standard and custom patterns.
Assessing Your Room and Installation Point
The room’s physical structure dictates your mounting options. A proper assessment avoids costly mistakes. Start by locating the ideal projection point on your ceiling.
Use a stud finder to locate ceiling joists. The mount’s main bracket must be securely anchored into solid wood, not just drywall. This is crucial for safety and preventing vibration.
Key Takeaway Summary Box:
- Always know your projector’s exact weight and dimensions.
- Prioritize mounts that anchor into ceiling joists, not drywall alone.
- Choose an extension range that gives you more reach than you think you need.
Consider the cable management path from your AV equipment to the projector. Some mounts include channels or hooks for clean cable routing. This final step ensures a professional-looking result.
Step-by-Step Installation and Calibration Guide
Proper installation is key to safety and optimal performance. Following a methodical process ensures a secure mount and a perfectly aligned image. This guide breaks down the essential steps from mounting to final calibration.
Secure Mounting and Assembly Process
Begin by assembling the mount’s components on the floor. Attach the universal plate to your projector using the correct screws. This is easier than working overhead with a loose projector.
- Locate and Mark Joists: Use a stud finder to locate solid ceiling joists. Mark the exact points where the mounting bracket’s holes will align with the joist center.
- Drill Pilot Holes and Secure Bracket: Drill pilot holes at your marks. Use the provided lag bolts to firmly anchor the main ceiling bracket into the wood joists.
- Attach Extension Arms and Projector: Connect the assembled extension arm assembly to the ceiling bracket. Finally, lift and securely attach the projector with its mounted plate to the arms.
Fine-Tuning Your Projector’s Position
With the projector securely mounted, the real advantage of extendable arms begins. Use the arms’ adjustment mechanisms to physically center the image on your screen before using any digital correction.
First, extend or retract the arms to move the projector forward or backward. Then, use any lateral shift adjustments to move it side-to-side. The goal is to fill the screen without using the lens shift dials initially.
| Adjustment Type | Tool Used | Goal |
|---|---|---|
| Forward/Backward | Arm Extension Locks | Set correct image size to match screen. |
| Side-to-Side | Lateral Slide Mechanism | Center image horizontally on screen. |
| Final Focus & Keystone | Projector Lens & Menu | Sharpen image and correct minimal distortion. |
Only after maximizing physical adjustment should you use minimal digital keystone correction. This preserves the highest possible image quality from your projector.
Maintenance Tips and Troubleshooting Common Issues
Maintaining your ceiling mount ensures long-term stability and performance. Regular checks prevent minor issues from becoming major problems. A well-maintained mount protects your valuable projector investment.
Ensuring Long-Term Stability and Safety
Perform a simple safety inspection every six months. This proactive approach catches loosening hardware before it fails. Focus on the connection points that bear the most stress.
- Check All Bolts and Locking Mechanisms: Gently tighten the lag bolts in the ceiling and all arm connection points. Ensure all thumb screws and extension locks are fully engaged.
- Inspect for Sagging or Drift: Observe if the projector has sagged from its set position over time. This indicates a worn locking mechanism or an overloaded mount.
- Clean Dust from Adjustment Tracks: Use a dry cloth to wipe dust from the extension arm tracks. Built-up debris can hinder smooth adjustment and cause slippage.
Solving Vibration, Noise, and Alignment Drift
Vibration or a drifting image are common frustrations. These issues usually have straightforward solutions. Identifying the root cause is the first step to a fix.
Persistent vibration often means the mount isn’t anchored firmly into a ceiling joist. The low-frequency sound from speakers can travel through the structure. Adding rubber washers between the mount and ceiling can dampen this transfer.
Quick Troubleshooting Guide:
| Symptom | Likely Cause | Solution |
|---|---|---|
| Image slowly drifts down | Tilt lock not fully tightened or worn | Retighten mechanism; consider a support strap. |
| Rattling noise during bass-heavy scenes | Mount vibrating against drywall | Ensure lag bolts are tight; add isolation pads. |
| Unable to extend arm fully | Internal debris or damaged track | Clean track; inspect for physical damage. |
For alignment drift, first ensure all locking knobs on the extendable arms are fully secured. If the problem continues, the internal friction mechanism may be worn and require manufacturer service.
Advanced Features and Professional Installation Considerations
Beyond basic extension, modern mounts offer features for enhanced functionality. These options cater to complex setups and professional-grade installations. Understanding them helps you maximize your home theater’s potential.
Cable Management and Integrated Solutions
Clean cable routing is essential for a professional installation. Integrated management systems hide and protect your wires. This improves aesthetics and prevents accidental disconnections.
- Conduit-Ready Designs: Some mounts feature a hollow center column. This allows you to run HDMI and power cables internally from the ceiling to the projector, creating a completely clean look.
- Cable Channels and Clips: Look for models with built-in clips or channels along the extension arms. These neatly bundle cables to the mount, preventing dangling wires.
- Connection Access Panels: High-end mounts include removable panels on the mounting plate. These provide easy access to the projector’s input ports without dismounting the entire unit.
When to Consider a Professional Installer
While DIY installation is common, some scenarios warrant professional help. An expert ensures safety, optimal performance, and handles complex challenges. This can be a wise investment for expensive equipment.
Consider hiring a professional if your installation involves concrete ceilings, vaulted heights, or complex cable runs through walls. They have the tools and expertise to manage these situations safely and cleanly.
Professional vs. DIY Installation Checklist:
| Scenario | Recommended Approach | Reason |
|---|---|---|
| Standard 8-10 ft flat drywall ceiling | Confident DIY | Straightforward with basic tools. |
| Projector over 30 lbs or very expensive | Consider Professional | Risk of damage or injury from error is high. |
| Need to run cables inside walls/ceiling | Professional | Requires knowledge of building codes and fishing tools. |
| Sloped or very high cathedral ceiling | Professional | Specialized ladders, safety gear, and alignment math needed. |
A professional can also perform precise geometric calibration. This is especially valuable for fixed-frame screens where image alignment must be pixel-perfect.
Cost Analysis and Value for Your Investment
Understanding the price range and value proposition of these mounts is crucial. You can find options for every budget, from basic to premium. The key is matching the mount’s features to your projector’s value and your performance needs.
Price Range and What You Get at Each Level
Mount prices vary significantly based on build quality, materials, and features. A higher price typically buys greater stability, smoother adjustments, and professional-grade materials.
- Budget Tier ($20 – $50): Offers basic extension and universal fit. Often made of lighter-gauge steel with simpler locks. Best for smaller, lighter projectors in low-vibration environments.
- Mid-Range Tier ($50 – $150): Features sturdier construction, better locking mechanisms, and often integrated cable management. This tier provides the best balance of value and performance for most home theaters.
- Premium/Professional Tier ($150+): Includes tool-free micro-adjustments, low-vibration designs, high-weight capacity, and internal conduit routing. Designed for commercial use or high-end home cinemas.
Why a Quality Mount Protects Your Projector
A projector is a significant investment. A robust ceiling mount is its primary safety system. A cheap, unstable mount risks catastrophic failure and costly damage.
Quality mounts use heavy-duty steel, precision-machined locks, and secure fasteners. This prevents dangerous sagging, sudden slippage, or vibration-induced wear on your projector’s internal components. Think of the mount as an insurance policy.
Value Comparison: Mount Cost vs. Projector Cost
| Projector Value | Recommended Mount Investment | Primary Justification |
|---|---|---|
| Under $500 | Budget to Mid-Range ($30-$80) | Adequate protection for entry-level models. |
| $500 – $2,000 | Mid-Range ($80-$150) | Protects a major AV investment; ensures stable performance. |
| $2,000+ (High-End/4K) | Premium Tier ($150+) | Essential for safety and to realize the projector’s full, vibration-free image quality. |
Never compromise mount quality to save a small percentage of your total system cost. The peace of mind and long-term reliability are worth the investment.
Frequently Asked Questions (FAQs)
This section answers the most common questions about universal projector ceiling mounts. Clear, direct answers help you make informed decisions and solve problems quickly. Find your question below for expert guidance.
Common Installation and Compatibility Questions
Users often have specific concerns before purchasing or during setup. These FAQs address the most frequent technical and compatibility queries.
- Q: Will a universal mount really fit my specific projector brand?
A: Yes, in the vast majority of cases. Universal mounts use adjustable brackets and plates with multiple hole patterns. They are designed to fit standard and proprietary screw layouts from all major brands like Epson, BenQ, Optoma, and Sony. - Q: Can I install this mount on a sloped or vaulted ceiling?
A> Some models offer a sloped-ceiling adapter as an accessory or built-in tilt. You must check the product specifications. For steep slopes, a professional installer is often recommended to ensure secure mounting and proper geometry. - Q: How do I know if my ceiling can support the weight?
A> The mount must be anchored into a wooden ceiling joist or concrete, not just drywall. Use a stud finder to locate joists. If mounting to concrete, you’ll need appropriate anchors and a drill.
Usage, Adjustment, and Safety Queries
Once installed, questions often arise about daily use and long-term safety. These answers provide practical advice for optimal operation.
Q: Is it safe to extend the arms fully with a heavy projector?
A: Always consult the mount’s manual for its rated capacity at full extension. Weight capacity often decreases as arms are extended. For safety, keep the projector weight well below the maximum rated limit, especially when fully extended.
Q: How often should I check the tightness of the bolts?
A: Perform a quick check every 6 months. Gently tighten the main ceiling bolts and arm connection points. Vibration from sound systems can gradually loosen hardware over time.
Quick Reference FAQ Summary:
| Topic | Key Answer |
|---|---|
| Compatibility | Universal plates fit most brands via adjustable brackets. |
| Ceiling Type | Must anchor into solid wood joists or concrete. |
| Extension Safety | Do not exceed weight rating, especially at full extension. |
| Maintenance | Check and tighten bolts every six months. |
If you encounter persistent issues like image drift or noise, refer to the troubleshooting section for detailed solutions.
Conclusion: Achieving the Perfect Home Theater Setup
A universal projector ceiling mount with extendable arms is the cornerstone of a professional installation. It provides the crucial flexibility to achieve perfect image alignment and long-term stability. This solves the most common and frustrating setup challenges permanently.
The key takeaway is to prioritize secure mounting into a joist and choose a mount with ample weight capacity. This protects your investment and ensures a flawless viewing experience for years to come.
Use the guidelines in this article to select, install, and maintain your mount with confidence. You now have the knowledge to create a stunning, theater-quality projection in your own home.
Take the next step by measuring your space and reviewing the recommended products. Your perfect, frustration-free home theater is within reach.
Frequently Asked Questions about Universal Projector Ceiling Mounts
What is the main advantage of extendable arms on a projector mount?
The primary advantage is post-installation positioning flexibility. Extendable arms let you slide the projector forward, backward, or side-to-side after it’s mounted to the ceiling. This allows for perfect physical centering of the image on your screen.
This physical adjustment is superior to digital keystone correction. It preserves your projector’s full image resolution and clarity, resulting in a sharper, more accurate picture without software distortion.
How do I choose the right ceiling mount for my projector’s weight?
First, find your projector’s exact weight in its manual or online specifications. Then, select a mount with a maximum load capacity that exceeds this weight by at least 25-30%. This safety margin is crucial for long-term stability.
Remember, the weight rating applies to the projector only. Do not include the weight of cables or other accessories in your calculation. Always anchor the mount into a solid ceiling joist for secure support.
Can a universal mount fit any projector model?
While called “universal,” these mounts are designed to fit the vast majority of home and business projectors. They achieve this through an adjustable mounting plate with multiple screw holes and sliding brackets.
You should verify compatibility by checking your projector’s bottom for a VESA pattern or proprietary screw layout. The mount’s plate must be able to attach securely to this pattern for a safe installation.
What is the best way to hide cables with a ceiling mount?
The best method is using a mount with integrated cable management. Look for models with built-in clips along the arms or a hollow center column that acts as a conduit. This allows you to run cables neatly inside the mount’s structure.
For a clean, professional look, plan to run your HDMI and power cables through the ceiling or along a dedicated raceway before mounting. This prevents dangling wires and creates a seamless home theater aesthetic.
Why is my ceiling-mounted projector vibrating during movies?
Vibration is typically caused by sound waves from your speakers transferring through the ceiling structure to the mount. The most common fix is ensuring the mount is firmly anchored into a wooden joist, not just drywall.
You can also add isolation pads or rubber washers between the mount’s base plate and the ceiling. This dampens vibration transfer. Checking and tightening all bolts on the mount can also eliminate minor rattles.
How far can extendable arms typically reach from the ceiling?
Extension ranges vary by model. Budget mounts may offer 15-20 inches of reach, while premium models can extend 30-40 inches or more. You must measure the horizontal distance from your desired ceiling anchor point to your screen’s center.
Always choose a mount whose maximum extension exceeds your measured distance. This gives you full flexibility for fine-tuning. The extension length directly impacts your ability to center the projector over your screen.
What should I do if my projector image drifts out of alignment over time?
First, check and firmly retighten all locking knobs on the extension arms and tilt mechanism. Vibration can slowly loosen them. If drift continues, the internal friction mechanism in the joints may be worn.
For a temporary fix, you can use a safety strap as a secondary support. For a permanent solution, contact the mount manufacturer. They may offer replacement parts or advise if the mount’s weight capacity is insufficient.
Is professional installation necessary for a projector ceiling mount?
For standard flat ceilings and a sub-30-pound projector, confident DIYers can handle installation. However, professional help is recommended for heavy projectors, vaulted ceilings, or complex cable runs inside walls.
An installer ensures perfect structural mounting, optimal placement for image geometry, and clean cable management. This investment protects your expensive equipment and guarantees the best possible performance from your setup.
Can a Projector Get a Virus?7 reasons why?
This website is a participant in the Amazon Services LLC Associates Program, an affiliate advertising program designed to provide a means for us to earn fees by linking to Amazon.com and affiliated sites.