This website is a participant in the Amazon Services LLC Associates Program, an affiliate advertising program designed to provide a means for us to earn fees by linking to Amazon.com and affiliated sites.
Installing a projector on an angled ceiling is a unique challenge. A standard mount simply won’t work. You need a specialized projector mount for an angled ceiling to achieve a perfectly level image.
This guide provides the expert solutions you need. We’ll cover the proven methods to correct for slope and ensure a stable, professional installation. Avoid the frustration of a crooked picture with the right equipment.
You will learn how to choose the best mount, understand key features like tilt adjustment, and get step-by-step installation tips. Our complete guide ensures your home theater setup is flawless, even with sloped or vaulted ceilings.
Best Projector Mounts for Angled Ceilings – Detailed Comparison
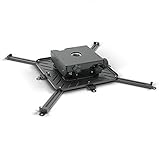
Chief Manufacturing CMA428 – Best Overall Choice
The Chief CMA428 is a premium universal mount with ±15 degrees of pitch adjustment. Its robust construction supports projectors up to 50 lbs. This makes it the best option for most sloped or vaulted ceiling installations, ensuring a perfectly level image with professional-grade stability.
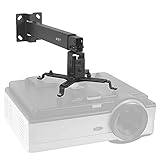
Peerless-AV PRG-UNV – Best Value Pick
Ideal for home theaters, the Peerless-AV PRG-UNV offers excellent tilt correction at a mid-range price. It features micro-adjustable leveling and a low-profile design. This recommended mount is perfect for DIY enthusiasts seeking reliable performance without professional installation costs.

- 50 lb. Weight load capacity
- Patent pending precision gear provides accurate projector image alignment
- Two adjustment knobs control projector image alignment
VIVO MOUNT-PROJ-02A – Best Budget Solution
For a cost-effective fix, the VIVO MOUNT-PROJ-02A provides essential functionality. It includes adjustable extension arms and a 10-degree tilt mechanism. This model is the ideal choice for lighter projectors on moderately angled ceilings, delivering solid value and straightforward installation.
- Solid Steel Construction makes this universal ceiling and wall projector…
- Universal Mounting Design enables this bracket to fit the majority of…
- Adjustable Features include -15° to +15° tilt and 16° swivel offering…
How to Choose the Right Mount for Your Sloped Ceiling
Selecting the correct mount is crucial for a stable, level projection. You must consider your ceiling’s specific angle and your projector’s weight. This guide breaks down the key specifications to evaluate.
Understanding Tilt and Pitch Adjustment Range
The adjustment range is the most critical specification for angled ceilings. It determines how much slope the mount can correct. Look for mounts with a clear ± degree rating for pitch or tilt.
- Key Spec: Match the mount’s adjustment range to your ceiling’s slope. A ±15-degree range handles most residential vaulted ceilings.
- Measurement Tip: Use a digital inclinometer or a smartphone app to measure your ceiling’s exact angle before purchasing.
- Pro Advice: Always choose a mount with a slightly wider range than you need for easier fine-tuning during installation.
Evaluating Weight Capacity and Compatibility
Never exceed the manufacturer’s stated weight limit. A mount struggling under weight cannot maintain a secure, level position. Check both projector weight and mount capacity.
Universal mounts fit most models, but verify the VESA pattern compatibility. This is the screw hole pattern on your projector’s bottom. Use this simple checklist:
- Confirm your projector’s weight (usually in the manual or online specs).
- Ensure the mount’s maximum load capacity is at least 25% greater than your projector’s weight.
- Check that the mount’s universal plate or arms support your projector’s VESA pattern (e.g., 100x100mm).
Material and Build Quality Considerations
Durability matters for a permanent overhead installation. High-quality materials prevent sagging and maintain alignment over time. Look for robust construction.
Professional-grade mounts use heavy-gauge steel or aluminum. Consumer models may use lighter alloys. Read reviews focusing on long-term stability and lack of vibration. A sturdy build is your best insurance policy.
Step-by-Step Installation Guide for Angled Ceilings
Proper installation is key to safety and a perfect picture. This process requires careful planning and precise execution. Follow these steps to secure your projector mount on a sloped surface.
Pre-Installation Planning and Measurement
Never start drilling without a detailed plan. This phase prevents costly mistakes and ensures optimal screen alignment. Accuracy here saves immense time later.
First, determine the exact mounting location on the slope. You must account for both the throw distance and lens offset. Use a projector placement calculator for this.
- Locate Ceiling Joists: Use a stud finder to find solid wood framing. Mounting into drywall alone is unsafe.
- Dry Fit: Temporarily assemble the mount and hold it in place. Verify the adjustment range can achieve a level position.
- Mark with Precision: Use a pencil and level to mark all drill points on the ceiling. Double-check measurements.
Mounting and Leveling the Projector Correctly
This is where you correct the ceiling’s angle. The goal is a perfectly horizontal projector, not one that follows the slope. Secure the ceiling plate to the joists using the provided lag bolts.
Attach the projector to the mounting plate before lifting. Then, connect the assembly to the ceiling plate. Now, begin the crucial leveling process.
- Loosen Adjustment Knobs: Release the locks on the tilt/pitch mechanism.
- Use a Precision Level: Place a small bubble level on top of the projector housing.
- Adjust Slowly: Carefully tilt the projector until the bubble is centered in the level.
- Secure All Locks: Tighten every adjustment knob and lock screw firmly to prevent drift.
Common Problems and Professional Solutions
Even with the right mount, challenges can arise during installation. Understanding these issues beforehand prepares you for a smooth setup. This section addresses frequent hurdles and their fixes.
Solving Vibration and Stability Issues
A shaky image ruins the viewing experience. Vibration often comes from loose components or mounting into insufficient structure. It’s a common problem with sloped ceiling installations.
First, ensure every bolt and screw is fully tightened. Re-tighten after 48 hours as materials settle. If vibration persists, investigate these potential causes:
- Weak Ceiling Structure: If you missed a joist, the drywall will flex. You must anchor directly into a ceiling joist for a solid hold.
- Mount Resonance: Some mounts can amplify subtle vibrations. Adding rubber washers between metal components can dampen this effect.
- External Sources: Check for nearby air vents, speakers, or foot traffic. Isolate the mount from these vibrations if possible.
Correcting Keystone and Image Alignment
Your image should be a perfect rectangle. If it’s trapezoidal, your projector isn’t square to the screen. Avoid using digital keystone correction, as it degrades image quality.
The goal is physical alignment over digital correction. Use the mount’s mechanical adjustments to solve this. Follow this alignment checklist:
- Ensure the projector is perfectly level (side-to-side and front-to-back).
- The projector’s lens should be centered horizontally on your screen.
- The entire projector assembly must be perpendicular to the screen wall.
| Problem | Likely Cause | Professional Solution |
|---|---|---|
| Image is trapezoidal (keystone) | Projector is tilted relative to screen | Re-level the mount; avoid digital keystone |
| Picture drifts out of level over time | Adjustment locks are not fully tightened | Firmly secure all locking knobs and re-check |
| Mount feels unstable or sags | Exceeding weight limit or poor joist contact | Verify weight capacity and joist anchoring |
Maintenance and Safety Tips for Long-Term Use
A secure installation is just the beginning. Proper maintenance ensures your projector mount remains safe and reliable for years. Regular checks prevent accidents and preserve your equipment.
Routine Inspection and Maintenance Schedule
Don’t adopt a “set it and forget it” mindset with an overhead mount. Schedule simple inspections to catch issues early. This proactive approach is crucial for safety.
Follow this recommended maintenance timeline to ensure ongoing stability and performance:
- Monthly: Visually inspect for any signs of sagging, dust buildup, or loose cables. Listen for unusual creaks.
- Every 6 Months: Gently check the tightness of key adjustment knobs and locking mechanisms. Do not over-torque.
- Annually: Perform a full stability check. Ensure all ceiling anchors and bolts are secure. Re-level the projector if necessary.
Critical Safety Precautions and Warnings
Safety must be your top priority when dealing with heavy equipment overhead. A falling projector can cause serious injury and significant damage. Adhere to these non-negotiable rules.
Always respect the maximum weight capacity listed by the manufacturer. This limit includes the projector and all attached cables. Never exceed it, even slightly.
Use this safety checklist before and during any interaction with the mounted projector:
- Verify Anchoring: Confirm the mount is secured into solid ceiling joists, not just drywall.
- Check Component Wear: Look for stress cracks in metal, stripped screw threads, or worn locking collars.
- Manage Cables Safely: Use secure cable ties or a raceway. Loose cables can snag and pull on the mount.
- Clear the Area: Ensure no one is standing beneath the projector during adjustment or maintenance.
When to Call a Professional Installer
Recognizing the limits of a DIY project is wise. Some situations require expert tools and experience. Hiring a professional ensures safety and optimal results.
Consider calling a certified installer if you encounter complex ceiling structures like concrete, heavy beams, or extreme slopes beyond 20 degrees. They have the specialized hardware and expertise.
Advanced Features and Future-Proofing Your Setup
Beyond basic leveling, modern mounts offer features that enhance convenience and flexibility. Investing in the right capabilities can future-proof your home theater. This section explores valuable upgrades.
Motorized Mounts and Smart Home Integration
For the ultimate in convenience, consider a motorized projector mount. These allow you to lower and raise the projector with a remote or app. This is ideal for hidden installations in media rooms.
Smart integration takes it further. Some models connect to systems like Control4, Savant, or Crestron. This enables automated scenes where the projector descends as lights dim. Key benefits include:
- Space Optimization: Retract the projector when not in use for a clean ceiling look.
- Enhanced Protection: Keep the lens and internals safe from dust and accidental damage.
- Seamless Operation: Integrate with your home automation for one-touch “Movie Mode” activation.
Cable Management and Extension Considerations
Clean installation requires hiding power and signal cables. Poor cable management can strain ports and look unsightly. Plan this before finalizing your mount position.
Many mounts include integrated cable channels or hooks. For long runs through ceilings, use in-wall rated HDMI and power cables. Consider these essential accessories:
- Cable Raceways: Use paintable channels to hide cables along the ceiling slope to the wall.
- Active HDMI Cables: For runs over 25 feet, these boost the signal to prevent degradation.
- Power Outlet Kit: Install a recessed outlet near the mount to avoid dangling power cords.
| Feature | Standard Mount | Advanced/Motorized Mount |
|---|---|---|
| Convenience | Manual adjustment | Remote/app control |
| Installation Complexity | Moderate (DIY-friendly) | High (often requires pro) |
| Cost | $$ | $$$$ |
| Best For | Fixed, dedicated theaters | Multi-use rooms & high-end automation |
Frequently Asked Questions (FAQ)
This section answers the most common questions about sloped ceiling projector installations. Find quick, authoritative solutions to specific challenges you might face.
Can I Use a Standard Mount on an Angled Ceiling?
No, a standard flat-ceiling mount is not recommended. It lacks the necessary tilt adjustment mechanism. Attempting to shim or force it will be unstable and likely damage your equipment.
You must use a mount specifically designed with pitch or tilt correction. These have a pivoting joint that allows the projector to be leveled independently of the ceiling angle.
How Do I Measure My Ceiling’s Angle Accurately?
Accurate measurement is the first critical step. You can use simple tools you likely already own. Follow this reliable two-step method:
- Place a straight board or a hardcover book flat against the sloped ceiling surface.
- Use a smartphone app (like a bubble level app) or a digital inclinometer on top of the board to read the angle.
This gives you the exact slope to match against a mount’s adjustment range specification.
What is the Maximum Slope a Mount Can Handle?
The maximum slope varies significantly by model. Consumer-grade mounts typically handle ±10 to ±15 degrees. Professional installation mounts can correct for slopes of ±20 degrees or more.
Always check the manufacturer’s specifications for the “pitch adjustment range.” For extreme angles, a custom bracket or professional consultation may be required.
Is Professional Installation Worth the Cost?
For complex setups, yes. Professional installers bring expertise, specialized tools, and liability insurance. They ensure perfect alignment and structural safety.
Consider hiring a pro if your situation involves:
- Very high ceilings or complex roof structures.
- Extremely heavy or expensive projector equipment.
- Integrating the system with advanced home automation or motorization.
Conclusion: Achieving the Perfect Angled Ceiling Setup
Installing a projector on a sloped ceiling is a solvable challenge with the right knowledge and tools. By following this guide, you can transform a potential obstacle into a professional-grade home theater feature. The key is systematic planning and precise execution.
Recap of Core Principles for Success
Let’s revisit the foundational steps that guarantee a successful installation. These principles form the blueprint for a stable, level projection every time.
- Choose the Right Tool: Select a mount with a sufficient tilt adjustment range and weight capacity for your specific ceiling and projector.
- Measure Twice, Drill Once: Accurately measure your ceiling angle and projector placement before making any permanent changes.
- Anchor into Structure: Always secure the mount directly into ceiling joists or solid framing, never just drywall.
- Prioritize Mechanical Alignment: Use the mount’s physical adjustments to achieve a level image, minimizing digital keystone correction.
Final Recommendations and Next Steps
Your journey begins with assessment. Start by gathering your projector’s specifications and measuring your room’s unique geometry. Use the product recommendations and comparison tables in this guide to narrow your choices.
For most DIY enthusiasts, a high-quality universal mount like the Chief CMA428 or Peerless-AV PRG-UNV offers the best balance of performance and value. If your setup is complex, don’t hesitate to consult a professional installer.
With careful planning and the specialized equipment outlined here, your vaulted or sloped ceiling becomes an asset, not a limitation. You are now equipped to create an immersive viewing experience that rivals any traditional flat-ceiling installation.
Conclusion: Mastering Your Projector Mount for Angled Ceiling
Installing a projector on a sloped ceiling is entirely achievable with the right mount and method. You can now achieve a perfectly level, professional-grade image. This guide has provided the complete solution.
The key takeaway is to prioritize mechanical adjustment over digital fixes. Choose a mount with adequate tilt correction and secure it into solid framing. This ensures long-term stability and optimal picture quality.
Begin by measuring your specific ceiling angle and reviewing the recommended products. Then, follow the step-by-step installation guide for a flawless setup.
Your unique room architecture no longer limits your home theater dreams. Enjoy your immersive, perfectly aligned viewing experience.
Frequently Asked Questions about Projector Mounts for Angled Ceilings
What is the best way to mount a projector on a sloped ceiling?
The best method is to use a specialized mount with pitch adjustment. First, measure your ceiling’s exact angle. Then, select a mount whose tilt range exceeds that measurement for proper leveling.
Always anchor the ceiling plate directly into structural joists. Use the mount’s mechanical adjustments to achieve a perfectly horizontal projector, avoiding digital keystone correction for the sharpest image.
How much does a good angled ceiling projector mount cost?
Quality mounts range from $50 to over $300. Budget options ($50-$100) offer basic tilt correction for lighter projectors. Mid-range models ($100-$200) provide better build quality and wider adjustment ranges.
Professional-grade mounts ($200+) feature heavy-duty construction, extensive adjustment, and higher weight capacities. Your projector’s value and weight should guide your investment.
Can I adjust a regular projector mount for a vaulted ceiling?
No, adapting a standard flat-ceiling mount is not recommended or safe. These mounts lack the necessary pivot point for independent leveling. Forcing an adaptation creates instability and risks damaging your projector.
You must purchase a mount specifically engineered for sloped surfaces. Look for product descriptions that explicitly mention “tilt,” “pitch,” or “angled ceiling” compatibility.
What tools do I need to install a projector mount on a slope?
You will need a stud finder, a drill with appropriate bits, a screwdriver set, a level (preferably digital), and a measuring tape. A helper is also highly recommended for safety when lifting the projector.
For measuring the ceiling angle, a smartphone inclinometer app or a digital angle finder is essential. Having the correct lag bolts for your ceiling type (wood vs. concrete) is critical.
Why is my projector image still crooked after installation?
A crooked image usually means the projector isn’t level in both axes. The mount may be level front-to-back but not side-to-side. Re-check all leveling bubbles on the projector housing itself.
Ensure all locking knobs on the mount are fully tightened after adjustment. Vibration or settling can cause slight shifts. Perform a final alignment check 24 hours after installation.
What is the difference between pitch and roll adjustment?
Pitch adjustment corrects for the front-to-back slope of your ceiling, which is the primary concern. Roll adjustment corrects for side-to-side tilt, ensuring the projector is also level from left to right.
For most sloped ceilings, a mount with robust pitch correction is essential. Roll adjustment is a valuable secondary feature for achieving perfect, multi-axis alignment on complex surfaces.
How do I hide cables on a vaulted ceiling installation?
Plan your cable route before mounting. Use paintable plastic raceways to run cables neatly along the ceiling slope down to the wall. For a cleaner look, you can run cables inside the ceiling before drywall installation.
Many mounts have integrated cable management channels. Use these to secure cables to the mount’s arm, preventing strain on the projector’s ports and creating a tidy appearance.
When should I hire a professional installer for this project?
Consider professional help for very high ceilings, extremely heavy projectors, or complex motorized setups. If you are unsure about locating structural supports or dealing with concrete ceilings, an expert is advisable.
Professionals ensure optimal placement for screen alignment and handle complex wiring. Their expertise guarantees safety and often comes with a warranty on the installation work itself.
4K Projector with HDR10+: Ultimate Guide to Stunning Home Theater Visuals in 2026
Can You Put HID in Halogen Projectors? (Complete Guide)
Can You Use a Projector Without a Laptop? 5 Easy Alternatives to Try Today
This website is a participant in the Amazon Services LLC Associates Program, an affiliate advertising program designed to provide a means for us to earn fees by linking to Amazon.com and affiliated sites.