
This website is a participant in the Amazon Services LLC Associates Program, an affiliate advertising program designed to provide a means for us to earn fees by linking to Amazon.com and affiliated sites.
Finding the best projector for your Nintendo Switch transforms your gaming experience. It turns portable play into a massive, immersive adventure right on your wall.
This complete guide cuts through the specs to highlight projectors that excel with the Switch. You’ll discover models perfect for low-latency gaming, bright rooms, and on-the-go fun.
We provide expert tips on key features, setup, and proven models. Get ready to learn how to choose and use the ideal projector to dominate your next gaming session.
Best Projectors for Nintendo Switch Gaming – Detailed Comparison
Anker Nebula Capsule 3 Laser – Best Portable Option
This compact powerhouse is ideal for portable Nintendo Switch gaming. It features a 1080p laser light source with 300 ISO lumens and a 2.5-hour battery. Its built-in Android TV provides seamless app access, making it perfect for gaming in any room or outdoors without a power outlet.
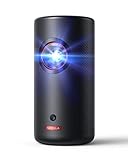
- Laser Engine to Illuminate Your World: Experience vibrant visuals with this laser projector, featuring a laser light source delivering 300 ANSI Lumens of brightness…
- Travel Light, Project Big: At just 2 lb (900 g) and 90% smaller than others with similar brightness, NEBULA Capsule 3 Laser projects up to a 120-inch screen and…
XGIMI Halo+ – Best for Bright Rooms
For gaming in well-lit spaces, the XGIMI Halo+ excels. It delivers a bright 900 ISO lumens image and auto keystone correction. Its integrated battery and Harman Kardon speakers create a superb, hassle-free setup. This model balances portability with performance, handling ambient light better than most portable projectors.

- A Whole New World of Entertainment: Google TV and Google Play Store provide seamless access to 5000+ apps like Netflix, YouTube, and Prime Video. Whether you’re…
- 1080P Super-Bright Image: With Halo+, you get brilliant 1080p FHD and LED-powered hyper-focused 700 ISO lumens in a compact build. Whether it’s family game night or…
BenQ TH575 – Best for Home Theater Gaming
The BenQ TH575 is the top choice for a dedicated game room. It offers a dedicated low-latency gaming mode with a 16ms response time at 1080p and 120Hz. With 3,800 lumens, it delivers vibrant, large-screen gameplay, making it the ideal wired projector for immersive, lag-free Nintendo Switch sessions.
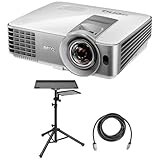
- INCLUDED – BenQ TH575 Full HD DLP Home Theater Gaming Projector | Remote Control with Batteries | 5.9′ Power Cord | User Manual | BenQ 3-Year Limited Warranty…
- FULL HD CINEMATIC PROJECTION – Native 1080p resolution with a 16:9 aspect ratio and advanced 0.65″ DMD DLP projection system delivers sharp images with vibrant…
Key Features to Look for in a Nintendo Switch Projector
Choosing the right projector for your Switch requires understanding specific technical features. Not all projectors are optimized for gaming performance and console compatibility. Focus on these critical specs to ensure a smooth, immersive experience.
Low Input Lag is Non-Negotiable
Input lag is the delay between your controller input and the action on screen. High lag makes games feel sluggish and unresponsive. For the Nintendo Switch, you need a projector with a gaming mode or a rated input lag under 50ms.
- Ideal Range: Look for a spec of 30ms or lower for fast-paced games like Super Smash Bros. or Splatoon 3.
- Gaming Mode: This special setting bypasses unnecessary image processing to minimize delay.
- Check Reviews: Manufacturer specs can be vague; always verify real-world lag tests in expert reviews.
Resolution and Native Aspect Ratio
The Nintendo Switch outputs at a maximum of 1080p in docked mode. A native 1080p (1920×1080) projector is the perfect match. Avoid 4K projectors unless they excel at upscaling, as the Switch won’t utilize the full resolution.
More importantly, match the aspect ratio. The Switch uses a 16:9 widescreen format. A projector with a native 16:9 aspect ratio will display your games perfectly without black bars or distorted images.
Brightness and Contrast for Vivid Gameplay
Brightness, measured in lumens, determines if you can see the image with lights on. Contrast ratio affects color depth and shadow detail.
- For Dark Rooms: 1,000-2,000 lumens is sufficient for a great image.
- For Some Ambient Light: Aim for 2,000-3,000 lumens to combat washout.
- High Dynamic Range (HDR): While the Switch has limited HDR support, an HDR-compatible projector future-proofs your setup and improves color range.
How to Set Up Your Nintendo Switch with a Projector
A proper setup is crucial for optimal gaming performance and image quality. Connecting your Switch to a projector is simple, but a few extra steps make a significant difference. Follow this guide for the best possible big-screen experience.
Connection and Audio Solutions
Connect your docked Switch to the projector using a standard HDMI cable. Ensure the projector is set to the correct HDMI input source. The main challenge is often audio, as most projectors have weak built-in speakers.
- HDMI Audio Extractors: This device splits the HDMI signal, sending video to the projector and audio to a separate sound system via optical or RCA cables.
- Bluetooth Transmitters: Plug a Bluetooth transmitter into the Switch dock’s headphone jack to wirelessly connect to Bluetooth speakers or headphones.
- External Speaker via Aux: If your projector has an audio-out port, connect powered speakers directly for an easy boost in sound quality.
Optimizing Image and Game Settings
After connection, fine-tune the image for gaming. First, enable the projector’s Game Mode to minimize input lag. Then, adjust the following settings on both the projector and your Switch.
- Positioning: Use keystone correction and the projector’s zoom/focus to get a sharp, rectangular image. Avoid digital keystone if possible, as it can degrade quality.
- Switch Settings: In the Switch System Settings under TV Output, set RGB Range to “Full Range” and match the projector’s resolution (usually 1080p).
- In-Game Calibration: Many games have brightness or HDR sliders. Adjust these with the projector on to achieve perfect visibility in dark and bright scenes.
| Common Issue | Quick Solution |
|---|---|
| No Sound from External Speakers | Check projector audio output settings; often set to “Internal” by default. |
| Blurry Image Edges | Re-focus lens and ensure projector is perfectly perpendicular to the screen. |
| Colors Look Washed Out | Switch projector to Game or Vivid picture mode and adjust contrast. |
Portable vs. Home Theater Projectors for Switch Gaming
Your gaming environment dictates the ideal projector type. The core choice is between a portable, battery-powered model and a traditional home theater unit. Each category offers distinct advantages for different Nintendo Switch playstyles.
Benefits of Portable Gaming Projectors
Portable projectors are designed for flexibility and quick setup. They are perfect for gamers who play in multiple rooms or want to take the big screen outdoors.
- All-in-One Convenience: Many have built-in batteries, speakers, and smart TV platforms, requiring only your Switch and a wall.
- Space-Saving: Their small size makes them easy to store and transport for gaming parties or trips.
- Quick Setup: Auto keystone correction and focus allow you to start playing on any surface in under a minute.
Advantages of Home Theater Projectors
Traditional home theater projectors prioritize pure performance for a dedicated space. They are the best choice for a permanent, immersive game room setup.
- Superior Performance: They typically offer higher brightness, better contrast, and more accurate colors than portable models.
- Enhanced Gaming Features: You’ll often find dedicated gaming modes with the lowest input lag and higher refresh rate support.
- Larger Screen Potential: With greater light output and lens flexibility, they can create a massive, crisp image exceeding 120 inches.
Making the Right Choice for Your Needs
Deciding between portability and power depends on your primary use case. Ask yourself these key questions to guide your decision.
- Where will you play most often? If it’s a dark, dedicated room, choose a home theater model. For varied locations, go portable.
- Is absolute image quality or convenience more important? Home theater wins on quality; portable wins on ease of use.
- What is your budget? You often pay a premium for portability and battery life at a given performance level.
Essential Accessories for the Ultimate Switch Projector Setup
The right accessories elevate your gaming experience from good to exceptional. They solve common problems like audio, mounting, and image quality. Investing in a few key items maximizes your projector’s potential with the Nintendo Switch.
Must-Have Audio Upgrades
The built-in speakers on most projectors are inadequate for immersive gaming. External audio is non-negotiable for capturing game soundtracks and effects.
- Soundbar: A compact soundbar placed below your screen or projector provides a massive audio upgrade with clear dialogue and powerful bass.
- Bluetooth Gaming Headset: For private, lag-free audio, use a Bluetooth transmitter paired with a low-latency gaming headset.
- HDMI Audio Extractor: This device is essential for routing audio to a traditional receiver or speaker system that lacks HDMI inputs.
Screen and Mounting Solutions
While you can project onto a wall, a proper screen improves contrast and color. Stable mounting is also key for a perfect picture.
A high-gain projector screen reflects more light back to the viewer, making the image appear brighter. For portable setups, a pull-down or tripod screen offers a professional surface anywhere.
Use a sturdy ceiling mount or a universal projector stand. Ensure it allows for precise adjustment to avoid using digital keystone correction, which can soften the image.
Cables and Power Management
Reliable cables and power solutions prevent frustrating interruptions. Don’t rely on the shortest or cheapest options.
- High-Speed HDMI Cable: Use a certified HDMI 2.0 cable to ensure full support for 1080p at 60Hz without signal issues.
- Surge Protector: Protect your valuable Switch, dock, and projector from power spikes with a quality surge-protecting power strip.
- Extension Cords & Cable Management: Plan your layout. Use long, rated extension cords and clips or sleeves to keep wires tidy and safe from tripping.
| Accessory | Primary Benefit | Budget-Friendly Alternative |
|---|---|---|
| Fixed Frame Screen | Optimal flat surface for image quality | High-quality matte white paint on a smooth wall |
| Universal Ceiling Mount | Secure, permanent placement | Sturdy shelf or tall furniture |
| Bluetooth Audio Transmitter | Wireless sound to headphones/speakers | 3.5mm aux cable to powered speakers |
Optimizing Your Nintendo Switch for Projector Play
Fine-tuning your console settings is the final step for peak performance. The Switch has specific options that directly impact your projected image quality and responsiveness. These adjustments ensure your hardware works in harmony with your new projector.
Critical System Settings to Adjust
Navigate to the Switch’s System Settings menu on the home screen. Under ‘TV Settings,’ you’ll find the most important options for external displays.
- TV Resolution: Set this to 1080p to match the native resolution of most recommended projectors. Avoid Automatic if your projector struggles with handshaking.
- RGB Range: Match this setting to your projector. If the projector has a “Full” or “Enhanced” black level setting, set the Switch to “Full Range.” Otherwise, use “Limited Range.”
- Screen Burn-In Reduction: Enable this to dim the screen if the Switch is idle, protecting the projector’s DLP chip or LCD panels from static images.
In-Game Visual Calibration Tips
Many Nintendo Switch games include built-in calibration tools. These are designed to optimize the picture for your specific display environment.
Always run these calibrations with your projector turned on and in its final gaming position. Games like The Legend of Zelda: Breath of the Wild and Super Mario Odyssey have excellent brightness sliders.
Adjust until you can clearly see details in both dark shadows and bright highlights. This compensates for your room’s ambient light and the projector’s contrast ratio.
Managing Performance and Heat
Projector gaming sessions can be long. It’s vital to keep your Switch dock running cool for sustained performance.
- Dock Ventilation: Ensure the dock has several inches of clear space on all sides, especially the rear vent. Never enclose it in a cabinet.
- Consider a Dock Replacement: Third-party portable docks or cooling stands can improve airflow. Only use reputable brands to avoid damaging your console.
- Joy-Con Charging: Use a separate charging grip or dock. Charging Joy-Cons through the console in the dock can generate additional heat during long play sessions.
Frequently Asked Questions About Nintendo Switch Projectors
Choosing and using a projector with your Switch raises common questions. This section provides clear, direct answers to help you troubleshoot and make informed decisions. Find quick solutions to the most frequent user concerns.
Can You Use a Projector with Nintendo Switch in Handheld Mode?
No, you cannot connect the Switch tablet directly to a projector. The projector must connect to the Nintendo Switch Dock via HDMI.
The console must be docked to output a video signal. For a portable setup, you simply bring the dock, power adapter, and projector with you.
Why is the Audio Not Working with My Projector?
Audio issues are very common. They are usually caused by incorrect output settings on the projector itself. Follow this checklist to solve the problem.
- Check the projector’s audio settings menu and ensure the output is set to “External Speakers” or “HDMI Out,” not “Internal.”
- Verify all cable connections are secure between the Switch dock, projector, and any external sound system.
- If using an external audio solution, ensure it is powered on and set to the correct input source (e.g., AUX, Optical).
How Do I Reduce Input Lag for Competitive Gaming?
Minimizing lag is crucial for fast-paced games. A multi-step approach yields the best results.
- Enable Game Mode: Always activate the dedicated Game or Low Latency picture mode on your projector. This is the single most important step.
- Check Connections: Use a high-speed HDMI cable and ensure all video processing features on the projector (like motion smoothing) are turned off.
- Controller Connection: For the most responsive feel, use Joy-Cons attached to the console or a Pro Controller connected via USB cable when docked.
| Question | Short Answer |
|---|---|
| Do I need a special projector for the Switch? | No, but prioritize one with a Game Mode and low input lag for the best experience. |
| What is the ideal screen size? | 80-120 inches is a great range, depending on your room size and projector brightness. |
| Can I play Switch games outdoors with a projector? | Yes, using a portable, battery-powered projector. Wait for full darkness for the best image. |
Top Nintendo Switch Games to Play on a Projector
Some Switch titles are truly transformed by a massive projected screen. These games offer breathtaking visuals, immersive worlds, or fantastic multiplayer that shines on the big screen. Discover which games benefit most from your new projector setup.
Immersive Single-Player Adventures
Epic adventures gain incredible scale and impact when projected. Vast landscapes and detailed worlds become truly enveloping.
- The Legend of Zelda: Tears of the Kingdom: Exploring the skies and depths of Hyrule feels monumental on a large screen, making every discovery more awe-inspiring.
- Metroid Dread: The tense atmosphere and detailed alien environments are amplified, enhancing the game’s cinematic feel and visual clarity during fast-paced action.
- Xenoblade Chronicles 3: The game’s sprawling, beautiful vistas and dramatic cutscenes are designed for a grand display, making the narrative even more powerful.
Best Multiplayer and Party Games
Projectors are perfect for social gaming. A big screen ensures everyone can see clearly, turning game nights into major events.
Super Smash Bros. Ultimate becomes a true spectator sport. Mario Kart 8 Deluxe feels more intense and immersive for all players. These games are built for shared, large-screen excitement.
Don’t overlook gems like Jackbox Party Packs, where the big screen shows the game and players use their phones as controllers. It’s an ideal setup for large groups.
Visually Stunning and Atmospheric Titles
Some games prioritize art style and mood. A projector can deepen the immersion of these visually unique experiences.
- Ori and the Will of the Wisps: The hand-painted artwork and luminous effects are breathtakingly beautiful when displayed on a large scale with good contrast.
- Luigi’s Mansion 3: The detailed lighting, shadows, and vibrant ghost-catching action pop on a big screen, enhancing the game’s charmingly spooky atmosphere.
- Hades: The fast-paced, isometric action and striking character art remain crisp and readable, making the frenetic combat even more engaging.
Conclusion: Elevate Your Gaming with the Best Projector for Nintendo Switch
Choosing the right projector transforms your Nintendo Switch into a home theater powerhouse. It delivers immersive, large-scale gaming that a TV simply cannot match.
Remember to prioritize low input lag and a native 1080p resolution for the best performance. Match the projector type to your lifestyle, whether portable or home theater.
Use our detailed setup and optimization tips to perfect your experience. Then, dive into the stunning worlds of your favorite Switch games on the big screen.
Your next-level gaming adventure awaits. Get ready to play bigger.
Frequently Asked Questions about Nintendo Switch Projectors
What is the most important spec for a Nintendo Switch projector?
Low input lag is the most critical specification. This measures the delay between your controller input and the on-screen action. High lag makes games feel unresponsive and sluggish.
Look for a projector with a dedicated Game Mode and a rated input lag under 50ms. For competitive gaming, aim for 30ms or lower to ensure precise control in fast-paced titles.
How do I connect my Nintendo Switch to a projector for sound?
Connect the Switch dock to the projector via HDMI for video. For audio, most projectors have weak speakers, so an external solution is best. Use the projector’s audio-out port to connect powered speakers.
Alternatively, use an HDMI audio extractor to split the signal. This sends video to the projector and audio to a separate soundbar or receiver for a much richer experience.
Can you play Nintendo Switch on a projector outdoors?
Yes, you can play outdoors with the right setup. You need a portable projector with a built-in battery, like the Anker Nebula Capsule. Bring your Switch dock, a power source, and a portable screen or light-colored wall.
For the best image quality, wait until after sunset. Even a bright portable projector struggles against direct sunlight, so plan your outdoor gaming sessions for dusk or nighttime.
What is the best screen size for Nintendo Switch gaming?
The ideal screen size is between 80 and 120 inches, measured diagonally. This range provides an immersive, theater-like feel without making the Switch’s 1080p image appear pixelated or soft.
The optimal size depends on your room and projector brightness. Sit at a distance of about 1.5 times the screen width for a comfortable and engaging field of view.
Why does my projector look blurry with my Nintendo Switch?
A blurry image is usually a focus or placement issue. First, use the projector’s focus ring to sharpen the image. Ensure the projector is perfectly perpendicular to your screen or wall.
Also, check the Switch’s TV Output settings. Manually set the resolution to 1080p. Avoid using excessive digital keystone correction, as it degrades image clarity.
Are 4K projectors worth it for the Nintendo Switch?
Generally, no. The Nintendo Switch outputs a maximum of 1080p resolution. A 4K projector will upscale the image, but you won’t see true 4K detail from the console itself.
Invest in a high-quality native 1080p projector instead. The budget is better spent on features like lower input lag, higher brightness, and better contrast specifically for 1080p gaming.
How can I reduce input lag on my existing projector?
First, enable the Game Mode or Low Latency mode in your projector’s picture settings. This disables post-processing effects that cause delay. Next, ensure all motion smoothing or frame interpolation features are turned off.
Finally, use a high-speed HDMI cable and set your Nintendo Switch’s TV resolution to match the projector’s native resolution, typically 1080p. This minimizes any unnecessary signal conversion.
What are the best Nintendo Switch games to play on a projector?
Open-world adventures and multiplayer games shine on a big screen. Titles like The Legend of Zelda: Tears of the Kingdom and Xenoblade Chronicles 3 offer breathtaking scale.
For group fun, Super Smash Bros. Ultimate, Mario Kart 8 Deluxe, and Jackbox Party Packs are phenomenal. The large screen ensures everyone can see the action clearly during social gaming sessions.
This website is a participant in the Amazon Services LLC Associates Program, an affiliate advertising program designed to provide a means for us to earn fees by linking to Amazon.com and affiliated sites.