This website is a participant in the Amazon Services LLC Associates Program, an affiliate advertising program designed to provide a means for us to earn fees by linking to Amazon.com and affiliated sites.
Creating a stunning outdoor cinema requires the right LED projector, screen, and setup distance. This complete guide reveals the best gear and expert tips for a perfect night under the stars.
We solve the common problems of brightness, portability, and calculating throw distance. You’ll learn how to achieve a crisp, large image in your backyard without complex math or guesswork.
Discover our top picks for durable outdoor projectors and screens. We’ll also break down the key factors that determine the maximum screen distance from your projector for optimal viewing.
Best LED Projectors and Screens for Outdoor Films – Detailed Comparison
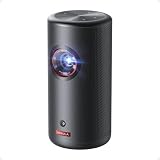
Anker Nebula Capsule 3 Laser – Best Portable Outdoor Projector
This compact powerhouse delivers 1080p resolution and 300 ISO lumens from a laser light source, ensuring vibrant colors even outdoors. Its built-in battery offers 2.5 hours of runtime, and Android TV provides instant streaming. It’s the ideal, all-in-one portable cinema for spontaneous backyard movie nights.
- Laser Engine to Illuminate Your World: Experience vibrant visuals with this…
- Travel Light, Project Big: At just 2 lb (900 g) and 90% smaller than others…
- Marathon Viewing Sessions: Watch a full 2.5-hour movie or listen to 8 hours…
ViewSonic M2e Portable Smart LED Projector – Best for Brightness
With 1,200 LED lumens and Harman Kardon speakers, the M2e combats ambient twilight brilliantly. Its auto vertical keystone correction simplifies setup on uneven surfaces. This model is the recommended choice for those needing extra brightness and premium audio in a durable, portable package.

- Smart LED Portable Projector: WVGA (854x480p) resolution with a 1.2 throw…
- Vibrant Colors: SuperColor technology delivers a wide color gamut and…
- Wireless Connectivity & Premium Sound: Stream content via Wi-Fi and enjoy…
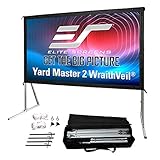
Elite Screens Yard Master 2 – Best Portable Outdoor Screen
This inflatable screen is the ultimate hassle-free solution. It sets up in minutes, features a 16:9 aspect ratio and a durable, weather-resistant matte white surface for superior image quality. Its sturdy design withstands light wind, making it the best option for a reliable, cinema-sized viewing area.
- 【120 inch Freestanding Portable Projector Screen】 This projector Screen…
- MATERIAL: Wraith Veil Dual – 0.8 Gain – 150˚ wide viewing angle – front…
- ASSEMBLES IN MINUTES without the use of tools! Lightweight aluminum square…
How to Calculate Maximum Screen Distance for Your Projector
Determining the ideal max screen distance is crucial for a sharp image. This distance, called the throw distance, depends on your projector’s lens and desired screen size. Getting it right prevents a blurry or dim picture during your outdoor film night.
Understanding Throw Ratio and Its Importance
The throw ratio is the key number for all distance calculations. It is the relationship between projection distance and image width. You can find your projector’s specific throw ratio in its manual or on the manufacturer’s website.
- Standard Throw: Ratio above 1.0. Requires more distance from the screen.
- Short Throw: Ratio around 0.4 to 1.0. Can project a large image from just a few feet away.
- Ultra-Short Throw: Ratio below 0.4. Can be placed inches from the screen, eliminating shadows.
Simple Formula for Calculating Projector Distance
Use this basic formula to find your maximum and minimum placement range. You only need your projector’s throw ratio and your desired screen width.
Projection Distance = Throw Ratio × Screen Width
For example, to get a 100-inch wide image with a projector that has a 1.5:1 throw ratio, you need 150 inches (or 12.5 feet) of distance. Always check your model for a range, not a single number.
Essential Factors Affecting Outdoor Viewing Distance
Outdoor conditions add variables that affect your effective viewing distance. Ambient light and screen type significantly impact the final result.
- Ambient Light: Dusk or streetlights wash out the image. Place the projector closer or use a higher-brightness (lumens) model for a given screen size.
- Screen Gain: A high-gain reflective screen can improve brightness, allowing for a slightly longer throw distance in darker settings.
- Image Resolution: Placing the projector too far for its native resolution (e.g., 1080p) will make pixels visible, reducing clarity.
Choosing the Right Outdoor Projector Screen for Maximum Impact
Your screen is as critical as your projector for outdoor movie quality. The right screen material and setup enhance brightness, contrast, and viewing angles. This choice directly affects how far your audience can sit and still enjoy a clear picture.
Portable vs. Fixed Frame Screens: A Quick Comparison
Your first decision is between a portable pop-up screen or a permanent fixed frame. Each has distinct advantages for backyard cinema setups.
| Type | Best For | Key Consideration |
|---|---|---|
| Portable Inflatable/Pop-up | Flexibility, storage, easy setup | Stability in wind; requires an air pump or tension poles. |
| Fixed Frame with Stand | Image flatness, frequent use, superior picture | More assembly time; requires storage space when not in use. |
| DIY Wall/Sheet | Lowest cost, impromptu nights | Wrinkles cause distortion; material may not be reflective. |
Critical Screen Material Specifications
Screen material, or gain, determines how light is reflected to your audience. A higher gain number means a brighter image from the same projector.
- Matte White (1.0-1.3 Gain): The most common. Offers wide viewing angles and accurate colors, ideal for darker settings.
- High-Power Grey (0.8-1.0 Gain): Enhances contrast in areas with some ambient light by absorbing ambient light while reflecting projector light.
- Rear-Projection Material: Allows projection from behind the screen. Perfect for high-traffic areas where people might block the front projector beam.
Optimal Screen Size and Audience Placement
Match your screen size to your calculated throw distance and audience size. A general rule is that the front row should sit at least 1.5 times the screen width away.
For a 120-inch diagonal screen (about 105 inches wide), the first seat should be roughly 13 feet back. This prevents neck strain and allows the entire image to be comfortably viewed.
Essential Setup Tips for Perfect Outdoor Projection
Mastering the final setup ensures your outdoor film night is a success. Proper placement, sound, and power management are the final pieces of the puzzle. These pro tips will help you avoid common pitfalls and maximize enjoyment.
Step-by-Step Guide to Aligning Your Projector
Correct alignment is critical for a rectangular, focused image. Follow this simple process after calculating your throw distance.
- Position: Place the projector on a stable, level surface at your calculated distance. Use the center of the lens as your reference point.
- Keystone Correction: Use the projector’s optical keystone dials (not digital) to square the image. Tilt the projector up/down first, then adjust the lens.
- Focus and Zoom: Fine-tune the focus ring for sharpness. Use the zoom ring to fill the screen without spilling over the edges.
Managing Audio and Ambient Light Outdoors
Great video needs great audio. Outdoor environments also present unique lighting challenges you must address.
- Bluetooth Speakers: Pair a powerful, portable Bluetooth speaker near the seating area. This provides much fuller sound than most built-in projector speakers.
- Total Darkness Myth: Aim for dusk rather than total darkness. Some ambient light helps with safety and navigation. Position the screen to avoid direct light from house lights or streetlamps.
- Wind Protection: Secure all cables and screen guylines. Even a light breeze can cause annoying screen flutter and image distortion.
Power Solutions and Connectivity for Backyard Use
Reliable power is non-negotiable. Always use heavy-duty outdoor-rated extension cords rated for your projector’s wattage.
For a truly wireless setup, consider a portable power station with an AC outlet. Ensure its capacity (in watt-hours) exceeds your projector and speaker’s total runtime consumption. Connect your media source directly to the projector via HDMI for the most reliable signal.
Key Specifications to Compare When Buying an Outdoor Projector
Understanding projector specifications ensures you buy the right model for your needs. Not all specs are equally important for an outdoor cinema setup. Focus on these critical metrics to guarantee a bright, clear image after dark.
Brightness (Lumens) vs. Resolution: What Matters More?
For outdoor use, brightness often trumps ultra-high resolution. Ambient light from the sky, even at dusk, can wash out a dim image.
- Brightness (ANSI Lumens): Look for a minimum of 500 lumens for dark backyards. For areas with more ambient light, 1,000+ lumens is ideal. LED projectors often list “LED Lumens,” which are not directly comparable to ANSI.
- Resolution: 1080p (Full HD) is the sweet spot. It provides excellent clarity on large screens without the premium cost of 4K. Native resolution is more important than “supported” resolution.
Contrast Ratio and Color Technology Explained
These specs determine image depth and vibrancy. A high contrast ratio makes blacks look truly black, not grey.
Contrast ratio measures the difference between the brightest white and darkest black. For movies, a higher ratio (e.g., 10,000:1) is better. Modern LED and laser light sources offer excellent color accuracy and longevity compared to traditional lamp-based models.
| Specification | Why It’s Important Outdoors | Good Target Range |
|---|---|---|
| Brightness | Fights ambient twilight; ensures image is visible. | 500 – 2,000+ ANSI Lumens |
| Native Resolution | Determines image sharpness on a large screen. | 1080p (1920×1080) |
| Contrast Ratio | Creates depth and detail in dark movie scenes. | 10,000:1 or higher |
| Light Source Life | LED/Laser lasts for years; no expensive lamp replacements. | 20,000+ hours |
Connectivity and Smart Features for Convenience
Modern projectors simplify setup with built-in smart features. These reduce the need for extra devices and cables outside.
Prioritize models with multiple HDMI ports and built-in streaming apps (Android TV, Roku). Built-in Wi-Fi and Bluetooth are highly useful for wireless screen mirroring and connecting speakers. A USB port that can power a streaming stick is a major convenience.
Advanced Tips for Optimizing Your Outdoor Cinema Experience
Go beyond basic setup with these expert techniques. Fine-tuning your environment and equipment elevates your outdoor movie night from good to spectacular. These pro strategies solve common outdoor viewing challenges.
Calibrating Image Settings for Nighttime Viewing
Default “out of the box” picture modes are often too bright or cool. Manual calibration optimizes the image for your specific dark environment.
- Select Movie/Cinema Mode: Start with this preset, as it’s typically the most color-accurate and less harsh than Vivid or Dynamic modes.
- Adjust Brightness & Contrast: Use a dark movie scene. Lower brightness until black areas look deep, not grey. Raise contrast to make whites pop without losing detail.
- Fine-tune Color & Sharpness: Slightly reduce color saturation for a more natural film look. Increase sharpness just enough to define edges without creating a grainy “halo” effect.
Managing Environmental Factors: Wind, Dew, and Bugs
Nature presents unique obstacles. A little preparation prevents major disruptions to your film screening.
- Condensation (Dew): Projector lenses can fog in humid air. Keep the projector running to generate heat, or use a silica gel pack near the intake vent. Never wipe a foggy lens until it acclimates.
- Insect Management: Place a yellow “bug” light away from the seating area to draw insects elsewhere. Avoid placing the projector’s bright exhaust vent near where people are sitting.
- Audience Comfort: Provide blankets for cooler nights. Designate a clear walking path with low-level solar path lights to avoid tripping without ruining the picture.
Creative Seating Layouts and Viewing Angles
Arrange your audience for the best social and viewing experience. The ideal layout depends on your screen type and guest count.
For a standard front-projection screen, arrange seating in a shallow arc centered on the screen. This ensures everyone has a direct view. Place speakers centrally, just below screen level, for even sound distribution. For larger groups, consider tiered seating using blankets on the ground and chairs behind.
Common Outdoor Projector Problems and How to Fix Them
Even with perfect planning, issues can arise during your outdoor movie night. Knowing how to quickly troubleshoot common problems saves the evening. Most fixes are simple and don’t require technical expertise.
Image is Too Dim or Washed Out
This is the most frequent outdoor complaint. It’s usually caused by competing light or incorrect settings, not a faulty projector.
- Cause: Ambient Light. Wait for full darkness or reposition the screen away from porch/house lights. Use a screen with grey material (lower gain) to improve contrast.
- Cause: Incorrect Mode. Switch from Eco or Standard mode to Bright or Dynamic mode. This maximizes lumen output at the expense of some color accuracy.
- Cause: Throw Distance. The projector may be too far back. Move it closer to the screen to increase image brightness and clarity.
Picture is Blurry or Out of Focus
A fuzzy image ruins the experience. Follow this systematic check to identify and solve the issue.
- Check Physical Focus Ring: Manually adjust the lens focus ring on the projector slowly while displaying a menu screen with fine text.
- Verify Keystone Correction: Excessive digital keystone correction degrades image quality. Re-position the projector to be as square to the screen as possible and use minimal correction.
- Inspect the Lens: Use a soft microfiber cloth to gently clean any dust or fingerprints from the projector lens. Never use liquid or paper towels.
No Sound or Connectivity Issues
Audio and signal problems often stem from loose connections or incorrect source settings.
First, ensure your media source’s volume is up and it’s not on mute. Verify the HDMI or audio cable is fully seated at both ends. For Bluetooth audio, ensure the speaker is in pairing mode and select it from the projector’s Bluetooth menu. If using a streaming stick, try a different USB port or a powered USB hub for adequate power.
Budget-Friendly Alternatives and DIY Solutions
Creating an amazing outdoor cinema doesn’t require a massive budget. With smart choices and a little DIY spirit, you can achieve great results for less. These alternatives focus on maximizing value without sacrificing the core experience.
Affordable Projector Models That Perform Outdoors
Several budget-friendly projectors offer sufficient brightness for casual use. Prioritize lumens and native resolution over extra features.
- Wimius P28: Offers 8,500 LED lumens (approx. 850 ANSI) and 1080p support. Its built-in Android OS provides good value for a low-cost, all-in-one option.
- Vankyo Leisure 510: A popular entry-point with 5,000 LED lumens and dual stereo speakers. It’s a solid choice for first-timers testing the waters of backyard movies.
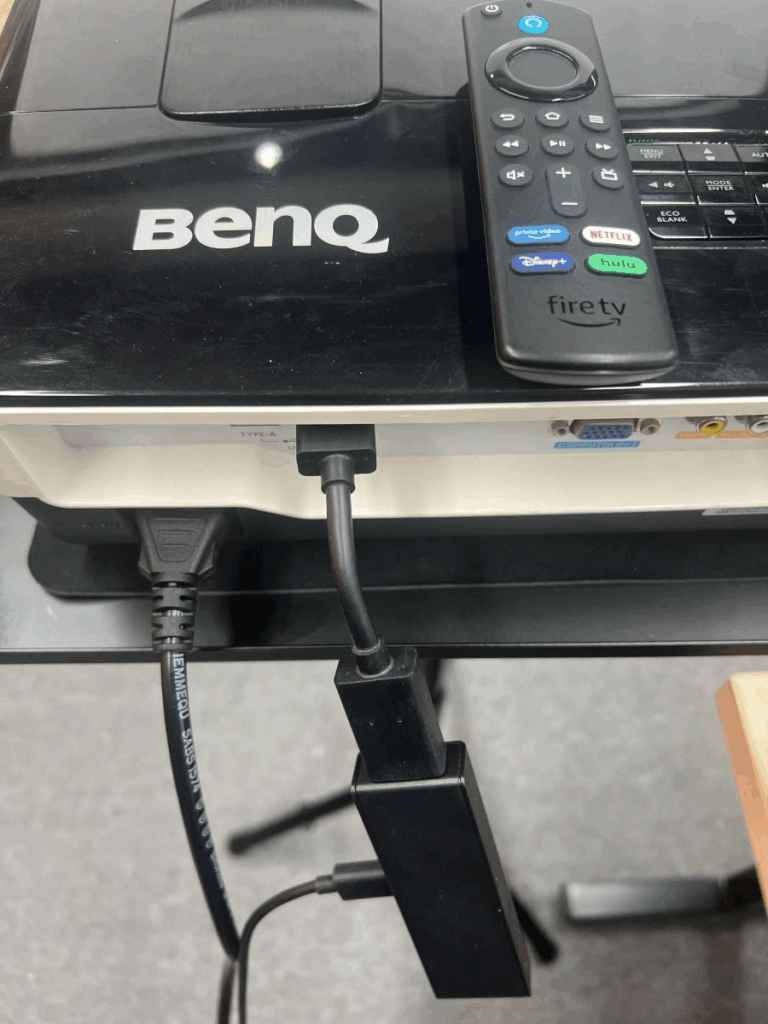
- Used/Business Projectors: Look for used 1080p models from brands like Epson or BenQ. Older business projectors often have high brightness but may lack HDMI; check ports carefully.
Creating a High-Quality DIY Outdoor Screen
A professional-grade screen can be made for a fraction of the cost. The key is using the right materials for a flat, reflective surface.
- Choose Your Frame: Build a simple frame from PVC pipe or wooden furring strips. Ensure it’s rigid and square.
- Select the Material: Purchase spandex matte white fabric (Blackout Cloth) from a fabric store. This material is wrinkle-resistant and has good reflectivity.
- Assemble: Stretch the fabric tightly over the frame and staple or grommet it in place. Apply even tension to avoid wrinkles that distort the image.
Low-Cost Accessories That Make a Big Difference
These inexpensive add-ons significantly improve stability, sound, and convenience. They are wise investments for any setup.
A heavy-duty photographer’s tripod or a sturdy portable table provides a stable base for your projector. Use bungee cords or sandbags to secure screens and cables against wind. A simple power strip with a long cord centralizes your plugs and allows you to turn everything on/off at once.
Conclusion: Mastering Your Outdoor Cinema Setup
Choosing the best LED projector and screen, and calculating the correct max screen distance, transforms your backyard. This guide provides the expert knowledge for a brilliant, large-scale outdoor film experience. You can now solve common setup problems with confidence.
The key takeaway is to prioritize brightness and throw ratio for your specific space. Use our formulas and tips to plan before you buy or set up. This ensures a sharp, bright image every time.
Start by measuring your space and reviewing our product recommendations. Then, gather your gear and host an unforgettable movie night under the stars. Your friends and family will be amazed by the professional results.
With the right preparation, your perfect outdoor cinema is just a sunset away. Happy viewing!
Frequently Asked Questions about Outdoor Projectors and Setup
What is the best lumen count for an outdoor projector?
For a backyard cinema, aim for a minimum of 500 ANSI lumens in fully dark conditions. In areas with ambient light from streetlamps or a late sunset, 1,000 to 2,000 ANSI lumens is ideal. This ensures the image remains vibrant and visible.
Remember that manufacturers may list “LED lumens,” which are not equivalent. Always look for the ANSI lumen rating for accurate brightness comparison between different projector models.
How far should the projector be from a 120-inch screen?
The distance depends entirely on your projector’s throw ratio. Using the formula (Distance = Throw Ratio x Screen Width), a common 1.5:1 ratio requires 15 feet for a 120-inch (10-foot wide) screen.
You must check your specific model’s manual for its throw ratio range. Short-throw projectors can achieve the same size image from just 4-5 feet away, offering more placement flexibility.
Can you use a regular projector screen outdoors?
You can, but it is not recommended. Indoor screens are not designed to withstand moisture, wind, or UV exposure. Using one outdoors risks damage and often results in a poor image due to non-reflective materials.
Dedicated outdoor screens use weather-resistant fabrics and frames. For the best results and longevity, always choose a screen specifically rated for outdoor or portable use.
What is the difference between throw ratio and zoom?
Throw ratio is a fixed specification of the lens that determines the required distance for a given image width. Optical zoom is an adjustable feature on some lenses that allows flexibility within that distance range.
A projector with a 1.3-1.8:1 throw ratio and 1.3x zoom can be placed anywhere between 13 and 18 feet for a 10-foot wide image. Zoom provides placement flexibility without moving the projector.
Why is my outdoor projector image blurry?
Blurriness is often caused by incorrect focus, a dirty lens, or excessive digital keystone correction. First, manually adjust the focus ring on the projector lens while displaying a menu with text.
If that doesn’t work, ensure the projector is as square to the screen as possible to minimize keystone adjustment. Finally, gently clean the lens with a microfiber cloth to remove dust or fingerprints.
What is the best way to get sound for an outdoor movie?
The most effective method is using a separate, high-quality Bluetooth speaker. Place it near the seating area for clear, powerful audio that most built-in projector speakers cannot match.
For a more permanent setup, consider outdoor-rated wired speakers. Always ensure your audio source (laptop, streaming stick) is correctly paired or connected, with its volume turned up.
How do I protect my projector from dew and moisture?
Allow the projector to run continuously, as the generated heat helps prevent internal condensation. When packing up, let the unit cool down completely before placing it in its case.
For storage, include silica gel desiccant packs in the case to absorb ambient moisture. Never cover or store a warm, damp projector, as this traps humidity inside.
Is a 4K projector worth it for outdoor movies?
For most backyard setups, a bright 1080p projector is a better value. The visual benefits of 4K are less noticeable outdoors at night, and 4K models command a significant price premium.
Prioritize high brightness (lumens) and contrast ratio over resolution. The investment is better spent on a high-quality screen and powerful audio, which have a more dramatic impact on the overall experience.
This website is a participant in the Amazon Services LLC Associates Program, an affiliate advertising program designed to provide a means for us to earn fees by linking to Amazon.com and affiliated sites.