
This website is a participant in the Amazon Services LLC Associates Program, an affiliate advertising program designed to provide a means for us to earn fees by linking to Amazon.com and affiliated sites.
What is the best mounting solution for your ultra-short throw projector? The NexiGo sliding tray provides the precise, adjustable foundation you need. This accessory solves the frustrating alignment issues common with UST projector placement.
It enables micro-adjustments for a perfectly square image without moving your entire projector. This complete guide will explore its key features, installation process, and proven setup methods.
You will learn expert tips for achieving flawless screen alignment and maximizing your home theater’s potential. Let’s dive into the details of this essential mounting hardware.
Best Mounting Solutions for UST Projectors – Detailed Comparison
NexiGo Universal Sliding Tray – Best Overall Choice
The NexiGo Universal Sliding Tray (Model NG-TRAY) is our top recommendation. It offers precise 40mm of lateral and vertical slide adjustment, ensuring perfect image alignment. Its universal compatibility and robust, low-profile design make it the ideal foundation for most ultra-short throw projectors on any surface.

- 【150″ Projection Near the Wall】The NexiGo Sliding Tray is crafted to…
- 【Achieve Optimal Projections with Ease】Simplify your setup. Preset your…
- 【Synchronizes to Projector Source】The slider’s movement is synchronized…
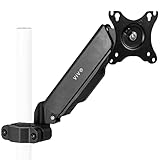
VIVO Universal UST Adjustable Mount – Best for Heavy-Duty Use
For larger, heavier projector models, consider the VIVO STAND-UST01. This mount features a heavy-duty steel construction with a 33lb weight capacity. Its integrated cable management and substantial slide range provide a secure, clean setup for premium home theater installations requiring extra stability.
- Universal Pneumatic Pole Mount Arm: This powerful counterbalance monitor…
- Fits 17″ to 32″ Screens: Designed for 17” to 32” monitors and TVs…
- Versatile Design: This sturdy mount lets you update your monitor stand’s…
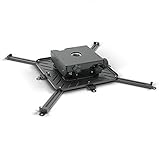
Chief RPMAU Universal Projector Mount – Best for Professional Installations
The Chief RPMAU is the premium choice for custom installations. It provides micro-precise adjustment in all directions and includes a unique removable tray. This model is ideal for integrators and users who demand the highest level of fine-tuning and a sleek, finished look.
Key Features and Benefits of the NexiGo Sliding Tray
Understanding the core features of the NexiGo sliding tray reveals why it’s essential for UST projector setups. This hardware solves the most common installation pain points. It transforms a frustrating process into a simple, precise adjustment.
Precision Micro-Adjustment Capabilities
The primary benefit is its precise sliding mechanism. You can make fine-tuned movements after the projector is placed. This eliminates the need for forceful, guesswork adjustments.
- Lateral Slide: Offers smooth side-to-side adjustment to center the image horizontally on your screen or wall.
- Vertical Slide: Allows up and down movement to align the image’s top and bottom edges perfectly.
- Stable Locking: Once aligned, secure locking knobs prevent any drift or movement, maintaining your perfect setup.
Universal Compatibility and Design
The NexiGo tray is designed for broad compatibility. It works with most major ultra-short throw projector brands. Its thoughtful design considers real-world user needs.
It features a low-profile, minimalist base that keeps your projector stable. The universal mounting pattern accommodates various projector foot placements. This design ensures it fits seamlessly into your entertainment center.
Solving Common UST Projector Problems
This accessory directly addresses specific ultra-short throw projector challenges. UST projectors are extremely sensitive to placement. Even a millimeter can throw the image off.
- Keystone Correction Avoidance: Enables physical alignment, reducing reliance on digital keystone correction which can degrade image quality.
- Time-Saving Setup: Drastically cuts down the trial-and-error time typically spent nudging a heavy projector.
- Surface Protection: The soft bottom padding prevents scratches on your furniture during adjustments.
How to Install and Set Up Your NexiGo Sliding Tray
A proper installation is crucial for optimal performance. This step-by-step guide ensures you set up your NexiGo projector tray correctly. Follow these instructions for a flawless, square image on your first try.
Pre-Installation Preparation and Placement
Begin by gathering your tools and preparing your space. You will need your UST projector, the sliding tray, and the screen. Choose a stable, level surface for the best results.
- Position Your Screen: First, permanently place your ALR screen or fixed frame screen on the wall.
- Rough Projector Placement: Place your projector on the intended furniture without the tray, roughly aligning it with the screen.
- Mark the Footprints: Lightly mark the position of the projector’s feet on the surface for reference.
Mounting and Alignment Process
Now, integrate the sliding tray into your setup. This process focuses on securing the projector and using the tray’s adjustments.
Place the NexiGo tray on your furniture within the marked area. Ensure the sliding mechanism is unlocked and centered. Then, place your projector onto the tray, aligning its feet with the tray’s mounting points.
Power on the projector and display a test grid or alignment image. Use the tray’s adjustment knobs to slide the projector laterally and vertically. Move it until the image is perfectly centered and squared within your screen’s borders.
Fine-Tuning for Perfect Image Quality
After basic alignment, fine-tune for absolute perfection. Minor adjustments can significantly impact sharpness and geometry.
- Check All Corners: Ensure the image fills the screen evenly with no blurring or distortion in any corner.
- Minimize Digital Correction: With perfect physical alignment, you should disable digital keystone and lens shift in the projector menu.
- Final Security Check: Gently nudge the projector to ensure it’s locked securely to the tray and won’t move during use or cleaning.
NexiGo Tray vs. DIY Solutions and Other Mounts
Choosing the right mounting solution involves comparing options. Many users consider DIY methods or fixed mounts before discovering sliding trays. Understanding the differences helps you make an informed investment.
Comparison with Fixed Mounts and DIY Methods
Fixed mounts and homemade solutions are common alternatives. They often fall short in solving the unique alignment challenges of UST projectors.
- Fixed Universal Mounts: These provide a stable base but lack any adjustment capability. They force you to move the entire projector and mount for tiny corrections.
- DIY Furniture Slides: Using hardware store drawer slides is unstable and rarely level. They can vibrate and lack secure locking mechanisms.
- Simple Pads or Feet: Rubber pads or adjustable feet only help with leveling. They offer no lateral slide for centering the image.
| Solution | Adjustment Capability | Stability | Ease of Setup |
|---|---|---|---|
| NexiGo Sliding Tray | High (Multi-directional) | Excellent | Simple |
| Fixed Projector Mount | None | Excellent | Moderate |
| DIY Drawer Slides | Low (Often Unstable) | Poor | Complex |
When a Sliding Tray is the Right Choice
The NexiGo tray is ideal for specific, common home theater scenarios. It addresses the precision required for high-end visual setups.
It is essential when using a fixed-frame projection screen where image borders are absolute. It’s also the best choice if your media console placement isn’t perfectly centered. Anyone who values pixel-perfect alignment should use this tool.
Long-Term Value and Performance Impact
Investing in a proper sliding tray pays off over time. It protects your equipment and enhances your viewing experience consistently.
- Preserves Image Quality: Enables pure optical alignment, avoiding digital processing that softens the picture.
- Protects Your Investment: Prevents wear and tear from constantly lifting and shifting your expensive projector.
- Future-Proofs Setup: If you move furniture or upgrade your screen, re-alignment is quick and simple without starting from scratch.
Expert Tips for Maximizing Your UST Projector Setup
Owning the right hardware is just the first step. Applying professional techniques elevates your home theater’s performance. These expert tips ensure you get the most from your NexiGo sliding tray and projector.
Optimizing Placement for Different Screen Types
Your screen type dictates specific placement strategies. The tray gives you flexibility, but starting from the optimal position is key.
- Fixed Frame ALR Screens: The tray is mandatory. Place the projector so the image slightly overfills the screen, then use the tray to perfectly retract the edges within the black border.
- Wall-Mounted Tension Screens: Align to the screen’s physical edge, not the projected image border. Slight tension can cause minute shifts over time.
- Painted Wall Surfaces: Use a digital test pattern. Align the projected grid with painter’s tape markers placed on the wall for a reference.
Advanced Calibration and Maintenance
After physical alignment, fine-tune your projector’s settings. Proper maintenance keeps your system performing flawlessly for years.
- Post-Alignment Calibration: With the image perfectly squared, run your projector’s built-in focus and pixel adjustment routines.
- Environmental Checks: Ensure no direct light hits the projector lens from the side, as this can cause color shift even with a perfect image shape.
- Tray Maintenance: Periodically check the locking knobs for tightness. Clean the sliding tracks with a dry cloth to prevent dust buildup that could affect smoothness.
Troubleshooting Common Alignment Issues
Even with the right tool, challenges can arise. Here are solutions to frequent problems encountered during UST projector setup.
If one corner remains blurry, your surface may not be level. Use a small spirit level on the tray itself. Shim the furniture leg, not the tray, to correct major level issues.
For persistent trapezoid distortion (keystone), double-check that the projector itself is perfectly perpendicular to the floor. The tray corrects lateral shift, not projector tilt. Ensure all projector feet are fully seated on the tray.
Frequently Asked Questions About the NexiGo Sliding Tray
Users often have specific questions before purchasing or during installation. This FAQ section addresses the most common queries with clear, actionable answers. Find quick solutions to your setup challenges here.
Compatibility and Purchase Questions
Understanding what the tray works with is crucial for buyers. These answers help you confirm it’s the right fit for your system.
- Which projector models are compatible? The NexiGo tray uses a universal design. It works with most UST projectors from brands like Samsung, LG, Hisense, Epson, and Optoma, as long as the projector’s feet fit within the adjustable mounting area.
- Does it work on carpet or uneven surfaces? It is designed for hard, level surfaces like media consoles. For uneven surfaces, you must level the furniture first, as the tray itself cannot correct large tilts.
- Where is the best place to buy it? It is available on major online retailers like Amazon and the manufacturer’s website. Always check for the latest model (NG-TRAY) to ensure you get current features.
Installation and Usage Troubleshooting
These questions tackle common hurdles encountered during and after setup. They provide fixes for typical problems.
My image is still not perfectly square after using the tray. What’s wrong? This usually means the projector body is tilted. Ensure the projector is not rocking on its feet and is perpendicular to the floor. The tray corrects horizontal/vertical shift, not rotation.
The sliding mechanism feels stiff or gritty. How can I fix it? A small amount of non-oily, dry lubricant like powdered graphite on the metal rails can help. First, ensure no debris is trapped in the tracks by cleaning them with compressed air.
Performance and Longevity Concerns
Users want to know about durability and ongoing performance. These answers address long-term value and maintenance.
- Will the tray sag or wobble over time with a heavy projector? The steel construction is designed for stability. As long as the weight is within the specified limit (check product specs), it should not sag. Ensure all knobs are tightened securely.
- Can I paint or modify the tray to match my furniture? It is not recommended. Paint or coatings could interfere with the smooth sliding mechanism. It is designed with a low-profile, neutral black finish to be discreet.
- Is it worth the investment compared to a new projector with auto-alignment? Yes. Even projectors with motorized alignment often benefit from a physically centered starting point. The tray provides a permanent, precise foundation that improves any setup.
Final Verdict and Who Should Buy the NexiGo Tray
After examining features, setup, and comparisons, a clear verdict emerges. This section summarizes the core value proposition and identifies the ideal user. It helps you make a confident final decision.
Overall Value Assessment and Rating
The NexiGo Sliding Tray delivers exceptional value for its specific purpose. It solves a high-precision problem with a simple, effective tool.
It earns high marks for build quality, ease of use, and transformative results. The investment is modest compared to the cost of a premium UST projector and screen. It protects that larger investment by enabling perfect setup.
Ideal User Profile and Use Cases
This product isn’t for every projector owner. It provides maximum benefit to specific users in particular situations.
- UST Projector Owners with Fixed Screens: This is the primary audience. If you have an ALR or fixed-frame screen, this tray is non-negotiable for perfect edge alignment.
- Home Theater Enthusiasts: Users who value pixel-perfect image geometry and want to avoid digital keystone correction will find it invaluable.
- Installers and Integrators: Professionals can save significant time on job sites by using this tool for quick, precise adjustments.
- Users with Off-Center Furniture: If your media console cannot be perfectly centered under your screen, the tray’s lateral slide is the perfect solution.
Potential Limitations to Consider
While excellent, the tray has specific boundaries. Understanding these ensures realistic expectations.
It does not correct for a projector that is tilted forward or backward (pitch). It requires a reasonably level starting surface to function correctly. It is also an accessory for placement, not a substitute for proper room planning and screen selection.
For users with perfectly centered, permanent setups on laser-etched stands, the value is diminished. However, for the vast majority of UST setups involving furniture, it is a transformative tool that delivers on its promise of simple, precise alignment.
Essential Accessories to Pair with Your NexiGo Tray
Maximizing your home theater involves creating a complete ecosystem. The sliding tray is a foundational piece, but pairing it with the right accessories enhances the entire experience. This section covers recommended add-ons for a professional-grade setup.
Cable Management and Power Solutions
A clean installation is a professional installation. Managing cables prevents clutter and maintains safety around your adjustment area.
- Adhesive Cable Channels: Use flat, paintable channels to route power and HDMI cables neatly along furniture legs and walls, keeping them away from the tray’s sliding path.
- Smart Power Strip: A surge-protected strip with individual switches or a master remote allows you to power all components (projector, soundbar, media player) simultaneously.
- Short, Premium HDMI Cables: Use certified high-speed cables (like HDMI 2.1) that are just long enough to reach from your source to the projector. Excess cable can cause interference and clutter.
Calibration Tools and Testing Media
Once physically aligned, fine-tune your image with professional tools. These resources help you achieve reference-quality picture settings.
Invest in a basic calibration Blu-ray or digital file. The Spears & Munsil disc or free online test patterns provide grids and color slides. Use these to verify focus, uniformity, and color alignment after using the sliding tray.
A laser level or a simple bubble level app on your phone is invaluable. Use it to confirm your screen is perfectly level and your projector (on the tray) is perpendicular before making fine adjustments.
Furniture and Environmental Enhancements
The environment around your projector impacts performance. Consider these additions to optimize viewing conditions.
- Acoustic Panels or Rugs: Reduce sound reflections for better audio, which is just as important as the perfect picture your tray enables.
- Dedicated Media Console: A sturdy, vibration-resistant console with proper ventilation ensures your tray and projector remain stable and cool during long viewing sessions.
- Ambient Light Rejection (ALR) Screen: While not an “accessory” per se, a proper ALR screen is the most impactful partner for a UST projector. The tray ensures you get the most from this expensive component.
Conclusion: Achieving Perfect UST Projector Alignment
The NexiGo sliding tray solves the core challenge of ultra-short throw projector setup. It provides the precise micro-adjustments needed for a perfectly square image. This eliminates frustrating guesswork and protects your equipment.
The key takeaway is to prioritize physical alignment over digital correction. This simple accessory unlocks your projector’s full visual potential. It is a small investment for a transformative result.
Ready to perfect your home theater? Assess your current setup and identify any alignment gaps. Then, integrate the NexiGo tray into your installation process for a flawless, professional finish.
With the right tools and techniques, you can achieve a cinema-quality picture in your own living room. Start your journey to perfect projection today.
Frequently Asked Questions about the NexiGo Sliding Tray
What is a sliding tray for a UST projector?
A sliding tray is a mounting platform with micro-adjustment capabilities. It sits between your projector and furniture, allowing precise lateral and vertical movement. This enables perfect image alignment without lifting or shifting the entire projector unit.
It specifically solves the sensitive placement requirements of ultra-short throw projectors. By providing controlled slide, it helps achieve a perfectly squared image on your screen, which is critical for fixed-frame installations.
How does the NexiGo tray improve picture quality?
It improves quality by enabling pure optical alignment. You can physically center and square the image, eliminating the need for digital keystone correction. Digital correction degrades resolution and can introduce visual artifacts.
This results in a sharper, more detailed picture with perfect geometry. Every pixel from your projector’s native resolution is used effectively, maximizing the clarity and impact of your content.
Can I use this sliding tray with any projector brand?
The NexiGo tray is designed for universal compatibility with most major UST projector brands. Its key requirement is that the projector’s feet fit within its adjustable mounting area. It works with models from Samsung, LG, Hisense, Epson, and Optoma.
Always check your projector’s foot pattern and weight against the tray’s specifications. The low-profile, universal design accommodates a wide range of models, but verifying dimensions is recommended for a perfect fit.
What is the best way to level the tray during setup?
The tray itself is not designed to correct major level issues. The best practice is to first ensure your media console or stand is perfectly level using a spirit level. Shim the furniture legs if necessary to create a stable, flat foundation.
Once the furniture is level, place the tray on top. The tray’s adjustments are for fine-tuning image position, not for compensating for a significantly tilted surface. Starting level is crucial for success.
Why is my image still distorted after using the sliding tray?
Persistent distortion usually indicates the projector body itself is tilted forward or backward (pitch). The sliding tray corrects for horizontal and vertical shift but cannot correct for the projector’s angle relative to the floor.
Ensure all projector feet are fully seated on the tray and the unit is not rocking. The projector’s body should be perpendicular to the floor. The tray handles left/right and up/down misalignment only.
What is the difference between this and a motorized alignment feature?
Motorized alignment is a digital correction performed by the projector’s lens or software. The NexiGo tray provides a physical, mechanical adjustment. Physical alignment is always superior as it preserves the full native image quality without digital processing.
Think of the tray as setting a perfect foundation. Even projectors with motorized features benefit from being physically centered first, allowing those motors to work within a smaller, more optimal range.
How do I maintain and clean the sliding mechanism?
Regular maintenance is simple. Periodically check that the locking knobs are secure. To clean, use a can of compressed air to blow dust and debris out of the metal sliding tracks. Avoid using liquid cleaners or oils that can attract more dust.
If the slide becomes stiff, a tiny amount of dry lubricant like powdered graphite on the rails can restore smooth motion. Always ensure the tracks are clean and dry before applying any lubricant.
Is the NexiGo tray worth it for a casual viewer?
If you use a fixed-frame or ALR screen, it is absolutely worth it. Casual viewers still benefit from a perfectly aligned, sharp image without distracting crooked edges. It transforms a frustrating setup process into a simple one-time adjustment.
For users projecting onto a plain wall with less concern for perfect borders, the value decreases. However, for anyone seeking a polished, professional-looking home theater, it is a highly recommended and cost-effective essential.
This website is a participant in the Amazon Services LLC Associates Program, an affiliate advertising program designed to provide a means for us to earn fees by linking to Amazon.com and affiliated sites.