This website is a participant in the Amazon Services LLC Associates Program, an affiliate advertising program designed to provide a means for us to earn fees by linking to Amazon.com and affiliated sites.
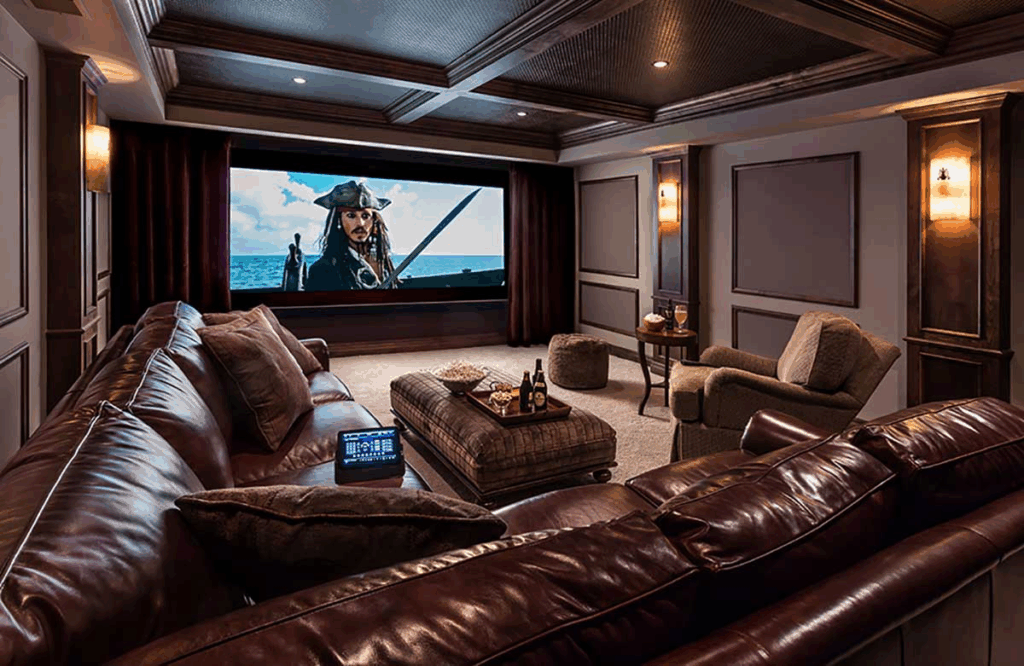
Struggling with a blurry or washed-out home theater display? This complete guide reveals proven methods to improve projector picture quality at home without buying expensive new equipment. You can transform your viewing experience with simple adjustments.
In this article, you will learn expert tips for optimizing screen placement, calibrating settings, and controlling ambient light. We cover easy fixes for contrast, sharpness, and black levels. Continue reading to unlock the full potential of your projector today.
Best Projector Screens for Improving Picture Quality – Detailed Comparison
Elite Screens Aeon CineGrey 5D – Best Ambient Light Rejection
This fixed-frame screen features advanced ambient light rejecting (ALR) technology. It dramatically boosts contrast and black levels in rooms with uncontrolled light. The CineGrey 5D material is ideal for home theaters where you cannot achieve total darkness, delivering vibrant colors even during daytime viewing.

- [CERTIFICATION AND DIMENSION SIZE] : ISF Certified for accurate color…
- [SCREEN MATERIAL] : CineGrey 5D, Angular-Reflective Material with…
- [FEATURES] : Stunning Award Winning EDGE FREE Design, Lightweight and Easy…
Silver Ticket Products STR-169120 – Best Value Fixed Frame
Offering a premium 4K Ultra HD surface at a budget-friendly price, this screen enhances sharpness and color accuracy. The white matte material provides excellent gain for bright projectors. It is the best option for dedicated dark rooms seeking maximum picture pop without overspending.

- Wall Mounted Fixed Frame Projection Screen (Overall Size 59.38″ Tall x…
- 1.1 Gain White screen surface with an exceptionally wide viewing angle at…
- 0.28″(7mm) Thin Bezel Projection Screen Perfect for UST Projectors. Heavy…
Screen Innovations Black Diamond 0.8 – Best Premium Performance
This motorized screen uses proprietary light-rejecting micro-optics to crush glare and maintain deep blacks. It is recommended for high-end home cinemas with strict ambient light challenges. The Zero Edge design creates a seamless floating image, making it the best overall choice for uncompromising quality.
- Compatible with Galaxy S26+ Only (6.7″ Screen Size)
- 6.6 ft drop protection (3x MIL-STD-810G)
- Lifted camera ring with built-in stand
Essential Projector Calibration Settings for Maximum Clarity
Your projector likely ships with default “torch mode” settings that sacrifice accuracy for brightness. Proper calibration is the single most effective way to improve projector picture quality at home without spending a dime. These adjustments fix common issues like washed-out blacks and unnatural skin tones.
Adjusting Brightness and Contrast Correctly
Start by setting your projector to “Cinema” or “Movie” picture mode to disable aggressive processing. Use a calibration disc or a free YouTube test pattern to set brightness so black bars are truly black, not gray. Then, adjust contrast until white details remain visible without clipping.
- Brightness (Black Level): Lower until black bars disappear, then increase slightly until shadow details emerge.
- Contrast (White Level): Raise until the brightest whites show texture, not just a solid blob.
- Sharpness: Reduce to zero or near-zero to eliminate artificial edge enhancement and noise.
Fine-Tuning Color Temperature and Gamma
Most projectors default to a cool, blueish color temperature that looks unnatural. Switch the color temperature to “Warm” or “D65” (6500K) for accurate skin tones. Next, set the gamma to 2.2 for a bright room or 2.4 for a dedicated dark home theater to improve shadow detail.
A gamma setting of 2.2 is the industry standard for most viewing environments. This single adjustment can make dark scenes watchable instead of muddy. Always save your calibrated settings to a custom preset for future use.
Optimizing Room Lighting and Projector Placement for Better Picture
Even the best projector cannot overcome a poorly lit room or incorrect placement. Controlling ambient light and positioning your projector correctly are critical steps to improve projector picture quality at home. These environmental factors directly impact contrast, brightness, and perceived sharpness.
Controlling Ambient Light for Maximum Contrast
Ambient light is the number one enemy of projector image quality, washing out blacks and reducing saturation. For a dedicated home theater, install blackout curtains or blinds to block all external light sources. If total darkness is impossible, consider bias lighting behind the screen to improve perceived contrast.
- Blackout curtains: Block 99% of external light for a true dark room experience.
- Paint walls dark: Use matte, dark-colored paint to reduce light reflection back onto the screen.
- Ambient light rejecting screens: These specialized screens combat overhead or window light effectively.
Perfecting Projector Placement and Lens Alignment
Incorrect projector placement causes keystone distortion and soft focus, ruining picture clarity. Always mount the projector so the lens is centered horizontally and vertically with the screen center. Use optical zoom and lens shift rather than digital keystone correction to avoid degrading image quality.
Digital keystone correction compresses pixels and introduces artifacts. Optical adjustments preserve every pixel of your native resolution for a sharper image. Ensure the projector is perfectly perpendicular to the screen for the best focus uniformity across the entire frame.
Upgrading Source Quality and Cables for Sharper Projector Images
Your projector is only as good as the signal you feed it. A low-quality source or outdated cable can bottleneck your entire system, making it impossible to improve projector picture quality at home. Upgrading these components delivers an instant and noticeable boost in detail and color fidelity.
Choosing the Right HDMI Cable for 4K and HDR
Not all HDMI cables are created equal, especially for modern 4K HDR projectors. You need a certified Ultra High Speed HDMI cable that supports 18Gbps bandwidth for 4K at 60Hz or 48Gbps for 8K and advanced HDR formats. A faulty or underspecced cable causes random black screens, sparkles, and color banding.
- Standard HDMI: Suitable for 1080p projectors only; insufficient for 4K.
- High Speed HDMI (18Gbps): Required for 4K HDR at 60Hz with basic HDR10.
- Ultra High Speed HDMI (48Gbps): Needed for 4K at 120Hz, 8K, and Dolby Vision.
Optimizing Your Media Source and Streaming Settings
Streaming services often compress video heavily, reducing detail and introducing artifacts. For the best picture, use a dedicated 4K Blu-ray player or a high-end streaming device like an Apple TV 4K or Nvidia Shield. Ensure your streaming apps are set to the highest possible bitrate and resolution in their settings menu.
A wired Ethernet connection is always superior to Wi-Fi for consistent streaming quality. Wireless interference can cause the stream to drop to a lower bitrate, resulting in a blocky, pixelated image. For local media, use a Plex server to play uncompressed 4K remux files for reference-level picture quality.
| Source Type | Video Quality | Best For |
|---|---|---|
| 4K Blu-ray Disc | Excellent (Highest Bitrate) | Reference quality, no compression |
| Apple TV 4K / Nvidia Shield | Very Good (High Bitrate) | Streaming with Dolby Vision/Atmos |
| Smart TV Apps (Built-in) | Good (Variable Bitrate) | Convenience, but lower quality |
Advanced Maintenance and Firmware Updates for Long-Term Quality
Even the most expensive projector will degrade over time without proper care. Dust buildup on the lens and internal components directly reduces brightness and sharpness. Regular maintenance and firmware updates are essential to consistently improve projector picture quality at home for years to come.
Cleaning the Lens and Filter for Maximum Brightness
A dusty lens scatters light, causing a hazy, low-contrast image that looks washed out. Use a microfiber cloth and specialized lens cleaning solution to gently wipe the projector lens in a circular motion. Never use paper towels or household cleaners, as they can scratch the delicate optical coating.
- Air filter: Clean or replace every 3-6 months to prevent overheating and fan noise.
- Lens cleaning: Perform every 2-3 months or whenever you notice a loss in sharpness.
- Vents: Use compressed air to clear dust from exhaust vents for proper airflow.
Updating Firmware and Resetting to Factory Settings
Projector manufacturers release firmware updates that fix bugs, improve HDR tone mapping, and add new features. Check your projector’s settings menu or the manufacturer’s website for the latest firmware version. A simple update can unlock significant picture quality improvements you did not know were possible.
If you notice strange colors or erratic behavior, perform a factory reset to clear corrupted settings. This restores the projector to its original calibration baseline. After resetting, re-apply your custom calibrated settings for a fresh, optimized start.
Using Test Patterns and Calibration Tools for Precision Tuning
Relying on your eyes alone is not enough for professional-grade picture quality. Using standardized test patterns and calibration tools ensures every setting is mathematically accurate. This precision approach is the ultimate way to improve projector picture quality at home and achieve reference-level performance.
Free and Paid Calibration Tools You Can Use Today
You do not need a professional calibrator to get excellent results. Free resources like the AVS HD 709 calibration disc or the Spears & Munsil benchmark disc provide all the patterns you need. For advanced users, a colorimeter like the X-Rite i1Display Pro paired with software like CalMAN automates the process for perfect accuracy.
- AVS HD 709 (Free): A downloadable disc with patterns for brightness, contrast, sharpness, and color.
- Spears & Munsil (Paid): The industry standard for home theater calibration with detailed tutorials.
- CalMAN Software (Paid): Professional-grade software that measures and corrects color accuracy automatically.
Step-by-Step Guide to Using a Test Pattern
Start by displaying a black clipping test pattern to set your brightness level correctly. Adjust brightness until the black bars are truly black, but you can still see the faintest steps of near-black detail. This single step eliminates crushed shadows that hide important scene information.
Next, use a white clipping pattern to set contrast so the brightest whites retain texture. You want to see distinct steps in the white areas without them merging into a solid white blob. Finally, use a color bar pattern to adjust tint and color saturation until all bars match their reference colors.
- Step 1: Display a black clipping pattern and lower brightness until the black bars disappear.
- Step 2: Slowly raise brightness until the first few near-black bars become visible.
- Step 3: Display a white clipping pattern and raise contrast until the brightest bars clip.
- Step 4: Lower contrast slightly until all white bars show distinct separation.
- Step 5: Use a color bar pattern to adjust tint and saturation for accurate skin tones.
Troubleshooting Common Projector Picture Quality Problems
Even after calibration and optimization, you may still encounter specific picture quality issues. Knowing how to diagnose and fix these common problems is the final step to improve projector picture quality at home. This section addresses the most frequent complaints from home theater owners.
Fixing a Blurry or Soft Image
A blurry image is usually caused by incorrect focus, projector vibration, or a dirty lens. First, ensure the projector is on a stable surface or mount that does not vibrate from footsteps or HVAC systems. Next, use the manual focus ring on the lens to sharpen the image, focusing on text or fine details in the center of the screen.
- Check focus: Adjust the focus ring while displaying a test pattern with fine text.
- Stabilize mount: Tighten all screws and add vibration-dampening pads if needed.
- Clean lens: Remove dust or smudges that scatter light and reduce sharpness.
Solving Color Banding and Posterization
Color banding appears as visible steps in smooth gradients like skies or shadows. This is often caused by low bit-depth processing or incorrect HDMI settings. Ensure your source device is set to output 10-bit or 12-bit color depth, not 8-bit, for smoother gradient transitions.
Disable any “smooth gradation” or “noise reduction” settings in your projector’s menu. These processing features often introduce more artifacts than they remove. If banding persists, check that your HDMI cable supports the required bandwidth for 4K HDR content at 10-bit color depth.
| Problem | Likely Cause | Quick Fix |
|---|---|---|
| Blurry Image | Dirty lens or vibration | Clean lens and stabilize mount |
| Color Banding | 8-bit output or bad cable | Set source to 10-bit color |
| Washed Out Blacks | Ambient light or wrong brightness | Darken room and recalibrate |
| Rainbow Effect (DLP) | Color wheel speed | Increase brightness or use different model |
Optimizing HDR and Wide Color Gamut Settings for Projectors
HDR (High Dynamic Range) content can look stunning on a projector, but it requires careful setup. Unlike TVs, projectors struggle to achieve the peak brightness needed for proper HDR tone mapping. Correctly configuring these settings is vital to improve projector picture quality at home with HDR movies and games.
Understanding HDR Tone Mapping for Projectors
Most projectors cannot reach the 1,000+ nits of brightness that HDR content is mastered for. Tone mapping is the process of compressing that wide brightness range to fit your projector’s capabilities. A good tone mapping algorithm preserves highlight details without crushing shadow information, creating a natural-looking image.
- Dynamic Tone Mapping: Analyzes each scene and adjusts brightness frame-by-frame for optimal results.
- Static Tone Mapping: Uses a single setting for the entire movie; less accurate but simpler.
- HDR10+ and Dolby Vision: Dynamic metadata formats that provide scene-by-scene instructions for better HDR.
Calibrating HDR Brightness and Contrast Specifically
Start by setting your projector to its HDR picture mode, which often unlocks additional brightness. Adjust the HDR brightness (sometimes called “HDR slider” or “dynamic range”) so that specular highlights like sunlight or explosions appear bright but not clipped. Reduce the setting if you see white areas losing all detail.
Next, check the color gamut setting and ensure it is set to “Wide” or “BT.2020” for HDR content. This unlocks the wider color palette that HDR is known for, producing richer reds, greens, and blues. Finally, disable any “HDR brightness boost” features that can introduce noise and artifacts.
| HDR Feature | Purpose | Recommendation |
|---|---|---|
| Tone Mapping | Compresses brightness range | Use Dynamic if available |
| HDR Brightness Slider | Adjusts peak white level | Reduce until highlights retain detail |
| Color Gamut | Unlocks wider colors | Set to Wide or BT.2020 |
| Noise Reduction | Removes grain | Disable for HDR content |
Conclusion: Master Your Home Theater and Improve Projector Picture Quality Today
You now have a complete toolkit to improve projector picture quality at home using calibration, lighting control, and proper source equipment. These proven methods work with any projector, from budget models to high-end cinema machines. Small adjustments can yield dramatic visual improvements you will notice immediately.
The single most impactful step is calibrating your brightness and contrast using test patterns. This free fix alone eliminates washed-out blacks and crushed shadows for a dramatically better image. Start with the basics today and work your way through each section for the best results.
Do not wait to transform your viewing experience. Grab a free test pattern, adjust your room lighting, and unlock the true potential of your projector tonight. Your favorite movies and games have never looked better.
Frequently Asked Questions about Improving Projector Picture Quality
What is the single most important setting to improve projector picture quality?
The most impactful setting is the brightness (black level) control. Setting this correctly ensures black bars appear truly black instead of gray, which instantly improves perceived contrast. A poorly set brightness level ruins shadow detail and makes the entire image look washed out.
Use a black clipping test pattern to find the perfect balance. Lower brightness until the black bars disappear, then raise it slowly until the first few near-black steps become visible. This single adjustment transforms the depth and realism of your image more than any other setting.
How to improve projector picture quality without spending money?
You can dramatically improve picture quality for free by calibrating your settings. Switch your projector to “Cinema” or “Movie” mode to disable overly bright, inaccurate presets. Then adjust brightness, contrast, sharpness, and color temperature using free online test patterns.
Controlling ambient light is another zero-cost upgrade. Close curtains, turn off overhead lights, and paint walls a darker color if possible. These environmental changes reduce light reflection on the screen, boosting contrast and color saturation without spending a penny.
Why does my projector picture look washed out during the day?
A washed-out daytime image is almost always caused by ambient light overwhelming the projector’s brightness. Projectors rely on a dark room to maintain contrast, unlike TVs that produce their own light. Sunlight or room lights wash out blacks and reduce color saturation significantly.
Install blackout curtains or blinds to block external light completely. If that is not possible, consider an ambient light rejecting (ALR) screen that reflects projector light toward you while absorbing ambient light from other angles. This solution preserves contrast even in bright rooms.
What is the best way to clean a projector lens safely?
Use a microfiber cloth designed for optics, never paper towels or tissues that can scratch the lens. Apply a small amount of specialized lens cleaning solution to the cloth, not directly to the lens. Gently wipe in a circular motion from the center outward.
Avoid using household glass cleaners or water, as they can damage the lens coating. For stubborn smudges, breathe lightly on the lens to create condensation before wiping. Clean your lens every 2-3 months or whenever you notice reduced sharpness or haze.
How often should I replace my projector’s lamp or bulb?
Projector lamps typically last between 2,000 and 5,000 hours depending on the model and brightness mode used. As the lamp ages, it naturally dims and shifts color temperature, reducing picture quality. Replace the lamp when it reaches 80% of its rated life for best performance.
Signs that a lamp needs replacement include noticeably dimmer image, yellow or green tint, and flickering. Always use genuine OEM replacement lamps, not cheap third-party alternatives. A fresh lamp restores peak brightness and color accuracy immediately.
Can a better HDMI cable really improve projector picture quality?
Yes, a certified Ultra High Speed HDMI cable ensures stable transmission of 4K HDR signals. A faulty or underspecced cable causes random black screens, sparkles, and color banding that ruin the viewing experience. Upgrading eliminates these artifacts and ensures consistent performance.
However, a better cable will not improve a perfectly working existing setup. If you are not experiencing signal dropouts or visual noise, your current cable is sufficient. Only upgrade if you are moving to 4K HDR, higher refresh rates, or longer cable runs that require better shielding.
What is the difference between digital keystone and lens shift for image quality?
Lens shift is an optical adjustment that moves the lens physically to reposition the image without degrading quality. Digital keystone correction electronically warps the image, compressing pixels and introducing artifacts. Lens shift preserves full resolution and sharpness, while keystone reduces both.
Always use optical lens shift and zoom for perfect image geometry. If your projector lacks lens shift, mount it perfectly centered and perpendicular to the screen. Avoid digital keystone correction entirely if you want the sharpest, most detailed picture possible.
How to improve projector picture quality for gaming with low input lag?
Enable your projector’s game mode to reduce input lag by disabling unnecessary video processing. This mode typically turns off motion smoothing, noise reduction, and frame interpolation. The trade-off is slightly reduced picture processing, but much faster response times.
For the best gaming experience, also ensure your HDMI cable supports the required bandwidth for your console or PC. Set your source device to output at the projector’s native resolution for the sharpest image. Disable HDR if your projector struggles with brightness, as it can increase input lag further.
Can a Projector Get a Virus?why you need to know
This website is a participant in the Amazon Services LLC Associates Program, an affiliate advertising program designed to provide a means for us to earn fees by linking to Amazon.com and affiliated sites.