
This website is a participant in the Amazon Services LLC Associates Program, an affiliate advertising program designed to provide a means for us to earn fees by linking to Amazon.com and affiliated sites.
Transform a blank wall into a stunning, realistic window in minutes. Learning how to do the fake window projector is the easiest way to add depth and light to any dark room. This complete guide covers the best projectors, screen types, and setup tricks.
You will discover proven methods to create a convincing illusion that fools the eye. We reveal expert tips on positioning, brightness control, and image selection for maximum realism. Keep reading to master this simple home upgrade.
Best Fake Window Projectors for Realistic Illusions
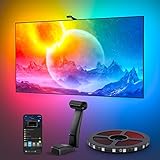
Govee DreamView T1 RGBIC – Best Overall Choice
This projector creates stunning window effects with RGBIC technology for vibrant, natural colors. It features a 2,000-lumen output that works well in dim rooms. Best use case: creating a sunlit garden window illusion in basement bedrooms or windowless offices.
- Govee Patented Envisual Technology: Upgraded dual cameras provide more…
- Unlimited TV Content Compatibility: Govee TV LED backlights adjust in real…
- DreamView Light Show: The DreamView feature takes the Govee TV LED…
Nebula by Anker Mars II Pro – Best Brightness Option
With 500 ANSI lumens and auto-focus, this portable projector delivers crisp, bright images even with ambient light. Its built-in battery runs for 3 hours. Ideal for renters who want a temporary fake window setup without permanent installation.
- Flippable Audio Magic: Rotate the dual 10W Dolby Audio speakers 90° side…
- True Brightness, Real Clarity: Enjoy lifelike details with TÜV‑certified…
- Designed for Consistent Viewing: All‑glass lenses and fully sealed…
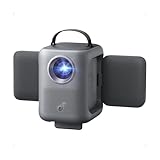
ViewSonic M1 Mini Plus – Best Compact Design
This ultra-portable projector fits in a pocket but projects clear window scenes up to 100 inches. Its LED light source lasts 30,000 hours. Best for small spaces like studio apartments where you need a discreet, space-saving fake window solution.

- Smart LED Portable Projector: WVGA (854x480p) resolution with a 1.2 throw…
- Vibrant Colors: SuperColor technology delivers a wide color gamut and…
- Wireless Connectivity & Premium Sound: Stream content via Wi-Fi and enjoy…
How to Set Up a Fake Window Projector: Step-by-Step Guide
Creating a convincing illusion requires the right preparation and technique. Follow these proven steps to achieve a professional-looking fake window in under 30 minutes.
Choosing the Perfect Wall Location
Select a wall that receives no direct sunlight to prevent image washout. The ideal spot is a blank, light-colored surface free from texture or obstructions. Measure your available space to ensure your projector’s throw ratio fits the desired window size.
Selecting the Right Window Image
Your image choice determines the realism of the effect. Use high-resolution photos or videos shot at eye level for maximum believability.
- Nature scenes: Gardens, forests, or oceans create calming depth
- Urban views: City skylines add architectural interest to modern spaces
- Weather effects: Rain or snow loops add dynamic realism
Positioning and Aligning the Projector
Place the projector on a stable surface at the same height as the intended window center. Angle it slightly downward to avoid ceiling glare. Use the keystone correction feature to square the image edges perfectly against your wall or a physical window frame.
Optimizing Brightness and Focus
Dim the room lights to at least 50% for the best effect. Adjust the projector’s brightness to match the image content—daytime scenes need higher output than night views. Manually focus the lens until individual leaves or bricks appear sharp and crisp.
Fake Window Projector Screen Options: DIY vs. Professional
The surface you project onto dramatically impacts the final illusion quality. Choosing between a DIY solution and a professional screen depends on your budget and desired realism.
Using a Blank Wall as Your Projection Surface
A smooth, matte white wall is the simplest and cheapest option. Paint the wall with high-gain projector paint to boost brightness by up to 50%. This method works best for permanent installations where you want a seamless, frameless look.
Installing a Physical Window Frame
Adding a real window frame around the projected image creates an astonishingly realistic effect. Purchase a lightweight MDF or foam frame painted white or black. Mount it directly on the wall, then align your projector to fill the opening perfectly.
- Depth trick: Add a window sill for extra realism
- Light control: Install blackout curtains around the frame
- Scale: Use standard window sizes like 36×48 inches
Choosing Retractable Projector Screens
For renters or temporary setups, a retractable screen offers flexibility without wall damage. Look for a tensioned, matte white screen that remains flat and wrinkle-free. These screens roll up when not in use, hiding the fake window completely.
| Screen Type | Cost | Realism | Installation Time |
|---|---|---|---|
| Blank wall | $0-50 | Medium | 15 minutes |
| Physical frame | $30-100 | High | 1 hour |
| Retractable screen | $100-300 | Very High | 30 minutes |
Best Content Sources for Fake Window Projectors
The image or video you project is the soul of your fake window illusion. Using low-resolution or poorly composed content instantly breaks the spell.
Downloading High-Quality Window Videos
Specialized websites offer loopable videos designed specifically for fake window projectors. These clips include natural motion like swaying trees, passing clouds, or falling rain. Look for 4K resolution content shot at 30 frames per second for smooth playback.
- YouTube: Search for “fake window video loops” for free options
- Stock sites: Pexels and Pixabay offer royalty-free nature clips
- Paid libraries: Envato Elements provides professional-grade scenes
Creating Custom Images with Editing Tools
For a truly unique window, take your own photos or edit existing ones. Use Photoshop or free tools like GIMP to crop images to standard window aspect ratios like 4:3 or 16:9. Adjust the brightness and contrast to match the ambient light in your room.
Using Streaming Services for Dynamic Views
Some streaming platforms offer live feeds of real locations that update naturally. Connect a streaming stick or smart TV dongle to your projector’s HDMI port. Play live nature cams from YouTube or services like EarthCam for ever-changing, realistic outdoor views.
| Content Type | Realism Level | Cost | Setup Complexity |
|---|---|---|---|
| Downloaded video loops | High | Free – $20 | Low |
| Custom edited photos | Medium | Free | Medium |
| Live streaming feeds | Very High | $5-15/month | Medium |
Troubleshooting Common Fake Window Projector Issues
Even with perfect setup, you may encounter problems that ruin the illusion. Here is how to fix the most frequent issues quickly.
Fixing Blurry or Out-of-Focus Images
Blurry images usually stem from incorrect projector placement or dirty lenses. First, clean the lens with a microfiber cloth to remove dust. Then, adjust the manual focus ring until edges are sharp. If the problem persists, move the projector closer to the wall to reduce the image size.
Solving Image Distortion and Keystone Problems
When the projected window appears trapezoidal instead of rectangular, use the keystone correction settings. Most projectors offer vertical and horizontal keystone adjustment sliders. For best results, position the projector directly perpendicular to the wall to minimize the need for digital correction.
- Check surface: Ensure the wall is perfectly flat
- Use 4-corner correction: Advanced projectors allow individual corner adjustments
- Reduce angle: Lower the projector tilt to under 15 degrees
Dealing with Insufficient Brightness
A dim projection fails to convince anyone it is a real window. Increase the projector’s brightness and contrast settings to maximum. Close all curtains and turn off overhead lights. If the image remains weak, consider upgrading to a projector with at least 3,000 lumens.
| Common Issue | Likely Cause | Quick Fix | Time to Resolve |
|---|---|---|---|
| Blurry image | Dirty lens or wrong focus | Clean lens and refocus | 2 minutes |
| Distorted shape | Angled projector placement | Use keystone correction | 5 minutes |
| Low brightness | Ambient light interference | Darken the room fully | 1 minute |
Enhancing Realism: Advanced Fake Window Projector Techniques
Once the basic setup is working, you can elevate the illusion to near-perfect realism. These advanced techniques will fool even the most observant guests.
Adding Ambient Lighting for Depth
Mimic natural sunlight by placing smart LED light strips around the window frame. Sync the light color and temperature to match the projected scene—warm orange for sunsets, cool blue for overcast days. This creates a convincing glow that spills into the room.
Incorporating Sound Effects for Immersion
Audio completes the sensory experience of a real window. Use a small Bluetooth speaker hidden behind the frame to play ambient nature sounds like birdsong, rain, or city traffic. Loop the audio to match the duration of your projected video for seamless playback.
- Birdsong: Pairs well with garden or forest scenes
- Gentle rain: Perfect for moody, overcast window views
- Distant traffic: Adds realism to urban cityscapes
Using Motion Sensors for Dynamic Effects
Make your fake window interactive with motion-activated technology. Connect a PIR motion sensor to a smart plug controlling the projector. When someone walks by, the scene could switch from day to night, or a curtain could appear to blow in the breeze.
| Advanced Technique | Equipment Needed | Difficulty Level | Cost |
|---|---|---|---|
| Ambient lighting sync | Smart LED strips | Easy | $20-50 |
| Sound effects | Bluetooth speaker | Easy | $15-40 |
| Motion sensors | PIR sensor + smart plug | Medium | $25-60 |
Fake Window Projector Budget Breakdown: Cost vs. Quality
Creating a convincing fake window can cost anywhere from $50 to $500. Understanding where to invest your money ensures the best results for your budget.
Budget Setup Under $100
A basic projector under $80 paired with free YouTube video loops can create a passable illusion. Use a blank wall and a simple cardboard frame for structure. This option works for temporary setups or testing the concept before committing more money.
- Projector: $50-80 (480p resolution, 1,000 lumens)
- Content: Free (YouTube loops)
- Frame: $5 (cardboard and tape)
- Total: $55-85
Mid-Range Setup Under $300
Invest in a 720p projector with 2,500 lumens for noticeably sharper images. Add a lightweight MDF window frame and a small Bluetooth speaker for sound. This is the sweet spot for most homeowners wanting convincing realism.
- Projector: $150-200 (720p, 2,500 lumens)
- Content: $10-20 (HD video loops)
- Frame: $30-50 (painted MDF)
- Speaker: $20-30 (Bluetooth)
- Total: $210-300
Premium Setup Over $400
A 1080p or 4K projector with 3,000+ lumens delivers stunning, photo-realistic images. Combine this with a professional retractable screen, smart LED strips, and live streaming content for the ultimate illusion.
| Budget Tier | Total Cost | Resolution | Realism Level |
|---|---|---|---|
| Budget | $55-85 | 480p | Low |
| Mid-range | $210-300 | 720p | Medium-High |
| Premium | $400-500+ | 1080p/4K | Very High |
Safety Considerations for Fake Window Projector Setups
While creating a fake window is a fun project, safety should never be overlooked. Proper setup prevents electrical hazards, fire risks, and eye strain.
Preventing Projector Overheating
Projectors generate significant heat during extended use. Ensure at least 6 inches of clearance around all ventilation grilles. Never place the projector on soft surfaces like beds or carpets that can block airflow and cause overheating.
Managing Cable Safety and Trip Hazards
Power cables and HDMI cords create tripping risks in high-traffic areas. Use cable management raceways to secure cords along baseboards. For permanent setups, consider hiring an electrician to install a dedicated outlet near the projector location.
- Use surge protectors: Protect expensive projector equipment from power spikes
- Secure loose cables: Use adhesive clips or cable sleeves
- Avoid extension cords: Plug directly into wall outlets when possible
Protecting Eyes from Direct Light Exposure
Staring directly into a projector lens can cause temporary eye discomfort. Position the projector above eye level or use a ceiling mount. Never allow children to look directly into the beam, as their eyes are more sensitive to bright light.
| Safety Concern | Risk Level | Prevention Method | Cost |
|---|---|---|---|
| Overheating | Medium | Proper ventilation | Free |
| Tripping hazards | High | Cable management | $10-30 |
| Eye strain | Low | Proper positioning | Free |
Conclusion: Mastering the Fake Window Projector
Learning how to do the fake window projector transforms dark, windowless rooms into bright, inviting spaces. With the right equipment, content, and placement, anyone can create a convincing illusion.
Start small with a budget setup and upgrade as needed. Prioritize image quality and proper positioning for the most realistic effect. Your fake window can change how you experience your home.
Now it is your turn. Choose your projector, pick a scene, and bring light to that dark corner today.
Frequently Asked Questions about the Fake Window Projector
What is a fake window projector and how does it work?
A fake window projector is a standard video projector used to display realistic window scenes on a wall. It works by projecting high-resolution images or videos of outdoor views onto a blank surface.
The projector is typically paired with a physical frame to mimic a real window. This creates the illusion of looking outside, adding depth and natural light to windowless rooms.
Can I use any projector for a fake window effect?
Yes, most projectors can create a fake window effect, but some perform better than others. Look for a model with at least 2,000 lumens for daytime scenes and 720p resolution for sharp images.
Short-throw projectors are ideal because they can create large images from close distances. Portable pico projectors work well for small, temporary setups in tight spaces.
What is the best resolution for a realistic fake window?
1080p (Full HD) resolution is the best choice for convincing fake window illusions. It provides enough detail for leaves, bricks, and distant objects to appear sharp and natural.
4K projectors offer even more realism but cost significantly more. Avoid 480p projectors as the image will appear pixelated and break the illusion up close.
How do I hide the projector from view?
Mount the projector on a ceiling bracket directly above the fake window frame. Paint the projector casing to match your ceiling color for seamless camouflage.
Alternatively, place the projector on a high shelf behind a decorative plant or book. For the cleanest look, build a small soffit or false beam to conceal the unit entirely.
Can I use a fake window projector in a room with windows?
Yes, fake window projectors work well even in rooms with real windows. They are excellent for adding a second view or filling a dark corner that real windows cannot reach.
Use the projector to display a complementary scene, like a garden view opposite a city-facing real window. This creates balanced, immersive natural light throughout the entire room.
How long can I run a fake window projector safely?
Most modern LED projectors can run safely for 8 to 12 hours continuously without issues. Laser projectors last even longer, often operating for 20,000 to 30,000 hours total.
Always check your projector’s manual for recommended usage limits. Ensure proper ventilation and clean the air filters regularly to prevent overheating during extended sessions.
What is the best way to project a fake window without a frame?
Use black electrical tape or painter’s tape to create a window outline directly on the wall. This simple trick defines the edges and helps the eye accept the illusion.
For a more polished look, paint a window-shaped rectangle in matte black or dark gray. This creates a shadow effect that makes the projected image appear recessed like a real window.
Why does my fake window look washed out during the day?
Ambient light is the most common cause of a washed-out fake window projection. Close curtains, blinds, or blackout shades to reduce competing light in the room.
If the image remains dim, increase the projector’s brightness setting to maximum. For permanent daytime use, invest in a projector with 3,000 lumens or higher specifically designed for ambient light conditions.
This website is a participant in the Amazon Services LLC Associates Program, an affiliate advertising program designed to provide a means for us to earn fees by linking to Amazon.com and affiliated sites.