
This website is a participant in the Amazon Services LLC Associates Program, an affiliate advertising program designed to provide a means for us to earn fees by linking to Amazon.com and affiliated sites.
A projector zoom lens adapter helps adjust a projector’s image size and throw range when the standard lens cannot provide the flexibility your setup requires. Whether you are building a home theater, classroom display, conference room, or large-screen projection system, the right adapter can make positioning and image sizing much easier.
Projector lenses are not universally interchangeable, however, so compatibility is one of the most important factors to consider before buying an adapter. The projector model, lens mount, optical design, throw ratio, image size, and available adjustment range can all affect whether an adapter will work properly.
Understanding how a projector zoom lens adapter functions can also help prevent common problems such as blurry images, distorted edges, vignetting, focus difficulties, or an image that cannot reach the desired screen size. In this guide, you will learn what these adapters do, how to choose one, how installation works, and how to troubleshoot common issues.
Best for Projector Zoom Lens Adapter
Because projector lens adapters are highly model-specific, the safest recommendations are compatible lens-and-adapter systems rather than generic universal adapters. Manufacturers such as Barco, Panasonic, and Epson publish compatibility information for their interchangeable lenses and mounts.
Barco R9801410 Lens Adapter
Barco’s R9801410 Lens Adapter is designed for mounting compatible third-party TLD lenses on supported Barco projectors. It is particularly useful for professional projection systems requiring different throw options.

Why it’s a pick: It provides a manufacturer-documented mounting solution for numerous Barco projector families, making compatibility easier to verify before installation.
Panasonic ET-D3QW300 Zoom Lens
The Panasonic ET-D3QW300 is an interchangeable zoom lens for the PT-RQ50K, offering a native 4K throw-ratio range of 1.11–1.70:1.


Why it’s a pick: Its broad zoom range gives installers useful flexibility when projector placement and screen distance vary between installations.
Epson ELPLW04 Wide Zoom Lens
The Epson ELPLW04 Wide Zoom Lens is compatible with several Epson PowerLite Pro large-venue projectors and provides a 1.19–1.77:1 WUXGA throw-ratio range.
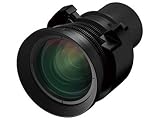
- Zoom Ratio: 1.0 – 1.4x
- Throw Ratio (4.3): 1.07 – 1.49, Throw Ratio (16:10): 1.04 – 1.46
Why it’s a pick: It combines interchangeable-lens flexibility with a useful wide-zoom range, making it practical when a projector must produce a large image from limited distances.
Important: These products are not interchangeable with every projector. Before purchasing a projector zoom lens adapter or lens, verify the exact projector model, lens mount, supported lens family, throw ratio, and screen distance using the manufacturer’s compatibility documentation. For example, Panasonic lists individual compatible lenses and their throw ratios, while Epson specifies the projector models supported by each lens.
What Is a Projector Zoom Lens Adapter and How Does It Work?
A projector zoom lens adapter is an optical mounting component that allows a compatible projector to use a particular zoom lens or lens system when the projector’s original lens arrangement does not provide the required mounting or positioning flexibility. Instead of changing the projector itself, the adapter provides the mechanical connection needed between the projector and a compatible lens.
The adapter does not normally create zoom capability on its own. The zoom range comes from the optical lens, while the adapter primarily provides the correct physical interface and positioning between the lens and projector. This distinction is important because a mounting adapter cannot turn a fixed-focus lens into a true zoom lens.
When correctly installed, the lens and projector work together to control the projected image. Adjusting the lens zoom changes the relationship between the image and the screen, allowing the projected picture to become larger or smaller without moving the projector.
Key factors include:
- Lens mount compatibility: The adapter must match the projector and supported lens system.
- Throw ratio: This determines the approximate projector-to-screen distance required for a particular image size.
- Zoom range: A wider range provides more flexibility for projector placement.
- Optical alignment: Incorrect mounting can cause focus problems, distortion, or uneven sharpness.
For this reason, always check the projector manufacturer’s compatibility documentation before purchasing an adapter or interchangeable zoom lens. A physically fitting adapter is not necessarily optically compatible.
How to Choose the Right Projector Zoom Lens Adapter for Your Projector
Choosing the right projector zoom lens adapter starts with identifying your exact projector model and its supported lens mount. Projector manufacturers often design lens systems for specific models or projector families, so an adapter that fits physically may still be unsuitable for the projector’s optical system.
Next, determine the throw distance and desired screen size. The lens’s throw ratio indicates how far the projector needs to be positioned from the screen to produce a particular image width. A zoom lens with a broader throw-ratio range can provide greater flexibility when the projector cannot be mounted at a precise distance.
Consider these important factors before purchasing:
- Projector model: Check the manufacturer’s official lens compatibility list.
- Lens mount: Confirm that the adapter and lens use the correct mounting system.
- Throw ratio: Match the lens range to your projector-to-screen distance.
- Image resolution: Make sure the lens supports the resolution and optical requirements of your projector.
- Image size: Calculate the required screen width before selecting the lens.
- Installation method: Check whether the adapter requires additional brackets, spacers, or professional alignment.
- Optical coverage: Verify that the lens can cover the projector’s image without unwanted vignetting.
It is also important to consider whether you actually need an adapter. Some projectors accept interchangeable lenses directly, while others require a dedicated mounting adapter or manufacturer-specific accessory. Checking the projector’s technical documentation first can prevent compatibility problems and unnecessary expense.
How to Install a Projector Zoom Lens Adapter Correctly
Installing a projector zoom lens adapter correctly requires careful alignment because even a small mounting error can affect focus, image geometry, or lens performance. Before beginning, turn off the projector, disconnect its power, and allow the unit and lens to cool completely.
Start by confirming that the adapter, lens, and projector are specifically compatible. Consult the projector manufacturer’s installation instructions because mounting procedures, locking mechanisms, screws, and alignment requirements can vary considerably between models.
A typical installation involves these steps:
- Prepare the projector: Place it on a stable surface and remove any protective lens cover or existing lens according to the manufacturer’s instructions.
- Inspect the mount: Check the adapter and projector mount for dust, damage, or foreign objects that could prevent proper seating.
- Attach the adapter: Position the adapter according to its alignment marks and secure it using the specified mounting hardware. Avoid forcing components into place.
- Install the zoom lens: Carefully insert or attach the compatible lens, then engage its locking mechanism.
- Check alignment: Confirm that the lens is seated evenly and securely before operating the projector.
- Adjust the image: Turn on the projector and use its approved focus, zoom, shift, and alignment controls to obtain a clear image.
Avoid touching optical surfaces with your fingers, as fingerprints and dust can reduce image quality. Also, do not overtighten screws because excessive pressure can damage mounting components.
After installation, project a test image and check the center and corners for consistent focus, brightness, and geometry. If the image is distorted, heavily blurred, or shows dark areas, switch off the projector and recheck compatibility and installation alignment rather than forcing further adjustments.
Common Projector Zoom Lens Adapter Problems and How to Fix Them
A projector zoom lens adapter can improve installation flexibility, but compatibility or alignment problems may cause blurry images, incorrect sizing, or uneven focus. Fortunately, many issues can be traced to a small number of common causes.
The lens does not fit correctly.
If the adapter will not seat properly, do not force it into position. Check the exact projector model, lens mount, adapter model, and manufacturer compatibility list. A similar-looking mount may use different dimensions or locking mechanisms.
The projected image is blurry.
First, adjust the projector’s focus and zoom controls. If only one side or corner remains blurry, the lens may not be correctly aligned, or the projector may be positioned outside the lens’s recommended operating range.
The image is too large or too small.
Check the lens’s throw ratio and compare it with the projector-to-screen distance. Zoom adjustment can provide some flexibility, but it cannot compensate for every installation distance.
Dark areas or vignetting appear.
Dark corners can indicate that the lens does not adequately cover the projector’s image area. Verify that the lens is specifically designed for your projector’s optical system.
The image looks distorted.
Check the projector’s physical position before relying heavily on digital correction. Keeping the projector appropriately aligned with the screen can help preserve image quality.
If troubleshooting does not resolve the problem, consult the lens and projector manufacturer’s installation documentation rather than modifying the adapter or lens yourself. This is especially important for professional projectors with precision optical mounts.
Projector Zoom Lens Adapter: Installation and Performance Tips
Getting the best performance from a projector zoom lens adapter involves more than simply attaching the lens and turning on the projector. Correct positioning, optical alignment, and regular maintenance can make a noticeable difference in image quality and operating reliability.
Start by keeping the projector and lens properly aligned with the screen. Whenever possible, position the projector so the lens faces the screen squarely rather than relying heavily on keystone correction or digital image adjustments. Excessive digital correction can change the projected image geometry and may reduce the usable image area.
The zoom setting also matters. Operating a zoom lens near the middle of its available range can provide useful positioning flexibility, although the recommended operating range depends on the specific lens. Always follow the manufacturer’s specifications rather than assuming every zoom lens performs identically.
For consistent performance:
- Keep the lens surface clean and free from fingerprints and dust.
- Check that the adapter remains firmly secured.
- Avoid moving the projector after precise lens alignment.
- Verify focus across the entire image, including the corners.
- Use the manufacturer’s recommended lens and adapter combinations.
- Inspect mounting components periodically for looseness or damage.
Environmental conditions can also affect projection. Excessive dust, heat, or poor ventilation may affect the projector and its optical components, so maintain adequate airflow around the equipment.
Finally, document the lens model, adapter model, projector model, and installation settings. Keeping these details together makes future maintenance, replacement, or troubleshooting much easier and helps ensure that replacement components remain compatible.
Conclusion
A projector zoom lens adapter can provide valuable flexibility when a projector needs a compatible interchangeable lens or a different mounting configuration. However, successful results depend on matching the adapter and lens to the exact projector model, mount, throw ratio, and optical requirements.
Before purchasing, verify manufacturer compatibility and calculate the required projector-to-screen distance. During installation, use the correct mounting procedure, protect the optical surfaces, and check focus and image alignment carefully.
If problems such as blurry corners, vignetting, incorrect image size, or distortion occur, check compatibility and physical alignment before attempting modifications. With the right combination of projector, adapter, and zoom lens, you can achieve a properly sized and clearly focused projected image while maintaining a reliable installation.
Frequently Asked Questions About Projector Zoom Lens Adapter
What is a projector zoom lens adapter?
A projector zoom lens adapter is a mounting component that allows a compatible projector to use a particular lens or lens system. The adapter provides the physical connection; the zoom function itself comes from the compatible zoom lens.
Can any projector use a zoom lens adapter?
No. Compatibility depends on the projector’s model, lens mount, optical system, and manufacturer specifications. Always check the official compatibility documentation before purchasing an adapter.
Does a zoom lens adapter increase image size?
The adapter itself does not normally increase image size. The lens’s zoom range and throw ratio determine the available image size at a particular projector-to-screen distance.
Why is my projected image blurry after installing an adapter?
Blurriness can result from incorrect focus, poor lens alignment, incompatible components, or positioning the projector outside the lens’s recommended throw range. Check the installation and manufacturer’s specifications first.
Can I use a third-party adapter?
Some projector systems support third-party adapters and lenses, while others require manufacturer-specific components. Confirm compatibility before installation because physical fit alone does not guarantee optical compatibility.
How do I know which zoom lens I need?
Start with your projector model, screen size, and projector-to-screen distance. Then compare those measurements with the compatible lenses and their published throw-ratio ranges.
How should I maintain a projector zoom lens adapter?
Keep the mounting area clean, avoid touching optical surfaces, periodically check mounting hardware, and follow the projector and lens manufacturer’s maintenance instructions. Proper handling helps preserve reliable alignment and image quality.
This website is a participant in the Amazon Services LLC Associates Program, an affiliate advertising program designed to provide a means for us to earn fees by linking to Amazon.com and affiliated sites.