
This website is a participant in the Amazon Services LLC Associates Program, an affiliate advertising program designed to provide a means for us to earn fees by linking to Amazon.com and affiliated sites.
A projector light art station is a creative workspace that uses a projector to display images, patterns, lettering, or designs onto a surface for drawing, tracing, painting, and other artistic activities. It makes creating detailed artwork easier by enlarging digital or printed references onto paper, canvas, walls, or other suitable materials.
Whether you are an artist, teacher, student, parent, or DIY enthusiast, setting up a projector light art station can open up exciting creative possibilities. Instead of struggling to copy complicated designs by hand, you can project an image onto your working surface and follow its outlines.
The best part is that you do not need an expensive professional studio to get started. With a suitable mini projector, a stable stand, proper lighting, and basic art supplies, you can create a functional workspace at home, in a classroom, or in an art studio.
In this guide, you will discover the essential equipment, recommended products, setup techniques, and practical tips for creating a projector light art station that makes artistic projects easier and more enjoyable.
Best for Projector Light Art Stations: Top 3 Recommended Products
Choosing the right projector is the foundation of a successful projector light art station. The ideal model should deliver clear images, reliable focusing, adjustable projection sizes, and convenient connectivity.
Here are three products worth considering for drawing, tracing, painting, and creative activities.
Caydo P3 Art Projector
Best for detailed artwork

- VIVID ART PROJECTION: Say goodbye to dark rooms. With 400 ANSI lumens of brightness, this P3 art projector delivers crisp, vivid images even during the day. The…
- EXCLUSIVE DRAWING ASSISTANT: Enhance your creative process with intuitive features including 0-200% zoom, 360° rotation, and 3×3 grids. Select from 3 background…
The Caydo P3 Art Projector is a strong option for artists who want a dedicated digital drawing projector. Its native 1080p resolution helps display detailed reference images, while its drawing features make enlarging and tracing designs more convenient.
Why I picked it: Its 1080p resolution, drawing app, grid tools, autofocus, and rotating base make it suitable for detailed artwork, canvas tracing, lettering, and creative projects.
Artograph Flare 500 HD
Best for portable art stations
The Artograph Flare 500 HD is designed with artists in mind. Its portable design and built-in grid patterns make it useful for transferring drawings, enlarging reference images, and working on different artistic surfaces.

- HD Art Projector: Perfect for drawing, mural layouts, and canvas work with image and grid projection in full HD or 4K
- Intuitive Creative Tools: Includes 36 built-in grid patterns in 3 colors with touchpad and remote control for dual projection and simplified setup
Why I picked it: Its portable construction, built-in grid patterns, cordless operation, and image enlargement features make it convenient for artists creating murals, canvas paintings, and temporary art stations.
Caydo P1 Art Projector
Best for beginners
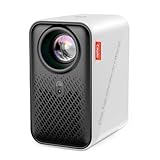
- ART PROJECTOR FOR DRAWING: Effortlessly project images, designs, and photos onto various surfaces, including walls, easels, blackboards, and whiteboards. Suitable…
- EXCLUSIVE DRAWING ASSISTANT: The built-in art software features tools like zooming, 360° rotation, and 3×3 grids. Our drawing app is designed to make your artistic…
The Caydo P1 Art Projector is a practical choice for beginners, students, and hobbyists who want an accessible way to project images for tracing. Its drawing application provides useful image adjustment and grid features.
Why I picked it: Its beginner-friendly drawing application, autofocus, keystone correction, wireless connectivity, and grid features simplify image projection for students, hobbyists, and occasional home art projects.
Related Products and Accessories for Your Art Station
Besides the projector itself, consider adding these accessories to create a more comfortable and functional workspace:
- Adjustable projector tripod: Keeps the projector stable and allows you to adjust its height and angle.
- Canvas boards: Provide a suitable surface for tracing and painting projected designs.
- Tracing paper: Helps transfer projected outlines onto other materials.
- USB-C or HDMI cables: Allow compatible projectors to connect to smartphones, tablets, and laptops.
- Drawing pencils and fine-tip markers: Help create accurate outlines before painting.
- Portable projection screen: Provides a clean surface for displaying artwork and reference images.
Buying tip: Before purchasing, check the projector’s native resolution, actual ANSI brightness, focusing capabilities, projection distance, and compatibility with your phone or computer. Advertised 4K support does not necessarily mean native 4K resolution.
How Does a Projector Light Art Station Work? (200–300 Words)
A projector light art station works by displaying a digital image onto a physical surface, allowing an artist to follow its outlines, shapes, colors, and details while creating artwork. The projector acts as a visual guide, making it easier to reproduce designs without drawing every element from scratch.
The process is relatively simple. First, you select an image or design on a smartphone, tablet, laptop, or USB-compatible device. The projector then displays that image onto your chosen working surface.
Understanding the Projection Process
A projector light art station uses several components to produce a clear image:
- Light source: LED or laser technology produces the light needed to display the image.
- Optical lens: Focuses the projected image onto the selected surface.
- Digital image source: Supplies the artwork, photograph, lettering, or pattern.
- Projection surface: Receives the image and provides a guide for tracing or painting.
- Adjustment controls: Allow you to change focus, image size, and positioning.
For example, if you want to paint a flower on a canvas, you can open a flower illustration on your phone and project it directly onto the canvas. Once the image is correctly positioned, you can trace the petals and outlines using a pencil.
What Makes It Useful for Art Projects?
The biggest advantage is accuracy. Projecting an image helps maintain proportions, spacing, and symmetry, especially when working with complicated illustrations.
It is also useful for:
- Creating large wall murals.
- Transferring lettering onto signs.
- Drawing portraits and landscapes.
- Designing classroom art activities.
- Creating decorative patterns on wood, fabric, and canvas.
However, remember that the projector does not create the artwork automatically. It provides a reference that you can interpret, trace, paint, or customize according to your creative ideas.
Essential Equipment Needed to Set Up a Projector Light Art Station
Creating a functional projector light art station requires more than just a projector. You need a few essential accessories to ensure your workspace is comfortable, stable, and suitable for different creative activities.
The good news is that most of these supplies are affordable and easy to find. You can start with basic equipment and gradually upgrade your station as your artistic projects become more advanced.
A Suitable Projector
The projector is the most important component. Choose one that offers clear image quality, adjustable focus, and sufficient brightness for your working environment.
For detailed tracing, a higher-resolution projector can help display fine lines and small design elements more clearly.
Adjustable Projector Stand
An adjustable stand allows you to position the projector at the correct height and angle. It also helps prevent unwanted movement while tracing.
Look for a sturdy tripod or overhead projector mount that supports your projector’s weight.
3. Art Surface or Canvas
Your projection surface determines the size and type of artwork you can create. Consider having several options available:
- Canvas boards for painting.
- Drawing paper for illustrations.
- Wooden boards for decorative projects.
- Large sheets of paper for murals.
- Fabric for custom textile designs.
Lighting and Workspace Accessories
A comfortable workspace improves accuracy and reduces eye strain. Consider using adjustable desk lighting, an ergonomic chair, and a spacious worktable.
You may also need pencils, paintbrushes, acrylic paints, markers, masking tape, and an eraser.
Digital Image Source
Finally, prepare a smartphone, tablet, or laptop containing the designs you want to project. Organize your reference images into folders so you can quickly access different patterns and illustrations.
Practical tip: Keep your projector cables organized and leave enough room around the equipment for ventilation.
How to Set Up a Projector Light Art Station Step by Step
Setting up a projector light art station is straightforward when you have the right equipment and a suitable workspace. Whether you are creating a small drawing corner at home or a larger classroom art station, following a few simple steps will help you achieve clear projections and accurate artwork.
Step 1: Choose a Suitable Workspace
Start by selecting a flat, stable surface with enough room for your projector, canvas, and art supplies. A quiet corner, spare room, classroom, or home studio can work well.
Choose an area where you can reduce unwanted light because excessive ambient lighting can make projected images difficult to see.
Step 2: Position Your Projector
Place your projector on a stable tripod, adjustable stand, or suitable table. Direct the lens toward your canvas or drawing surface.
Make sure the projector is positioned at a distance that produces an image large enough for your project.
Step 3: Connect Your Digital Device
Connect your smartphone, tablet, or laptop using a compatible HDMI cable, USB connection, or wireless screen-mirroring feature.
Open the image you want to trace and adjust its orientation and size.
Step 4: Adjust Focus and Alignment
Use the projector’s focus controls to sharpen the projected image. Correct any distortion using keystone correction if your model supports it.
Ensure the image is properly centered before beginning your artwork.
Step 5: Start Creating
Secure your canvas or paper using masking tape to prevent movement. Trace the main outlines with a pencil before adding colors, shading, and decorative details.
Pro tip: Take a photograph of your initial projection setup so you can recreate the same position for future projects.
Creative Projects You Can Make Using a Projector Light Art Station
A projector light art station opens up numerous creative possibilities for beginners, experienced artists, teachers, and DIY enthusiasts. By projecting digital designs onto different surfaces, you can experiment with artwork that would otherwise require considerable drawing time and precision.
Here are some exciting projects to try.
Canvas Painting and Portraits
Projecting photographs, illustrations, or reference images onto canvas makes it easier to reproduce proportions and important details. You can trace the outlines before adding acrylic paints, watercolors, or other artistic materials.
This technique is particularly helpful when creating portraits, landscapes, floral paintings, and abstract artwork.
DIY Wall Murals
If you enjoy decorating your home, use your projector light art station to create personalized wall murals. Project large illustrations, geometric patterns, inspirational quotes, or nature-inspired designs onto a wall.
Trace the outlines and fill them with your preferred paint colors.
Classroom Drawing Activities
Teachers can use projector art stations to make classroom activities more interactive. Children can project and trace animals, letters, numbers, cartoon-inspired shapes, and educational illustrations.
This approach encourages creativity while helping students develop drawing confidence.
Custom Signs and Lettering
Projectors are also useful for creating decorative signs, business displays, personalized wooden plaques, and event decorations.
You can enlarge text, adjust spacing, and trace lettering before painting or decorating the final surface.
Fabric and Craft Designs
Try projecting patterns onto suitable fabric surfaces to create custom textile designs, decorative pillow covers, or personalized craft projects.
Always test the material and marking tools first to avoid unwanted stains.
Creative tip: Start with simple outlines before attempting complicated illustrations. As your confidence improves, experiment with layered designs, different materials, and larger projection surfaces.
7. Conclusion: Create More with a Projector Light Art Station
A projector light art station is a practical and exciting way to explore creativity, improve drawing accuracy, and bring artistic ideas to life. With a suitable projector, adjustable stand, digital reference images, and basic art supplies, you can create a versatile workspace for painting, tracing, wall murals, lettering, and DIY decorations.
Whether you are a beginner, professional artist, teacher, or hobbyist, the right setup can make creative projects easier and more enjoyable. Start with essential equipment, experiment with different projection surfaces, and gradually expand your collection of art supplies.
Ultimately, a projector light art station is more than a drawing tool. It is a creative space where technology and imagination work together to turn everyday ideas into beautiful artwork.
Frequently Asked Questions About Projector Light Art Stations
What is a projector light art station?
A projector light art station is a creative workspace that uses a digital projector to display images, patterns, and designs onto surfaces such as canvas, paper, walls, and fabric. Artists use the projected images as guides for tracing, painting, and creating decorative artwork.
What is the best projector for an art station?
The best projector depends on your budget and artistic requirements. Options such as the Caydo P3 Art Projector, Artograph Flare 500 HD, and Caydo P1 Art Projector are worth researching. Compare their resolution, brightness, focusing capabilities, and drawing features before purchasing.
Can I use a mini projector for drawing and tracing?
Yes. A mini projector can work well for drawing and tracing, provided it produces sufficiently clear images and offers adjustable focus. However, check its brightness and native resolution because some inexpensive models struggle to display fine details.
Do I need a dark room for projector art?
A completely dark room is not necessary, but reduced ambient lighting improves image visibility. For the best tracing experience, avoid direct sunlight and bright overhead lighting.
Can I use my phone with a projector light art station?
Yes. Many projectors support smartphone connections through HDMI adapters, USB-C connections, or wireless screen mirroring. Compatibility depends on your phone and projector model.
What surfaces can I use for projector art?
You can project designs onto canvas, drawing paper, cardboard, wood, walls, and certain fabrics. Choose a relatively flat surface to maintain image clarity and accurate proportions.
Is a projector art station suitable for beginners?
Absolutely! Beginners can start with simple shapes, lettering, flowers, and basic illustrations. With practice, they can progress to portraits, murals, and more detailed artistic projects.
This website is a participant in the Amazon Services LLC Associates Program, an affiliate advertising program designed to provide a means for us to earn fees by linking to Amazon.com and affiliated sites.