
This website is a participant in the Amazon Services LLC Associates Program, an affiliate advertising program designed to provide a means for us to earn fees by linking to Amazon.com and affiliated sites.
Finding the best outdoor waterproof projector enclosure is essential for protecting your investment from the elements. This complete guide reveals the top-rated solutions for weatherproof protection.
An outdoor projector enclosure shields your device from rain, dust, and temperature extremes. It enables year-round backyard movie nights without risking costly damage to your equipment.
You will learn how to choose a durable enclosure, compare top models, and get expert tips for secure installation. Let’s explore the ultimate protection for your outdoor entertainment setup.
Best Outdoor Waterproof Projector Enclosures for Weatherproof Protection – Detailed Comparison
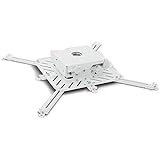
B-Tech BT-Projector-Enclosure – Best Overall Choice
The B-Tech BT-Projector-Enclosure offers superior all-weather protection with its IP66-rated, heavy-duty ABS plastic construction. It features a clear acrylic front panel for optimal image quality and includes a universal mounting bracket. This model is the best option for most users seeking reliable, year-round protection.

- [ Officially-Licensed APP – No Extra Devices Needed ] – VISSPL Mini Projector: Hollywood in the palm of your hand. Enjoy it anywhere. Pre-installed with…
- [ Instant Clarity, Precision Aligned ] – The smart projector 4K combines automatic fast focus and 6D keystone correction technology, delivering perfect picture…
Peerless-AV Weatherproof Projector Shelter (PRG-UNV) – Best for Permanent Installation
Designed for permanent outdoor setups, the Peerless-AV PRG-UNV is a robust, lockable aluminum enclosure with integrated cooling fans and cable ports. Its corrosion-resistant powder-coated finish makes it ideal for commercial installations or backyard theaters requiring maximum security and durability.

- Safeguards and shields most projectors
- Top tray design with interlocking feature suits retrofit applications
Chief CPAE1K Projector Enclosure – Best Premium Universal Fit
The Chief CPAE1K is a high-end, universal enclosure known for its excellent thermal management system and sleek design. It accommodates most projector sizes and is recommended for users who prioritize advanced climate control to protect expensive projector equipment from heat and humidity.
Key Features to Look for in a Waterproof Projector Case
Choosing the right outdoor projector enclosure requires understanding critical protective features. Not all cases offer the same level of weatherproofing or functionality. This section breaks down the essential specifications for durable outdoor projector protection.
Ingress Protection (IP) Rating and Build Material
The IP rating is the most important specification for a waterproof projector box. It defines the level of protection against solids and liquids. A higher second digit indicates better water resistance.
- IP65 Rating: Dust-tight and protected against water jets. Suitable for most backyard setups.
- IP66 Rating: Dust-tight and protected against powerful water jets. Ideal for areas with heavy rain.
- Build Material: Look for UV-resistant ABS plastic, polycarbonate, or powder-coated aluminum. These materials resist cracking, fading, and corrosion from sun exposure.
Thermal Management and Ventilation Systems
Projectors generate significant heat, and a sealed enclosure can cause overheating. Effective thermal management is non-negotiable for safe, long-term operation outdoors.
A proper system uses passive vents with dust filters or active cooling fans. Some premium models include thermostatically controlled fans that activate only when needed. This prevents internal condensation while maintaining a safe operating temperature for your projector.
Installation and Compatibility Considerations
Ensure the enclosure is compatible with your specific projector model and mounting setup. Universal enclosures come with adjustable internal shelves or padding kits.
Check for key installation features before purchasing:
- Mounting Options: Integrated universal bracket, pole-mount compatibility, or wall-mount flanges.
- Cable Access: Sealed gland ports or pass-throughs for power and AV cables without compromising the seal.
- Access & Security: Front-hinged or removable door with a reliable latch and optional lock for security.
How to Install and Maintain Your Projector Weatherproof Enclosure
Proper installation and routine maintenance are crucial for maximizing the lifespan of your enclosure and projector. A correct setup ensures optimal performance and reliable weatherproof protection for years. Follow these expert guidelines for a secure installation and easy upkeep.
Step-by-Step Outdoor Projector Enclosure Installation
Begin by selecting a stable mounting location with a clear projection path. Ensure the surface can support the combined weight of the enclosure and projector. Follow this process for a secure installation.
- Pre-Assemble: Mount your projector on the internal bracket inside the enclosure first. Connect all necessary cables through the sealed ports.
- Secure the Enclosure: Attach the loaded enclosure to your wall, pole, or eave using the provided hardware. Use appropriate anchors for your wall type (brick, wood, siding).
- Final Adjustments: Power on the projector and make final focus, zoom, and keystone adjustments through the clear panel before fully sealing the unit.
Essential Maintenance for Long-Term Durability
Regular maintenance prevents minor issues from becoming major failures. A simple seasonal checklist keeps your protective case in top condition. This routine is key for permanent outdoor projector setups.
- Seasonal Inspection: Check seals, gaskets, and the clear panel for cracks or wear every three months. Look for any signs of water ingress or condensation inside.
- Clean Exterior & Lens: Gently wipe the exterior with a damp cloth to remove dirt and pollen. Clean the interior acrylic lens with a microfiber cloth to maintain image clarity.
- Ventilation Check: Ensure all filter mats on passive vents are clean. For active fan models, listen for proper operation and clear any obstructing debris.
Troubleshooting Common Protection Issues
Even the best enclosures can encounter problems. Quickly address these common issues to maintain your weatherproof barrier and projector safety.
Condensation Inside: This indicates inadequate ventilation or a failed seal. Ensure vents are not blocked and the unit is properly sealed after access.
Overheating Projector: Confirm cooling fans are working and intake/exhaust paths are clear. Avoid direct, all-day sun on the enclosure to reduce internal heat buildup.
DIY vs. Commercial Outdoor Projector Enclosures: A Detailed Comparison
Many enthusiasts consider building a DIY protective box to save money. Understanding the trade-offs between custom builds and commercial solutions is crucial. This comparison helps you decide which path offers the best protection for your specific needs and budget.
Benefits and Drawbacks of a DIY Protective Box
A DIY projector enclosure can be cost-effective and tailored to odd-sized equipment. It allows for creative integration into unique outdoor spaces. However, achieving true weatherproofing is challenging without expertise.
- Pros: Lower initial cost, fully customizable dimensions, personal satisfaction from building it yourself.
- Cons: Risk of inadequate sealing leading to water damage, poor thermal management causing overheating, time-consuming construction, and often less professional appearance.
Advantages of Professional Weatherproof Housing
Commercial enclosures are engineered for reliability and tested to meet specific IP ratings. They provide peace of mind with proven designs and often include warranties. This makes them the safer choice for valuable projector equipment.
These units feature precision-molded seals, integrated cable glands, and designed airflow paths. Manufacturers use materials specifically chosen for UV resistance and durability in harsh outdoor climates. This level of engineering is difficult to replicate in a home workshop.
Cost Analysis and Long-Term Value
While the upfront cost of a commercial unit is higher, its long-term value often surpasses a DIY option. Consider total cost of ownership, not just the initial purchase price.
| Factor | DIY Enclosure | Commercial Enclosure |
|---|---|---|
| Initial Cost | Lower ($50 – $150) | Higher ($200 – $600+) |
| Weatherproof Guarantee | Uncertain, self-tested | Certified (IP Rating) |
| Projector Safety & Warranty | Risk of voiding projector warranty | Professional protection |
| Resale Value | Low to none | Retains some value |
Optimizing Your Outdoor Viewing Experience with an Enclosure
A waterproof case protects your projector, but optimizing the entire setup enhances your viewing pleasure. Proper placement, screen choice, and audio integration are key. These pro tips will transform your protected projector into a stunning outdoor theater.
Ideal Placement and Screen Pairing for Protected Projectors
Place your enclosure on a stable surface with a direct, unobstructed line to the screen. Consider the projector’s throw ratio to determine the ideal distance. This ensures a bright, focused image from within the protective housing.
Pair your setup with a high-quality outdoor screen. Your options include:
- Fixed Frame Screens: Best for permanent installations; provide a perfectly flat surface.
- Inflatable Screens: Great for portability and large sizes; easy to set up and store.
- DIY Options: A smooth, white wall or a taut, white spandex sheet can work well.
Managing Cables and Power for a Clean, Safe Setup
Exposed cables are a tripping hazard and can degrade your setup’s weather resistance. Plan for neat and safe cable management from the start. Use the sealed ports on your enclosure correctly.
- Use Outdoor-Rated Cables: Always run power and AV cables designed for outdoor use. They have thicker, UV-resistant jackets.
- Employ Conduit or Cable Protectors: Bundle cables together inside a flexible conduit. Use cable protectors where cords cross walkways.
- Connect to a GFCI Outlet: Plug everything into a Ground Fault Circuit Interrupter outlet. This is a critical safety measure for any outdoor electronics.
Enhancing Audio and Ambient Lighting Integration
Great video deserves great audio. Bluetooth speakers or a dedicated outdoor speaker system provide immersive sound. Position speakers near the seating area, not the projector, for the best effect.
Control ambient light to boost image quality. Strategically placed landscape lighting can illuminate paths without washing out your screen. For the best results, aim for total darkness in the viewing direction.
Frequently Asked Questions About Outdoor Projector Protection
Choosing and using a projector enclosure raises common questions for first-time buyers. This FAQ section provides clear, actionable answers based on expert advice. Get the clarity you need to make confident decisions about weatherproofing your setup.
Are All Outdoor Projector Enclosures Truly Waterproof?
Not all enclosures offer the same level of protection. The term “waterproof” is often used loosely. True protection is defined by a product’s Ingress Protection (IP) Rating.
- IP65/IP66 Rated: These are truly weatherproof for outdoor use, protecting against dust and powerful water jets.
- “Weather-Resistant” or “All-Weather”: These may only offer splash protection and are not suitable for permanent, exposed installation.
- Always Check: Look for the official IP rating in the product specifications, not just marketing claims on the box.
Can I Leave My Projector in the Enclosure Year-Round?
Yes, if you use a high-quality, commercially rated enclosure (IP65/IP66) designed for permanent installation. The enclosure must have proper thermal management to handle summer heat and winter cold.
For extreme climates, consider an enclosure with a thermostatically controlled heater for sub-freezing temperatures. Always perform seasonal maintenance checks to ensure seals and vents remain intact. This guarantees safe, year-round operation.
How Much Brightness Do I Lose Using a Protective Case?
A high-quality enclosure with an optical-grade acrylic front panel causes minimal brightness loss, typically 5-10%. The clarity of the panel is more important than thickness.
To compensate, you can:
- Choose a projector with higher lumens (add 500-1000 lumens to your target).
- Use a projection screen with a higher gain (1.1 to 1.3).
- Ensure the acrylic lens is kept impeccably clean on both sides.
What Size Enclosure Do I Need for My Projector Model?
Measure your projector’s dimensions (Width x Depth x Height) and add at least 2-3 inches of clearance on all sides. This space is crucial for airflow and heat dissipation.
Most manufacturers provide a compatibility chart. Universal enclosures list maximum internal dimensions. For odd-shaped projectors, an adjustable-shelf model offers the best fit and future-proofing.
Top Brands and Where to Buy Weatherproof Projector Housings
Selecting a reputable brand ensures quality, reliability, and access to customer support. The market offers several trusted manufacturers specializing in AV protection. Knowing where to shop helps you find the best deals and authentic products.
Leading Manufacturers of Quality Protective Enclosures
Several brands have established strong reputations in the professional and consumer AV markets. Their products are consistently well-reviewed for durability and performance.
- Chief: Known for premium, universal-fit enclosures with excellent thermal management. Ideal for high-end home and commercial installations.
- Peerless-AV: Offers robust, secure solutions often used in commercial digital signage. Their products feature durable aluminum construction.
- B-Tech (BTI): Provides a great balance of value and protection. Popular for residential use with reliable IP-rated plastic enclosures.
- Draper: A trusted name in projection screens that also manufactures compatible, high-quality protective housings.
Recommended Retailers for AV Protection Gear
Purchasing from authorized retailers guarantees you receive a genuine product with a valid warranty. It also provides access to expert advice and reliable customer service.
For the best shopping experience, consider these retailer types:
- Specialty AV Retailers: Sites like ProjectorScreen.com, AVOutlet, or B&H Photo Video offer vast selection and expert staff.
- Major Online Marketplaces: Amazon and eBay provide convenience and reviews, but verify the seller is an authorized dealer.
- Direct from Manufacturer: Buying from the brand’s own website often ensures the latest model and direct support.
Understanding Warranty and Support for Outdoor Gear
A strong warranty reflects the manufacturer’s confidence in their product. Scrutinize the warranty terms before purchasing, as they vary significantly.
| Brand/Consideration | Typical Warranty | Key Support Aspect |
|---|---|---|
| Chief | 5 Years | Comprehensive coverage, known for good customer service. |
| Peerless-AV | 3-5 Years | Strong commercial support and replacement parts availability. |
| General Tip | Check Fine Print | Ensure the warranty covers weather-related damage and not just manufacturing defects. |
Final Checklist Before Purchasing Your Projector Enclosure
Use this actionable checklist to ensure you select the perfect protective housing for your needs. It consolidates all critical factors into one simple guide. Avoid costly mistakes by verifying each point before you buy.
Essential Pre-Purchase Verification Steps
Do not rely solely on product photos or marketing descriptions. Conduct thorough research to confirm the enclosure’s specifications match your environment and equipment.
- Confirm IP Rating: Verify the official IP65 or IP66 rating is listed in the technical specs, not just in the title.
- Check Dimensions: Measure your projector and compare to the enclosure’s internal dimensions, ensuring adequate space for airflow.
- Review Mounting: Ensure the included bracket or mounting system is compatible with your intended location (wall, pole, ceiling).
Compatibility and Future-Proofing Considerations
Your AV setup may evolve. Choosing an enclosure that accommodates future changes protects your investment for years to come.
- Projector Upgrades: Select a universal enclosure slightly larger than your current model to fit potential future projectors.
- Cable Management: Ensure enough sealed cable ports for all current connections (HDMI, power, control) plus one extra.
- Accessory Space: If using a streaming stick or media player inside, confirm there is room for it on a shelf or mount.
Budgeting for Total Cost of Ownership
The purchase price is just one part of the total cost. Account for all necessary accessories and potential installation expenses from the start.
| Cost Category | What to Include | Estimated Range |
|---|---|---|
| Enclosure & Hardware | Unit price, mounting bracket, screws/anchors. | $200 – $600+ |
| Installation & Accessories | Outdoor-rated cables, conduit, GFCI outlet install (if needed). | $50 – $200 |
| Long-Term Upkeep | Replacement filter mats, seal lubricant, occasional cleaning. | $10 – $30/year |
Conclusion: Securing Your Outdoor Entertainment with the Best Protection
Investing in the best outdoor waterproof projector enclosure is essential for reliable, year-round viewing. It provides complete weatherproof protection against rain, dust, and temperature extremes. This safeguard lets you enjoy your backyard theater without worry.
Remember to prioritize certified IP ratings and proper ventilation in your choice. A quality enclosure is a small price for protecting a valuable projector. Your setup deserves professional-grade defense.
Use our detailed checklist to evaluate your options and make an informed purchase today. Start planning your perfect, protected outdoor movie nights with confidence.
With the right enclosure, your outdoor entertainment system will deliver stunning performances for many seasons to come.
Frequently Asked Questions about Outdoor Waterproof Projector Enclosures
What is the difference between weather-resistant and waterproof projector enclosures?
Weather-resistant enclosures offer basic protection against light splashes and dust. They are not designed for heavy rain or direct exposure. Waterproof enclosures have official IP65 or IP66 ratings, guaranteeing protection against powerful water jets and complete dust ingress.
For permanent outdoor installation, always choose a rated waterproof (IP65/IP66) enclosure. Weather-resistant cases are only suitable for temporary, covered setups where the projector will not face direct rainfall.
How do I install a cooling fan in my DIY projector enclosure?
Install computer case fans on opposite sides of the enclosure to create cross-ventilation. Use one fan as an intake and another as an exhaust. Ensure you use fans with ball bearings for quiet, long-lasting operation in an outdoor setting.
Seal the fan mounts with silicone and cover the intake with a fine mesh filter to prevent dust. Connect the fans to a power source separate from the projector’s circuit to avoid electrical interference.
Can I use an indoor projector outside with just an enclosure?
Yes, an enclosure allows you to use an indoor projector outside by providing necessary weatherproofing. However, indoor projectors often have lower brightness (lumens) compared to outdoor models. The enclosure’s acrylic panel will also reduce light output slightly.
For best results, choose an indoor projector with high brightness (3,000+ lumens) and ensure the enclosure has excellent ventilation to manage heat, as indoor models aren’t built for ambient temperature swings.
What should I do if I see condensation inside my waterproof case?
Condensation indicates a humidity imbalance, often from inadequate ventilation or a recent temperature change. First, power off the projector to prevent electrical damage. Leave the enclosure door open in a dry environment to let the moisture evaporate completely.
Before resealing, check that all ventilation filters are clean and unblocked. For persistent issues, consider adding silica gel desiccant packs inside the enclosure to absorb excess moisture passively.
Which is better for a projector enclosure: polycarbonate or acrylic lens?
Both materials are excellent, but they serve slightly different purposes. Acrylic offers superior optical clarity with minimal distortion, making it ideal for the front viewing panel. Polycarbonate is much more impact-resistant but can be prone to scratching.
A common professional solution is to use an optical-grade acrylic panel for the image path. Use polycarbonate or ABS plastic for the main body of the enclosure to achieve a blend of clarity and durability.
How often should I perform maintenance on a permanent outdoor enclosure?
Perform a basic visual inspection and cleaning every three months. Conduct a more thorough maintenance check at the start and end of your primary viewing season. This biannual schedule catches wear before it causes problems.
Key tasks include cleaning the acrylic lens, checking and lubricating door seals, clearing debris from vents, and ensuring all mounting hardware remains tight. This simple routine dramatically extends the life of the enclosure and projector.
What is the best way to run cables into a sealed projector housing?
Always use the pre-molded cable gland ports designed into the enclosure. These ports have rubber grommets that compress around your cables to create a watertight seal. Never drill your own holes, as this compromises the IP rating.
For multiple cables, group them together and use a single larger gland. Apply a dab of silicone sealant around the cable where it enters the gland for an extra layer of protection against driven rain.
Are expensive commercial enclosures worth it compared to budget models?
For protecting a valuable projector, yes. Commercial enclosures from reputable brands use higher-grade materials, have certified IP ratings, and include engineered thermal management. They also come with meaningful warranties that cover outdoor use.
Budget models often cut corners on seal quality, UV resistance, and cooling. The potential cost of replacing a water-damaged projector far exceeds the price difference between a budget and a premium enclosure.
This website is a participant in the Amazon Services LLC Associates Program, an affiliate advertising program designed to provide a means for us to earn fees by linking to Amazon.com and affiliated sites.