
This website is a participant in the Amazon Services LLC Associates Program, an affiliate advertising program designed to provide a means for us to earn fees by linking to Amazon.com and affiliated sites.
Digital projectors for artists are transformative tools for scaling and transferring artwork. They solve the age-old challenge of accurately enlarging sketches onto large canvases or walls. This guide unlocks their potential for painters, muralists, and illustrators.
Using a projector streamlines the initial drawing phase, saving immense time and preserving creative energy. It ensures perfect proportions and complex compositions are transferred flawlessly. You avoid the frustration of manual grid methods.
Our complete guide will help you choose the best projector and use it like a pro. You’ll learn key specs, setup techniques, and expert tips to integrate this tool into your artistic workflow seamlessly.
Best Digital Projectors for Artists – Detailed Comparison
ViewSonic M1+ Portable Projector – Best for Studio & Field Work
This ultra-portable LED projector is ideal for artists on the move. Its compact, battery-powered design allows you to project in any studio or on-location for murals. With 300 LED lumens, built-in Harman Kardon speakers, and multiple connectivity options, it balances performance with exceptional convenience for most artistic scaling tasks.

- Smart LED Portable Projector: WVGA (854x480p) resolution with a 1.2 throw ratio, 3-in-1 smart stand, and built-in battery
- Vibrant Colors: SuperColor technology delivers a wide color gamut and stunningly beautiful images.
Epson CO-FH02 1080p 3LCD Projector – Best for Color Accuracy
Artists prioritizing true-to-life color will love this model. Its advanced 3LCD technology delivers 100% RGB color for stunning, vibrant projections without distracting “rainbow effects.” With 3,000 lumens, it performs well in ambient light, making it perfect for detailed painting, illustration, and ensuring your transferred artwork matches your original color palette perfectly.
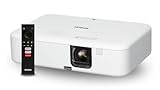
- Display Stunning Images up to 300″ — Full HD 1080p picture four times larger than a 75″ flat panel delivers an immersive experience for business presentations…
- Compact Design — Sleek, lightweight design easily fits in backpacks for easy portability on the go
Anker Nebula Mars 3 – Best Smart & Wireless Option
This all-in-one smart projector simplifies the workflow. It runs Android TV, allowing you to wirelessly cast images directly from your phone, tablet, or cloud storage. With 1080p resolution, 400 ANSI lumens, and a robust built-in battery, it eliminates cable clutter and is ideal for artists who frequently work from digital sketches and references on various devices.

- Immersive Outdoor Movies: With 1000 ANSI Lumens brightness, a max screen size of 200 inches, and 1080p resolution, you can enjoy a cinema-level movie experience…
- Enjoy Up to 5 Hours of Playtime Anywhere: Our exclusive RoamPower️ technology supports a 185Wh capacity, which lets you use Mars 3 as a power bank to charge smart…
How to Choose the Right Art Projector: Key Specifications
Selecting the perfect digital projector for your art requires understanding key technical specs. These features directly impact image quality, usability, and your final artwork’s accuracy. Focus on these core specifications to make an informed purchase.
Understanding Resolution and Image Clarity
Resolution is critical for projecting fine details from your sketches. Higher resolution means a sharper, more precise guide for your work. This prevents blurry lines that can compromise your painting or drawing.
- 1080p (Full HD): The ideal standard for most artists. It provides excellent detail for complex sketches and photographs.
- 720p (HD): A good budget-friendly option for simpler line art or larger murals where extreme detail is less critical.
- 4K: Offers exceptional detail for hyper-realistic work but is often an expensive overkill for basic transferring.
Brightness (Lumens) and Color Performance
Brightness determines if you can see the projection in your workspace. Color technology affects how faithfully your original palette is reproduced. These factors work together for a usable, true-to-life image.
Lumens measure light output. For art, aim for at least 2,000 lumens for a dim studio or 3,000+ for spaces with ambient light. For color, 3LCD projectors generally offer superior color accuracy and consistency over single-chip DLP models, which can sometimes show a “rainbow effect.”
Connectivity and Portability Factors
Consider how you’ll connect your devices and where you’ll use the projector. Modern artists need flexible input options. Portability is key for muralists or those with limited studio space.
- Essential Ports: Look for HDMI (for laptops, tablets) and USB (for flash drives or direct media playback).
- Wireless Capability: Projectors with Wi-Fi or Bluetooth allow cable-free casting from phones and tablets, streamlining your workflow.
- Weight & Power: A battery-powered, lightweight model (under 5 lbs) is ideal for location work, while a heavier plug-in model may suit a permanent studio.
Setting Up Your Art Projector: A Step-by-Step Guide
Proper setup is crucial for accurate scaling and distortion-free projection. A misaligned projector can warp your entire composition. Follow this professional process to ensure your artwork transfers perfectly every time.
Positioning for Perfect Scaling and Focus
Start by placing your projector on a stable, level surface opposite your canvas or wall. The distance determines the final image size. Use the projector’s zoom and focus rings to sharpen the image edges after positioning.
- Place Your Canvas: Secure your canvas or surface vertically.
- Calculate Distance: Move the projector back until the image fits your canvas dimensions.
- Fine-Tune Focus: Adjust the focus ring until lines are razor-sharp and clear.
Correcting Keystone and Image Distortion
Keystone distortion creates trapezoidal images when the projector isn’t perfectly perpendicular to the surface. This makes circles look oval and squares look skewed. Always correct this before tracing.
First, use the projector’s physical feet to make it as level as possible. Then, use the digital keystone correction feature sparingly to square the image. Avoid extreme digital correction, as it can slightly reduce image clarity.
Optimizing Your Digital File for Projection
The quality of your digital file dictates projection clarity. A pixelated image will result in a fuzzy, unusable guide. Prepare your files correctly for the best results.
- Use High-Resolution Images: Start with the highest resolution scan or photo of your sketch possible.
- Maximize Contrast: In an image editor, boost contrast and convert to black and white for clearer line definition.
- Choose the Right Format: Save your final file as a PNG or high-quality JPEG to maintain clarity when displayed.
Advanced Techniques and Creative Applications
Mastering basic projection opens doors to innovative artistic methods. These advanced techniques can enhance your workflow and inspire new creative directions. Move beyond simple tracing to unlock the full potential of your art projector.
Layering and Complex Composition Building
Use your projector to build intricate compositions through digital layering. This technique is perfect for complex scenes or combining multiple reference images. It provides unparalleled control over your final layout before any paint touches the canvas.
- Composite Sketches: Project and trace individual elements (a figure, a background) separately onto the same canvas to build a scene.
- Value Studies: Project a grayscale version of a reference photo to map out light and shadow areas accurately.
- Pattern Integration: Project detailed patterns or textures onto specific areas of a larger drawing for precise placement.
Working with Different Surfaces and Textures
Artists don’t just work on flat canvases. Projectors can assist on textured, curved, or irregular surfaces. The key is adapting your setup and technique to maintain accuracy.
For textured surfaces like raw canvas or wood, use a brighter projector setting. For mural work on brick or stucco, project at night or use a high-lumen model. On curved surfaces, focus on projecting key anchor points and connect them freehand.
| Surface Type | Challenge | Projector Solution |
|---|---|---|
| Raw Canvas/Textured Wood | Image appears broken up | Increase brightness; trace major lines only |
| Dark or Colored Ground | Low contrast, hard to see lines | Use a high-lumen projector; prep sketch with white lines digitally |
| Large Walls (Murals) | Massive scale, ambient light | Use a projector with 3,500+ lumens; work at dusk/night |
Integrating Projection into a Mixed-Media Workflow
Your projector can be a bridge between digital and physical art forms. Combine projected elements with traditional drawing, collage, or underpainting for unique hybrid artwork.
- Digital Underpainting Guide: Project a color study to block in large areas quickly and confidently.
- Stencil Creation: Project a complex shape onto cardstock, cut it out, and use it as a reusable stencil.
- Animation Frames: Use a sequence of projected images to trace keyframes for hand-drawn animation.
Common Projector Art Mistakes and How to Fix Them
Even with the right equipment, artists can encounter frustrating issues. Recognizing common pitfalls will save you time and improve your results. These solutions address the most frequent problems in projector-assisted art creation.
Dealing with Blurry or Distorted Images
A blurry projection makes accurate tracing impossible. This is often caused by incorrect setup, not a faulty projector. Follow a systematic checklist to restore a crisp image.
- Check Focus: Manually adjust the focus ring on the projector lens slowly.
- Verify File Quality: Ensure your digital sketch is high-resolution (300 DPI minimum).
- Stabilize Your Setup: Ensure neither the projector nor canvas vibrates from fans or floor movement.
Managing Color Shifts and Calibration Issues
Projected colors often differ from your screen or original art. This shift can mislead your color mixing. Calibrating your workflow manages this discrepancy effectively.
First, understand that projectors prioritize brightness over absolute color accuracy. To compensate, use projection primarily for drawing composition, not color matching. For color work, make a small test swatch on the canvas under the projected light to see true pigment interaction.
Solving Alignment and Sizing Problems
Misalignment or incorrect sizing wastes materials and effort. These problems occur when the projector isn’t square to the surface or distance calculations are off. Precise measurement is your best tool.
- Use a Laser Level: Align the projector’s lens center with the canvas center using a laser level for perfect perpendicular placement.
- Test on Paper First: Always project and trace a test outline on scrap paper taped to your canvas to verify size and placement.
- Employ the “Throw Ratio”: Use your projector’s specified throw ratio (distance-to-width) in its manual to calculate exact positioning for your desired image size.
Maintaining Your Art Projector for Longevity
Proper care protects your investment and ensures consistent performance. Projectors are precision instruments sensitive to dust, heat, and mishandling. A simple maintenance routine prevents most common hardware failures and image degradation.
Essential Cleaning and Dust Prevention
Dust is the primary enemy of projector image quality and cooling systems. It can settle on the lens, creating blurry spots, and clog internal filters, causing overheating. Regular, gentle cleaning is non-negotiable.
- Lens Cleaning: Use a soft, dry microfiber cloth designed for camera lenses. Gently wipe in a circular motion. Avoid liquid cleaners unless specifically designed for coated optics.
- Vent and Filter Care: Check intake vents weekly for dust buildup. If your model has a cleanable filter, follow the manufacturer’s instructions for removal and gentle washing.
- Storage: Always use the projector’s lens cap and store it in a case or a clean, dry cupboard when not in use.
Optimal Operating Environment and Storage
Where and how you use your projector significantly impacts its lifespan. Extreme conditions strain the components. Creating an artist-friendly environment also benefits your projector.
Avoid using the projector in overly humid, dusty, or smoky studios. Ensure it has ample ventilation space on all sides, especially near the exhaust vent. Never place it on a soft surface like a bed or couch that can block airflow.
| Do’s | Don’ts |
|---|---|
| Use on a hard, stable surface | Place on fabrics or carpets |
| Allow full cool-down cycle before unplugging | Disconnect power immediately after turning off |
| Store in a cool, dry place with lens cap on | Leave it set up in a sunny or dusty studio |
Troubleshooting Common Hardware Issues
Recognizing early warning signs can prevent a minor issue from becoming a major repair. Most problems have simple user-serviceable solutions before professional help is needed.
- Overheating/Shutdown: Immediately check and clean air filters and vents. Ensure the room is not too hot and ventilation is clear.
- Flickering Image or Strange Colors: First, check all cable connections (HDMI, power). Try a different cable or input source to isolate the problem.
- Unusual Fan Noise: This often indicates dust in the fan assembly or bearing wear. Professional cleaning may be required.
Budget-Friendly Alternatives and DIY Solutions
Professional art projectors are an investment. Fortunately, effective alternatives exist for artists on a tight budget. These solutions leverage technology you may already own to achieve similar scaling and transfer results.
Using Smartphone and Tablet Projectors
Modern smartphones and tablets have incredibly bright, high-resolution screens. With a simple accessory, they can become capable micro-projectors for smaller-scale work. This is perfect for sketching and planning.
- Pico Projector Attachments: Devices like the APeman Mini Projector connect directly to your phone, projecting its screen.
- App-Controlled Projectors: Some budget projectors connect via Wi-Fi to an app on your phone, using it as the source.
- Limitation: These typically have lower brightness (50-200 lumens), requiring a very dark room.
Creating a DIY Opaque Projector
An opaque projector uses a bright light to cast the shadow of a physical object or drawing. You can build a simple version with a cardboard box and a lamp. This is ideal for projecting small, flat physical sketches.
- Take a sturdy cardboard box and cut a viewing hole in one side.
- Place a bright LED lamp inside, facing the opposite interior wall.
- Place your physical sketch on the hole, and it will project a shadow onto your canvas in a dark room.
Maximizing Free and Low-Cost Software
The right software prepares your images perfectly for any projection method. You don’t need expensive programs. Free or subscription-based tools offer all necessary functions.
- For Image Editing: Use GIMP (free) or Photopea (free, browser-based) to increase contrast, convert to monochrome, and resize your sketches.
- For Composition: Use Krita (free) to digitally combine multiple reference photos into a single composite image to project.
- For Presentation: Use your device’s built-in photo gallery in “slideshow” mode to project a sequence of images for animation or studies.
Frequently Asked Questions (FAQ)
Artists new to using projectors often have similar questions. This FAQ addresses the most common concerns about technique, ethics, and practicality. Clear answers help you integrate this tool confidently into your practice.
Is Using a Projector for Art “Cheating”?
This is a common concern, but most professional artists reject this notion. A projector is simply a tool for transferring and scaling, much like a grid or carbon paper. The true artistry lies in the original composition, color choices, and painting technique.
Historically, masters like Vermeer are theorized to have used camera obscura. The tool saves time on the mechanical process, freeing mental energy for creative decisions. Your vision and skill define the final artwork, not the transfer method.
What’s the Best Surface for Projecting Art?
The ideal surface is light-colored, matte (non-glossy), and smooth. A primed white canvas or wall provides the best contrast and clarity. Textured or dark surfaces scatter light, making the image harder to see.
- Excellent: White gessoed canvas, smooth white walls, heavyweight drawing paper.
- Good (with brighter projector): Light gray canvas, raw linen, smooth wood panels.
- Challenging: Dark canvases, heavily textured surfaces, glossy panels.
Can I Project onto a Dark or Textured Canvas?
Yes, but it requires adaptation. For dark surfaces, you lose contrast. For textured surfaces, the image appears broken. You can overcome these challenges with a few adjustments.
For a dark ground, use the brightest projector setting. Alternatively, digitally invert your sketch to white lines on a black background before projecting. For textured canvas, project to establish key landmark points, then connect them freehand, using the projection as a guide rather than a strict template.
Conclusion: Mastering Your Art with Digital Projectors
Digital projectors for artists are powerful tools that streamline the creative process. They solve the practical challenge of accurate scaling and composition transfer. This allows you to focus your energy on color, texture, and expression.
The key is choosing the right model and mastering its setup. Prioritize resolution and color accuracy for the best results. Integrate projection as one step in your unique artistic workflow.
Start by experimenting with the techniques outlined in this guide. Test projection on a small study before committing to a major piece. Embrace the tool to enhance, not replace, your creative vision.
Your next masterpiece begins with a clear, confident outline. Let a digital projector help you get there faster.
Frequently Asked Questions about Digital Projectors for Artists
What is the best digital projector for a beginner artist?
The best beginner projector balances affordability with core features. Look for a model with at least 1080p resolution and 2,000 lumens. The ViewSonic M1+ is an excellent starting point due to its portability and ease of use.
It allows you to learn projection fundamentals without a major investment. Focus on mastering setup and technique first. You can always upgrade to a more specialized, professional model later as your needs evolve.
How do you transfer a drawing to a canvas using a projector?
First, digitize your sketch with a high-resolution scan or photo. Project the image onto your primed canvas in a dark room, adjusting distance for correct size. Carefully trace the projected lines with a light pencil or diluted paint.
Ensure the projector is perfectly perpendicular to avoid distortion. Use a hard pencil to avoid damaging the canvas surface. This method preserves every detail of your original sketch at the new scale.
Can you use a normal home theater projector for art?
Yes, many home theater projectors work well for art. They often have excellent resolution and brightness. However, check for key features like multiple input ports and a good zoom lens for flexible positioning.
Be aware that some home theater models prioritize color vibrancy over absolute accuracy. For most drawing transfer work, this is fine. For color-critical work, test the projection against your original under your studio lights.
What lumens do I need for art projection in a lit studio?
For a studio with ambient light, you need a minimum of 3,000 lumens. This ensures a bright, visible image that won’t get washed out. Brighter is generally better for overcoming challenging lighting conditions.
If you can control your studio lighting, dimming the lights allows you to use a lower-lumen projector effectively. For total darkness, 2,000 lumens is often sufficient for clear, detailed projection.
How do you prevent keystone distortion when projecting art?
Prevent keystone distortion by positioning the projector so its lens is centered on the canvas and perfectly level. Use a tripod with a bubble level or a laser level for precision. The projector should shoot straight on, not at an angle.
Only use the digital keystone correction feature as a last resort for minor adjustments. Heavy digital correction degrades image sharpness and can create uneven pixelation, which is detrimental for accurate tracing.
Is an LCD or DLP projector better for accurate color art?
For the most accurate and consistent color, 3LCD projectors are typically better for artists. They project the full RGB color spectrum simultaneously, eliminating the “rainbow effect” some see with single-chip DLP models.
DLP projectors can be very sharp and are often more portable. If you are sensitive to the rainbow effect or do color-critical work, prioritize an LCD model. For black-and-white line art, both technologies perform excellently.
What is the best way to project a digital painting onto canvas?
Prepare your digital painting file by ensuring it’s high-resolution and has strong contrast. Convert color images to grayscale temporarily to see the value structure clearly for tracing. This helps you map out the composition accurately.
Project the grayscale image to trace the main shapes and value boundaries. Then, use the original color file on a separate device as your color reference while painting. This separates the drawing and color phases cleanly.
How do you clean a projector lens without damaging it?
Always start by using a rocket blower to gently remove loose dust particles. For smudges, use a clean, dry microfiber cloth designed for camera lenses. Wipe in a gentle, circular motion from the center outward.
Never use household glass cleaners, alcohol, or paper towels, as they can strip anti-reflective coatings. If a dry cloth doesn’t work, use a single drop of lens cleaning fluid on the cloth, not directly on the lens.
This website is a participant in the Amazon Services LLC Associates Program, an affiliate advertising program designed to provide a means for us to earn fees by linking to Amazon.com and affiliated sites.