
This website is a participant in the Amazon Services LLC Associates Program, an affiliate advertising program designed to provide a means for us to earn fees by linking to Amazon.com and affiliated sites.
A drawing projector for kids 6-12 is a creative art tool that projects images onto paper for easy tracing. It transforms simple sketching into a fun, confidence-boosting activity. This guide explores the best models and how to use them.
This device solves the common frustration of “I can’t draw that!” It empowers young artists to create detailed pictures they love. Kids gain artistic skills and immense pride in their work.
Our complete guide provides expert tips for choosing the right projector. You’ll learn proven methods to maximize creativity and educational value. Discover how to turn screen time into creative time.
Best Drawing Projectors for Kids 6-12 – Detailed Comparison
Artograph Tracer Projector – Best Overall Choice
The Artograph Tracer Projector is a professional-grade, durable option. It projects crisp images from small objects or printed art up to 20 times larger. Its bright LED light and precise focus wheel make it ideal for serious young artists wanting to trace detailed designs.

- Effortless Image Enlargement: Light projector makes it easy to enlarge any…
- Portable & User-Friendly: Easy to transport and great for a studio, a wall…
- Reliable & Safe: Built for durability with a 163 mm optical glass lens for…
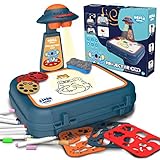
KIDWILL Projector Drawing Kit – Best Value Set
This all-in-one kit includes the projector, 12 pattern discs, and 3 coloring books. It’s perfect for beginners with its simple operation and pre-made cartoon images. The compact design and affordable price make it the best option for first-time users and gift-givers.
- DRAWING PROJECTOR FOR KIDS: This kids drawing projector set is great for…
- LEARN HOW TO DRAW TOYS: This trace and draw projector includes 10 color…
- SKETCHER STARTER DRAWING PROJECTOR: The drawing projector can be rotated…
AKIYO Drawing Projector for Kids – Best for Portability
Featuring a lightweight, tablet-shaped design, the AKIYO projector is highly portable. It uses a smartphone’s camera to project any picture onto paper. This model is ideal for creative freedom, allowing kids to easily trace their own photos or downloaded images anywhere.
How a Drawing Projector for Kids Boosts Creativity and Skills
A children’s drawing projector is more than just a toy. It is a powerful educational tool that builds foundational art skills. It transforms the intimidating blank page into a guided creative adventure.

- 700+ Guided Drawing Activities – Struggling to spark your child’s lasting…
- AI Art & Photo-to-Sketch App – Does your child have WILD ideas that are…
- Eye-Safe Certified Learning Projector – Worried about screen time straining…
Key Developmental Benefits for Young Artists
Using an art projector teaches core artistic principles in a hands-on way. Kids learn by doing, which reinforces concepts far better than passive observation. This builds a strong, confident foundation for all future creative pursuits.
- Hand-Eye Coordination & Fine Motor Skills: Tracing projected lines requires precise pencil control. This directly improves dexterity and prepares children for writing and detailed tasks.
- Understanding Form, Proportion, and Perspective: Kids see how a simple outline creates a complex image. They intuitively learn about scale and spatial relationships on the page.
- Color Theory and Composition: After tracing, children focus on color selection and shading. This teaches them how colors work together and how to fill a space effectively.
Turning Tracing into Original Art
The goal is to use the projector as a starting point, not a crutch. Encourage your child to move beyond the traced lines. This fosters true creative thinking and personal expression.
For example, they can trace a dinosaur skeleton, then draw a lush jungle environment around it. They can project a castle and design their own flags, characters, and landscapes. This scaffolded learning approach ensures success while leaving room for imagination.
| Skill Learned | Projector Activity | Creative Extension |
|---|---|---|
| Line Control | Tracing the projected outline | Varying line thickness for emphasis |
| Color Application | Coloring inside the lines | Adding unique patterns, textures, and shading |
| Composition | Placing one main subject | Adding a detailed background and secondary elements |
How to Choose the Right Kids Art Projector: A Buyer’s Guide
Selecting the perfect drawing projector requires considering your child’s age and interests. Not all projectors are created equal. Focus on key features that match their skill level and your budget.
Essential Features to Compare
Look beyond the basic promise of projection. The right combination of features ensures a frustration-free and engaging experience. This leads to longer, more productive creative sessions.
- Light Source (LED vs. Bulb): Modern LED lights are cooler, safer, and longer-lasting. They are the best choice for children, eliminating burn risks and frequent replacements.
- Image Source & Flexibility: Does it use pre-printed discs, a phone camera, or physical objects? Phone-compatible models offer infinite image options, while disc-based ones provide curated, age-appropriate content.
- Adjustability & Ease of Use: A good focus wheel and tilt adjustment are crucial. The projector should be simple for a child to operate independently, fostering a sense of ownership.
Matching the Projector to Your Child’s Age
A projector for a 6-year-old differs from one for a 12-year-old. The ideal model grows with your child’s abilities. It should challenge them without causing frustration.
| Priority | Ages 6-8 | Ages 9-12 |
|---|---|---|
| Key Need | Build Confidence & Fun | Skill Development & Creativity |
| Ideal Image Source | Pre-made pattern discs, simple cartoons | Smartphone compatibility, detailed templates |
| Important Feature | Durable construction, very easy operation | Precise focus, size adjustment, brighter LED |
Always check for safety certifications and non-toxic materials. Read reviews focusing on durability and real-world use by kids. The best drawing projector is one they will use repeatedly.
Creative Projector Drawing Activities and Project Ideas
Unlock the full potential of your child’s art projector with these engaging activities. Move beyond simple tracing to integrated, imaginative projects. These ideas are designed to keep kids aged 6-12 excited and learning.
Step-by-Step: Mastering the Drawing Projector
Start with the basics to ensure success. A proper setup prevents blurry images and frustration. Follow this simple process for perfect results every time.
- Set Up in a Dim Room: Find a space with controlled lighting. Too much ambient light will wash out the projected image, making it hard to see.
- Secure the Paper & Adjust Distance: Tape your paper to the table to prevent shifting. Move the projector closer for a smaller image or farther away to enlarge it.
- Focus and Trace: Use the focus wheel until the outline is sharp. Then, gently trace the projected lines with a pencil, taking your time.
Advanced Art Projects for Older Kids
Challenge children 9-12 with projects that combine tracing with original creation. These activities develop advanced planning and compositional skills. They bridge the gap between guided art and independent design.
- Create a Storybook: Project and trace a consistent character across multiple pages. Then, draw different scenes and write a short story to go with the pictures.
- Design a Board Game: Use the projector to create a perfectly circular game board and uniform playing pieces. Invent the rules and objectives for a unique family game.
- Scientific Illustration: Project a photo of a butterfly, plant, or planet. Trace the accurate outline, then use reference books to add detailed, labeled diagrams.
These projects teach that a drawing projector is a creative launchpad. The traced image provides a confident start, freeing mental energy for storytelling, design, and detailed artistry.
Maintenance, Safety, and Troubleshooting Your Kids’ Projector
Proper care ensures your drawing projector remains a reliable creative tool for years. Understanding basic maintenance and safety is crucial for parents. This section covers essential tips for longevity and safe operation.
Essential Safety Tips for Parents
While modern projectors are designed for kids, adult supervision and good habits are key. Always prioritize your child’s safety during creative sessions. A safe environment leads to worry-free fun.
- Never Stare Directly into the Light Source: Teach children to look at the projected image on the paper, not into the projector’s lens. This protects their eyesight.
- Ensure Proper Ventilation: Do not cover the projector’s vents or use it on soft surfaces like a bed. This prevents the unit from overheating during long drawing sessions.
- Use the Right Supplies: Pair the projector with non-toxic, washable art materials. Supervise the use of permanent markers or very small craft items with younger children.
Common Troubleshooting Solutions
Encountering a problem is normal. Most issues have simple fixes that you can handle at home. Follow this logical sequence before assuming the device is broken.
| Problem | Likely Cause | Simple Solution |
|---|---|---|
| Blurry Image | Incorrect focus or distance | Adjust the focus wheel slowly. Move the projector closer/farther from the paper. |
| Dim or Faint Projection | Too much room light or weak power source | Darken the room. Replace batteries or check the power adapter connection. |
| Image Won’t Project | Lens cap on or incorrect mode | Remove the lens cap. Ensure a pattern disc is inserted or the phone is connected as instructed. |
For maintenance, clean the lens gently with a microfiber cloth. Store the projector in a cool, dry place away from direct sunlight. Following these steps maximizes your investment and keeps the art flowing.
Educational Integration: Using a Projector for Learning
A drawing projector is a versatile cross-curricular learning tool. It seamlessly blends art with subjects like science, history, and language arts. This approach makes abstract concepts tangible and memorable for elementary and middle school students.
Enhancing School Subjects Through Art
Transform homework and school projects from stressful to engaging. The projector provides a framework for success across disciplines. It helps students visualize and interact with complex information.
- Science & Nature Studies: Project images of cell structures, animal skeletons, or leaf veins for accurate biological diagrams. Tracing a volcano cross-section aids in understanding geological layers.
- History & Social Studies: Recreate historical maps, famous landmarks, or period-appropriate clothing. Tracing a pyramid or Greek column teaches architectural principles hands-on.
- Language Arts & Storytelling: Illustrate key scenes from a book they’re reading. Create characters and settings for original stories, building narrative skills alongside artistic ones.
Supporting Children with Different Learning Styles
This tool is particularly powerful for visual and kinesthetic learners. It bridges the gap between seeing and doing, reinforcing knowledge through multiple senses. This builds confidence in learners who may struggle with traditional methods.
For a project on the solar system, a child can trace accurately sized planets. They then research and label each one. This combines research, fine motor skill development, and visual memory in one activity.
| Subject | Projector-Based Activity | Learning Outcome |
|---|---|---|
| Geometry | Tracing and measuring different shapes and angles | Hands-on understanding of form, symmetry, and measurement |
| Geography | Drawing detailed maps with borders, rivers, and mountains | Improved spatial awareness and retention of geographical facts |
| Creative Writing | Creating illustrated storyboards for a narrative | Enhanced planning, sequencing, and descriptive language skills |
Beyond Tracing: Advanced Techniques and Digital Integration
For the aspiring young artist ready to level up, a projector can be a gateway to advanced art forms. These techniques move past basic coloring into true artistic exploration. They prepare kids for more sophisticated creative tools and concepts.
Introducing Light, Shadow, and Texture
Use the projected outline as a base for teaching fundamental art principles. This shifts focus from *what* to draw to *how* to draw it. The consistent outline allows them to concentrate on advanced rendering skills.
- Shading and Value: After tracing, identify a consistent light source. Practice shading one side of the object to create a three-dimensional effect, learning about gradients and contrast.
- Adding Texture: Project an animal like a lion or a turtle. Use different pencil strokes (hatching, stippling) to create the illusion of fur, scales, or skin on the traced form.
- Mixed Media Exploration: Trace a simple shape, then fill it using collage, watercolor washes, or colored pencils. This teaches how different materials interact on the page.
Connecting to Digital Art and Animation
A drawing projector can be the perfect bridge between traditional and digital art. It demystifies the digital creation process by starting with a familiar, physical step. This builds a strong foundational skill set.
Children can create a series of traced drawings showing a character in slightly different poses. Photographing these sequentially introduces the basic principle of frame-by-frame animation. They learn about movement and timing in a hands-on way.
| Traditional Skill | Advanced Projector Use | Digital Art Connection |
|---|---|---|
| Line Art & Inking | Tracing with a fine liner pen for clean lines | Learning the “inking” phase in digital comics |
| Character Design | Projecting a basic body form to design costumes | Creating turnarounds and model sheets for animation |
| Background Design | Using perspective grids or landscape photos | Building layered backgrounds in digital painting software |
Frequently Asked Questions About Kids Drawing Projectors
Parents and gift-givers often have specific questions before purchasing. This FAQ section addresses the most common concerns with clear, actionable answers. Get the information you need to make a confident decision.
Common Parental Concerns Addressed
Understanding the practicalities ensures the tool fits your family’s lifestyle. These answers focus on real-world use, safety, and value.
- Is it just a “cheating” tool that prevents real learning? No. It’s a scaffolding tool that builds confidence and teaches proportion. It removes the intimidating blank page, allowing focus on coloring, shading, and composition.
- What age is truly appropriate for a drawing projector? Most children are ready around age 6, when fine motor skills allow for controlled tracing. The key is choosing a model with age-appropriate image complexity and simple operation.
- Can it be used without a smartphone or special discs? Yes. Many projectors work with small physical objects (toys, leaves, keys) or printed pictures placed under the lens. Check the model’s specifications for “object projection” capability.
Technical and Usage Questions
These questions delve into the specifics of setup, results, and longevity. Proper expectations lead to a satisfying experience for both child and parent.
| Question | Short Answer | Detailed Consideration |
|---|---|---|
| How long does the projected image last? | Indefinitely while powered. | The image remains as long as the projector is on and the source is in place. Kids can take their time tracing. |
| Is the light safe for children’s eyes? | Generally, yes. | Use LED-based models (cool, bright, efficient). Teach children to look at the paper, not the lens, as a standard safety rule. |
| Will my child outgrow it quickly? | Not if used creatively. | Its utility evolves. Younger kids trace simple shapes; older kids use it for complex designs, school projects, and learning advanced techniques. |
Ultimately, a drawing projector’s value is unlocked through guided use and creative challenges. It is a tool that grows with your child’s abilities.
Conclusion: Unlocking Creative Confidence with a Drawing Projector
A drawing projector for kids 6-12 is a powerful gateway to artistic confidence. It transforms frustration into achievement by making complex drawings accessible. This tool builds foundational skills while keeping creativity fun and engaging.
The key takeaway is to use it as a creative launchpad, not a crutch. Encourage your child to add personal touches and original ideas to every traced outline. This fosters true artistic growth and problem-solving.
Ready to inspire your young artist? Review our detailed product recommendations and activity guides. Choose a projector that matches their age and interests to start their creative journey.
Embrace this tool to nurture a lifelong love for art and learning. Watch their skills and pride grow with every project they complete.
Frequently Asked Questions about Drawing Projectors for Kids
What is the best drawing projector for a 7-year-old beginner?
The best choice is a simple, durable model with pre-made pattern discs, like the KIDWILL Projector Drawing Kit. It eliminates setup complexity and provides immediate, fun images. Look for a bright LED light and easy-to-turn focus wheel.
This builds confidence without frustration. Ensure it’s made from child-safe, non-toxic materials. A projector with a few included coloring pages or stencils offers great starter value.
How to use a drawing projector with a smartphone for custom images?
First, select a projector with smartphone compatibility, like the AKIYO model. Place your phone on the designated tray or connect via an app. The projector’s camera will capture and project your phone’s screen.
Display any photo or drawing on your phone. Adjust the projector’s distance and focus for the perfect size and clarity on your paper. This unlocks infinite tracing possibilities from family photos to internet images.
What are the main benefits of a projector versus freehand drawing?
A projector provides immediate success in proportion and scale, which are challenging freehand skills. It allows children to focus on coloring, shading, and storytelling rather than struggling with outlines. This builds artistic confidence rapidly.
It also serves as an excellent educational tool for precise diagrams in school projects. The core benefit is reducing creative barriers, making art accessible and enjoyable for all skill levels.
Why is my child’s projector image blurry and how do I fix it?
A blurry image is almost always due to incorrect focus or distance. Slowly adjust the focus wheel on the projector while looking at the paper. If that doesn’t work, move the entire unit slightly closer to or farther from the drawing surface.
Also, check that the lens is clean and the room is sufficiently dark. Ensure the image source (disc or object) is firmly in place. These simple fixes usually resolve blurriness instantly.
Can a drawing projector help a child who gets frustrated with art?
Absolutely. It is an excellent tool for children who experience art-related frustration. By guaranteeing a successful outline, it removes the fear of “getting it wrong.” This shifts the experience from stressful to rewarding.
The child controls the outcome and feels pride in a completed, recognizable picture. This positive reinforcement can rebuild their interest and willingness to try other creative challenges.
What is the best way to transition from tracing to original drawing?
Start by adding original elements to traced work. After tracing a dinosaur, have them draw an original jungle background. Next, project a simple shape and challenge them to turn it into a new creature or object.
Finally, use the projector to study and trace parts of different objects, then combine them into a unique drawing. This scaffolded approach builds skills while encouraging independent creativity.
Are drawing projectors safe for children’s eyesight?
Modern LED-based projectors are very safe, producing bright, cool light without harmful UV rays. The primary safety rule is to teach children never to look directly into the projector’s lens. They should always look at the projected image on the paper.
Supervise initial use to establish this habit. Choosing a reputable brand with appropriate safety certifications adds an extra layer of assurance for parents.
How can I use an art projector for homeschool lessons?
Integrate it across subjects for hands-on learning. In science, project and trace cell diagrams or insect parts. For history, recreate accurate maps or architectural blueprints. In language arts, illustrate key scenes from literature.
It transforms abstract concepts into tangible projects. This multi-sensory approach benefits visual and kinesthetic learners, making lessons more engaging and memorable.
This website is a participant in the Amazon Services LLC Associates Program, an affiliate advertising program designed to provide a means for us to earn fees by linking to Amazon.com and affiliated sites.
