This website is a participant in the Amazon Services LLC Associates Program, an affiliate advertising program designed to provide a means for us to earn fees by linking to Amazon.com and affiliated sites.
Connecting your Oculus headset to your PC is straightforward. This process unlocks a vast library of PC VR games and experiences. Our complete guide provides the expert tips you need for a seamless setup.
Linking your devices transforms your Oculus into a powerful PC VR system. You can enjoy high-fidelity graphics and expansive game worlds. We’ll solve common connection problems with proven methods.
You will learn the requirements for both wired and wireless connections. We cover Oculus Link, Air Link, and Virtual Desktop. Get ready to elevate your virtual reality experience today.
Best Cables and Accessories for Connecting Oculus to PC
Oculus Link Cable (Official) – Best Overall Choice
The official Oculus Link Cable is a 5-meter fiber-optic cable designed specifically for Meta headsets. It provides a lightweight, durable, and high-bandwidth connection for PC VR. This is the best option for maximum reliability and image quality with minimal latency during extended play sessions.

- [Super Fast Charge 18W] Maxonar VR Link Cable features an upgraded internal…
- [Compatible with Meta 3S/3/2/Pico4] This link cable connects your VR…
- [Safer for Battery Life] Equipped with a SmartProtect3.0 chip and a…
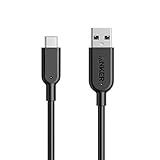
Anker PowerLine USB-C to USB-A 3.0 Cable – Best Budget Cable
This high-quality third-party cable is a highly recommended and affordable alternative to the official Link cable. It offers robust data transfer speeds and sturdy construction. Ideal for users who need a reliable wired connection without the premium price tag.
- 10Gbps Data Transfer: Supports SuperSpeed data transmission (send or…
- Versatile Power: For laptops, phones, tablets and more. Compatible with…
- USB-IF Certified: Meets safety standards of the USB International…
TP-Link Archer AXE75 WiFi 6E Router – Best for Wireless Air Link
For a flawless wireless PC VR experience, a dedicated WiFi 6E router is key. This model provides a dedicated, high-speed 6GHz band exclusively for your headset, eliminating interference. It’s the ideal solution for achieving low-latency, high-fidelity wireless gameplay with Air Link or Virtual Desktop.

- Tri-Band WiFi 6E Router – Up to 5400 Mbps WiFi for faster browsing…
- WiFi 6E Unleashed – The brand new 6 GHz band brings more bandwidth…
- Connect More Devices—True Tri-Band and OFDMA technology increase capacity…
Essential Requirements for Connecting Oculus to PC
Before you start the connection process, ensure your system meets all necessary specifications. A compatible setup prevents performance issues and connection failures. This section covers the hardware and software you must have ready.
PC Hardware and Software Specifications
Your computer must meet or exceed Meta’s official system requirements for a smooth experience. These are more demanding than standard gaming specs. Check your components against the following list.
- Operating System: Windows 10 or Windows 11 (64-bit).
- Processor: Intel i5-4590 / AMD Ryzen 5 1500X or greater.
- Graphics Card: NVIDIA GTX 1060 / AMD Radeon RX 480 or better (See GPU compatibility list).
- RAM: 8 GB or more is strongly recommended.
- USB Ports: For Link, you need a USB 3.0 Type-A or Type-C port.
Oculus Headset and App Setup
Your headset and desktop software must be correctly configured. An outdated app is a common cause of connection problems. Follow these preliminary steps on your devices.
- Fully update your Oculus/Meta Quest headset to the latest system software.
- Download and install the Oculus PC app from the official Meta website.
- Create a Meta account or log in within the PC app to sync your devices.
Choosing Your Connection Method
You have two primary ways to connect: wired (Oculus Link) or wireless (Air Link). Each method has distinct advantages depending on your priorities. Use this comparison to decide.
| Feature | Oculus Link (Wired) | Air Link (Wireless) |
|---|---|---|
| Latency | Lowest, most consistent | Slightly higher, depends on WiFi |
| Visual Quality | Maximum bitrate, stable | Very good, but can compress |
| Freedom of Movement | Limited by cable length | Complete room-scale freedom |
| Setup Complexity | Simple plug-and-play | Requires robust WiFi network |
Step-by-Step Guide to Wired Oculus Link Setup
Connecting your Oculus Quest to a PC with a cable provides the most stable experience. This method, called Oculus Link, is ideal for graphic-intensive games. Follow this precise guide for a successful first-time connection.
How to Set Up Oculus Link with a Cable
Begin by ensuring your PC and headset meet the requirements outlined previously. Power on your headset and have your chosen USB 3.0 cable ready. The process is straightforward when done in order.
- Launch the Oculus PC app on your computer and log into your Meta account.
- Put on your headset and open the universal menu. Navigate to Settings > System > Oculus Link.
- Plug the USB cable into your PC’s port, then connect it to your headset.
- A prompt will appear inside the headset asking “Enable Oculus Link?” Select Enable.
- You will enter the Oculus Link environment, launching the PC VR dashboard.
Troubleshooting Common Link Connection Issues
If the connection fails, don’t worry. Most problems have simple solutions. Systematically check these common failure points.
- No Prompt Appears: Test your cable in the PC app under Settings > Beta > USB Test. Ensure it scores “USB 3.0”.
- Black Screen or Static: Update your PC’s GPU drivers from NVIDIA or AMD’s official website.
- Poor Performance: In the Oculus PC app, go to Devices > Graphics Preferences and set the refresh rate and resolution to match your PC’s capability.
Optimizing Your Wired PC VR Experience
After establishing a connection, fine-tune your settings. Proper optimization maximizes visual fidelity and performance. Adjust these key settings for your hardware.
| Setting (Oculus PC App) | Recommended Value | Purpose |
|---|---|---|
| Refresh Rate | 80Hz or 90Hz | Balances smoothness and GPU load |
| Render Resolution | 1.0x (or native) | Start here, increase if performance allows |
| Air Link / Link Sharpening | On | Improves image clarity significantly |
How to Connect Oculus to PC Wirelessly with Air Link
Air Link provides complete freedom from cables for your PC VR sessions. This wireless method streams content directly from your PC to your headset. A proper network setup is crucial for a lag-free experience.
Configuring Your Network for Air Link
Your WiFi network is the backbone of a stable wireless connection. A standard home network shared with other devices often causes lag. Follow these network requirements for optimal performance.
- Router: Use a WiFi 6 (802.11ax) router for best results. Place it in the same room as your play area.
- Connection: Connect your PC to the router via Ethernet cable. This is non-negotiable for stability.
- Band: Ensure your headset connects to the router’s 5GHz band. The 2.4GHz band is too slow.
- Dedicated Channel: Set your router to use a clear, uncongested 5GHz channel to minimize interference.
Enabling and Using Air Link Step-by-Step
Once your network is ready, enabling Air Link is simple. The feature must be activated on both your PC software and your headset. Follow this sequence exactly.
- On your PC, open the Oculus app. Go to Settings > Beta and toggle Air Link to ON.
- Put on your headset. Open the universal menu and select the clock on the left side.
- Select Settings > System > Air Link and toggle the feature ON.
- Your PC should appear in the list of available devices. Select it and choose Pair.
- After pairing, select Launch to enter the wireless PC VR environment.
Advanced Air Link Settings for Performance
Fine-tuning Air Link settings can drastically improve visual quality and responsiveness. Access these settings from the Air Link connection dialog in your headset. Experiment to find your ideal balance.
| Setting | Recommended Adjustment | Effect |
|---|---|---|
| Dynamic Bitrate | On | Automatically adjusts for network stability |
| Fixed Bitrate | Start at 100 Mbps | Increases manually for better visuals if network allows |
| Refresh Rate | 90Hz | Good balance of smoothness and performance |
| Render Resolution | 1.0x | Increase only if you have no performance issues |
Advanced Solutions and Troubleshooting Common Problems
Even with proper setup, you may encounter technical hurdles. This section addresses frequent errors and provides advanced fixes. These solutions resolve most persistent Oculus to PC connection issues.
Fixing Black Screen, Stuttering, and Audio Problems
Performance issues often stem from software conflicts or incorrect settings. Isolate the problem by testing one variable at a time. Apply these targeted fixes for specific symptoms.
- Black Screen on Launch: Disable any GPU overlay software (MSI Afterburner, Discord overlay, GeForce Experience in-game overlay). These are common culprits.
- Micro-Stutters: Ensure your PC’s power plan is set to High Performance. Close all unnecessary background applications before launching VR.
- No Audio in Headset: Right-click the sound icon on your Windows taskbar. Select Sounds > Playback and set “Oculus Virtual Audio Device” as the default.
Using Virtual Desktop as an Alternative to Air Link
Virtual Desktop is a premium third-party application available on the Quest store. Many users find it offers better performance and more tuning options than Air Link. The setup process is different.
- Purchase and install the Virtual Desktop app on your Meta Quest headset.
- Download and install the free Virtual Desktop Streamer app on your Windows PC.
- Open the Streamer app on your PC and log into the same account shown in your headset’s Virtual Desktop app.
- In the Streamer app, ensure your PC is connected via Ethernet and check “Automatically adjust bitrate.”
- Launch Virtual Desktop from your headset, find your PC, and connect to enter your PC VR environment.
When to Factory Reset or Contact Support
If all troubleshooting fails, more drastic measures may be needed. Consider these steps as a last resort before concluding your hardware is faulty. Follow them in order.
| Problem | Advanced Solution | Notes |
|---|---|---|
| Persistent USB connection errors | Try every USB port on your PC, including front and rear panels. | Some motherboard ports may share a controller that causes issues. |
| Software is completely unresponsive | Uninstall the Oculus PC app, then reinstall it as an administrator. | Ensure you download the latest version from meta.com. |
| All methods fail consistently | Perform a factory reset on your headset (back up data first). | This erases all local data and returns the OS to a clean state. |
| Hardware suspicion | Contact Meta Support with your headset’s serial number. | Have your purchase receipt and a detailed error description ready. |
Optimizing Performance and Enhancing Your PC VR Experience
After establishing a stable connection, you can fine-tune your setup for peak performance. Optimization maximizes visual quality, responsiveness, and comfort. These pro tips will elevate your gameplay beyond the basic connection.
In-Headset and PC App Settings for Best Quality
Strategic adjustments in both the Oculus PC software and your headset can yield significant improvements. Do not max out every setting; balance is key for smooth gameplay. Focus on these high-impact adjustments first.
- Super Sampling: In the Oculus Debug Tool, increase the Pixels Per Display Pixel (PPD) setting slightly (e.g., 1.2 to 1.3) for a sharper image without overloading the GPU.
- ASW Management: In the Debug Tool, set Asynchronous Spacewarp (ASW) to “Auto.” This feature helps maintain framerate during demanding scenes.
- Headset Settings: Enable 90Hz or 120Hz mode in your headset’s settings if your PC can sustain it. This greatly improves motion clarity.
Essential PC Optimization for VR Gaming
Your Windows PC itself must be tuned for the low-latency demands of virtual reality. Background processes and power-saving features are the enemy of consistent performance. Implement these system-wide optimizations.
- Set your Windows Power Plan to Ultimate Performance or High Performance to prevent CPU/GPU throttling.
- In NVIDIA Control Panel (for NVIDIA users), manage 3D settings for the Oculus client. Set Power Management Mode to “Prefer Maximum Performance.”
- Disable unnecessary startup programs via the Task Manager to free up RAM and CPU cycles before launching VR.
Managing SteamVR and Third-Party Games
Most PC VR content is played through SteamVR, which adds another software layer. Proper configuration here prevents conflicts and ensures games launch correctly. Follow this workflow for SteamVR titles.
| Step | Action | Purpose |
|---|---|---|
| 1. Launch Method | Always launch games from within the Oculus PC VR dashboard after connecting. | Ensures the Oculus runtime is active before SteamVR loads. |
| 2. SteamVR Resolution | Open SteamVR Settings > Video and set Manual Override to 100%. | Prevents SteamVR from applying its own supersampling on top of Oculus settings. |
| 3. Oculus as OpenXR | In the Oculus PC app, set Settings > General > OpenXR Runtime to Oculus. | Directs modern games (like Microsoft Flight Simulator) to use the Oculus driver. |
Maintaining Your Oculus to PC Connection Long-Term
A reliable PC VR setup requires ongoing maintenance and good habits. Prevent future issues by proactively managing your software and hardware. This final section ensures your connection stays fast and stable over time.
Regular Software and Driver Update Schedule
Outdated drivers are the leading cause of broken connections after initial setup. Establish a routine to keep all critical components current. Automate this process where possible for convenience.
- GPU Drivers: Check for updates monthly using the official NVIDIA GeForce Experience or AMD Radeon Software applications.
- Oculus Software: The PC app and headset firmware update automatically, but manually check under Settings > Beta periodically.
- Windows Updates: Do not indefinitely defer major Windows updates, as they often contain critical security and performance fixes for hardware.
Cable and Hardware Care Best Practices
Physical damage to cables and ports is a common yet preventable problem. Proper handling extends the life of your equipment significantly. Adopt these simple care habits.
- Always disconnect the USB cable by gripping the connector, not by pulling on the cable itself.
- Use a magnetic USB-C adapter or a cable with a 90-degree connector to reduce strain on your headset’s port.
- Periodically inspect your cable for kinks, frays, or bent connectors. Test its speed in the Oculus app USB test.
- Keep your headset’s USB-C port free of dust and debris using a can of compressed air.
Creating System Restore Points and Backups
Before making major changes to your PC or installing new VR software, create a safety net. A system restore point allows you to revert your PC’s state if an update causes instability.
| Task | How-To | When to Do It |
|---|---|---|
| Create Restore Point | Type “Create restore point” in Windows Search. Select your C: drive and click “Create.” | Before installing new GPU drivers or major Windows updates. |
| Backup Game Saves | Use Steam Cloud or manually copy folders from C:\Users\[You]\AppData\LocalLow. | Before performing a factory reset on your headset or reinstalling Windows. |
| Document Settings | Take screenshots of your optimal Oculus Debug Tool and in-app settings. | After you’ve perfected your performance setup, for easy recovery. |
Conclusion: Mastering Your Oculus PC VR Setup
You now possess the complete knowledge to connect and optimize your Oculus headset for PC VR. From the initial cable plug-in to advanced wireless tuning, this guide has covered every critical step. A reliable connection is the gateway to an incredible library of immersive experiences.
Key Takeaways for a Flawless Connection
Let’s consolidate the most vital lessons from this comprehensive guide. Remember these core principles whenever you set up or troubleshoot your system. They form the foundation of a great PC VR experience.
- Preparation is Key: Always verify your PC meets the system requirements and that all software is updated before starting.
- Choose Your Method Wisely: Use a wired Oculus Link cable for the highest fidelity and stability. Choose Air Link or Virtual Desktop for untethered freedom if you have a robust, dedicated WiFi network.
- Troubleshoot Systematically: When issues arise, follow the logical flow: check cables/ports, update drivers, disable conflicting software, then adjust settings.
Your Next Steps in the PC VR World
With your headset successfully connected, a vast universe of content awaits. Knowing where to start can be overwhelming. Here are curated recommendations to begin your journey.
- Explore the Oculus Rift store on your PC app for optimized, high-quality exclusive titles.
- Visit SteamVR and browse the massive VR catalog, using the management tips provided earlier.
- Experiment with free experiences and social platforms like VRChat or Rec Room to get your “VR legs.”
- Consider investing in optional accessories like prescription lens inserts or a premium head strap for enhanced comfort during long sessions.
Join the Community for Ongoing Support
The VR community is an invaluable resource for continuous learning and troubleshooting. Engage with other enthusiasts to discover new tips, mods, and game recommendations.
| Resource | Best For | Where to Find |
|---|---|---|
| Official Meta Support | Hardware issues and warranty claims | Meta Help Center website |
| r/OculusQuest Subreddit | Real-user troubleshooting and news | Reddit.com |
| VR-Specific Discords | Real-time help and game communities | Discord servers for games like Beat Saber or VRChat |
| YouTube Tutorials | Visual guides for settings and optimizations | Channels like “Virtual Reality Oasis” or “Ben Plays VR” |
Conclusion: How to Connect Your Oculus to PC Successfully
You now have a complete, step-by-step guide for connecting your Oculus to your PC. Whether you choose a wired or wireless setup, you can achieve a stable, high-performance link. This unlocks the full potential of PC VR gaming and applications.
The most important factor is ensuring your hardware meets requirements and your software is updated. Start with a wired connection for simplicity, then experiment with wireless freedom. Apply the troubleshooting tips if you encounter any hurdles.
We encourage you to test your connection and dive into your first PC VR experience today. Share your success or questions in the comments below. The vibrant VR community is ready to welcome you.
Your journey into expansive virtual worlds begins with this solid connection. Enjoy the incredible experiences that await.
Frequently Asked Questions about Connecting Oculus to PC
What is the difference between Oculus Link and Air Link?
Oculus Link is a wired connection using a USB-C cable, offering maximum stability and visual fidelity. Air Link is the official wireless alternative that streams content over your local WiFi network. Both methods require the Oculus PC app and a compatible computer.
The key difference is freedom versus consistency. Choose Link for competitive gaming or the best graphics. Choose Air Link for room-scale experiences without cable management, provided you have an excellent WiFi setup.
How can I test if my USB cable is compatible with Oculus Link?
Open the Oculus PC app on your computer and navigate to Settings > Beta > USB Test. Plug your cable into both your PC and headset, then run the test. The app will measure the data transfer speed and confirm if it meets the USB 3.0 standard required for Link.
A compatible cable will show a green checkmark and a speed result. If it fails or shows USB 2.0, the cable cannot support the high data throughput needed for PC VR, and you should try a different one.
Why is my Oculus Air Link connection so laggy and stuttering?
Lag in Air Link is almost always due to an insufficient WiFi network. The most common causes are using a congested 2.4GHz band, having your PC connected via WiFi instead of Ethernet, or router interference from other devices.
For a smooth wireless experience, ensure your PC is connected to your router via an Ethernet cable. Your headset must connect to a clear 5GHz or 6GHz band, ideally on a router dedicated to VR streaming.
Can I use a standard USB charging cable to connect my Oculus to my PC?
No, most standard USB cables included for charging only support USB 2.0 data speeds. These are insufficient for the high-bandwidth video data required for Oculus Link. Using one will result in a poor-quality image, extreme lag, or a failed connection.
You must use a certified USB 3.0 (or higher) Gen 1 cable that explicitly supports high-speed data transfer. Look for cables marketed for Oculus Link or VR use, or verify their speed with the Oculus app’s USB test.
What is the best way to improve graphics quality when using Oculus Link?
First, increase the render resolution and refresh rate in the Oculus PC app under Devices > Graphics Preferences. Then, use the Oculus Debug Tool (found in your Oculus installation folder) to raise the Encode Bitrate to between 350-500 Mbps.
Higher bitrate reduces compression artifacts for a clearer image. Also, enable Link Sharpening in the PC app’s Beta settings. Finally, ensure your in-game graphics settings are optimized for your specific GPU.
Do I need to buy Virtual Desktop if Air Link is free?
Not necessarily. Air Link is a robust, free solution built directly into the Oculus system. However, many advanced users prefer Virtual Desktop for its extensive tuning options, consistent performance updates, and often better performance on certain networks.
Try Air Link first, as it requires no additional purchase. If you experience issues or desire more granular control over codec and streaming settings, then consider Virtual Desktop as a powerful alternative.
What should I do if my Oculus headset is not detected by my PC?
First, try a different USB port on your computer, preferably a USB 3.0 port on the motherboard’s rear I/O panel. Restart both your headset and the Oculus PC app service. Ensure you have the latest version of the Oculus PC app installed from the official website.
If still not detected, check your device drivers. Update your motherboard’s USB chipset drivers and your GPU drivers. Also, disable any power-saving settings for USB hubs in your Windows Device Manager.
Is it better to connect Oculus to a laptop or a desktop PC?
A desktop PC is generally better due to more powerful, upgradeable components and better thermal management. However, many modern gaming laptops with a dedicated NVIDIA or AMD GPU and a compatible USB-C port work perfectly.
For laptops, the critical requirement is that the USB-C port must be connected directly to the discrete GPU (not the integrated graphics). Also, ensure your laptop is plugged into power and set to a high-performance mode to prevent throttling.
This website is a participant in the Amazon Services LLC Associates Program, an affiliate advertising program designed to provide a means for us to earn fees by linking to Amazon.com and affiliated sites.