
This website is a participant in the Amazon Services LLC Associates Program, an affiliate advertising program designed to provide a means for us to earn fees by linking to Amazon.com and affiliated sites.
You can make a simple 3D hologram projector at home by creating a transparent four-sided pyramid from clear plastic and placing it over a suitable video on a smartphone or tablet. This inexpensive DIY project uses the Pepper’s Ghost illusion, where reflected light creates the appearance of a floating image rather than producing a true volumetric hologram.
The effect is surprisingly convincing in a dark or dimly lit room. With a few household or craft materials, you can build a small pyramid that reflects four versions of the same animation toward your eyes, making the subject appear suspended in the center.
This project is useful for science demonstrations, classroom activities, parties, photography, and simple home entertainment. However, it is important to understand the difference between a DIY hologram illusion and genuine holographic or volumetric display technology. The homemade version is inexpensive and accessible, but its viewing area and image size are limited by the screen and pyramid dimensions.
Best for DIY 3D Hologram Projection: Grafix Crystal Clear Craft Plastic, Apollo Overhead Transparency Film, and Scotch Transparent Tape
Choosing the right materials can make a noticeable difference when learning how to make a 3D hologram projector at home. The transparent pyramid needs clear, relatively flat material that allows light from the smartphone screen to reflect toward the viewer without excessive distortion. Educational and maker projects commonly use transparent craft plastic, acetate or similar clear sheets for this purpose.
Grafix Crystal Clear Craft Plastic
Why we picked it: Grafix Crystal Clear Craft Plastic is specifically suited to DIY hologram projects because it is transparent, easy to trace, cut, score, and fold into a compact four-sided pyramid.
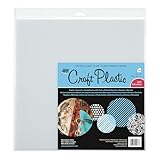
- MANY APPLICATIONS: This ultra-clear surface is perfect for journals, cards, embellishments, and stencils. Decorate your project with permanent markers, rubber…
- ACID FREE AND ARCHIVAL: Grafix Craft Plastic is acid-free making it perfect for book and journal making and framing. It is also safe to use around your artwork and…
It is particularly useful for beginners because you can mark the template directly onto the sheet before cutting. Grafix’s own DIY project instructions use its clear craft plastic film with a ruler, scissors, craft knife, transparent tape, and smartphone to create a hologram viewer.
Apollo Overhead Transparency Film
Why we picked it: Apollo-style clear transparency film provides a lightweight, inexpensive option for creating the pyramid, especially when you want to test different dimensions before using thicker plastic.
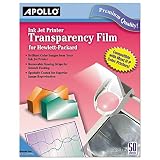
- TRANSPARENT SHEETS – Create eye-catching results with exceptionally clear film. This premium film has a removable sensing stipe and can be used with a printer.
- COATED SURFACE – Each sheet is specially coated to produce brilliant details. Great for making image reproductions.

Thin transparency material is convenient because it can be marked, cut, folded, and assembled without requiring specialized fabrication equipment. It is also a practical choice for classroom demonstrations or multiple DIY attempts.
Scotch Transparent Tape
Why we picked it: Scotch Transparent Tape provides a simple way to join the pyramid edges while keeping the assembly lightweight, inexpensive, and easy to adjust during your first DIY hologram build.

- Classic glossy-finish
- Ideal for multi-purpose sealing and label protection
Use only small strips around the outside edges whenever possible. Excessive tape across the transparent surfaces can become visible in the reflection and reduce the clean appearance of the finished floating image.
Related Products You May Need
Along with the main materials, gather a few basic tools before starting your project:
- Ruler: Helps you reproduce four matching trapezoid panels accurately.
- Fine-tip marker: Useful for transferring the template onto clear plastic.
- Precision craft knife: Makes cleaner cuts in suitable plastic sheets.
- Cutting mat: Protects your work surface while cutting.
- Smartphone or tablet: Provides the bright video source for the illusion.
- Black cardboard or construction paper: Can help reduce distracting light around the display.
- Hologram-ready four-way video: Provides the repeated images needed for the pyramid effect.
The exact pyramid dimensions should be matched to the display being used rather than assuming one universal size. A commonly demonstrated phone-sized design uses four identical transparent panels that meet to form a truncated pyramid, with the finished projector centered over a specially formatted four-sided video.
For the best visual result, prioritize clarity, symmetry, clean edges, accurate alignment, and a dark viewing environment. These factors generally matter more than buying expensive equipment because the homemade device is fundamentally a reflection-based optical illusion rather than a true volumetric holographic display.
What Materials Do You Need to Make a 3D Hologram Projector at Home?
Making a simple 3D hologram projector at home does not require expensive electronics or specialized equipment. The basic design uses a transparent material shaped into a small truncated pyramid, which sits on a smartphone or tablet displaying a specially formatted video. This creates a Pepper’s Ghost-style optical illusion in which reflected images appear to float inside the pyramid.
Before starting, gather the following materials:
- Clear plastic sheet or transparent acetate: This forms the four sides of the pyramid. Choose a material that is as clear and smooth as possible.
- Ruler: Accurate measurements are important because four uneven panels can produce a distorted or poorly aligned image.
- Marker or pen: Use it to trace the pyramid template onto the transparent sheet.
- Scissors or craft knife: Scissors work well with thin plastic, while a craft knife can provide cleaner cuts on suitable thicker sheets.
- Transparent tape: Use small pieces to connect the pyramid’s edges after cutting.
- Smartphone or tablet: The screen provides the four-way video that creates the reflected images.
- Hologram video: Look for videos specifically designed for four-sided smartphone hologram displays.
- Cutting mat or protective surface: This protects your table when using a craft knife.
The screen brightness also matters. Increasing the phone or tablet’s brightness can make the reflected image more visible, particularly when the surrounding room is dark.
For a cleaner result, keep fingerprints, dust, and adhesive away from the transparent panels. Even small marks can become noticeable when bright images are reflected from the plastic.
Most importantly, remember that this homemade device is not a true hologram generator. It creates a convincing floating-image illusion using reflection, which is why the project can be built inexpensively with everyday materials.
How to Make the Transparent Pyramid for Your 3D Hologram Projector
The transparent pyramid is the most important physical component of a DIY 3D hologram projector because its angled surfaces reflect light from the screen toward your eyes. A simple phone-sized version can be made from one sheet of clear plastic, acetate, or another transparent material that is thin enough to cut and fold.
Start by creating a trapezoid template rather than cutting four pieces at random. Each panel should be identical so the four sides meet evenly at the top and form a symmetrical truncated pyramid. For a typical smartphone-sized projector, you can use a template with a narrow top edge and a wider bottom edge, adjusting the dimensions to match the screen and the hologram video you plan to use.
Follow these steps:
- Measure and mark four identical trapezoids on the transparent sheet.
- Cut along the marked lines carefully using scissors or a suitable craft knife.
- Check all four panels to make sure their dimensions match.
- Arrange the pieces into a pyramid shape, bringing their narrow edges together at the top.
- Secure the edges with transparent tape, preferably on the outside so the viewing surfaces remain unobstructed.
- Clean the plastic with a soft microfiber cloth before placing it on the screen.
Accuracy is important because gaps, uneven angles, or fingerprints can interfere with the reflected image. The finished pyramid should sit securely in the center of the phone or tablet display, with all four sides facing the corresponding sections of the four-way hologram video.
For safety, use a cutting mat when working with a craft knife and keep sharp tools away from children. If children are participating, an adult should handle cutting and assembly.
How Does a DIY 3D Hologram Projector Work?
A homemade 3D hologram projector works by using reflection to create the appearance of a floating image. Although these projects are commonly called holograms, the effect is technically an optical illusion based on the Pepper’s Ghost principle rather than a true three-dimensional holographic projection.
The process begins with a specially formatted video containing four versions of the same animation. These images are usually arranged around the center of the smartphone or tablet screen, with each image intended for one side of the transparent pyramid.
When you place the pyramid over the center of the screen, light from each image travels toward the corresponding transparent panel. Because the plastic surface is angled, some of that light reflects toward the viewer. Your eyes therefore perceive an image that appears to be located inside or just above the center of the pyramid.
The four reflected images work together to create a floating 3D-like appearance. As the animation moves, the effect can look surprisingly realistic, particularly when the surrounding room is dark.
Several factors affect the quality of the illusion:
- Screen brightness: A brighter display generally produces a more visible reflection.
- Room lighting: Darkness or low ambient light improves contrast.
- Plastic clarity: Scratches, fingerprints, and cloudy material can reduce image quality.
- Pyramid symmetry: Uneven panels can make the four reflections misalign.
- Video format: A properly formatted four-way hologram video is essential.
The result is best
as a reflection-based display illusion. It does not project light into open space or create a physical object suspended in the air, but it can convincingly make colorful animations appear to float within the transparent pyramid.
How to Assemble and Set Up Your DIY 3D Hologram Projector
Once the transparent pyramid has been cut and assembled, the next step is positioning it correctly over your smartphone or tablet. Proper alignment is essential because the four reflective surfaces need to correspond with the four images displayed on the screen.
Begin by finding a flat, stable surface where you can place the phone or tablet. A table works well because movement can cause the pyramid to shift and make the reflected images appear misaligned.
Next, open a video specifically designed for a four-sided hologram projector. These videos normally contain four copies of the same animation arranged around a central point. Turn the screen brightness up and, if possible, disable notifications so that incoming alerts do not interrupt the display.
Place the pyramid directly over the center of the screen. The wider bottom edges should rest close to the four sides of the display, while the narrower edges meet toward the top.
For the best effect:
- Darken the room as much as practical.
- Increase screen brightness before starting the video.
- Keep the phone stationary throughout the demonstration.
- Center the pyramid carefully over the video.
- View the display from approximately the same height as the pyramid for a stronger floating effect.
- Clean the transparent plastic before use.
If the image looks doubled, tilted, or incomplete, check whether the pyramid is centered and whether all four panels have identical dimensions. You can also experiment with the phone’s brightness and different hologram videos.
Avoid placing the device in direct sunlight or near intense room lighting because bright ambient light can overpower the reflected image. With the room dimmed and the pyramid accurately positioned, colorful animations can appear to float inside the transparent structure, creating the characteristic DIY 3D hologram effect.
How to Improve the Image Quality of a DIY 3D Hologram Projector
The image quality of a homemade 3D hologram projector depends less on expensive equipment and more on alignment, screen brightness, transparent material, video quality, and ambient lighting. Small improvements in each area can make the floating-image illusion noticeably clearer.
Start with the transparent pyramid. Clean every panel with a soft microfiber cloth before use, because fingerprints and dust scatter light and can make reflections appear hazy. If possible, use smooth, highly transparent plastic rather than cloudy or heavily scratched material.
Next, adjust the smartphone or tablet display. Set the screen brightness relatively high and disable automatic brightness if it causes the display to dim during playback. A sharp, high-resolution screen can also produce cleaner reflected details.
Room lighting is equally important. The hologram effect is easiest to see in a dark or dimly lit room, because reflections from the screen need to stand out against the surrounding environment. Avoid positioning lamps or windows directly behind or beside the projector.
You can also improve the effect by:
- Using high-quality four-sided hologram videos.
- Keeping the pyramid precisely centered on the screen.
- Ensuring all four pyramid panels have matching dimensions.
- Removing unnecessary tape or adhesive from viewing areas.
- Using a stable phone stand to prevent movement.
- Experimenting with different viewing distances.
If the image appears faint, first try increasing screen brightness and reducing surrounding light. If it appears distorted, inspect the pyramid’s shape and alignment before assuming the phone or video is the problem.
Remember that this DIY design has inherent limitations. Because it relies on reflected light rather than genuine volumetric projection, the apparent image will remain relatively small and is best viewed from a limited range of angles.
Common Problems When Making a 3D Hologram Projector at Home and How to Fix Them
DIY 3D hologram projectors are simple to build, but small construction or setup mistakes can make the floating image look dim, distorted, or completely invisible. Fortunately, most problems can be corrected by checking the pyramid, screen, video, and surrounding lighting.
The Image Looks Too Dim
A weak reflection is often caused by excessive room lighting or low screen brightness. Move to a darker room, increase the phone’s display brightness, and make sure the transparent panels are clean.
The Hologram Looks Distorted
Distortion commonly occurs when the four pyramid panels are different sizes or do not meet at consistent angles. Check that the trapezoids were measured accurately and that the pyramid is positioned directly over the center of the display.
Only Part of the Image Appears
Check whether you are using a four-sided hologram video rather than an ordinary video. Each section of the video needs to align with one of the pyramid’s four reflective surfaces.
The Reflections Do Not Line Up
Even a small shift can affect alignment. Carefully reposition the pyramid so its center corresponds with the center of the video, then keep the phone and pyramid stationary during playback.
The Plastic Looks Cloudy
Cloudy plastic, scratches, fingerprints, or excessive adhesive can scatter reflected light. Replace heavily scratched material and clean the panels gently with a microfiber cloth.
The Effect Is Difficult to See
Try turning off nearby lights and viewing the projector in a darker environment. The illusion depends on reflected screen light being noticeably brighter than the surrounding background.
Finally, remember that a homemade projector cannot produce the same results as specialized commercial holographic display systems. The DIY version is best treated as an educational optical illusion and entertainment project, making it an accessible way to explore reflection, light, geometry, and visual perception at home.
How to Choose the Right Hologram Video for Your DIY Projector
The hologram video you use can make a major difference to the final effect because a homemade pyramid projector depends on the video being arranged correctly for its four reflective surfaces. An ordinary video will usually not produce the intended floating-image effect.
Look for videos described as “4-way hologram,” “pyramid hologram,” or “Pepper’s Ghost hologram” videos. These typically show four versions of an animation arranged around the center of the screen, allowing each pyramid panel to reflect one version toward the viewer.
For the strongest results, choose content with:
- Dark or black backgrounds: These help the reflected subject stand out.
- Bright, high-contrast subjects: White, neon, or brightly colored animations tend to be easier to see.
- Simple shapes: Objects with recognizable outlines can look more convincing than extremely detailed scenes.
- Slow movement: Gradual animations give the eye more time to perceive the floating effect.
- Appropriate screen dimensions: The video should fit your smartphone or tablet without important portions being cropped.
Once you find a suitable video, maximize the display brightness and place the pyramid precisely over the center. If the four reflections appear uneven, check the pyramid’s position before changing the video.
It is also worth experimenting with different animations. Rotating objects, planets, animals, characters, clocks, and abstract patterns can all work well because movement helps reinforce the illusion of depth.
Keep in mind that video content cannot overcome physical limitations. A scratched pyramid, poorly aligned panels, bright room, or unsuitable screen can still produce a weak result even when the video itself is excellent.
For a first attempt, choose a short, high-contrast four-way animation and test it in a dark room. Once the basic setup works, experimenting with different videos is an easy way to improve the visual experience without rebuilding the projector.
How to Make Your DIY 3D Hologram Projector Safer and More Effective
A homemade 3D hologram projector is generally a simple craft and optics project, but careful construction and setup can make the experience safer and produce a cleaner visual effect. The main concerns involve cutting transparent plastic, handling sharp tools, protecting the smartphone, and positioning the finished projector securely.
If you use a craft knife, cut on a proper cutting mat and away from your body. Adults should handle sharp tools when children are involved. For thin transparency film, scissors may be a safer alternative, although the resulting edges should still be checked for sharp points.
The finished pyramid should also be stable. Uneven or sharp plastic edges can cause minor cuts, so carefully inspect and smooth the edges where appropriate. Avoid placing the projector where it can easily be knocked onto the floor.
To improve the display:
- Keep the transparent panels clean and free from fingerprints.
- Place the smartphone or tablet on a stable, flat surface.
- Avoid covering the device’s ventilation openings.
- Keep liquids away from the electronics.
- Use moderate screen brightness when extended operation makes the device noticeably warm.
- Dim the surrounding room instead of relying entirely on maximum screen brightness.
- Keep the pyramid away from direct sunlight and strong heat sources.
Another important consideration is eye comfort. You do not need extremely intense lighting to create the effect; a dark environment and a bright, high-contrast video are usually more useful than attempting to make the screen excessively bright.
Finally, remember that the homemade device produces a reflection-based illusion rather than a genuine holographic image. Its relatively small viewing area is normal, and attempting to enlarge the effect simply by placing a much larger pyramid over a small phone screen will not automatically produce a better result.
With accurate construction, appropriate lighting, and sensible safety precautions, the project can be an enjoyable way to explore basic optics and create an impressive floating-image display at home.
How to Customize Your DIY 3D Hologram Projector for Different Displays
A DIY 3D hologram projector can be customized for different smartphones and tablets, but the pyramid should be designed around the actual display area and the format of the hologram video. Changing the screen size without changing the pyramid proportions can cause the reflected images to appear too small, distorted, or poorly aligned.
For a smartphone, a compact pyramid is usually sufficient because the display is relatively small. If you want to experiment with a tablet, you can create a larger version using a bigger transparent sheet. However, simply scaling every measurement upward is not always enough; the pyramid’s proportions, panel angles, and video layout still need to work together.
You can customize your projector in several ways:
- Change the pyramid size: Make a smaller version for phones or a larger one for tablets.
- Use different transparent materials: Thin acetate, clear craft plastic, or suitable transparent film can work for prototypes.
- Create a reusable frame: Instead of permanently taping the pyramid together, you can construct a lightweight frame that allows the panels to be repositioned.
- Decorate the base: Cardboard can be used around the outside of the display area without blocking the reflective surfaces.
- Experiment with content: Different animations can create dramatically different visual effects.
A larger screen can make the reflected image easier to see, but it does not transform the project into a true holographic display. The fundamental principle remains the same: light from the screen is reflected by angled transparent surfaces toward the viewer.
Before making a permanent version, it is therefore useful to create a temporary prototype with inexpensive transparent material. Test the proportions with your chosen device and hologram video first, then build a cleaner final version once you know the dimensions work properly. This approach reduces wasted material and makes it easier to troubleshoot alignment problems.
Conclusion
Learning how to make a 3D hologram projector at home is a simple way to explore reflection, light, geometry, and visual perception without expensive equipment. A clear plastic or acetate pyramid positioned over a smartphone or tablet can create a convincing floating-image illusion when paired with a properly formatted four-way hologram video.
The most important factors are accurate pyramid construction, clean transparent panels, correct screen alignment, suitable video content, and a dark viewing environment. While the result is not a true volumetric hologram, the Pepper’s Ghost-style effect can still be surprisingly impressive.
Start with inexpensive materials and a small prototype before experimenting with larger designs. With careful measurements and a little trial and error, you can create a fun DIY display suitable for science demonstrations, classroom projects, parties, photography, or home entertainment.
Frequently Asked Questions About How to Make a 3D Hologram Projector at Home
Can I make a 3D hologram projector with a phone?
Yes. A smartphone is enough for a basic DIY hologram projector. You need a transparent four-sided pyramid positioned over the phone’s screen and a video specifically formatted for pyramid-style hologram displays.
Is a homemade hologram projector a real hologram?
Not technically. Most homemade smartphone “hologram projectors” create a Pepper’s Ghost-style reflection illusion. The reflected images appear to float inside the pyramid, but the device does not generate a true volumetric holographic image.
What can I use instead of special hologram plastic?
Clear acetate, transparent overhead-projector film, or suitable clear craft plastic can be used. The material should be sufficiently transparent and smooth because scratches, cloudiness, and fingerprints can reduce the clarity of the reflection.
What video do I need?
Use a four-way hologram video designed for pyramid displays. These videos normally contain four copies of an animation arranged around the center of the screen so each transparent panel can reflect one image.
Why is my hologram projector not working?
Check the pyramid’s alignment first. Then increase the screen brightness, reduce surrounding light, clean the transparent panels, and confirm that the video is designed for a four-sided pyramid.
Does the room need to be completely dark?
No, but a dim environment generally produces a stronger effect. Bright sunlight or strong room lighting can overwhelm the reflected image and make the floating animation difficult to see.
Can I make a larger hologram projector?
You can create a larger pyramid for a larger display, but the design needs to maintain appropriate proportions and alignment. Simply making the pyramid bigger will not necessarily produce a larger or clearer image.
Can children make one?
Children can participate in the project, particularly when assembling and decorating the projector. However, an adult should supervise or perform any cutting involving craft knives or other sharp tools.
What objects look best in a DIY hologram?
Bright, high-contrast animations with relatively simple shapes tend to work well. Rotating objects, colorful characters, planets, animals, and abstract animations can all produce interesting floating effects.
Can I use a tablet instead of a phone?
Yes. A tablet can provide a larger display, although you will need a correspondingly sized pyramid and appropriately formatted video. Test the dimensions with inexpensive material before constructing a larger permanent version.
This website is a participant in the Amazon Services LLC Associates Program, an affiliate advertising program designed to provide a means for us to earn fees by linking to Amazon.com and affiliated sites.