
This website is a participant in the Amazon Services LLC Associates Program, an affiliate advertising program designed to provide a means for us to earn fees by linking to Amazon.com and affiliated sites.
Setting up a star projector is simple and transforms any room into a personal planetarium. This guide provides the proven methods for a perfect installation every time.
Proper setup is crucial for achieving a crisp, immersive night sky effect and maximizing your device’s features. Avoid common mistakes that lead to blurry stars or poor coverage.
You will learn the best placement strategies, essential calibration steps, and expert tips for creating breathtaking atmospheres for relaxation, sleep, or entertainment. Let’s begin your journey to the stars.
Best Star Projectors for a Perfect Setup – Detailed Comparison
BlissLights Sky Lite 2.0 – Best Overall Choice
The BlissLights Sky Lite 2.0 is our top recommendation for its exceptional ease of setup and stunning visual impact. It projects a deep nebula cloud with laser-precise stars. Simply plug it in, aim, and enjoy. It’s ideal for creating an instant, mesmerizing ambiance in any bedroom or living space.

Sega Homestar Flux – Best for Authentic Realism
For astronomy enthusiasts seeking realism, the Sega Homestar Flux is unmatched. It uses genuine optical discs to project accurately mapped constellations. The setup involves choosing a disc and focusing the lens, resulting in the most authentic home planetarium experience available.

- Project 60,000 twinkling high definition stars onto your rooms ceiling or…
- Christmas 2021: Order till Friday December 17 and usually receive in time.
- Leading brand with 5-watt warm white LED technology
Encalife Atmos Smart Galaxy Projector – Best for Tech Integration
The Encalife Atmos is the best option for smart home control. Set it up via the app to adjust colors, rotation, and brightness from your phone. It features voice control compatibility with Alexa and Google Assistant, making it ideal for automated, hands-free ambiance.
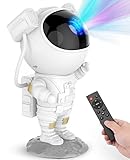
- [Astronaut Star Projector Galaxy Night Light] The galaxy projector supports…
- [Remote Control & Auto-off Timer] This starlight projector with timer and…
- [Projection Angle Adjustable] This night light starry projector is designed…
Essential Pre-Setup Checklist for Your Star Projector
Before you power on your device, proper preparation is key. This checklist ensures you have everything needed for a flawless star projector setup. It prevents common issues and saves time.
Choosing the Perfect Location
Location dramatically affects your projection quality. The ideal spot is central, with a clear, flat surface and a large, unobstructed wall or ceiling. Avoid placing it near bright lights or windows to maximize contrast.
- Central Placement: Ensures even star field coverage and prevents distorted images on adjacent walls.
- Flat, Stable Surface: A nightstand, shelf, or tripod prevents the projector from shaking and blurring the stars.
- Optimal Distance: Most projectors work best 3-8 feet from the projection surface for a sharp, wide display.
Gathering Your Tools and Materials
You likely have most items already. Having them ready streamlines the entire setup process. This minimizes interruptions once you begin.
Summary Box: What You’ll Need
- Your star projector and its power adapter
- A microfiber cloth for lens cleaning
- A measuring tape for optimal placement
- Extension cord or power bank (if needed)
Optimizing Your Room Environment
Ambient light is the enemy of a vivid starry sky. For the best results, your room must be as dark as possible. This simple step makes a dramatic difference in final image clarity.
- Block External Light: Use blackout curtains or blinds to seal windows.
- Control Internal Lights: Turn off or dim all lamps, TVs, and digital displays.
- Consider Surfaces: Light-colored, matte walls and ceilings reflect projections better than dark or textured ones.
Step-by-Step Guide to Setting Up Your Star Projector
Follow this clear, sequential process for a perfect installation. These steps apply to most home planetarium projectors. They ensure you activate all features correctly.
Initial Unboxing and Assembly
Carefully remove all components from the packaging. Check the contents against the manual’s inventory list. This prevents discovering a missing part later.
- Inspect and Clean: Gently wipe the projector’s lens with a microfiber cloth to remove any dust.
- Insert Batteries or Connect Power: For cordless models, insert fresh batteries. For plug-in models, keep the adapter handy.
- Attach Accessories: Secure any included stands, tripod mounts, or star discs as instructed.
Calibration and Focus Adjustment
This is the most crucial step for a sharp image. Proper calibration turns a blurry light blob into a defined galaxy. Patience here pays off with stunning visuals.
Summary Box: Calibration Steps
- Place the projector at your chosen distance from the wall/ceiling.
- Turn it on to the default white star setting for easiest focusing.
- Slowly rotate the focus ring or knob until each star point is a sharp, distinct pinprick of light.
Configuring Modes and Settings
Modern projectors offer multiple modes. Explore these settings to customize your experience. This allows you to tailor the ambiance to your activity.
- Color Selection: Cycle through colors like blue, green, or multicolor to set the mood.
- Rotation Speed: Adjust from a slow drift to a fast spin for dynamic effects.
- Timer Function: Set an auto-shutoff (e.g., 60 minutes) for worry-free sleep.
Advanced Tips and Troubleshooting Common Issues
Master these pro techniques to elevate your starry display. This section also solves frequent problems encountered during setup. Achieve a professional-grade home planetarium with these insights.
Pro Techniques for Enhanced Effects
Combine your projector with other elements for a truly immersive scene. These methods add depth and realism to your celestial display. They transform a simple projection into an experience.
- Layered Projection: Use two projectors at different angles to create a 3D, multi-depth star field.
- Ambient Sound: Pair with a nature sound machine featuring gentle rain or cosmic tones for full sensory immersion.
- Strategic Decor: Hang sheer black curtains or place potted plants in the room to catch shadows and add texture.
Solving Frequent Setup Problems
If your stars aren’t perfect, a quick fix is usually available. Refer to this troubleshooting table for common issues and their solutions.
| Problem | Likely Cause | Quick Solution |
|---|---|---|
| Blurry or distorted stars | Incorrect focus or projector too close/far | Re-calibrate focus ring and adjust distance to surface. |
| Dim projection | Ambient light is too bright or lens is dirty | Darken the room completely and clean the lens. |
| Uneven star field | Projector is not on a level surface | Place projector on a flat, stable base or use a tripod. |
Maintenance for Long-Term Performance
Proper care ensures your projector lasts for years. Follow these simple maintenance steps. They prevent dust buildup and component wear.
Summary Box: Care Checklist
- Always unplug the device before cleaning.
- Dust the exterior and lens weekly with a soft, dry cloth.
- Store in a cool, dry place when not in use for extended periods.
- Avoid touching the lens directly with your fingers to prevent oil smudges.
Creative Uses and Ideal Setups for Different Rooms
Your star projector is versatile beyond the bedroom. Tailoring the setup to the room’s purpose maximizes its benefits. Discover how to adapt your projector for any space.
Bedroom Setup for Sleep and Relaxation
This is the most popular use case. The goal is to create a calming environment that promotes rest. The right settings can significantly improve sleep hygiene.
- Color Choice: Use soft blues, purples, or warm white stars. Avoid stimulating bright red or fast-flashing modes.
- Placement: Project onto the ceiling above the bed for a lying-down viewing experience.
- Timer Function: Always engage the auto-shutoff timer (30-60 minutes) so it doesn’t stay on all night.
Living Room and Entertainment Space
Here, the projector becomes a dynamic piece of ambient decor. It sets the mood for social gatherings, movie nights, or quiet evenings. Think of it as adjustable mood lighting.
Summary Box: Entertainment Setup Tips
- Feature Wall: Project onto a large, blank wall as a focal point.
- Dynamic Settings: Use rotating multicolor modes for parties or a static blue hue for a chill vibe.
- Synced Audio: Connect to your sound system; some smart models can sync light patterns to music.
Children’s Room and Educational Use
Transform the projector into a fun, educational tool. It can soothe bedtime routines and spark an interest in science. Safety and simplicity are key here.
- Constellation Learning: Use projectors with specific constellation discs (like the Homestar) to teach star patterns.
- Night Light Alternative: Provides a comforting, non-threatening glow that helps alleviate fear of the dark.
- Safety First: Secure cords out of reach and place the projector on a high, stable shelf they cannot touch.
Safety Guidelines and Best Practices for Operation
Safe operation ensures you enjoy your star projector without risk. Following these guidelines protects your device, your home, and your eyesight. They are essential for long-term, worry-free use.
Electrical and Placement Safety
Always prioritize safe handling of electronics and heat management. Improper use can pose fire or electrical hazards. These rules are non-negotiable for all projector models.
- Power Source: Use only the manufacturer-provided adapter. Do not overload power strips with multiple high-draw devices.
- Ventilation: Never cover the projector or place it on soft surfaces like beds or carpets that can block vents and cause overheating.
- Cable Management: Secure cords along walls or under rugs to prevent tripping hazards, especially in dark rooms.
Laser Safety and Eye Protection
Many high-quality projectors use Class II laser diodes to create sharp stars. While generally safe, direct eye exposure should be avoided. Understanding laser classification is key.
Summary Box: Laser Safety Rules
- Never Stare: Do not look directly into the projector’s laser aperture.
- Keep Out of Reach: Place the projector where young children and pets cannot access the lens directly.
- Understand Class: Class II lasers are low-power and safe for incidental exposure, but intentional staring is harmful.
Long-Term Usage and Storage
Proper habits extend the lifespan of your device. They also maintain optimal performance between uses. Treat your projector as a precision optical instrument.
- Cool Down: Allow the projector to cool completely before moving or storing it after extended use.
- Regular Cleaning: Dust the exterior and lens gently with compressed air or a dry microfiber cloth to maintain brightness.
- Proper Storage: Store in its original box or a protective case in a dry, temperature-stable environment.
Accessories to Enhance Your Star Projector Experience
The right accessories can dramatically improve your setup’s functionality and impact. They solve common limitations and unlock new creative possibilities. Consider these add-ons for a premium home planetarium.
Essential Mounting and Positioning Tools
Getting the perfect angle is often challenging with furniture alone. Dedicated mounts provide stable, flexible positioning. They are a game-changer for projection accuracy.
- Mini Tripod: Offers adjustable height and a stable base on uneven surfaces. Look for one with a standard 1/4″ screw mount.
- Wall/Ceiling Mount Bracket: Provides a permanent, space-saving installation solution for a clean, professional look.
- Flexible Gooseneck Mount: Allows you to bend and position the projector precisely from a bedside table or shelf.
Ambiance-Enhancing Add-Ons
Pair your visual display with complementary elements for full immersion. These accessories engage other senses to complete the atmosphere. They transform a visual show into an experience.
Summary Box: Atmosphere Accessories
- Smart Plug: Enables voice control or scheduling to turn your projector on/off automatically.
- White Noise/Sound Machine: Plays calming nature sounds or ambient music to sync with the tranquil visuals.
- Remote Dimmer Switch: For plug-in models, this allows you to adjust brightness from your bed without getting up.
Maintenance and Protection Kits
Protect your investment to ensure years of clear projections. A small maintenance kit prevents the most common causes of image degradation. It’s a simple, cost-effective measure.
- Lens Cleaning Kit: Includes a microfiber cloth and safe, non-alcoholic lens solution to remove fingerprints and dust without scratching.
- Protective Case: A padded carrying case is essential for safe storage or travel, preventing damage to the lens and body.
- Rechargeable Power Bank: For cordless operation, a high-capacity power bank extends run time significantly for camping or power outages.
Finalizing Your Setup: Testing and Optimization
Your star projector is now physically set up. This final phase involves fine-tuning for perfection. Testing and optimization ensure you get the absolute best performance from your device.
Running a Comprehensive Function Test
Before settling in, methodically test all features. This confirms everything works and helps you familiarize yourself with the controls. It’s your quality assurance check.
- Power & Basic Projection: Verify the unit powers on and projects a basic star field clearly.
- Cycle All Modes: Test every color setting, rotation speed, and any special effects (like cloud simulation).
- Check Additional Functions: Confirm the timer, remote control, or app connectivity (if applicable) work correctly.
Fine-Tuning for Visual Perfection
Minor adjustments make a major difference in visual quality. This step is about achieving the crispest, most immersive image possible. View from your intended seating or lying position.
Summary Box: Optimization Checklist
- Re-check Focus: View from your bed or couch and make micro-adjustments to the focus ring.
- Adjust Tilt: Use a mount or small wedge to eliminate keystone distortion (where stars look stretched).
- Balance Brightness: Find a brightness level that is vivid but not harsh on the eyes in a dark room.
Creating and Saving Your Preferred Presets
Once you find the perfect settings, note them down. This saves time for future use and allows you to create different moods for different occasions quickly.
- Sleep Preset: Dim blue, no rotation, 60-minute timer.
- Party Preset: Multicolor, medium rotation speed, maximum brightness.
- Relaxation Preset: Slow-rotating green or purple, medium brightness, no timer.
Conclusion: Mastering Your Star Projector Setup
You now possess the complete knowledge to set up a star projector flawlessly. From choosing the right model to advanced calibration, each step creates a stunning celestial display. This transforms any room into a personal oasis.
The key takeaway is preparation and patience. A perfect setup hinges on the right location, a dark room, and careful focusing. Follow the step-by-step guide for guaranteed results.
We encourage you to experiment with different settings and creative uses. Find the perfect ambiance for sleep, relaxation, or entertainment. Your ideal starry night is just a switch away.
Enjoy the journey to the stars from the comfort of your home. A beautifully projected galaxy awaits your command.
Frequently Asked Questions about Setting Up a Star Projector
What is the best distance to place a star projector from the wall?
The optimal distance is typically 3 to 8 feet from the projection surface. This range provides a wide, immersive field of view while keeping the star points sharp and distinct. Always refer to your specific model’s manual for its recommended throw distance.
Start at 5 feet as a middle ground. Then, adjust closer for a smaller, brighter image or farther back for a larger, slightly dimmer display. Fine-tune the focus ring after each distance adjustment for the clearest result.
How do I fix a blurry star projection?
A blurry projection is almost always a focus issue. Locate the focus ring or dial on your projector, usually around the lens. Slowly rotate it while observing the wall until each individual star becomes a sharp, tiny pinprick of light.
Ensure the projector is on a stable surface, as vibration can cause blur. Also, check that the lens is clean. Use a dry microfiber cloth to gently wipe away any dust or smudges obstructing the light path.
Can I use a star projector outdoors?
You can use battery-powered or power-bank-compatible models outdoors in dry conditions. Ensure the projector is rated for use and placed on a stable, level surface. The effect is stunning in a backyard or while camping.
Critical precautions include never leaving it unattended, avoiding any moisture (dew or rain), and ensuring no ambient light from streetlights or houses washes out the projection. Always bring it inside after use.
Why are my star projector’s colors dim or inaccurate?
Dim colors are usually caused by excessive ambient light. Even small light sources from electronics or windows can drastically reduce contrast and saturation. For accurate, vibrant colors, achieve total darkness in the room.
If colors seem “off” in a dark room, check the settings. Some projectors have separate controls for nebula cloud color and star color. Consult your manual to ensure you are adjusting the correct setting for the desired effect.
What is the best surface to project stars onto?
A smooth, light-colored, and matte-finish ceiling or wall is ideal. Matte white surfaces reflect the light evenly without creating hot spots. This results in a consistent, realistic star field across the entire projection.
Avoid dark, textured, or glossy surfaces. Dark walls absorb too much light, making stars dim. Textured surfaces (like popcorn ceilings) distort the stars, and glossy paints create glare that ruins the subtle effect.
How do I safely clean my star projector’s lens?
Always unplug the device first. Use a soft, clean microfiber cloth designed for lenses or glasses. Gently wipe the lens in a circular motion from the center outward to remove dust and fingerprints.
Avoid using household cleaners, alcohol wipes, or paper towels, as these can scratch the delicate optical coating. For stubborn smudges, lightly breathe on the lens to fog it, then wipe immediately with the dry microfiber cloth.
Is it safe to leave a star projector on all night?
While many projectors are designed for extended use, it is not recommended to leave them on unattended for 8+ hours. This can lead to unnecessary wear, potential overheating, and increased energy use.
Instead, use the built-in timer function found on most models. Set it for 60 to 90 minutes, allowing you to fall asleep under the stars while the projector turns off automatically, ensuring safety and longevity.
What’s the difference between LED and laser star projectors?
LED projectors typically create a softer, more diffuse nebula or galaxy effect with less defined stars. Laser projectors use Class II laser diodes to create incredibly sharp, pinpoint stars that look more realistic and can be focused precisely.
Laser models generally offer superior clarity and a more authentic night-sky appearance. However, they require strict adherence to laser safety guidelines, such as avoiding direct eye exposure. LED models are often more budget-friendly and great for ambient color.
This website is a participant in the Amazon Services LLC Associates Program, an affiliate advertising program designed to provide a means for us to earn fees by linking to Amazon.com and affiliated sites.