This website is a participant in the Amazon Services LLC Associates Program, an affiliate advertising program designed to provide a means for us to earn fees by linking to Amazon.com and affiliated sites.
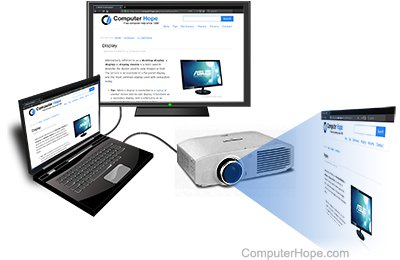
How do you use Air Link with a Meta Quest 2? This feature lets you play PC VR games wirelessly. You simply connect your headset to a compatible computer over Wi-Fi.
It solves the major problem of being tethered by a cable. This grants you complete freedom of movement for a more immersive experience. Setting it up correctly is crucial for smooth performance.
This complete guide provides step-by-step instructions and expert tips. You will learn system requirements, optimal settings, and proven troubleshooting methods. Get ready to cut the cord and dominate your virtual world.
Best Wi-Fi Routers for Air Link – Detailed Comparison
For a flawless wireless VR experience with Air Link, your Wi-Fi network is critical. A dedicated, high-performance router is the single most important upgrade. These three models are consistently recommended by the VR community for their stability and low latency.
TP-Link Archer AXE75 – Best Overall Choice
This tri-band Wi-Fi 6E router is the ideal balance of performance and value. It provides a dedicated, interference-free 6GHz band for your Quest 2, while other devices use separate bands. This ensures rock-solid stability and ultra-low latency, making it the top recommendation for most users.

- WIFI 6 TECHNOLOGY: Advanced AX5400 router delivers ultra-fast speeds up to…
- TRI-BAND PERFORMANCE: Features dedicated bands to reduce network congestion…
- COVERAGE CAPACITY: Powerful antennas and advanced technology ensure…
ASUS RT-AX86U – Best for Advanced Tuning
A legendary Wi-Fi 6 router known for its gaming optimization and robust firmware. Its powerful processor and extensive Quality of Service (QoS) settings allow you to prioritize VR traffic precisely. This is the best option for tech-savvy users who want maximum control over their network performance.

- New-generation WiFi 6 – Enjoy ultrafast speeds up to 5700 Mbps with the…
- Mobile Game Mode – Minimize lag and latency for mobile gaming with just a…
- True 2 Gbps wired and wireless speeds – Aggregated 2 Gbps WAN connections…
Netgear Nighthawk RAXE300 – Premium Performance Pick
For the absolute best wireless experience, this tri-band Wi-Fi 6E router delivers. It offers exceptional range and speed on the 6GHz band, future-proofing your setup. It’s the ideal choice for larger play spaces or environments with many competing wireless signals, guaranteeing a pristine connection.

- Blazing-fast WiFi 7 speeds up to 12Gbps for real-time gaming, 4K/8K…
- WiFi 7 delivers 2.4x faster speeds than WiFi 6 to maximize performance…
- This router does not include a built-in cable modem. A separate cable modem…
Air Link System Requirements and Prerequisites
Before diving into setup, you must ensure your hardware and software are compatible. Meeting these requirements is non-negotiable for a smooth, stutter-free wireless VR experience. Failing to do so will result in lag, compression artifacts, and disconnections.
PC Hardware and Software Checklist
Your gaming PC needs to be VR-ready and running specific software. The requirements are more stringent than for standard Link with a cable.
- PC Specs: Your computer must meet the Oculus Rift S minimum specifications or higher. A powerful GPU (NVIDIA GTX 1060 / AMD Radeon RX 480 minimum, but RTX 3060 or better recommended) is crucial.
- Oculus Software: You must have the latest Oculus PC app installed and set up with your Meta account. Enable “Public Test Channel” in Settings > Beta for the newest features.
- Headset Software: Your Meta Quest 2 must be on the latest v50 or newer firmware. Check for updates in the headset’s Settings > System.
Wi-Fi Network Essentials
Your network is the backbone of Air Link. A subpar setup is the most common cause of performance issues.
- Dedicated Router: Use a Wi-Fi 6 router dedicated solely to your Quest 2, placed in the same room. This eliminates bandwidth competition from phones, tablets, and other devices.
- 5GHz Band is Mandatory: Air Link will not work on a 2.4GHz network. You must connect your PC via Ethernet and your headset to the router’s 5GHz (or preferably 6GHz) band.
- Optimal Channel: Use a tool to find the least congested 5GHz channel in your area. Set your router to use this channel to minimize wireless interference from neighbors.
Step-by-Step Air Link Setup and Connection Guide
Once your system meets all prerequisites, connecting is straightforward. Follow these steps precisely to establish a stable Air Link connection between your Quest 2 and PC. The process involves enabling the feature on both devices.
Enabling Air Link on Your PC and Headset
You must first activate Air Link within the Oculus PC application. Then, you will enable it on your Quest 2 headset.
- On your PC: Open the Oculus app. Click Settings > Beta. Toggle the “Air Link” switch to the ON position.
- On your Quest 2: Put on your headset. Open the Universal Menu by pressing the Oculus button. Select Settings > Experimental Features.
- Final Activation: In Experimental Features, toggle “Air Link” on. Your headset will scan for available PCs. Select your computer from the list and choose “Pair”.
Establishing Your First Wireless Connection
After pairing, you can launch Air Link anytime from your headset. This brings up the Oculus Rift environment on your Quest 2.
- Launching: Go to Settings > Experimental Features and select “Launch Air Link”. Your paired PC will appear; select it to connect.
- Desktop View: You will see the Oculus Home or your PC desktop. Use your Quest controllers as virtual mouse pointers to launch SteamVR or any PC VR game.
- Disconnecting: To exit, press the Oculus button on your controller. Select “Quit Air Link” from the menu to return to the native Quest home environment.
Optimizing Air Link Performance and Settings
A successful connection is just the beginning. Fine-tuning settings is essential for maximizing visual quality and minimizing latency. The Oculus Debug Tool and in-headset settings give you powerful control over your experience.
Configuring Oculus Debug Tool (ODT) Settings
This advanced tool, found in your Oculus software installation folder, is key for enthusiasts. Key settings dramatically impact performance and image clarity.
- Encode Bitrate: This controls the data stream quality. Set it between 100-200 Mbps for Air Link. Higher values improve clarity but require a perfect network.
- Distortion Curvature: Set this to “Low”. This reduces rendering workload with minimal visual impact, boosting performance.
- Link Sharpening: Enable this. It applies a filter that enhances image clarity and reduces the soft, blurry look of compression.
Adjusting In-Headset Air Link Settings
Access these by clicking the Oculus button in Air Link and selecting the Settings cog. Start with a conservative profile and adjust upward.
| Setting | Recommended Value | Effect |
|---|---|---|
| Refresh Rate | 90Hz | Balances smoothness with GPU demand. Use 120Hz only with high-end GPUs. |
| Render Resolution | 1.2x (or native) | Increases clarity. Raise this only if your GPU can maintain 90 FPS. |
| Dynamic Bitrate | Enabled | Automatically adjusts bitrate to maintain a stable connection, reducing stutter. |
Network and Environmental Tweaks
Your physical environment and network health are critical factors for consistent performance.
- Line of Sight: Maintain a clear visual line between your headset and the router. Avoid walls and large metal objects.
- Dedicated Channel: As mentioned earlier, use a Wi-Fi analyzer to select the least congested 5GHz channel in your area.
- Reduce Interference: Keep the router away from microwaves, cordless phones, and Bluetooth speakers which can cause signal noise.
Troubleshooting Common Air Link Problems
Even with a perfect setup, you may encounter issues. This section addresses the most frequent Air Link errors and their proven solutions. Methodically working through these steps will resolve most connection and performance problems.
Fixing “PC Not Found” and Connection Errors
If your headset cannot see your PC, the issue is almost always network-related. Follow this checklist to re-establish communication.
- Verify Network Topology: Ensure your PC is connected to your router via Ethernet cable, not Wi-Fi. Your Quest 2 must be on the same network’s 5GHz band.
- Restart Services: On your PC, open the Oculus app. Go to Settings > Beta and toggle Air Link off and on. Restart the Oculus service via the app’s “Devices” page.
- Re-pair Devices: In your headset’s Air Link menu, select your PC and choose “Forget This Device”. Then, restart the pairing process from the beginning.
Resolving Stuttering, Lag, and Visual Artifacts
Performance issues like stuttering or a blurry image point to bandwidth or encoding problems. These adjustments can help.
- Lower the Bitrate: High ODT bitrate on a weak network causes stutter. Reduce the Encode Bitrate in 50 Mbps increments until stability returns.
- Check for Interference: Other devices can saturate your Wi-Fi channel. Temporarily turn off other smart devices or download activity on your network.
- Update Drivers: Ensure your GPU drivers are up to date. Outdated drivers are a common cause of encoding latency and visual glitches.
Advanced Fixes for Persistent Issues
For problems that won’t resolve, these deeper system checks are necessary.
| Problem | Advanced Solution |
|---|---|
| Micro-stutters every few seconds | Disable hardware-accelerated GPU scheduling in Windows Graphics Settings. This feature can conflict with VR encoding. |
| Black screen upon connecting | Ensure your PC’s power plan is set to “High Performance.” Also, disable any aggressive GPU overclocking that may be unstable. |
| Audio cutting out or crackling | In Windows Sound Control Panel, set both the default device and default communications device to the Oculus Virtual Audio Device. |
Air Link vs. Virtual Desktop vs. Link Cable
Air Link is not your only option for PC VR on Quest 2. Understanding the key differences between wireless and wired solutions helps you choose the best tool for your needs. Each method has distinct advantages and trade-offs.
Performance and Latency Comparison
Latency and image quality are the primary battlegrounds. A wired connection provides the most reliable baseline.
- Link Cable (USB-C): Offers the lowest possible latency and highest possible bitrate (up to 500+ Mbps). This means the sharpest image and most immediate response, ideal for competitive games.
- Air Link (Native): Provides a good balance of convenience and quality. Latency is slightly higher than wired, and image quality depends heavily on your network’s health.
- Virtual Desktop (App): Often praised for its superior video streaming codecs (like HEVC) and granular settings. It can feel smoother than Air Link on some networks due to intelligent optimization.
Convenience, Setup, and Cost Analysis
Beyond raw performance, practical considerations like ease of use and price are important.
| Method | Setup Complexity | Cost | Best For |
|---|---|---|---|
| Official Link Cable | Simple (plug & play) | $$$ (High) | Users who prioritize max fidelity and play seated/stationary games. |
| Air Link | Moderate (Network config) | Free | Meta ecosystem users who want a free, integrated wireless solution. |
| Virtual Desktop | Moderate (App install) | $ (One-time app fee) | Enthusiasts who want deep customization and often find it works better on their specific network. |
Choosing the Right Tool for Your Playstyle
Your choice should align with the types of games you play and your physical space.
- Choose Link Cable for: Flight/racing sims, competitive shooters, and long play sessions where battery life isn’t a concern.
- Choose Air Link for: Room-scale action games (like Blade & Sorcery), casual use, and anyone wanting to use Meta’s free, first-party solution.
- Choose Virtual Desktop for: Users with strong networks who want extensive performance graphs, codec choice, and a streamlined interface for launching non-Oculus store games.
Pro Tips and Advanced Air Link Techniques
Mastering the basics gets you connected, but these advanced strategies elevate your wireless VR experience. From managing battery life to integrating with other platforms, these tips provide the polish of a power user.
Maximizing Battery Life During Play
The Quest 2’s internal battery drains faster when streaming PC content. Prolong your sessions with these methods.
- Use a Power Bank: Attach a 10,000mAh+ power bank to your headset’s strap with a short USB-C cable. This can extend playtime indefinitely, effectively countering Air Link’s power draw.
- Reduce Screen Brightness: Lowering the headset display brightness by 20-30% in the Quick Settings menu saves significant power with minimal visual impact.
- Disable Unnecessary Features: Turn off hand tracking and reduce the guardian sensitivity when using Air Link. This reduces background processing load.
Seamless Integration with SteamVR
Playing SteamVR games via Air Link requires one extra step but works flawlessly. Proper setup prevents library conflicts.
- Install SteamVR: Ensure SteamVR is installed on your PC via the Steam client. Launch it once on your desktop to complete initial setup.
- Launch from Air Link: Connect via Air Link. In the Oculus Rift dashboard, select the “Library” tab, then choose “SteamVR” from the list of applications.
- Set OpenXR Runtime (Optional): For best compatibility with newer titles, set the OpenXR runtime to Oculus in the Oculus PC app under Settings > General.
Enhancing Immersion and Comfort
Small adjustments can significantly improve your sense of presence and reduce fatigue during long wireless sessions.
| Focus Area | Advanced Technique | Benefit |
|---|---|---|
| Audio | Use high-quality Bluetooth headphones paired directly to the Quest 2 for lower latency audio than Windows streaming. | Better spatial sound and no audio-video sync issues. |
| Play Space | Create a stationary guardian slightly smaller than your actual room’s boundaries. | Prevents accidental boundary triggers during intense movement, maintaining immersion. |
| Performance | For demanding games, use ODT to enable Fixed Foveated Rendering (FFR) at “Level 3”. | Boosts frame rate by reducing detail in your peripheral vision, where it’s less noticeable. |
Air Link Safety, Maintenance, and Best Practices
Ensuring a safe play environment and maintaining your equipment is crucial for long-term enjoyment. These guidelines protect you, your hardware, and your data while using wireless PC VR.
Creating a Safe Wireless VR Play Area
Physical safety is your top priority. A wireless headset increases mobility but also the risk of collisions.
- Clear Obstacles: Always define your guardian boundary with a clear meter of buffer space from walls, furniture, and hanging light fixtures.
- Use a VR Mat: Place a small, textured mat in the center of your play space. Feeling it under your feet provides tactile feedback to re-center yourself without looking.
- Manage Cables: Even wirelessly, keep PC and router cables securely taped down or routed out of the play area to prevent tripping.
Routine Maintenance for Peak Performance
Regular checks prevent gradual performance degradation and connectivity issues.
- Update Regularly: Weekly, check for updates to the Oculus PC app, Quest 2 firmware, and your GPU drivers. Updates often include critical stability fixes for Air Link.
- Clean Your Headset: Gently wipe the lenses with a microfiber cloth. Clean the facial interface foam with non-alcoholic wipes to prevent skin irritation and maintain hygiene.
- Reboot Your Router: Schedule a monthly reboot of your dedicated Air Link router. This clears its memory cache and can resolve subtle latency creep.
Network Security and Privacy Considerations
Using a dedicated network has security benefits. Implement these practices to protect your data.
| Consideration | Best Practice | Reason |
|---|---|---|
| Dedicated SSID | Create a separate network name (SSID) just for your Quest 2. | Isolates VR traffic and prevents other devices from slowing your connection or accessing the stream. |
| Strong Encryption | Use WPA3 security on your router if supported, otherwise WPA2. | Encrypts the data stream between your headset and PC, protecting your gameplay from local snooping. |
| Firewall Settings | Ensure the Oculus app is allowed through your PC’s Windows Firewall. | Prevents connection blocks that can cause “PC Not Found” errors. |
Conclusion: Mastering Wireless PC VR with Air Link
Using Air Link with your Meta Quest 2 unlocks a new level of immersive, cable-free PC VR. By following the setup, optimization, and troubleshooting steps outlined, you can achieve a stable, high-performance wireless experience. The freedom of movement it provides fundamentally enhances gameplay.
The key takeaway is that your Wi-Fi network is the most critical component. Investing in a proper router and configuration is non-negotiable for success. Start with the prerequisites and work through the guide methodically.
We encourage you to experiment with the settings and pro tips to fine-tune Air Link for your specific setup and games. Share your experiences and favorite wireless titles in the comments below.
With the right preparation, Air Link delivers a transformative VR experience that makes returning to a tether feel impossible. Enjoy your newfound freedom.
Frequently Asked Questions about Using Air Link
What is the difference between Air Link and Oculus Link?
Air Link is Meta’s official wireless solution, streaming PC VR content over Wi-Fi. Oculus Link uses a physical USB-C cable to tether your headset to the PC. The core difference is freedom of movement versus maximum fidelity. Air Link provides untethered play, while Link offers slightly lower latency and higher visual bitrates for the sharpest image.
How do I fix Air Link lag and stuttering?
First, ensure your PC is connected to your router via Ethernet, not Wi-Fi. Then, lower the Encode Bitrate setting in the Oculus Debug Tool to 100-150 Mbps. Finally, check for Wi-Fi interference by changing your router’s 5GHz channel to the least congested one in your area. These steps resolve most performance issues.
Can I use Air Link with any Wi-Fi router?
Technically, you need a 5GHz Wi-Fi router, but performance varies drastically. For a good experience, a Wi-Fi 5 (AC) router dedicated solely to the Quest 2 is the minimum. For a great, consistent experience, a Wi-Fi 6 (AX) or Wi-Fi 6E router is highly recommended to handle the high-bandwidth, low-latency demands.
What are the best settings for Air Link quality?
Start with 90Hz refresh rate and 1.2x render resolution in the Oculus desktop app. In Oculus Debug Tool, set Encode Bitrate to 150 Mbps, enable Link Sharpening, and set Distortion Curvature to Low. Adjust bitrate down if you experience stuttering, or resolution up if your GPU can maintain 90 FPS.
Why won’t my Quest 2 find my PC on Air Link?
This is almost always a network configuration error. Verify both devices are on the same network—your PC via Ethernet and your Quest on the 5GHz band. Ensure Air Link is toggled ON in the Beta settings of the Oculus PC app. Restarting the Oculus service on your PC often resolves this.
Is Virtual Desktop better than Air Link?
It depends on your network and needs. Virtual Desktop offers more advanced codecs (HEVC) and granular performance graphs, which can provide a smoother experience on some setups. Air Link is free and deeply integrated with the Oculus ecosystem. It’s best to try the free Air Link first, then purchase Virtual Desktop if you need finer control or better performance.
How can I improve Air Link battery life?
The most effective method is using a high-capacity (10,000mAh+) USB-C power bank attached to your headset strap. Additionally, reduce the headset’s screen brightness and disable background features like hand tracking while using Air Link. This combination can extend play sessions for many hours.
Do I need a separate router for Air Link?
While not absolutely mandatory, a dedicated router is the single best upgrade for Air Link reliability. It eliminates bandwidth competition from phones, laptops, and other household devices. For consistent, stutter-free performance, a router used exclusively for your Quest 2 in the same room is the professional recommendation.
This website is a participant in the Amazon Services LLC Associates Program, an affiliate advertising program designed to provide a means for us to earn fees by linking to Amazon.com and affiliated sites.