
This website is a participant in the Amazon Services LLC Associates Program, an affiliate advertising program designed to provide a means for us to earn fees by linking to Amazon.com and affiliated sites.
Optimizing your Meta Quest Windows Air Link bitrate settings is crucial for a smooth, high-fidelity wireless VR experience. The correct settings eliminate lag, compression, and stuttering during gameplay.
This guide provides expert tips and proven methods to configure your bitrate for maximum performance. You will learn how to balance visual quality with network stability effortlessly.
We will cover the optimal bitrate values, advanced troubleshooting steps, and key adjustments for your router and PC. Transform your Air Link from choppy to crystal clear.
Best Routers for Meta Quest Air Link Bitrate Optimization
Your router is the backbone of a stable Air Link connection. For optimal bitrate performance, you need a Wi-Fi 6 or Wi-Fi 6E router dedicated to your VR headset. These models offer the low latency and high bandwidth required for flawless wireless PC VR streaming.
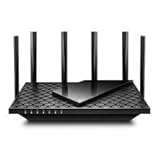
TP-Link Archer AXE75 (Wi-Fi 6E) – Best Overall Choice
The TP-Link Archer AXE75 is the ideal router for Meta Quest Air Link. Its Wi-Fi 6E support provides a clean, uncongested 6 GHz band exclusively for your headset. This delivers the highest possible bitrate with minimal interference, making it the best overall choice for serious VR enthusiasts.
- TRI-BAND TECHNOLOGY: Features 6GHz, 5GHz, and 2.4GHz bands for maximum…
- FAST SPEEDS: Delivers combined wireless speeds up to 5400Mbps…
- COVERAGE CAPACITY: Supports simultaneous connections for multiple devices…
ASUS RT-AX86U (Wi-Fi 6) – Best Performance Value
For a premium Wi-Fi 6 experience, the ASUS RT-AX86U is a top performer. It features adaptive QoS (Quality of Service) that you can prioritize for gaming traffic. This ensures your Air Link bitrate remains consistent even when other devices are on the network, offering excellent value.

- New-generation WiFi 6 – Enjoy ultrafast speeds up to 5700 Mbps with the…
- Mobile Game Mode – Minimize lag and latency for mobile gaming with just a…
- True 2 Gbps wired and wireless speeds – Aggregated 2 Gbps WAN connections…
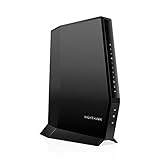
Netgear Nighthawk RAXE300 (Wi-Fi 6E) – Best for Future-Proofing
The Netgear Nighthawk RAXE300 is a powerhouse for future-proofing your setup. With a massive 10.8 Gbps combined speed across bands, it handles maximum Air Link bitrates with ease. Its robust processing power eliminates bottlenecks, making it ideal for high-resolution VR and simultaneous household use.
- Compatible with major cable internet providers including Xfinity, Spectrum…
- Coverage up to 2,000 sq. ft. and 25 concurrent devices with dual-band WiFi…
- 4 X 1 Gig Ethernet ports (supports port aggregation) and 1 USB 3.0 port for…
Understanding and Configuring Air Link Bitrate Settings
Bitrate is the amount of data streamed per second from your PC to your Quest. A higher bitrate means better visual fidelity with less compression. However, setting it too high for your network causes lag and stuttering.
You must find the sweet spot for your specific setup. This involves adjusting settings in both the Oculus PC app and the Oculus Debug Tool (ODT). We will guide you through both methods for optimal control.
How to Adjust Bitrate in Oculus App Settings
The Oculus PC app provides a user-friendly slider for dynamic bitrate adjustment. This is the best starting point for most users. Dynamic bitrate automatically adjusts based on your network conditions.
To access this setting, open the Oculus app on your PC. Put on your headset and open the Air Link interface. Select your PC and click on the ‘Settings’ button before launching.
- Dynamic Bitrate Slider: Drag this to adjust your maximum streaming bitrate. Start at 100 Mbps and increase in 10 Mbps increments.
- Refresh Rate & Resolution: Lower these (e.g., 72Hz) if you have stability issues before maxing out bitrate.
- Perform Bandwidth Test: Use the built-in test in the app to check your connection speed before adjusting.
Using Oculus Debug Tool for Advanced Bitrate Control
The Oculus Debug Tool (ODT) offers granular control for advanced users. It allows you to set a fixed bitrate, which can provide a more consistent image if your network is strong enough. You can find ODT in your Oculus installation folder, typically under `Support\oculus-diagnostics`.
The two key settings to change are ‘Encode Bitrate (Mbps)’ and ‘Encode Dynamic Bitrate’. For a fixed bitrate, set your desired value (e.g., 150) and disable the dynamic option.
| Setting | Recommended Value | Purpose |
|---|---|---|
| Encode Bitrate (Mbps) | 0 (Dynamic) or 150-200 (Fixed) | Controls the primary streaming data rate. |
| Encode Dynamic Bitrate | Disabled for Fixed Bitrate | Turns off automatic bitrate adjustment. |
| Encode Resolution Width | Default (3664) or lower | Adjusts render resolution; lower for performance. |
Remember to click ‘Service’ > ‘Restart’ in ODT for changes to take effect. Always test in-headset after each adjustment. If you experience issues, revert to a lower value or re-enable dynamic bitrate.
Troubleshooting Common Air Link Bitrate Problems
Even with optimal settings, you may encounter performance issues. These problems often manifest as stuttering, visual artifacts, or sudden disconnections. Identifying the root cause is the first step to a smooth wireless VR experience.
Most bitrate issues stem from three areas: network congestion, PC performance bottlenecks, or software conflicts. We will address the most common symptoms and their proven solutions.
Fixing Stuttering and Latency Issues
Stuttering, or “judder,” occurs when frames are delivered inconsistently. High latency creates a noticeable delay between your movement and the screen’s response. Both ruin immersion and can cause motion sickness.
Follow this step-by-step process to isolate and fix the issue:
- Isolate Your Network: Ensure your Quest is on a 5 GHz or 6 GHz band with no other active devices. Use a dedicated router if possible.
- Lower Your Bitrate: Reduce your bitrate setting by 20-30 Mbps in the Oculus app or ODT. A stable, lower bitrate is better than a choppy high one.
- Check PC Performance: Open Task Manager. Ensure your GPU and CPU are not maxed out by other applications while using Air Link.
Solving Visual Artifacts and Compression
Visual artifacts like blurry textures, pixelation, or color banding indicate heavy compression. This happens when the bitrate is too low to handle the complex visual data. It’s a clear sign your settings need adjustment.
- Symptom: Blurry Image: Increase your bitrate incrementally. Also, check your Encode Resolution Width in ODT is not set too low.
- Symptom: Blocky Pixelation: This is severe compression. Boost bitrate first. If it persists, ensure your PC’s GPU encoder (NVENC for NVIDIA) is functioning correctly.
- Symptom: Color Banding: Try switching between H.264 and HEVC codecs in the Oculus Debug Tool. One may handle gradients better on your system.
Optimizing Your Network Environment
Your Wi-Fi environment is critical. Interference from other networks or devices can cripple your bitrate stability. A few simple optimizations can make a dramatic difference.
Use a Wi-Fi analyzer app to find the clearest channel for your router’s 5 GHz band. Physically position your router in the same room as your play area, with a clear line of sight. Avoid placing it near large metal objects or appliances like microwaves.
Advanced Optimization: Codecs, Resolution, and Fixed vs. Dynamic
Beyond basic bitrate sliders lie advanced settings that fine-tune your stream. Understanding codecs, render resolution, and bitrate modes unlocks the final tier of Air Link quality. These settings interact closely with your chosen bitrate.
Adjusting them allows you to prioritize visual clarity or performance stability. This is where you tailor the experience to your specific hardware and personal preference.
Choosing Between H.264 and HEVC Codecs
The codec determines how your video stream is compressed and decompressed. Oculus Air Link primarily uses two: H.264 and HEVC (H.265). Each has distinct advantages for different scenarios.
You can switch between them in the Oculus Debug Tool under the ‘Settings’ section. The choice impacts latency, visual quality, and GPU load.
- H.264 (Default): Lower latency and wider compatibility. It’s less efficient but easier for your PC and headset to encode/decode quickly. Best for competitive gaming where reaction time is critical.
- HEVC (H.265): More efficient compression, offering better visual quality at the same bitrate. However, it adds 5-10ms of encoding latency and requires more GPU power. Best for slower-paced, visually rich games.
Balancing Render Resolution with Bitrate
Render resolution and bitrate are a tandem setting. Increasing resolution sends more pixel data, demanding a higher bitrate to avoid compression. Setting them in harmony is key.
A 1.0x resolution multiplier in the Oculus app matches your headset’s native display resolution. You can increase this for super-sampling or decrease it for performance.
| Scenario | Resolution Advice | Bitrate Advice |
|---|---|---|
| Prioritizing Sharpness | Set to 1.2x or 1.3x | Requires a high fixed bitrate (180+ Mbps) |
| Balanced Experience | Keep at 1.0x (Default) | Use dynamic bitrate (100-150 Mbps) |
| Solving Performance Issues | Lower to 0.9x | Allows for a stable, lower bitrate |
When to Use Fixed vs. Dynamic Bitrate
This choice dictates how your bitrate behaves during a session. Dynamic Bitrate is the default and safest option. It automatically lowers the bitrate if network conditions worsen to prevent stuttering.
Fixed Bitrate maintains a constant data rate you set. It provides a perfectly consistent image if your network can handle it. However, any interference will cause packet loss and stuttering instead of a graceful quality reduction.
Only use a fixed bitrate if you have a dedicated, uncongested Wi-Fi 6/6E network. Start with a value of 150 Mbps and test thoroughly. If you see any hitches, switch back to dynamic.
Step-by-Step Guide to Finding Your Optimal Bitrate
Finding your perfect bitrate is a systematic process, not guesswork. This methodical approach ensures you achieve the best balance for your unique setup. Follow these steps to dial in your settings with confidence.
You will need your Meta Quest headset, your gaming PC, and about 15 minutes of testing time. We recommend testing in a graphically intensive area of a familiar game.
Initial Setup and Baseline Test
Start with a clean slate to establish a performance baseline. This eliminates variables and gives you a clear starting point for improvement.
- Reset Settings: In the Oculus PC app Air Link settings, set the bitrate slider to its default (usually “Auto” or a middle value). Ensure Dynamic Bitrate is enabled.
- Set Conservative Resolution: In the Oculus app under Devices > Quest > Graphics, set Refresh Rate to 72Hz and Render Resolution to 1.0x.
- Run Baseline Test: Connect via Air Link and play. Note the visual quality and any stuttering. This is your “zero point” for comparison.
Incremental Adjustment and Evaluation
Now, you will increase bitrate step-by-step while monitoring for the point of failure. The goal is to find the maximum stable value.
Return to the Oculus PC app Air Link settings. Increase the Dynamic Bitrate Max slider by 15 Mbps (e.g., from 100 to 115). Reconnect Air Link and run your 60-second test sequence again.
- If stable: The image should look sharper with less compression. Make a note of the setting and increase by another 15 Mbps.
- If stuttering occurs: You have exceeded your network’s stable capacity. Reduce the bitrate by 10 Mbps from the last stable value.
- Check for Artifacts: Look closely at dark areas and complex textures. Increased pixelation means the bitrate is still too low for the content.
Finalizing and Locking In Your Settings
Once you find a high, stable bitrate, it’s time to test consistency and finalize. Your optimal setting is the highest value that caused no stuttering during prolonged play.
Play for at least 10-15 minutes at your chosen bitrate. Engage in intense gameplay that involves fast movement and loading new areas. This stress test confirms long-term stability.
If it remains smooth, you have found your optimal dynamic bitrate. Enter this value as your maximum in the Oculus app. For advanced users, you can now experiment with switching to a fixed bitrate at this value in ODT for ultimate consistency.
Maintaining Peak Air Link Performance Over Time
Your optimal bitrate settings aren’t a “set and forget” solution. Network environments and software updates can change performance. Regular maintenance ensures your Air Link connection stays in top condition.
This involves monitoring for interference, updating key software, and knowing when to reset your configuration. A small routine check can prevent major performance headaches later.
Regular Network Health Checks
Wi-Fi environments are dynamic. New devices, neighbor networks, or even physical obstructions can degrade your signal. Schedule a brief network audit every few weeks.
Use a free Wi-Fi analyzer app on your phone to scan your play area. Check if your router’s 5 GHz channel is still the least congested. Also, verify that no new large appliances or furniture are blocking the line of sight.
- Check Channel Congestion: If your current channel is crowded, log into your router and switch to a clearer one.
- Reboot Your Router: A simple monthly reboot clears its memory and can resolve latent connectivity issues.
- Verify Device Priority: Ensure your Quest’s MAC address still has traffic priority (QoS) in your router settings if you configured it.
Updating Critical Software and Drivers
Outdated drivers are a common source of sudden performance drops. Graphics drivers, in particular, receive regular optimizations for VR and encoding tasks.
Keep these three software components up to date:
- GPU Drivers: Update NVIDIA GeForce Experience or AMD Adrenalin drivers. Look for release notes mentioning “VR” or “encoder” improvements.
- Oculus Software: Update both the PC app and your Quest headset firmware. Updates often include Air Link optimizations.
- Router Firmware: Check your router manufacturer’s website for firmware updates that improve stability and Wi-Fi performance.
When to Perform a Full Settings Reset
If you experience sudden, unexplained problems, a full reset can help. This clears corrupted configuration files and resets everything to default.
First, try resetting your experimental settings on the Quest itself (Settings > System > Developer > Reset All Experimental Settings). If issues persist, use the Oculus Repair Tool on your PC or reinstall the Oculus PC software entirely.
After a reset, you will need to reconfigure your bitrate from scratch. Follow the step-by-step guide in the previous section to find your new optimal values on the clean installation.
Pro Tips and Lesser-Known Settings for Experts
Once you’ve mastered the basics, these advanced techniques can push your Air Link quality further. They involve deeper software tweaks and hardware considerations. Use these tips to extract every last drop of performance and clarity.
These settings are for experienced users comfortable with technical adjustments. Always note your original values before changing anything in the Oculus Debug Tool.
Oculus Debug Tool (ODT) Hidden Gems
Beyond bitrate and codecs, ODT houses several powerful settings. They directly affect the encoding pipeline and can reduce latency or improve image sharpness.
Navigate to your Oculus installation folder and open `OculusDebugTool.exe`. Apply changes and restart the Oculus service for them to take effect.
- Distortion Curvature: Set this to Low. This slightly reduces the rendered FOV periphery to prioritize performance and clarity in the center of the lens.
- Link Sharpening: Enable this (especially with H.264). It applies a subtle filter that can make edges appear crisper without a significant performance hit.
- Encode Resolution Width: Manually setting this to 3664 (for Quest 2) or 4128 (for Quest 3) can sometimes override app glitches and ensure full resolution streaming.
PC-Side Optimization for Encoding
Your PC’s GPU is responsible for encoding the video stream. Ensuring it has dedicated resources is crucial for maintaining a high, stable bitrate.
Open your GPU control panel (NVIDIA Control Panel or AMD Software). Navigate to the 3D settings or graphics settings. Here, you can create a profile specifically for `OculusClient.exe`.
- Set Power Management: Change to “Prefer Maximum Performance” to prevent the GPU from downclocking during encoding.
- Adjust Background Apps: In Windows Graphics Settings, set the Oculus service to “High performance” to ensure it uses your dedicated GPU.
- Close Encoding Competitors: Before playing, close any other application that uses GPU encoding, like streaming software (OBS, Discord stream) or other recording tools.
Understanding the Role of ASW and SSW
Asynchronous Spacewarp (ASW) and Synchronous Spacewarp (SSW) are frame interpolation technologies. They kick in when your PC can’t maintain the target framerate, creating synthetic frames.
While not a direct bitrate setting, they affect perceived smoothness. You can force them on or off in ODT under the `ASW` dropdown. Setting it to “Disabled” can reduce visual artifacts in fast motion but may cause stuttering if your framerate drops.
For most users, “Auto” is the best setting. It allows the system to activate only when necessary, providing a smoother experience when bitrate or GPU limits cause framerate dips.
Air Link vs. Virtual Desktop: Bitrate and Performance Comparison
Virtual Desktop is a popular third-party alternative to Air Link for wireless PC VR. Both solutions handle bitrate and streaming differently, leading to distinct performance characteristics. Understanding their differences helps you choose the right tool.
Your ideal choice depends on your hardware, the games you play, and your tolerance for tinkering. Both are excellent, but one may suit your specific setup better.
Bitrate Handling and Codec Support
The core difference lies in how each application manages the streaming pipeline. Air Link is integrated into the Oculus runtime, while Virtual Desktop operates as a separate, optimized layer.
Virtual Desktop often supports higher maximum bitrates (up to 400+ Mbps on H.264) and offers more codecs. This can translate to a visibly cleaner image if your network can handle it.
| Feature | Meta Quest Air Link | Virtual Desktop |
|---|---|---|
| Max Bitrate (Typical) | ~200 Mbps (Fixed) | ~400 Mbps (H.264), ~200 Mbps (HEVC) |
| Primary Codecs | H.264, HEVC | H.264, HEVC, AV1 (Quest 3) |
| Bitrate Control | App Slider & ODT | In-Stream Menu with Presets |
| Latency | Generally very low | Can be lower with optimal settings |
Performance and Game Compatibility
Performance can vary significantly between the two streaming methods. This is often due to different encoding methods and game-specific optimizations.
Some games built specifically for the Oculus SDK (like Lone Echo) may run more smoothly on Air Link. Many OpenVR/SteamVR titles, however, can perform better on Virtual Desktop due to its efficient translation layer.
- Air Link Strength: Seamless Oculus Store integration, consistent performance in Oculus SDK games, and no additional cost.
- Virtual Desktop Strength: Superior for SteamVR, excellent performance on AMD GPUs (using H.264), AV1 codec support for Quest 3 (efficient high-quality streaming), and detailed performance graphs.
Which Should You Use for High Bitrate?
For pushing the highest possible bitrate on a flawless network, Virtual Desktop has the technical advantage. Its higher ceiling and AV1 codec (on Quest 3) can deliver a near-lossless image.
However, Air Link’s deep integration often provides a more stable, lower-latency baseline for most users. It’s also updated directly by Meta. The best approach is to test both with your favorite games.
Purchase Virtual Desktop on the Quest Store and test it on your network. Compare the visual quality and feel at similar bitrate levels. Let your personal experience, not just specs, guide your final choice.
Conclusion: Mastering Your Meta Quest Air Link Bitrate
Optimizing your Meta Quest Air Link bitrate settings transforms your wireless VR experience. The right balance eliminates compression artifacts and lag. It delivers a smooth, immersive connection to your PC library.
The key takeaway is to test incrementally and prioritize stability over maximum numbers. Use our step-by-step guide to find your personal sweet spot. Your ideal settings depend on your unique network and PC hardware.
Start by applying the initial setup and baseline test from this guide. Experiment with the advanced codec and resolution tips as you gain confidence. Share your results and favorite settings with the community.
With patience and these proven methods, you can achieve a flawless, high-fidelity wireless VR setup. Enjoy your newfound freedom and crystal-clear gameplay.
Frequently Asked Questions about Meta Quest Air Link Bitrate
What is the best bitrate for Meta Quest Air Link?
The best bitrate depends on your network. For most users, a dynamic bitrate set between 100-150 Mbps is optimal. This provides excellent visual quality while maintaining stability. Test incrementally from a baseline of 100 Mbps.
On a dedicated Wi-Fi 6E network, you can try a fixed bitrate of 150-200 Mbps. Always prioritize a stable connection over a higher number that causes stuttering during gameplay.
How do I increase my Air Link bitrate?
Increase bitrate using the slider in the Oculus PC app Air Link settings. Put on your headset, open Air Link, and select your PC. Click ‘Settings’ before launching to find the Dynamic Bitrate Max adjustment.
For more control, use the Oculus Debug Tool. Change the ‘Encode Bitrate (Mbps)’ value and disable ‘Encode Dynamic Bitrate’ for a fixed rate. Remember to restart the Oculus service after changes.
Why is my Air Link bitrate so low and unstable?
Low, unstable bitrate is usually a network issue. Common causes include Wi-Fi interference, an overcrowded 5 GHz channel, or distance from the router. Other household devices streaming can also consume bandwidth.
Ensure your Quest is on a clear 5 GHz or 6 GHz channel. Use a dedicated router for VR if possible. Also, check that your PC is connected via Ethernet, not Wi-Fi.
What is the difference between dynamic and fixed bitrate?
Dynamic bitrate automatically adjusts data flow based on network conditions to prevent stuttering. Fixed bitrate maintains a constant data rate you set, offering consistent image quality if your network is perfect.
Dynamic is safer for most environments. Fixed is for expert users with dedicated, uncongested networks. A network hiccup on a fixed setting causes stuttering instead of a quality dip.
How do I fix stuttering and lag on high bitrate settings?
Stuttering at high bitrates means your network or PC cannot sustain the load. First, lower your bitrate by 20-30 Mbps. Ensure your PC is connected to your router via a Gigabit Ethernet cable.
Check for background processes on your PC using the GPU. Also, verify your router’s Quality of Service (QoS) settings prioritize your Quest headset’s traffic over other devices.
Is a higher bitrate always better for Air Link quality?
No, a higher bitrate is not always better. Beyond your network’s stable capacity, a higher bitrate causes packet loss, latency, and stuttering. The image may freeze or become blocky as the stream struggles.
The goal is the highest *stable* bitrate. A clean, consistent 150 Mbps will look and feel infinitely better than a choppy, artifact-ridden 200 Mbps stream.
Should I use H.264 or HEVC codec for Air Link?
Use H.264 for lower latency in fast-paced games. It’s the default and most compatible. Use HEVC for better visual quality at the same bitrate in slower, scenic games, but expect slightly higher latency.
HEVC is more efficient, so 150 Mbps on HEVC can look like 200 Mbps on H.264. Test both in your favorite game to see which feels and looks better on your system.
How does Air Link bitrate compare to Virtual Desktop?
Virtual Desktop often supports higher maximum bitrates (up to 400+ Mbps) and more codecs like AV1. Air Link is deeply integrated with the Oculus runtime, which can mean lower latency for Oculus SDK games.
Air Link’s bitrate is generally capped lower but is very stable. For pushing extreme bitrates on excellent hardware, Virtual Desktop has a technical edge. For simplicity and integration, Air Link excels.
This website is a participant in the Amazon Services LLC Associates Program, an affiliate advertising program designed to provide a means for us to earn fees by linking to Amazon.com and affiliated sites.