
This website is a participant in the Amazon Services LLC Associates Program, an affiliate advertising program designed to provide a means for us to earn fees by linking to Amazon.com and affiliated sites.
Projecting educational videos for homeschooling can transform your child’s learning experience by making lessons more engaging and interactive. Whether you’re teaching science, history, or math, using a projector allows children to see content on a large screen, making complex topics easier to understand.
Did you know that visual learning can improve information retention by up to 42% compared to traditional reading methods? This makes projecting videos an invaluable tool for homeschooling parents looking to enhance comprehension and maintain attention.
Getting started is easier than you might think. All you need is a reliable projector, a suitable screen or wall, and the right digital resources.
Best for Projecting Educational Videos for Homeschooling
Choosing the right projector can make all the difference in creating an effective homeschooling environment. Here are three top projectors that are perfect for projecting educational videos at home, along with related accessories to enhance the experience:
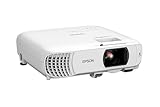
Epson Home Cinema 880
The Epson Home Cinema 880 delivers bright, sharp images and reliable color accuracy, making science diagrams, maps, and animated lessons look vivid and easy to follow. Its lightweight design is perfect for easy relocation between rooms.
- Exceptional Picture Quality — Provides stunning, detailed 1080p images…
- Ultra Bright Images — 4,000 lumens of color brightness (IDMS rated) and…
- Outstanding Picture Brightness — Advanced 3LCD technology displays…
ViewSonic M1 Mini Plus
Compact and portable, the ViewSonic M1 Mini Plus offers versatile connectivity and built-in speakers. Its portability is ideal for homeschooling setups, allowing you to project videos in different rooms or even outdoors for interactive lessons.

- 2.2 Channel 36W Speakers & 3D Stereo Audio: Aurzen BOOM 3 proyector is the…
- Smart TV OS & Officially-Licensed Apps: BOOM 3 smart projector is equipped…
- Intelligent Screen Adaption: The BOOM 3 portable projector uses advanced AI…
Anker Nebula Capsule II
The Anker Nebula Capsule II combines projector and streaming capabilities in a single device. With Android TV built-in, it offers access to educational apps and videos directly, making it simple for parents to customize lessons.

- Super-Sized Screen, Portable Design: Capsule 3 is an all-new ultra-portable…
- Take the Big Screen Anywhere: With a max screen size of 120 inches, Capsule…
- Next-Level Image Quality: The 1080p display with 200 Lumens of brightness…
Related Products:
- Projector Screen – Enhance video clarity with a smooth, dedicated screen instead of a wall.
- HDMI Cable – Ensure high-quality video transmission from your laptop or tablet.
- Portable Stand – Keep the projector at the right height and angle for clear projection.
Choosing the Right Projector for Homeschooling
Selecting the right projector is the foundation of a successful homeschooling setup. The right projector ensures your child can clearly see educational videos, diagrams, and interactive lessons without straining their eyes.
Key Factors to Consider:
- Brightness (Lumens):
A projector with 2,000–3,000 lumens is ideal for homeschooling. This ensures that videos remain clear even in rooms with some ambient light, so you won’t need to dim the room completely. - Resolution:
Full HD (1080p) resolution is highly recommended for crisp visuals. Higher resolutions make detailed content like maps, charts, or text-based lessons easier to read and understand. - Portability and Setup:
If you plan to move the projector between rooms or even outdoors, choose a lightweight, compact model. Features like built-in speakers, wireless connectivity, or battery power can simplify setup and reduce clutter. - Connectivity Options:
Check that the projector supports HDMI, USB, or wireless streaming. This allows you to connect laptops, tablets, or even smartphones to stream educational videos seamlessly. - Audio Quality:
Many projectors have built-in speakers, but consider external speakers for larger rooms or groups of students. Clear audio is essential for understanding lessons.
Tip: Before purchasing, read reviews from other homeschooling parents. Real-world experiences often highlight ease of setup and durability, which can be more important than specs alone.
Investing time in selecting the right projector ensures your homeschooling setup is functional, engaging, and enjoyable for your children.
Setting Up Your Projector for Homeschooling
Proper setup is crucial for a comfortable and effective learning experience. A well-positioned projector ensures videos are clear, shadows are minimized, and your children can focus without distractions.
Step-by-Step Setup Tips:
- Choose the Right Wall or Screen:
Select a smooth, light-colored wall or a dedicated projector screen. Avoid walls with textures or patterns, as they can distort the image. Screens with a matte finish reduce glare and improve visibility. - Position the Projector:
Place the projector at a height that allows the entire image to fit the screen without tilting excessively. Use a projector stand or adjustable shelf to secure it. Ensure it’s stable to prevent accidental movement. - Adjust Image Settings:
Use the projector’s keystone correction to straighten the image and adjust brightness, contrast, and color for optimal clarity. A test video can help fine-tune these settings before starting lessons. - Manage Lighting:
While high-lumen projectors can handle some ambient light, dimming the room slightly will improve image quality. Blackout curtains or blinds can enhance viewing without making the room too dark for note-taking. - Audio Setup:
If your projector’s built-in speakers are insufficient, connect external speakers or a soundbar. Proper audio placement ensures every word in the lesson is heard clearly. - Cable Management:
Use cable organizers to keep HDMI, power, and audio cables tidy. This prevents tripping hazards and makes the setup look professional and organized.
Tip: Create a permanent homeschooling corner if possible. Having a dedicated space for projection saves time during setup and fosters a consistent learning environment.
Choosing Educational Video Resources for Homeschooling
The effectiveness of projecting educational videos depends not just on the projector, but also on selecting high-quality learning content. The right resources can make lessons engaging, interactive, and aligned with your child’s curriculum.
Tips for Selecting Educational Videos:
- Curriculum Alignment:
Choose videos that match your child’s grade level and subjects. Resources like Khan Academy, National Geographic Kids, or PBS LearningMedia provide lessons in science, history, and math that complement your homeschooling plan. - Visual and Audio Quality:
Select videos with clear visuals and good audio. Poor-quality videos can cause eye strain and reduce comprehension. HD videos work best with projectors to maintain clarity and color accuracy. - Interactivity and Engagement:
Look for videos that include interactive elements, quizzes, or questions to encourage active learning. Platforms like BrainPOP offer features that test comprehension while keeping kids engaged. - Variety of Content:
Mix animated videos, documentaries, and live-action lessons to cater to different learning styles. Visual diversity helps maintain attention and reinforces understanding. - Accessibility and Convenience:
Ensure resources are easy to stream or download. Many platforms allow offline access, which is useful if your homeschooling area has unreliable internet.
Bonus Tip: Create a structured video schedule. Assign specific videos to different subjects or topics each week. This not only organizes learning but also keeps children motivated and focused.
Tips for Enhancing Learning While Projecting Videos
Simply projecting a video isn’t enough—active engagement helps your child retain information and develop critical thinking skills. Small adjustments and interactive techniques can make lessons far more effective.
Strategies to Boost Learning:
- Pause and Discuss:
Stop the video at key moments to ask questions or encourage discussion. This ensures your child is actively processing information rather than passively watching. - Supplement with Notes and Activities:
Encourage your child to take notes, draw diagrams, or complete worksheets while watching. This reinforces learning and helps visualize abstract concepts. - Incorporate Multi-Sensory Elements:
Combine projected videos with hands-on activities, such as experiments, crafts, or interactive games. Multi-sensory learning improves comprehension and retention. - Adjust Viewing Environment:
Maintain a comfortable seating arrangement, proper lighting, and minimal distractions. Eye-level alignment with the screen and moderate room brightness reduce strain and improve focus. - Use Repetition and Review:
Rewatch short segments of videos for complex topics. Repetition strengthens memory, and reviewing challenging sections ensures understanding. - Encourage Peer or Family Participation:
If possible, involve siblings or family members in discussions and activities. Collaborative learning promotes engagement and social interaction.
Tip: Keep sessions short and focused. Younger children, in particular, benefit from 15–30 minute video segments followed by active tasks to apply what they’ve learned.
Troubleshooting Common Projection Issues in Homeschooling
Even the best setups can encounter technical challenges. Knowing how to address common projection issues ensures lessons remain smooth and uninterrupted.
Common Issues and Solutions:
- Blurry or Distorted Image:
- Cause: Incorrect focus, projector distance, or keystone settings.
- Solution: Adjust the focus ring, reposition the projector, and use keystone correction to straighten the image.
- Dim or Washed-Out Picture:
- Cause: Low lumen projector or bright ambient light.
- Solution: Close blinds, dim room lights, or increase projector brightness. For rooms with strong sunlight, consider a higher-lumen model.
- Poor Audio Quality:
- Cause: Weak built-in speakers or misplaced audio output.
- Solution: Connect external speakers or reposition the projector for better sound projection. Check cables and volume settings.
- Connectivity Problems:
- Cause: Incompatible cables, outdated software, or unstable Wi-Fi.
- Solution: Use HDMI or USB connections when possible. Update firmware, and ensure stable internet for streaming content.
- Overheating or Shutting Down:
- Cause: Blocked ventilation or long continuous use.
- Solution: Ensure vents are unobstructed, allow breaks between sessions, and place the projector in a well-ventilated area.
Tip: Keep a small troubleshooting checklist handy. Quick fixes save time and prevent interruptions during lessons, keeping your child engaged and focused.
Conclusion
Projecting educational videos for homeschooling can significantly enhance learning by making lessons more engaging, interactive, and visually stimulating. Choosing the right projector, setting it up correctly, and selecting high-quality educational content are the foundation for a successful homeschooling experience.
Incorporating strategies like pausing for discussion, using hands-on activities, and troubleshooting common issues ensures that projected lessons are both effective and enjoyable. With a dedicated space, reliable equipment, and carefully curated videos, homeschooling parents can create an immersive learning environment that keeps children motivated and focused.
Frequently Asked Questions About Projecting Educational Videos for Homeschooling
Do I need a projector for homeschooling, or can I use a TV or tablet?
While TVs and tablets work, a projector offers a larger display that engages multiple children at once. Large visuals improve comprehension, especially for diagrams, charts, and interactive lessons.
What is the best room setup for projecting educational videos?
Choose a room with minimal ambient light, a smooth wall or screen, and seating at eye level with the screen. Ensure proper ventilation for the projector and a safe distance for cables.
Can I use any projector for homeschooling?
Not all projectors are ideal. Look for full HD resolution, at least 2,000 lumens brightness, reliable connectivity, and good audio. Portability and easy setup are additional advantages for homeschool use.
How can I make projected videos more engaging for my child?
Pause the video for discussion, encourage note-taking, integrate hands-on activities, and mix animated and live-action content. Active participation helps retain information and keeps lessons exciting.
Are there free educational video resources suitable for projectors?
Yes. Platforms like Khan Academy, PBS LearningMedia, National Geographic Kids, and CrashCourse provide free, high-quality educational videos across subjects and grade levels.
What if my projector image is blurry or the audio is weak?
Adjust focus, check projector placement, use keystone correction, and connect external speakers if needed. Ensure cables are secure, and the room lighting is appropriate for the projector’s brightness.
How long should a homeschooling video session last?
Younger children benefit from 15–30 minute sessions, while older students can handle 30–45 minutes. Always follow video sessions with interactive activities or discussions to reinforce learning.
Can I project videos wirelessly?
Yes, many modern projectors support Wi-Fi or Bluetooth streaming from laptops, tablets, or smartphones. Ensure stable internet and compatible apps for seamless playback.
Can a Projector Get a Virus?why you need to know
This website is a participant in the Amazon Services LLC Associates Program, an affiliate advertising program designed to provide a means for us to earn fees by linking to Amazon.com and affiliated sites.