This website is a participant in the Amazon Services LLC Associates Program, an affiliate advertising program designed to provide a means for us to earn fees by linking to Amazon.com and affiliated sites.
A golf simulator short throw projector is a specialized projector designed for tight spaces. It mounts close to the screen to cast a large, bright image without shadows. This is the essential visual component for a realistic indoor golf experience.
It solves the critical problem of golfer shadow interference and space constraints. You get an immersive, high-definition course display right in your garage or spare room. This technology is what makes professional-grade simulation possible at home.
This complete guide will help you choose the best short throw projector. You’ll learn key specs, setup tips, and expert recommendations. We cover everything for a flawless golf simulator build.
Best Short Throw Projectors for Golf Simulators – Detailed Comparison
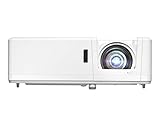
Optoma GT1090HDR – Best Overall Choice
The Optoma GT1090HDR is a top-tier choice for serious golfers. It delivers a bright 4,200 lumens and true HDR10 compatibility for stunning contrast on simulated courses. With a 0.5:1 throw ratio, it needs only inches from the screen. This model is ideal for achieving a brilliant, shadow-free image in any lighting condition.
- DEPENDABLE LASER LIGHT SOURCE: DuraCore laser light source eliminates lamp…
- SHORT THROW LENS: Experience a large 120″ image projected from 4′-4″ away…
- 4K HDR INPUT: HDR10 & HLG technologies enable brigher whites and deeper…
BenQ TH671ST – Best Value for Money
For golfers seeking excellent performance on a budget, the BenQ TH671ST excels. It offers 1080p resolution, 3,000 lumens, and a 0.69:1 throw ratio. Its low input lag is crucial for real-time swing feedback. This projector is the recommended best option for creating a highly responsive and affordable home simulator setup.

- UNPARALLELED PICTURE QUALITY: TV Projector, comes with Native Full HD 1080p…
- GEARED TOWARDS GAMING: Ultra-fast low input lag and a refresh rate that…
- WOW YOUR FRIENDS: Take the action to the big screen by projecting a…
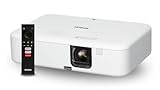
Epson CO-FH02 – Best for Bright Rooms
The Epson CO-FH02 dominates with its incredible 3,000 lumens of color and white brightness. Its laser hybrid light source ensures consistent performance and long life. Featuring a flexible 0.87:1 throw ratio, it’s perfect for spaces with ambient light. This is the ideal projector for garages or multi-use rooms where total darkness isn’t possible.
- Display Stunning Images up to 300″ — Full HD 1080p picture four times…
- Compact Design — Sleek, lightweight design easily fits in backpacks for…
- Ultra Bright Images — 3,000 lumens of color and white brightness…
Why a Short Throw Projector is Essential for Your Golf Simulator
Choosing the right projector is critical for simulator realism and performance. A standard projector creates major shadows and requires ample room behind you. A short throw projector for golf solves these core spatial and interference issues completely.
Key Benefits of a Short Throw Projector Setup
The primary advantage is eliminating the golfer’s shadow on the screen. This creates an immersive, unobstructed view of the virtual course. You also gain significant space efficiency for your home golf simulator.
- No Shadow Interference: Mounting close to the screen means your body never blocks the projection path. This allows for a natural, distraction-free playing experience.
- Space-Saving Design: These projectors can be ceiling-mounted just a few feet from the impact screen. This is perfect for garages, basements, or spare rooms with limited depth.
- Improved Image Brightness: With a shorter throw distance, less light is lost. You get a brighter, more vibrant image even with lower lumen models, enhancing realism.
Critical Technical Specifications to Understand
Not all short throw projectors are equal for golf simulation. You must evaluate key specs to ensure compatibility and performance. Focus on these three critical metrics.
| Specification | Why It Matters | Ideal Range for Golf |
|---|---|---|
| Throw Ratio | Determines how close the projector must be to the screen to create a large image. | 0.5:1 or lower (Ultra Short Throw) is best for tight spaces. |
| Brightness (Lumens) | Affects image clarity in rooms with ambient light. Crucial for daytime play. | 3,000+ ANSI lumens recommended for a clear, vivid picture. |
| Input Lag | The delay between your swing data and the on-screen result. Lower is faster. | Under 50ms is critical; under 20ms is ideal for real-time feedback. |
Understanding these specs ensures your projector matches your space and simulator software. It guarantees a responsive, true-to-life golfing experience every time you play.
How to Choose the Right Short Throw Projector for Your Setup
Selecting the perfect projector involves more than just specs. You must align the device with your specific room, screen, and budget. This decision-making guide will help you navigate the key considerations for an optimal purchase.
Evaluating Your Space and Screen Size
Your room dimensions dictate the required throw ratio and brightness. First, measure the distance from your intended mounting point to the screen surface. Then, use the projector’s throw ratio to calculate the resulting image size.
- Calculate Throw Distance: For a 0.5:1 ratio projector, a 10-foot wide image needs just 5 feet of distance. This precise calculation prevents buying a projector that won’t fit your space.
- Match Brightness to Ambient Light: A dedicated dark room needs fewer lumens (2,500+). For a multi-use garage with windows, prioritize high brightness (3,500+ lumens).
- Consider Ceiling Height: Ensure there’s enough vertical clearance for mounting and image alignment. Account for the projector’s physical depth and lens offset.
Balancing Resolution, Lag, and Budget
These three factors form the core value proposition. You must decide which is most critical for your simulator experience and financial plan.
| Priority | Recommended Focus | Typical Budget Tier |
|---|---|---|
| Performance & Realism | Prioritize low input lag (≤20ms) and 1080p/4K resolution. This is best for serious practice and game improvement. | Mid to High ($1,200+) |
| Value & Functionality | Focus on adequate brightness and a reliable brand. Accept 1080p with slightly higher lag for casual play. | Mid-Range ($800 – $1,200) |
| Entry-Level Setup | Seek the minimum viable specs: 1080p, 3,000 lumens, and a confirmed short throw ratio. Perfect for beginners. | Budget (Under $800) |
Remember, your launch monitor and software also impact the experience. The projector is the display component, so ensure it doesn’t become the system’s bottleneck.
Installation and Setup Guide for Optimal Performance
Proper installation is crucial to unlock your projector’s full potential. A poor setup can ruin image quality and negate the benefits of a short throw model. Follow this step-by-step guide for a flawless, professional-looking result.
Step-by-Step Mounting and Alignment
Precision is key during the physical installation phase. Rushing this process leads to keystone distortion and focus issues. Follow these steps in order for the best outcome.
- Choose Mounting Location: Use your throw ratio calculation to mark the exact ceiling or wall position. Ensure the mount is secured firmly into a ceiling joist or wall stud for safety.
- Connect and Power On: Run all HDMI and power cables to your simulator computer before mounting. Use a tester to confirm the signal works to avoid adjustments later.
- Fine-Tune Image Alignment: Project a test grid and use the lens shift, zoom, and focus rings. Adjust until the image is perfectly rectangular and sharp across the entire screen.
Calibrating Image Quality for Golf Simulation
After physical alignment, software calibration enhances realism. This tailors the picture to your specific screen and lighting environment. Focus on these three calibration areas.
- Brightness & Contrast: Adjust so the bright sky on the virtual course is not washed out. The dark shadows in bunkers should still show detail without being crushed to black.
- Color Temperature: A cooler temperature (6500K) often makes greens and fairways look more natural and vibrant. Avoid overly warm tones that can dull the image.
- Game Mode: Always enable the projector’s Game Mode or Low Latency setting. This reduces image processing delay, ensuring your swing and the on-screen result feel connected.
Finally, test with your actual simulator software. Play a few holes and make minor tweaks from the tee box view. The goal is a bright, responsive, and immersive picture that feels natural.
Common Mistakes to Avoid and Pro Maintenance Tips
Even with great equipment, simple errors can degrade your simulator experience. Knowing these pitfalls helps you prevent them from the start. Proper maintenance also extends your projector’s lifespan and preserves image quality.
Critical Installation and Buying Errors
These mistakes are often made during planning and setup. They are costly to fix after everything is mounted and wired. Avoid these three common errors.
- Ignoring Input Lag: Buying a projector with high input lag for a golf simulator is a major error. It creates a disconnect between your swing and the visual result, ruining realism.
- Incorrect Throw Calculation: Assuming “short throw” means any distance can work leads to an image that’s too small or large. Always verify the exact throw distance for your desired screen size.
- Poor Ventilation: Installing the projector in an enclosed nook or too close to the ceiling traps heat. This can cause premature failure and thermal throttling of brightness.
Essential Long-Term Care and Troubleshooting
Regular maintenance ensures consistent performance year after year. A small amount of care prevents most common issues. Follow this simple routine.
| Maintenance Task | Frequency | Pro Tip |
|---|---|---|
| Filter Cleaning/Replacement | Every 3-6 months | Check your manual. A clogged filter is the leading cause of overheating and dimming. |
| Lens Cleaning | As needed, with care | Use a dedicated lens blower and microfiber cloth. Never use household cleaners or press hard on the lens. |
| Image Quality Check | Seasonally | Re-project your alignment grid. Settling or temperature changes can cause slight shifts over time. |
If the image suddenly dims or colors shift, check the lamp hours first in the menu. Most projectors signal when the lamp is nearing end of life. Planning for this replacement avoids a sudden black screen during a round.
Advanced Features and Future-Proofing Your Investment
Beyond core specs, modern projectors offer features that enhance the golf simulator experience. Understanding these options helps you future-proof your setup. This knowledge ensures your system remains relevant and enjoyable for years.
Enhancing Realism with HDR and 4K
High Dynamic Range (HDR) and 4K resolution are premium features that significantly boost visual fidelity. They work together to create a more lifelike and immersive virtual golf course.
- HDR (High Dynamic Range): This technology expands the contrast ratio and color gamut. It allows you to see more detail in bright skies and deep shadows simultaneously, mimicking real-world vision.
- 4K Resolution: With four times the pixels of 1080p, 4K provides incredibly sharp detail on distant flags, grass texture, and bunker edges. It reduces the “screen door” effect for a seamless image.
- Combined Impact: Using a projector with both features, like the Optoma GT1090HDR, delivers the pinnacle of simulator realism. It’s a worthwhile investment for users who prioritize visual immersion.
Connectivity and Smart Features for Convenience
Ease of use is a key factor in daily enjoyment. Modern connectivity options streamline your setup and offer greater flexibility for different uses.
| Feature | Benefit for Golf Simulator | Practical Example |
|---|---|---|
| Multiple HDMI Ports | Allows easy switching between your simulator PC and other media sources (e.g., a streaming stick for entertainment). | Quickly switch from a practice session to watching tournament coverage on the same screen. |
| Vertical Lens Shift | Allows fine-tuning the image position up or down without tilting the projector. This simplifies ceiling mounting and avoids keystone correction. | Precisely align the image with your impact screen after mounting, saving significant setup time. |
| Laser/LED Light Source | Offers longer lifespan (20,000+ hours), instant on/off, and consistent brightness over time compared to traditional lamp-based models. | Eliminates worry about lamp replacement costs and provides reliable performance for thousands of rounds. |
Prioritize features that match your long-term usage. A laser light source and good lens shift offer excellent long-term value and hassle-free operation for a dedicated simulator space.
Frequently Asked Questions About Golf Simulator Projectors
Choosing and setting up a projector raises common questions for golfers. This section provides clear, direct answers to help you make confident decisions. These answers are based on expert recommendations and technical specifications.
Technical Specifications and Compatibility
Understanding how specs interact with your setup is crucial. These questions address the most common technical concerns for first-time buyers.
- What is the minimum brightness needed? For a dedicated dark room, 2,500 lumens is a good starting point. For spaces with ambient light, aim for 3,000 to 4,000 ANSI lumens to maintain a vivid, clear image.
- Can I use a regular projector for a golf simulator? Technically yes, but it’s not recommended. Standard projectors require more space behind you and will cast your shadow on the screen, breaking immersion.
- Is 1080p resolution sufficient, or do I need 4K? 1080p is perfectly sufficient for most users and provides a great experience. 4K offers sharper detail but at a significantly higher cost; it’s a premium upgrade, not a necessity.
Setup, Cost, and Long-Term Use
These questions cover practical installation, budgeting, and ongoing ownership. They help you plan for the total cost and effort involved.
| Question | Expert Answer |
|---|---|
| How much does a good short throw projector cost? | Expect to invest between $800 and $2,000. The BenQ TH671ST represents the value sweet spot, while models like the Optoma GT1090HDR are premium investments. |
| How difficult is the installation process? | Installation is moderately DIY-friendly. The most challenging part is precise ceiling mounting and alignment. Having a helper and using a projector mounting template is highly recommended. |
| How long do the bulbs/lasers last? | Traditional lamp bulbs last 3,000-5,000 hours. Modern laser or LED light sources last 20,000+ hours, effectively making them a “buy it for life” component for casual home use. |
Always check the throw ratio calculator on the manufacturer’s website before purchasing. This simple step confirms the projector will work in your specific room dimensions with your desired screen size.
Final Recommendations and Actionable Next Steps
With all the information covered, it’s time to make a final decision and begin your project. This section consolidates key advice into a clear action plan. Follow these steps to move from research to a fully functional home golf simulator.
Choosing Your Projector: A Decision Summary
Your ideal choice depends on your primary goal and budget. Match your needs to one of these three clear user profiles for the best result.
- For the Performance-Focused Golfer: Prioritize low input lag and high brightness. The Optoma GT1090HDR is the best overall choice, offering HDR and a ultra-short throw for exceptional realism.
- For the Value-Conscious Builder: Seek the best balance of cost and reliable performance. The BenQ TH671ST delivers excellent 1080p clarity and sufficient brightness at a mid-range price point.
- For the Bright Room or Multi-Use Space: Laser brightness and flexibility are key. The Epson CO-FH02 provides outstanding lumen output and a long-life light source for challenging environments.
Your Project Implementation Checklist
Before you click “buy,” complete this final checklist. It ensures you have all the necessary components and information for a smooth build.
| Step | Action Item | Why It’s Important |
|---|---|---|
| 1. Final Measurement | Re-measure your room’s width, depth, and ceiling height. Note any obstructions like garage door openers. | Confirms your chosen projector’s throw ratio will work before purchase. |
| 2. Accessory Check | Ensure you have a compatible ceiling mount, long HDMI 2.0 cable, and surge protector. | Prevents installation delays. A quality mount is critical for stable alignment. |
| 3. Purchase Source | Buy from reputable retailers with good return policies in case of dead pixels or issues. | Provides peace of mind and customer support for your significant investment. |
| 4. Installation Plan | Schedule a block of time (4-6 hours) for unboxing, mounting, and calibration. Enlist a helper. | Rushing setup leads to errors. Proper calibration is essential for the best experience. |
Start by finalizing your room measurements and budget. Then, select the projector model from our recommendations that best fits those two constraints. This systematic approach guarantees a successful outcome for your golf simulator project.
Conclusion: Elevating Your Golf Simulator with the Right Projector
A golf simulator short throw projector is the essential key to an immersive, shadow-free experience. It solves core space and interference problems that standard projectors create. This investment transforms any room into a realistic virtual driving range.
Your best choice balances throw ratio, brightness, and input lag with your budget. Use our detailed recommendations and setup guide as your roadmap. Measure your space carefully before making a final purchase decision.
Begin your build today by selecting the ideal model from our top picks. A properly installed projector will provide years of enjoyment and practice. You are now equipped with the knowledge to make an informed choice.
Your perfect home golf simulator is within reach. Take the next step and start creating your ultimate golfing sanctuary.
Frequently Asked Questions about Golf Simulator Short Throw Projectors
What is a short throw projector for a golf simulator?
A short throw projector is designed to project a large image from a very short distance. For golf simulators, this means mounting it just a few feet in front of the screen, typically from the ceiling. This placement completely eliminates the golfer’s shadow on the impact screen.
This technology is essential for creating an immersive, realistic experience in limited spaces like garages. It solves the two main problems of standard projectors: requiring a long room and casting the player’s shadow during their swing.
How do I calculate the throw distance I need for my simulator?
You calculate throw distance using the projector’s throw ratio and your desired screen width. The formula is: Throw Distance = Screen Width x Throw Ratio. For example, a 10-foot wide screen with a 0.5:1 ratio needs a 5-foot throw distance.
Always use the manufacturer’s official throw calculator tool for the specific model. This ensures you buy a projector that can fill your screen from your available mounting location, preventing a costly mistake.
What is more important for golf: lumens or resolution?
For most setups, brightness (lumens) is more critical than 4K resolution. Sufficient lumens (3,000+) ensure a clear, vivid image in rooms with ambient light. A dim 4K image will look worse than a bright, sharp 1080p image.
Prioritize lumens first, then ensure 1080p resolution, and finally consider 4K as a premium upgrade. Low input lag is also a non-negotiable spec that is more important than resolution for real-time feedback.
Can I use an ultra short throw (UST) projector for golf?
Yes, an ultra short throw projector (with a ratio below 0.4:1) can be an excellent choice. It mounts even closer to the screen, often on a low table or shelf directly below it. This maximizes usable space behind the hitting area.
Ensure the model has high enough brightness and low input lag. Also, verify that the placement won’t be in the path of golf balls or clubs, as UST projectors are often lower to the ground.
Why is input lag so important for a golf simulator projector?
Input lag is the delay between your swing data being processed and the visual result on screen. High lag creates a disconnect, making the simulation feel unresponsive and unrealistic. This can negatively affect your timing and practice quality.
For a realistic experience, aim for an input lag of 50ms or less. For serious practice, a lag under 20ms is ideal. Always enable the projector’s “Game Mode” to minimize this delay.
What is the best way to mount a short throw projector?
The best method is a secure, adjustable ceiling mount directly in front of the screen. This keeps the unit safely out of the way of clubs and balls. Ensure the mount is rated to hold your projector’s weight and allows for fine-tuning tilt and rotation.
Use a mounting template to drill precise holes. Leave some slack in your cables for final adjustments. Having a helper during this process is highly recommended for alignment and safety.
How often do I need to replace the bulb or filter?
Traditional lamp bulbs last 3,000 to 5,000 hours. With regular use, plan for replacement every 1-2 years. The projector will usually warn you when lamp life is low. Always replace it with an official OEM bulb for best performance.
Check and clean the air filter every 3-6 months, or as specified in your manual. A clogged filter is a leading cause of overheating, which can permanently damage the projector or cause it to dim prematurely.
Is it worth getting a laser projector over a lamp-based model?
Laser projectors are worth the investment for long-term, hassle-free use. They offer 20,000+ hours of life, meaning you may never need a replacement. They also provide instant on/off and maintain consistent brightness over their entire lifespan.
While the upfront cost is higher, you save on bulb replacements and enjoy more reliable performance. For a dedicated simulator you plan to use for years, a laser model like the Epson CO-FH02 is a future-proof choice.
Can a Projector Get a Virus?why you need to know
This website is a participant in the Amazon Services LLC Associates Program, an affiliate advertising program designed to provide a means for us to earn fees by linking to Amazon.com and affiliated sites.