This website is a participant in the Amazon Services LLC Associates Program, an affiliate advertising program designed to provide a means for us to earn fees by linking to Amazon.com and affiliated sites.
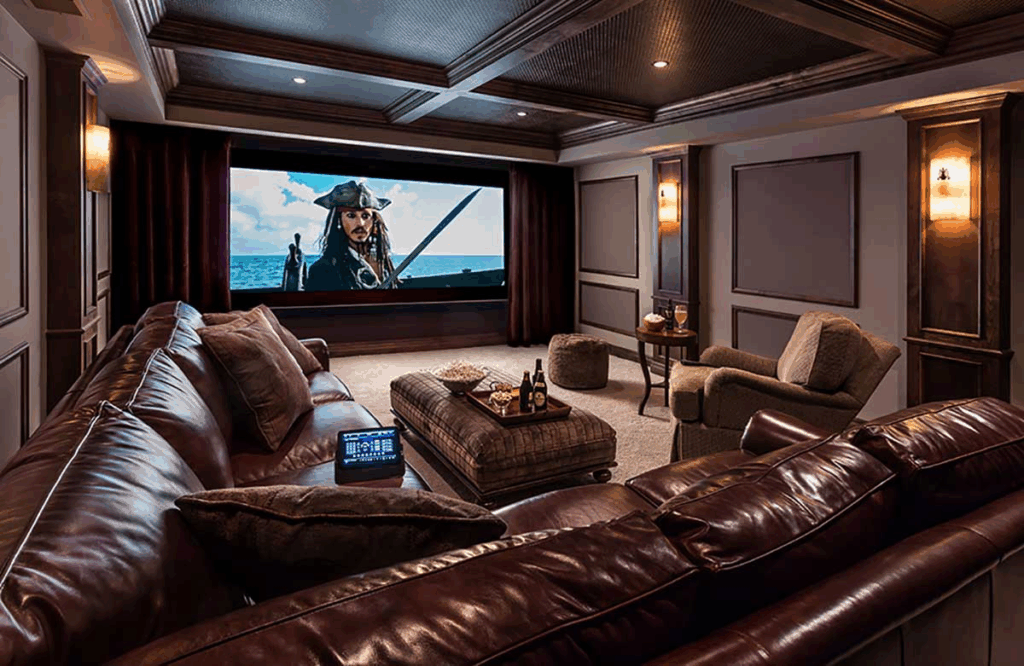
Choosing a golf simulator projector short throw 4000 lumens is the key to a brilliant, immersive, and space-efficient home golf experience. This specific combination solves the core challenges of brightness and space in indoor setups.
A 4000-lumen output ensures a vivid, clear image even in ambient light, while a short throw lens allows placement just feet from the screen. This guide will explain why this pairing is ideal and how to select the best model.
You will learn the critical benefits, key features to compare, and expert tips for installation. We’ll help you understand exactly what makes this projector type the top choice for a realistic and practical golf simulator.
Best Golf Simulator Projectors for a Short Throw 4000 Lumens Setup
Optoma GT1090HDR – Best Overall Choice
The Optoma GT1090HDR is a top-tier choice, delivering a bright 4200 lumens and true HDR10 support for stunning contrast. Its ultra-short throw ratio projects a large 120″ image from just a few feet away. This model is ideal for achieving a cinematic, high-impact simulation in rooms with some ambient light.

- DEPENDABLE LASER LIGHT SOURCE: DuraCore laser light source eliminates lamp…
- SHORT THROW LENS: The GT1090HDRx is designed to be placed closer to the…
- 4K HDR INPUT: HDR10 and HLG technologies enable brighter whites and deeper…
BenQ TH671ST – Best Value for Golf Simulators
Offering exceptional performance for the price, the BenQ TH671ST provides a reliable 3000 lumens (sufficient for most controlled lighting) with a short throw lens. It features a high 1080p resolution and a fast 8.4ms response time. This is the best option for golfers seeking a high-quality, lag-free experience without the premium price tag.

- UNPARALLELED PICTURE QUALITY: TV Projector, comes with Native Full HD 1080p…
- GEARED TOWARDS GAMING: Ultra-fast low input lag and a refresh rate that…
- WOW YOUR FRIENDS: Take the action to the big screen by projecting a…
Epson Pro EX10000 – Best for Commercial or High-Ambient Light
For the ultimate in brightness and durability, the Epson Pro EX10000 is a powerhouse. It boasts a massive 4000 lumens of 3LCD laser projection, ensuring a vivid, color-accurate image that won’t fade. This laser model is ideal for commercial facilities, garages, or any space where controlling ambient light is a challenge.

- Best-in-Class Color Brightness (3) — 4,500 lumens of color and white…
- Astounding image quality — amazing Full HD 1080p (1) resolution delivers…
- High-performance laser light source — 20,000 hours virtually…
Why a Short Throw 4000 Lumen Projector is Essential for Golf Simulators
Selecting the right projector is the most critical hardware decision for your golf simulator. The combination of short throw capability and high lumen output directly solves the two biggest constraints of a home setup: limited space and competing light. This section breaks down why these specs are non-negotiable for a professional-grade experience.
Understanding Short Throw Projection Benefits
A short throw projector can create a large image from a very short distance, typically just 3 to 8 feet away. This is a game-changer for golf simulators where space is at a premium. It allows for a more flexible room layout and eliminates the risk of shadows.
- Space Efficiency: Mount the projector close to the screen, freeing up valuable ceiling or floor space behind the hitting area. This creates a safer, less cluttered environment.
- No Shadow Interference: With the projector positioned in front of the player, there is no risk of casting a shadow on the screen during your swing, ensuring an unobstructed view.
- Simplified Installation: Shorter projection distances mean easier mounting, often on the ceiling just behind the golfer, and less complicated cable management.
The Critical Role of 4000 Lumens for Brightness
Lumens measure a projector’s light output, and 4000 is the sweet spot for golf simulators. This high brightness level ensures a vivid, clear image that can compete with ambient light from windows or indoor lighting, which is crucial for realism.
Without sufficient lumens, the projected image will appear washed out and dull. This diminishes the visual detail of the golf course and can make reading greens or seeing ball flight less precise. A bright image is essential for immersion.
Key Specifications Beyond Lumens and Throw
While lumens and throw are paramount, other specs fine-tune performance. Pay close attention to these for optimal results:
- Native Resolution: Aim for 1920×1080 (1080p) minimum. This ensures sharp details on fairways, greens, and user interfaces. 4K models are superior but at a higher cost.
- Contrast Ratio: A higher ratio (e.g., 10,000:1 or more) means deeper blacks and better distinction between shadows and bright areas on the course, enhancing depth perception.
- Input Lag: Critical for real-time feedback. Look for a lag under 20ms, preferably in the “Gaming” or “Fast” mode of the projector, to ensure your on-screen ball flight is instantaneous.
How to Choose and Set Up Your Short Throw Golf Simulator Projector
Selecting the perfect model is just the first step. Proper planning and installation are crucial to unlocking your projector’s full potential. This guide covers the key calculations and setup steps to ensure a flawless, bright image for your simulator.
Calculating Throw Distance and Image Size
Every short throw projector has a specific throw ratio (e.g., 0.5:1). This number is vital for planning. You must calculate the required distance to achieve your desired screen size before mounting anything permanently.
- Find Your Throw Ratio: Check your projector’s specifications sheet for its “throw ratio.” A ratio of 0.5:1 is common for ultra-short throw models.
- Measure Your Screen Width: Determine the exact width of your impact screen or projection surface in inches or centimeters.
- Do the Math: Multiply your screen width by the throw ratio. For a 10-foot (120-inch) wide screen and a 0.5:1 ratio, the projector lens should be 120″ x 0.5 = 60 inches (5 feet) away.
Optimizing Placement and Mounting
Correct placement ensures a perfectly aligned, keystone-free image. Ceiling mounting is the most popular and space-efficient method for golf simulators. It keeps the unit safe from errant shots and shadows.
- Ceiling Mount: Use a universal short throw ceiling mount. Ensure it is rated to hold your projector’s weight and allows for fine-tuning of tilt and position.
- Lens Alignment: The projector lens must be perfectly centered on your screen, both horizontally and vertically. Even a small misalignment will distort the image.
- Avoid Keystone Correction: Physically align the projector to create a square image. Relying on digital keystone correction degrades image quality and can introduce input lag.
Essential Settings for Peak Performance
Once mounted, dial in these settings for the best golf simulator image. Start with the projector’s brightest mode (often “Dynamic” or “Bright”) to maximize lumen output for clarity.
Next, disable any automatic features like Eco Mode or dynamic contrast that can dim the image or cause lag. Finally, enable the dedicated low latency or gaming mode in the settings menu to minimize input lag for real-time ball flight.
Common Mistakes and Expert Tips for Your Projector Setup
Even with the right gear, small errors can undermine your simulator’s visual quality. Avoiding common pitfalls and applying pro-level tips will elevate your experience from good to exceptional. This section helps you sidestep headaches and maximize your investment.
Top 3 Mistakes to Avoid with Short Throw Projectors
These frequent errors can lead to dim, distorted, or laggy images. Being aware of them is the first step to prevention.
- Ignoring Ambient Light: Assuming 4000 lumens eliminates all light issues is a mistake. Direct sunlight or bright overhead lights will still wash out the image. Always control your room’s lighting for the best contrast.
- Incorrect Throw Calculation: Guessing the placement distance often results in an image that’s too large or small for your screen. Always use the manufacturer’s throw ratio and calculator for precise positioning.
- Using Digital Keystone Correction: Relying on keystone to fix a crooked image degrades sharpness and increases input lag. Take the time to physically level and square your projector and mount instead.
Advanced Optimization for a Professional Experience
Go beyond basic setup with these expert techniques. They fine-tune your system for unparalleled realism and performance.
First, invest in a high-gain impact screen. A screen with a gain of 1.2 to 1.8 will reflect more light back to the viewer, effectively making your projector appear brighter and enhancing color vibrancy.
Second, manage your cables meticulously. Use braided sleeves or conduit to bundle and secure HDMI and power cables. This prevents accidental disconnection and creates a clean, safe environment free of tripping hazards.
| Setting | Recommended Configuration | Reason |
|---|---|---|
| Picture Mode | Dynamic / Bright | Maximizes lumen output for clarity. |
| Eco Mode | Off | Prevents automatic dimming that reduces brightness. |
| Gaming Mode | On | Minimizes input lag for real-time ball flight. |
| Dynamic Contrast | Off | Avoids fluctuating brightness that can cause lag. |
Long-Term Maintenance and Care
Protect your investment with simple, regular maintenance. A clean projector lasts longer and performs better. Always refer to your user manual for specific instructions.
- Filter Cleaning: Many projectors have air filters. Check and clean these every few months to prevent overheating, which can reduce brightness and lamp life.
- Lens Care: Gently dust the lens with a soft, dry microfiber cloth designed for optics. Never use liquid cleaners or rough materials that can scratch the coating.
- Ventilation: Ensure the projector’s intake and exhaust vents are never blocked. Proper airflow is critical to prevent thermal shutdown and prolong component lifespan.
Frequently Asked Questions About Golf Simulator Projectors
Choosing and setting up a projector brings up common questions. This FAQ section provides clear, direct answers to help you make confident decisions and troubleshoot issues. Find quick solutions to the most pressing concerns below.
Technical Specifications and Compatibility
Understanding how specs interact with your space and software is key. These answers clarify common technical confusions.
- Is 4000 lumens really necessary, or is 3000 enough? 4000 lumens is ideal for spaces with any ambient light. 3000 lumens can work well in a completely light-controlled room (e.g., a blacked-out garage or basement). For most multi-use spaces, 4000 provides a crucial brightness buffer.
- What is the difference between laser and lamp projectors? Laser light sources last longer (20,000+ hours), maintain brightness over time, and turn on/off instantly. Lamp projectors are less expensive upfront but require bulb replacements every 3,000-5,000 hours and gradually dim.
- Do I need a 4K projector for my golf simulator? While 1080p is perfectly sufficient, 4K resolution provides sharper details on textures like grass and trees, enhancing realism. It is a premium upgrade, not a necessity, for most golfers.
Setup, Cost, and Troubleshooting
Practical questions about installation, budget, and solving problems are addressed here. Get your system running smoothly.
What is a realistic budget for a quality short throw golf simulator projector? Expect to invest between $1,000 and $3,000. The lower end gets you a solid 1080p lamp model, while the higher end features laser 4K models with higher brightness and durability.
My projected image has a slight curve or bow at the edges. How do I fix this? This is usually caused by screen curvature. Ensure your impact screen is pulled perfectly taut. If the problem persists, it may be inherent to the projector’s lens; minor edge distortion is common in some short throw models.
Enhancing Your Simulator Experience
These final tips help you get the most enjoyment and performance from your setup once everything is running.
- Can I use this projector for movies and gaming too? Absolutely. A high-lumen short throw projector is excellent for a home theater. Just remember to switch the picture mode to “Cinema” for better color accuracy and turn gaming mode on for console play.
- How often should I replace the projector bulb or filter? Consult your manual, but plan to check/clean air filters every 3-6 months. For lamp-based models, budget for a replacement bulb every 2-4 years with regular use. Laser models largely eliminate this concern.
Final Verdict and Making Your Purchase Decision
You now have the knowledge to select the perfect projector. This final section synthesizes the key criteria to help you make a confident, informed choice based on your specific needs and budget. Let’s break down the decision-making process.
Choosing Based on Your Primary Use Case
Your simulator’s environment and your personal priorities should guide your final selection. Match the projector’s strengths to your most important requirement.
- For the Budget-Conscious Home Golfer: Prioritize a reliable 1080p lamp projector like the BenQ TH671ST. Ensure it has a true short throw and at least 3000 lumens for a dedicated, light-controlled space.
- For the Enthusiast Seeking the Best Experience: Invest in a high-brightness, laser 4K model like the Optoma GT1090HDR. This future-proofs your setup with superior brightness, longevity, and stunning detail.
- For Commercial or High-Traffic Setups: Durability and brightness are paramount. Choose a laser projector with 4000+ lumens like the Epson Pro EX10000. The maintenance-free laser engine and intense brightness handle all-day use.
Essential Pre-Purchase Checklist
Before you click “buy,” run through this final checklist. It ensures the model you’ve chosen will work seamlessly in your planned space.
- Verify Throw Ratio & Distance: Use the manufacturer’s calculator to confirm the projector fits in your room and fills your screen from your intended mount location.
- Confirm Connectivity: Ensure the projector has the correct HDMI ports (preferably HDMI 2.0) to connect to your computer, launch monitor, or media player without adapters.
- Check Warranty & Support: Look for a strong manufacturer’s warranty (3 years is excellent) and confirm the availability of replacement bulbs or filters for lamp models.
Next Steps After Your Projector Arrives
Unbox your new projector carefully and save all packaging. Begin with a temporary setup on a stable table or box at the calculated distance before permanent mounting.
Use this test phase to dial in all picture settings, connect to your simulator software, and ensure everything works perfectly. Only after a successful test should you proceed to install the ceiling mount and secure all cables.
Conclusion: Elevate Your Game with the Right Projector
Investing in a high-quality short throw projector is the definitive upgrade for your home golf simulator. It transforms a technical setup into an immersive sporting experience. The right choice brings the course to life with stunning clarity and realism.
Recap of Core Benefits
The advantages of a dedicated 4000-lumen short throw model are clear and impactful. They directly address the unique demands of indoor golf simulation.
- Unmatched Space Efficiency: The short throw lens allows installation close to the screen, preserving your room’s layout and ensuring no shadows interrupt your swing.
- Brilliant Image Quality: High lumen output guarantees a vibrant, detailed picture that stands up to ambient light, making every fairway and green look authentic.
- Professional Performance: Together, these features create a reliable, low-lag system that feels responsive and looks exceptional, matching the quality of commercial simulators.
Your Path to a Perfect Setup
You now have a complete roadmap. Start by assessing your room’s size and lighting conditions. Use this to determine your non-negotiable need for high brightness and a short throw ratio.
Next, compare models using the key specifications outlined: native resolution, contrast ratio, and input lag. Balance these features against your budget, remembering that a laser model offers long-term value through durability.
Begin Your Golf Simulator Journey
With your projector selected and installed, you’re ready to focus on what matters most: improving your game. The technology will fade into the background, leaving only the thrill of the shot.
Enjoy the convenience of playing world-class courses regardless of weather. Welcome to the future of home golf, where every detail is designed to help you play better and have more fun.
Additional Resources and Further Reading
Your journey to the perfect simulator doesn’t end with the projector. A truly great setup involves complementary components and ongoing learning. This section points you toward valuable resources to complete and enhance your home golf experience.
Essential Complementary Components
A projector is one part of a complete system. To build a professional-grade simulator, you will need to integrate these key components seamlessly.
- Launch Monitor: The heart of data capture. Options range from camera-based systems (like SkyTrak+ or Uneekor) to radar units (like FlightScope or Garmin). Choose based on your budget and desired data accuracy.
- Impact Screen & Enclosure: A high-tension, high-gain screen is crucial for image quality and durability. A full enclosure with side nets protects your space and contains golf balls safely.
- Simulator Software: This is your virtual golf course. Popular options include E6 Connect, The Golf Club 2019, and GSPro. They offer various courses, game modes, and practice ranges.
Recommended Forums and Communities
Connect with fellow enthusiasts to get advice, share setups, and troubleshoot issues. These communities are invaluable sources of real-world experience.
The Golf Simulator Forum is the largest and most active dedicated community online. It features in-depth build threads, technical discussions, and user reviews on every piece of equipment imaginable.
Subreddits like r/Golfsimulator offer a more casual platform for quick questions, photo sharing of home setups, and news on new product releases. Engaging here can provide quick, crowd-sourced answers.
Helpful Tools and Calculators
Use these free online tools to plan your space with precision. They remove the guesswork from critical measurements.
- Projector Central Throw Calculator: The industry standard tool. Input any projector model to see exact throw distances and image sizes for your room.
- Room Layout Planners: Software like SketchUp Free or even simple graph paper can help you visualize component placement, ensuring you have enough space for a full swing.
- Manufacturer Resources: Always download the official user manual and installation guide for your specific projector model for detailed specs and warranty information.
Conclusion: Mastering Your Golf Simulator Projector Choice
Selecting a short throw 4000 lumen projector solves the core challenges of space and brightness. This combination delivers a brilliant, immersive image perfect for realistic practice. It is the cornerstone of a professional home golf simulator.
The key takeaway is to match the projector’s specifications to your specific room and budget. Prioritize throw ratio and lumens, then refine your choice with resolution and lag time. Your perfect model balances all these factors.
Use the guidelines and checklist provided to make your final purchase decision with confidence. Begin planning your installation using the recommended tools and calculations for a flawless setup.
You are now equipped to build a stunning simulator that will transform your game and provide endless enjoyment. Hit ’em straight!
Frequently Asked Questions about Golf Simulator Projectors
What is the best short throw projector for a golf simulator?
The best model depends on your budget and room. For most home users, the Optoma GT1090HDR offers an ideal balance of 4200 lumens, HDR, and a reliable ultra-short throw. It provides a bright, cinematic image that performs well in various lighting conditions, making it a top overall choice.
For those on a tighter budget, the BenQ TH671ST delivers excellent value with solid performance. For commercial use or very bright rooms, a laser model like the Epson Pro EX10000 is the most durable and bright option.
How many lumens do I really need for a golf simulator?
For a vivid image that combats ambient light, 4000 lumens is the recommended sweet spot. This brightness level ensures the course graphics remain crisp and colorful even if some room lighting is on. It provides a crucial buffer for realistic contrast and detail.
If your simulator is in a completely dark, dedicated basement or garage, 3000 lumens may suffice. However, opting for 4000 lumens offers more flexibility and a consistently superior viewing experience, preventing a washed-out picture.
Can you use a regular projector for a golf simulator?
You can, but it is not ideal. A standard long-throw projector must be mounted far behind the hitting area, consuming significant space and casting shadows. Its brightness is often lower, struggling to produce a clear image in anything but total darkness.
A dedicated short throw golf simulator projector is designed specifically for this application. It solves the space and shadow issues by mounting close to the screen, and high-lumen models guarantee a bright picture. The specialized design justifies the investment.
What is the ideal throw ratio for a golf simulator?
An ultra-short throw ratio of 0.5:1 or less is ideal. This means the projector can be placed just a few feet from the screen to create a large image. This placement eliminates the risk of the golfer casting a shadow during their swing.
Short throw ratios (between 0.5:1 and 1.0:1) are also acceptable but require more careful placement planning. Always use the manufacturer’s throw calculator to ensure your chosen model can fill your screen from your intended mounting position.
How do I reduce input lag on my golf simulator projector?
First, enable the projector’s dedicated “Gaming Mode” or “Fast Mode” in its picture settings. This setting bypasses unnecessary image processing that causes delays. Second, ensure all digital keystone correction is turned off, as this processing also adds lag.
Finally, use a high-speed HDMI cable and connect directly to a port on your computer or launch monitor. Avoid intermediary switches or extenders if possible. Aim for a total system lag under 20ms for a real-time feel.
What is the difference between lamp and laser for golf simulators?
Lamp projectors use a traditional bulb that dims over time and needs replacement every 3,000-5,000 hours. Laser light sources maintain consistent brightness for 20,000+ hours and turn on/off instantly with no warm-up time.
For a golf simulator used frequently, a laser projector is a superior long-term investment. It offers better durability, stable performance, and lower maintenance, though it has a higher upfront cost. Lamp models are a more budget-friendly entry point.
Why is my golf simulator projector image blurry?
First, use the lens focus ring on the projector to sharpen the image. If the center is sharp but edges are blurry, your screen may not be perfectly flat and taut; tighten the impact screen material. Also, check that the projector is positioned exactly perpendicular to the screen.
If blur persists, ensure you are using the projector’s native resolution (e.g., 1920×1080) in your computer’s display settings. Running at a non-native resolution will always produce a softer, less defined image.
How high should I mount my short throw projector?
The projector lens should be aligned with the top edge of your impact screen for a standard setup. Many short throw models are designed for ceiling mounting just behind the hitting area. Use the manufacturer’s vertical offset specification to calculate the exact height.
Always perform a temporary test setup before drilling any holes. Place the projector at the planned height and distance to confirm the image fills the screen correctly without excessive digital adjustment, which can reduce quality.
This website is a participant in the Amazon Services LLC Associates Program, an affiliate advertising program designed to provide a means for us to earn fees by linking to Amazon.com and affiliated sites.