
This website is a participant in the Amazon Services LLC Associates Program, an affiliate advertising program designed to provide a means for us to earn fees by linking to Amazon.com and affiliated sites.
An overhead projector school focuses on mastering this classic teaching tool. It provides essential training for educators. This ensures effective use in today’s diverse classrooms.
Learning proper techniques solves common classroom engagement problems. It unlocks powerful, interactive visual teaching methods. This bridges the gap to modern digital tools.
Our complete guide delivers expert tips and proven methods. You will learn setup, creative transparencies, and maintenance. Transform your lessons with this versatile technology.
Best Overhead Projectors for School – Detailed Comparison
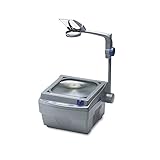
Elmo HP-L3700 – Best Overall Classroom Choice
The Elmo HP-L3700 is a top-tier overhead projector for daily school use. It features a bright 3,000-lumen lamp and a high-resolution camera head. This model excels at displaying detailed textbook pages and 3D objects clearly to the entire class. It’s the best option for versatile, interactive lessons.

Apollo 3800T – Best Budget-Friendly Option
For schools needing reliable performance on a tight budget, the Apollo 3800T is ideal. It offers a powerful 2,800-lumen output and a durable, lightweight design for easy transport between classrooms. Its simple controls make it a recommended choice for teachers new to overhead projection technology.
3M 9800 Overhead Projector – Best for Legacy Support
The 3M 9800 is a classic, workhorse model perfect for schools with existing transparency libraries. Known for its exceptional durability and consistent color fidelity, it handles frequent use with minimal maintenance. This is the ideal for institutions prioritizing long-term reliability over digital features.
- Sold as 1 Each.
- Weighs just 12 lbs. for easy portability and reliable tabletop use.
- Open head folds down or can be stored in built-in storage compartment.
How to Set Up Your Overhead Projector for Classroom Use
Proper setup is crucial for an effective lesson. A well-positioned projector ensures clear visibility and minimizes distractions. Follow this guide for optimal performance every time.
Choosing the Perfect Projector Placement
Location directly impacts student engagement. The screen should be visible from every desk without obstruction. Center the projector on a stable cart or table opposite the screen.
Maintain the correct distance for a sharp image. Typically, place the projector 5 to 8 feet from the screen. Always check your model’s manual for the exact throw distance specification.
Step-by-Step Startup and Alignment
Follow these steps for a flawless startup sequence. This prevents technical issues during your teaching time.
- Power On: Plug in the projector and turn it on. Allow the bulb to warm up for 60-90 seconds.
- Position Transparency: Place your first transparency on the glass stage. Use the corner guides for straight alignment.
- Focus and Keystone: Turn the focus knob until the text is razor-sharp. Adjust the projector head or keystone control to square the image on the screen.
Essential Tools for Overhead Projection
Beyond the machine, a few simple tools enhance your teaching. Keep this kit nearby for smooth presentations.
- Water-Soluble Markers: Use multiple colors for dynamic, erasable notes.
- Pointer or Ruler: Direct attention to specific parts of the image without shadowing.
- Cleaning Kit: Include a soft cloth and glass cleaner for a dust-free, bright stage.
| Problem | Likely Cause | Solution |
|---|---|---|
| Blurry Image | Incorrect focus or dirty stage | Adjust focus knob; clean glass thoroughly |
| Image Not Square | Projector misaligned with screen | Adjust projector height or use keystone correction |
| Dim Projection | Old bulb or bright room lights | Replace bulb; dim overhead classroom lights |
Creative Teaching Techniques with an Overhead Projector
Modern teaching strategies can revitalize this classic tool. The overhead projector offers unique interactive possibilities. It encourages student participation and visual learning.
Interactive Lesson Strategies for Student Engagement
Transform passive viewing into active learning. Use the projector to facilitate collaborative problem-solving. This turns your lesson into a shared, dynamic experience.
- Progressive Reveal: Cover parts of a transparency with paper. Uncover information step-by-step to build suspense and focus discussion.
- Student Scribe: Invite students to the projector to solve equations or annotate diagrams. This builds confidence and public speaking skills.
- Live Annotation: Annotate maps, label scientific diagrams, or work through math problems in real-time with colored markers.
Creating Effective and Reusable Transparencies
Quality transparencies are the foundation of a great lesson. Well-designed visuals enhance comprehension and can be used for years. Follow these design principles.
Focus on clarity and simplicity above all. Use large, clear fonts and high-contrast colors. Limit text to key points and rely on your verbal explanation for detail.
Protect your investment by making them durable. Use permanent markers for static elements. Add erasable marker notes during the lesson. Store them flat in protective sleeves.
Integrating Digital and Analog Methods
Bridge the gap between old and new classroom tech. The overhead projector can complement digital tools for a hybrid approach. This maximizes your available resources.
Project physical objects directly under the camera. Use this for science experiments, examining historical artifacts, or displaying pages from a single, precious book.
Combine it with simple digital outputs. Print diagrams or text onto transparency film using a standard laser printer. This creates professional-looking, reusable resources easily.
Overhead Projector Maintenance and Troubleshooting Guide
Regular care extends your projector’s lifespan and ensures reliability. Simple maintenance prevents most common classroom disruptions. A well-maintained unit delivers consistent, bright performance.
Routine Cleaning and Care Schedule
Dust and fingerprints are the main enemies of clear projection. Establish a quick weekly and monthly cleaning routine. This takes only minutes but makes a major difference.
- Weekly: Wipe the glass stage and fresnel lens with a microfiber cloth. Clean the projector’s exterior to prevent dust intake.
- Monthly: Use lens cleaner on the glass stage for stubborn marks. Check the fan vents and gently vacuum any accumulated dust.
- As Needed: Carefully clean the projection lens with appropriate tools. Always turn off and unplug the unit before any internal cleaning.
Common Problems and DIY Solutions
Most issues have simple fixes you can perform yourself. Diagnose problems quickly using this troubleshooting guide. Avoid unnecessary service calls.
| Symptom | Probable Cause | Immediate Action |
|---|---|---|
| No power / No light | Loose plug, blown fuse, or dead bulb | Check power connection; replace fuse or bulb |
| Overheating shutdown | Blocked air vents or failing fan | Clear vents; ensure proper ventilation around unit |
| Dark spot in image | Dust or debris on the fresnel lens inside | Consult manual to safely access and clean internal lens |
When to Replace the Projector Bulb
The bulb is a consumable part with a finite life. Recognizing end-of-life signs prevents a sudden blackout during a lesson. Plan for a timely replacement.
- Dimming Output: The image becomes noticeably darker even in a dim room.
- Discoloration: The projected light develops a yellow or pink tint.
- Flickering or Delay: The light flickers or takes much longer to reach full brightness.
Always note the model-specific bulb type (e.g., ELH, EYR) before purchasing. Keep a spare bulb in your classroom supply closet for a swift changeover.
Overhead Projector vs. Modern Digital Projectors
Choosing classroom technology requires understanding strengths and limitations. Both overhead and digital projectors have distinct roles. The right tool depends on your specific teaching objective.
Key Advantages of Using an Overhead Projector
The classic overhead projector offers unique pedagogical benefits. Its simplicity and immediacy are powerful teaching assets. These strengths ensure its continued relevance.
- Real-Time Interaction: Teachers can write, draw, and reveal information live. This supports spontaneous, student-led discussion and problem-solving.
- No Tech Delays: Instant on/off functionality with no boot-up time or software updates. It guarantees your lesson starts on time, every time.
- Tactile Element: Allows projection of physical objects, manipulatives, and book pages. This connects the digital image directly to a real-world item.
When to Choose a Digital Projector Instead
Digital projectors excel in multimedia and prepared content delivery. They are ideal for certain modern classroom scenarios. Consider a digital model for these uses.
Choose a digital projector for dynamic multimedia lessons. It seamlessly integrates video, animations, and software applications. This is essential for subjects requiring rich digital resources.
It is also superior for remote or hybrid learning setups. Digital projectors easily connect to computers for video conferencing and screen sharing. They are the backbone of the connected classroom.
| Feature | Overhead Projector | Digital Projector |
|---|---|---|
| Best For | Live annotation, simple diagrams, object display | Multimedia, videos, software, pre-made slides |
| Setup Speed | Very Fast (plug and play) | Moderate (requires source connection) |
| Content Source | Physical transparencies & objects | Computer, DVD, Document Camera |
| Interaction Style | Direct, teacher-centered, analog | Indirect, software-dependent, digital |
Creating a Blended Classroom Technology Approach
The most effective classrooms often use both tools. They are complementary, not mutually exclusive. Strategically deploy each based on the lesson phase.
Use the overhead for warm-up activities and collaborative worked examples. Switch to the digital projector for multimedia explanations or student presentations. This blended approach maximizes engagement and resource utility.
Essential Accessories and Supplies for Overhead Projection
The right accessories transform a basic projector into a powerful teaching station. These supplies enhance functionality and creativity. A small investment significantly improves your daily experience.
Must-Have Writing Tools and Materials
Markers are the primary interface for your lessons. Choosing the correct type prevents smudges and damage. Quality tools make presentation smoother.
- Water-Soluble Overhead Markers: These are essential for erasable notes. Use multiple colors for coding information. Wipe clean with a damp cloth for reuse.
- Permanent Transparency Markers: Use these for creating master templates. They create durable outlines, diagrams, or headers that won’t erase during lessons.
- Fine-Point and Chisel-Tip Varieties: Have both for detailed work and bold headings. This allows for varied visual hierarchy on your transparencies.
Creating and Organizing Your Transparency Library
Build a reusable collection of core lesson materials. Organized transparencies save immense preparation time year after year. Protect your investment with proper storage.
Use clear sheet protectors in a three-ring binder for storage. Label each protector with the subject and topic. This system allows for quick browsing and retrieval during class.
Create a master index at the front of your binder. List transparencies by unit and lesson sequence. This turns your collection into a structured, efficient teaching resource.
Advanced Add-Ons for Enhanced Functionality
Consider these upgrades to solve specific classroom challenges. They address common limitations of standard overhead projector use.
| Accessory | Primary Function | Teaching Benefit |
|---|---|---|
| Roll-Feed Attachment | Holds a roll of clear acetate film | Creates a continuous scrolling “whiteboard” for long workflows |
| Magnifying Lens Attachment | Snaps over the main lens | Enlarges small details on objects or fine print for the whole class |
| Portable Light-Blocking Hood | Fits around the projection stage | Reduces glare and improves image contrast in well-lit rooms |
Implementing Overhead Projectors in Curriculum Planning
Strategic integration maximizes the tool’s educational impact. Plan specific lessons that leverage its unique strengths. This moves beyond simple substitution to transformative use.
Subject-Specific Lesson Plan Ideas
Tailor your approach to meet distinct subject-area goals. The projector can be a central tool across the curriculum. Here are targeted applications.
- Mathematics: Live-solve complex equations step-by-step. Use overlays to demonstrate geometric transformations or graph functions progressively.
- Language Arts: Annotate poetry, mark grammatical structures, or collaboratively edit student writing. Reveal story plot points sequentially.
- Science: Label detailed diagrams of cells or systems. Project live chemical reactions or the movement of small organisms in a petri dish.
- History/Geography: Trace migration routes on maps. Annotate timelines or compare historical documents side-by-side using multiple transparencies.
Designing Effective Projector-Based Activities
Move from teacher-centered demonstration to student-centered exploration. Design activities that require active manipulation of the tool. This deepens understanding and engagement.
Create a “Silent Lesson” where instructions are revealed step-by-step on transparencies. Students must read and follow directions independently, building literacy and focus.
Use the layering technique with multiple transparencies. Start with a base map, then add overlays for climate, population, and resources. This visually builds complex concepts.
Assessing Student Learning with Projector Work
The projector is not just for instruction; it’s also an assessment tool. It provides immediate, visual feedback on student comprehension. Use it formatively during lessons.
- Exit Ticket Display: Have students solve a problem on a small acetate sheet. Quickly project a sample of answers anonymously for whole-class review.
- Group Presentation: Assign small groups to create and present a transparency summarizing a topic. Assess both content mastery and communication skills.
- Error Analysis: Project a worked example containing deliberate mistakes. Facilitate a class discussion to identify and correct the errors collaboratively.
Safety and Best Practices for Classroom Projectors
A safe learning environment is the top priority. Overhead projectors present specific, manageable safety considerations. Establishing clear protocols protects both students and equipment.
Electrical and Operational Safety Protocols
Prevent accidents by following fundamental electrical safety rules. These practices should become second nature for every user in the classroom.
- Cord Management: Secure power cords to prevent tripping. Use cord covers or tape in high-traffic areas. Never run cords under rugs.
- Ventilation: Always ensure the projector’s cooling vents are unobstructed. Operate it on a hard, flat surface, not on soft materials like a carpet or blanket.
- Power Down: Turn off and unplug the unit when not in use, especially overnight. This prevents overheating and saves energy.
Handling the Bulb and Heat Management
The projector bulb operates at extremely high temperatures. Proper handling is critical to avoid burns or bulb explosion. Never touch a bulb with bare hands.
Always allow the projector to cool for at least 30-45 minutes before attempting to change the bulb. Oils from skin can create hot spots on the glass, causing premature failure.
Use the provided gloves or a clean cloth when installing a new bulb. Insert it carefully according to the manual’s instructions. Ensure it is seated correctly in the socket.
Student Guidelines for Projector Use
Set clear expectations if students will interact with the equipment. This empowers them while maintaining a safe, respectful environment for learning.
| Rule | Reason | Teaching Point |
|---|---|---|
| Look at the screen, not the projector lamp. | Prevents eye strain and damage from bright light. | Explain the danger of looking directly at intense light sources. |
| No touching the projector stage or lens without permission. | Prevents smudges, scratches, and accidental misalignment. | Teach respect for shared classroom tools and equipment. |
| Keep papers and objects away from the top vent. | Prevents fire hazard and equipment overheating. | Discuss basic principles of electronics and heat dissipation. |
Conclusion: Mastering the Overhead Projector for Modern Teaching
The overhead projector remains a uniquely powerful tool for visual instruction. Its strength lies in live interaction and simplicity. This guide provides the complete blueprint for effective use.
Your key takeaway is to leverage its real-time teaching capabilities. Use it for building concepts collaboratively, not just displaying them. Integrate it strategically within your broader classroom technology.
Start by trying one new technique from this guide next week. Practice the setup and maintenance routines to build confidence. Observe how it changes student engagement.
Embrace this classic tool as a specialist in your teaching arsenal. It can make your lessons more dynamic and memorable starting today.
Frequently Asked Questions about Overhead Projectors in School
What is an overhead projector used for in the classroom?
An overhead projector is used to display enlarged images, text, and objects onto a screen. It excels at live demonstrations, allowing teachers to write, draw, and annotate in real-time. This supports interactive lessons and step-by-step problem-solving.
It is ideal for projecting prepared transparencies, pages from books, or even three-dimensional objects. This visual aid helps maintain student focus and caters to visual learners, making complex concepts easier to understand for the entire class.
How do you make transparencies for an overhead projector?
You can create transparencies using specialized clear acetate film. The simplest method is to write or draw directly on the film with water-soluble or permanent overhead projector markers. This is perfect for creating materials during a lesson.
For professional-looking, reusable masters, use a laser printer or photocopier designed to accept transparency film. Ensure you use the correct film type (laser or inkjet) to prevent damage to your equipment. Always test a sheet first.
What are the advantages of an overhead projector vs. a document camera?
The primary advantage is simplicity and direct interaction. An overhead projector has no boot time, software, or complex connections. Teachers can write naturally and manipulate physical objects under the lens with immediate, large-scale results.
A document camera offers higher resolution and digital features like image capture and zoom. However, it requires a computer and digital projector. The overhead projector wins for spontaneous, analog interaction and absolute reliability in any classroom setting.
Why is my overhead projector image blurry?
A blurry image is most commonly caused by an out-of-focus lens or a dirty projection stage. First, adjust the focus knob on the projector head while viewing the screen. Turn it slowly until the text and lines become sharp.
If focusing doesn’t work, the glass stage or the internal fresnel lens may be dirty. Turn off the projector, let it cool, and clean the glass with a suitable cleaner and a soft, lint-free cloth. Avoid spraying liquid directly onto the unit.
What is the best way to store overhead projector transparencies?
The best way is to store them flat in archival-quality, clear sheet protectors within a three-ring binder. This prevents curling, scratching, and dust accumulation. Organize them by subject or unit for quick access during lessons.
Label each protector clearly. Avoid storing transparencies in stacked piles, as this can lead to permanent sticking and damage. Keep the binder in a cool, dry place away from direct sunlight to prevent the film from degrading over time.
How often should you replace an overhead projector bulb?
Replace the bulb when you notice significant dimming, discoloration (a yellow tint), or flickering. There is no fixed schedule, as lifespan depends on usage, but typical bulbs last 50-100 hours. Always keep a spare bulb on hand.
Note the specific model number (e.g., EYR, ELH) from the old bulb or your manual before purchasing a replacement. Remember to let the projector cool completely before changing the bulb and handle the new one with a cloth to avoid oils.
Can you connect a computer to an overhead projector?
Traditional overhead projectors are analog devices and cannot directly connect to a computer. They are designed to project physical transparencies and objects placed on their stage. There is no video input port for a computer signal.
To display computer content, you need a digital video projector. However, you can print computer-generated images or slides onto transparency film using a laser printer. Then, project those printed transparencies using the overhead projector.
What are some creative lesson ideas using an overhead projector?
Use the “progressive reveal” technique by covering parts of a transparency with paper. Uncover content step-by-step to build suspense. You can also have students come up to solve problems or annotate diagrams directly on the stage, promoting engagement.
Try layering multiple transparencies to build complex systems, like a map with overlaid climate and population data. Project live science experiments or small objects for detailed class observation. These methods leverage the tool’s unique interactive potential.
This website is a participant in the Amazon Services LLC Associates Program, an affiliate advertising program designed to provide a means for us to earn fees by linking to Amazon.com and affiliated sites.