
This website is a participant in the Amazon Services LLC Associates Program, an affiliate advertising program designed to provide a means for us to earn fees by linking to Amazon.com and affiliated sites.
Finding the best screen for your Valerion projector dramatically transforms your viewing experience. A quality screen enhances contrast, brightness, and color accuracy more than any projector upgrade.
This complete guide reveals expert tips for matching screens to Valerion models. You will learn proven methods to select the perfect material, gain, and size for your space. Keep reading to unlock your projector’s full potential.
Best Screens for Valerion Projector – Detailed Comparison
Elite Screens Aeon CineGrey 5D – Best Overall Choice
The Elite Screens Aeon CineGrey 5D (CLR) is the top recommended screen for Valerion projectors. Its ambient light rejecting material boosts contrast by 10x. Ideal for living rooms with windows, it maintains deep blacks and vibrant colors even with lights on.
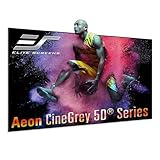
- 【Dimension Size & Certification】: 165-inch ALR projection screen…
- 【Screen Material】: CineGrey 5D angular-reflective material with Ceiling…
- 【Features】: Award-winning EDGE FREE Design for a modern, frameless…
Silver Ticket Products STR-169120 – Best Budget Option
This Silver Ticket STR-169120 matte white screen delivers excellent value. It provides a smooth, wrinkle-free surface perfect for Valerion’s high lumen output. The fixed frame design ensures perfect tension. Best option for dedicated dark home theater rooms on a budget.

- Wall Mounted Fixed Frame Projection Screen (Overall Size 65.175″ Tall x…
- Acoustically Transparent (Speakers may be placed behind the screen surface…
- 3 1/8″ heavy duty beveled aluminum frame wrapped in light-absorbing black…
Stewart Filmscreen Studiotek 130 G3 – Best Premium Choice
The Stewart Studiotek 130 G3 is the ultimate screen for cinephiles. Its 1.3 gain fabric maximizes Valerion’s HDR brightness and color accuracy. This micro-perforated screen supports behind-screen speakers. Ideal for high-end installations demanding reference-grade image quality.
- 【Optimized for Long-Throw and Standard Projectors】 Designed to deliver…
- 【Enhanced ALR Material with 95% Light Rejection】 Featuring an advanced…
- 【Crystal-Clear 4K/8K Ultra HD Visuals】 Supporting 4K UHD and 8K…
How to Choose the Right Screen Material for Your Valerion Projector
Selecting the correct screen material is the most critical decision for your Valerion projector’s performance. The wrong material washes out colors or creates hot spots. Your room’s ambient light level dictates the best choice.
Ambient Light Rejecting Screens for Bright Rooms
Valerion projectors deliver high brightness, but ambient light still reduces perceived contrast. An ALR screen like the CineGrey 5D reflects projector light while absorbing side light. This preserves black levels in living rooms or spaces without total light control.
- ALR screens improve contrast by up to 10x in lit rooms
- Grey materials absorb ambient light better than white fabrics
- Best for: Mixed-use spaces, family rooms, and daytime viewing
Matte White Screens for Dedicated Dark Theaters
For a completely light-controlled room, a matte white screen offers the most accurate color reproduction. It reflects all light evenly without directionality. This material works perfectly with Valerion’s native contrast ratio for cinematic blacks.
- Gain of 1.0 provides uniform brightness across the entire surface
- Best for: Basement theaters and blackout rooms
- Cost-effective: Typically 30-50% cheaper than ALR alternatives
Screen Gain: Matching Projector Lumens
Screen gain measures reflectivity. A gain of 1.3 boosts peak brightness for HDR content without washing out shadows. Valerion projectors produce 2000-3000 lumens, so high gain screens above 1.5 may create visible hot spots in the center.
| Gain Range | Best Use Case | Valerion Compatibility |
|---|---|---|
| 0.8 – 1.0 | Dark theaters | Excellent |
| 1.1 – 1.3 | Mixed lighting | Optimal |
| 1.4+ | High ambient light | Caution |
Determining the Perfect Screen Size and Aspect Ratio for Valerion Projectors
Getting the screen size wrong ruins immersion or causes eye strain. Valerion projectors perform best at specific distances and sizes. Measure your room and throw distance before buying any screen.
Calculating Throw Distance for Maximum Image Size
Valerion models typically feature a 1.2x to 1.5x zoom lens. This determines how large an image you can project from your seating position. Use the projector’s throw ratio to calculate your maximum screen size.
- Formula: Screen width = Throw distance ÷ Throw ratio
- Example: 10 feet distance ÷ 1.2 ratio = 8.3 feet wide (100-inch diagonal)
- Tip: Leave 10% zoom range for fine-tuning placement
Recommended Screen Sizes for Common Room Dimensions
A 100 to 120-inch diagonal screen suits most home theaters. Smaller rooms under 12 feet deep work best with 90 to 100-inch screens. Larger spaces can accommodate 135-inch screens without pixel visibility.
| Room Depth | Recommended Screen Size | Viewing Distance |
|---|---|---|
| 10-12 feet | 90-100 inches | 8-10 feet |
| 12-15 feet | 100-120 inches | 10-13 feet |
| 15+ feet | 120-135 inches | 13-16 feet |
Choosing Between 16:9 and 2.35:1 Aspect Ratios
16:9 widescreen is the standard for most Valerion projectors and streaming content. It fills the entire screen with TV shows, sports, and YouTube videos. A 2.35:1 screen offers a cinematic experience but requires an anamorphic lens.
- 16:9: Best for mixed content, gaming, and general viewing
- 2.35:1: Ideal for movie enthusiasts watching Blu-ray films
- Compromise: A 16:9 screen with motorized masking for films
Fixed Frame vs. Motorized Screens: Which Is Best for Your Valerion Setup?
The screen frame type affects both image quality and room aesthetics. Fixed frame screens offer superior flatness, while motorized screens provide flexibility. Your room layout and usage patterns determine the best choice.
Fixed Frame Screens for Ultimate Picture Quality
A fixed frame screen uses a tensioned fabric stretched over a rigid aluminum frame. This creates a perfectly flat surface with zero wrinkles or ripples. Valerion’s sharp 4K resolution demands this level of precision for edge-to-edge focus.
- Best image quality: No waves or distortions across the surface
- Permanent installation: Requires dedicated wall space
- Acoustic transparency: Many models allow speakers behind the screen
- Cost: Typically $300 to $1,500 depending on size and material
Motorized Drop-Down Screens for Multi-Purpose Rooms
Motorized screens retract into a ceiling housing when not in use. This preserves wall space for artwork or furniture in living rooms. Modern tab-tensioned designs maintain flatness comparable to fixed frames.
- Space-saving: Disappears completely when not watching
- Convenience: Remote control or smart home integration
- Drawback: Slightly less flat than fixed frames
- Cost: Typically $500 to $2,500 for quality tab-tensioned models
Comparing Screen Types for Common Scenarios
Your choice depends on whether the room serves multiple purposes. A dedicated theater benefits from a fixed frame. A living room or multipurpose space favors a motorized screen.
| Scenario | Recommended Type | Key Reason |
|---|---|---|
| Dedicated home theater | Fixed frame | Perfect flatness, best image |
| Living room with TV | Motorized tab-tension | Hides when not in use |
| Outdoor or portable use | Portable tripod screen | Easy setup and takedown |
| Conference or classroom | Motorized matte white | Professional appearance |
Installation Tips and Mounting Best Practices for Valerion Projector Screens
Proper installation ensures your screen stays flat and aligned for years. Even the best screen performs poorly if mounted incorrectly. Follow these proven steps for a professional-grade setup.
Measuring and Marking the Perfect Mounting Height
The screen center should align with your eye level when seated. For most home theaters, this places the bottom edge 24 to 36 inches above the floor. Measure from your seated eye height and mark the wall accordingly.
- Step 1: Sit in your primary viewing position and measure eye height
- Step 2: Divide screen height by two and add to bottom clearance
- Step 3: Mark the top mounting bracket position using a laser level
- Step 4: Verify alignment with the projector lens center
Choosing the Right Mounting Hardware for Your Wall Type
Drywall anchors alone cannot support a 50-pound screen. Use toggle bolts or find wall studs for fixed frame installations. Motorized screens require ceiling joist attachment for safe operation.
- Stud mounting: Strongest option, requires locating studs with a finder
- Toggle bolts: Hold up to 100 pounds in drywall without studs
- Concrete anchors: Needed for basement or brick wall installations
- Ceiling mounts: Use Unistrut channels for heavy motorized screens
Avoiding Common Installation Mistakes
Many users mount screens too high, causing neck strain during long movies. Others forget to account for projector lens offset. Always test the image position before drilling final holes.
| Common Mistake | Consequence | Solution |
|---|---|---|
| Mounting too high | Neck fatigue, poor immersion | Lower screen to seated eye level |
| Ignoring lens shift | Keystone correction reduces quality | Center screen with lens, not case |
| Uneven tension | Wrinkles and image distortion | Use tab-tensioned or fixed frame |
| Poor cable management | Visible wires ruin aesthetics | Run HDMI through wall plates |
Calibrating Your Valerion Projector to Match Your New Screen
Even the best screen cannot fix a poorly calibrated projector. Valerion models ship with bright, oversaturated settings for retail displays. Proper calibration unlocks the screen’s full potential for accurate colors and deep blacks.
Adjusting Brightness and Contrast for Screen Gain
High gain screens reflect more light, which can clip white details. Lower your Valerion’s brightness setting to 45-50 and contrast to 75-80. Use a test pattern to ensure you see distinct steps from 0 to 100 IRE.
- Start with Cinema mode: Most accurate out-of-the-box preset
- Reduce laser power: High lumen output can wash out blacks
- Test with white screen: Ensure no blooming at 100% white
- Fine-tune gamma: Set to 2.2 for mixed lighting, 2.4 for dark rooms
Color Temperature and White Balance Settings
Valerion projectors default to a cool, blue-ish image. Switch to Warm color temperature for D65 standard (6500K). This matches Hollywood mastering suites and produces natural skin tones.
- Step 1: Select Custom color temperature in the menu
- Step 2: Reduce Blue gain by 5-10 points initially
- Step 3: Increase Red gain slightly to balance skin tones
- Step 4: Verify using a grayscale test pattern
HDR Tone Mapping for Optimal Brightness
Valerion’s HDR tone mapping adjusts dynamic range for your screen size. A 120-inch screen requires different mapping than a 90-inch. Set the screen size in the projector menu for accurate HDR brightness distribution.
| Screen Size | HDR Setting | Expected Peak Brightness |
|---|---|---|
| 90 inches | Standard | 250-300 nits |
| 100 inches | High Brightness | 200-250 nits |
| 120 inches | Maximum | 150-200 nits |
| 135 inches | Dynamic | 120-150 nits |
Maintaining and Cleaning Your Valerion Projector Screen for Longevity
Screen fabric accumulates dust, fingerprints, and smudges over time. Improper cleaning can damage the delicate reflective coating permanently. Follow these care guidelines to keep your screen looking pristine for years.
Recommended Cleaning Tools and Solutions
Never use household cleaners or paper towels on projection screens. These contain chemicals that strip the optical coating. Use only microfiber cloths and distilled water for safe cleaning.
- Microfiber cloth: 300+ GSM density for dust pickup without scratching
- Distilled water: No minerals that leave residue on the surface
- Compressed air: Remove loose dust before wiping to avoid scratches
- Avoid: Alcohol, ammonia, Windex, or any spray cleaners
Step-by-Step Screen Cleaning Process
Cleaning should happen only when visible marks appear. Over-cleaning wears down the reflective layer faster. Follow this method for safe, effective results.
- Step 1: Use compressed air to blow off loose dust and debris
- Step 2: Lightly dampen microfiber cloth with distilled water only
- Step 3: Wipe gently in vertical strokes from top to bottom
- Step 4: Allow screen to air dry completely before lowering or using
Preventative Care to Extend Screen Life
Motorized screens benefit from periodic extension to maintain tension. Fixed frame screens should be dusted monthly with a static duster. Keep projector exhaust away from the screen to prevent heat damage.
| Maintenance Task | Frequency | Benefit |
|---|---|---|
| Dust with microfiber | Monthly | Prevents buildup on coating |
| Extend motorized screen | Every 2 weeks | Maintains even tension |
| Deep clean with water | Every 6 months | Removes stubborn smudges |
| Check frame bolts | Annually | Prevents sagging over time |
Budget Considerations: How Much to Spend on a Screen for Your Valerion Projector
Screen prices range dramatically from under $100 to over $5,000. Your budget should align with your Valerion projector’s capabilities and room conditions. Spending too little wastes your projector’s potential, while overspending offers diminishing returns.
Entry-Level Screens Under $300
Budget screens work well for portable or temporary setups. A manual pull-down screen or portable tripod model costs $100 to $250. These suit casual viewers who prioritize affordability over absolute image quality.
- Best for: Guest rooms, outdoor movie nights, kids’ playrooms
- Trade-offs: Wrinkles possible, lower gain uniformity, no tensioning
- Recommended: Elite Screens Manual Series or similar entry models
- Expectation: Decent image but not reference-grade performance
Mid-Range Screens $300 to $1,000
This price bracket offers the best value for most Valerion owners. Fixed frame screens with matte white or basic ALR materials deliver excellent flatness. Tab-tensioned motorized options also fall within this range.
- Best for: Dedicated home theaters and serious enthusiasts
- Benefits: Wrinkle-free surface, proper tension, better gain control
- Recommended: Silver Ticket fixed frames, Elite Screens Aeon series
- Expectation: Excellent image quality matching projector performance
Premium Screens Over $1,000
High-end screens use advanced optical coatings and precision engineering. A Stewart Filmscreen or Screen Innovations model costs $1,500 to $5,000. These maximize HDR brightness and offer zero hotspot issues.
| Price Range | Screen Type | Best Valerion Model |
|---|---|---|
| Under $300 | Manual pull-down | Valerion VisionMaster Lite |
| $300 – $600 | Fixed frame matte white | Valerion Pro Cinema |
| $600 – $1,000 | Basic ALR fixed frame | Valerion UltraBright |
| $1,000+ | Premium ALR or Stewart | Valerion Reference Series |
Conclusion: Choosing the Best Screen for Your Valerion Projector
Selecting the best screen for your Valerion projector transforms casual viewing into a cinematic experience. The right material, size, and frame type unlock your projector’s full potential for stunning image quality.
Match your screen choice to your room’s lighting and your viewing habits. A fixed frame ALR screen offers the best results for most home theater setups.
Ready to upgrade your viewing experience? Start by measuring your room and identifying your primary use case. Your Valerion projector deserves a screen that matches its exceptional performance.
Frequently Asked Questions about the Best Screen for Valerion Projector
What is the best screen material for a Valerion projector?
The best screen material depends on your room’s ambient light level. For dark dedicated theaters, a matte white screen with 1.0 gain offers the most accurate color reproduction.
For living rooms with windows, an ambient light rejecting (ALR) screen like the Elite Screens CineGrey 5D is recommended. It preserves contrast by absorbing side light while reflecting projector light directly at viewers.
Can I use a painted wall instead of a screen for my Valerion projector?
A painted wall works for temporary or budget setups but significantly reduces image quality. Standard wall paint has texture that scatters light, reducing sharpness and contrast by up to 50%.
Projector-specific screen paint costs $200 to $500 and improves performance. However, even premium paint cannot match the uniform gain and flatness of a proper tensioned screen.
What size screen is best for a Valerion projector in a small room?
For rooms under 12 feet deep, a 90 to 100-inch diagonal screen provides the best balance of immersion and comfort. This size ensures all viewers sit within the optimal viewing angle.
Measure your throw distance using Valerion’s throw ratio formula. A 10-foot distance with a 1.2 ratio supports up to a 100-inch screen without digital zoom artifacts.
How do I clean my Valerion projector screen without damaging it?
Use only a soft microfiber cloth and distilled water for cleaning. Never apply household cleaners, alcohol, or paper towels as these strip the optical coating permanently.
Blow off loose dust with compressed air first to prevent scratching. Wipe gently in vertical strokes and let the screen air dry completely before use.
Is a fixed frame or motorized screen better for my Valerion projector?
Fixed frame screens offer superior flatness and image quality for dedicated home theaters. They maintain perfect tension with zero wrinkles, essential for Valerion’s sharp 4K resolution.
Motorized screens suit multipurpose living rooms where hiding the screen is important. Choose tab-tensioned models for flatness comparable to fixed frames, though they cost $200 to $500 more.
What screen gain should I choose for my Valerion projector?
For Valerion projectors producing 2000 to 3000 lumens, a screen gain between 1.0 and 1.3 is optimal. This range boosts HDR brightness without creating visible hot spots.
Gain above 1.5 can cause uneven brightness across the screen. Lower gain below 1.0 works for ultra-short-throw projectors but reduces overall brightness.
How do I mount a screen for my Valerion projector correctly?
Center the screen at seated eye level, typically 24 to 36 inches from the floor. Use a laser level to mark mounting brackets and verify alignment with the projector lens.
Always mount into wall studs or use toggle bolts rated for the screen’s weight. Motorized screens require ceiling joist attachment for safe and quiet operation.
Why does my Valerion projector image look dim on my new screen?
Dim images often result from incorrect projector settings or mismatched screen gain. Check that your Valerion is set to the correct brightness and contrast levels for your screen material.
ALR screens can appear dimmer off-axis due to their directional reflectivity. Ensure all viewers sit within the screen’s optimal viewing cone for maximum brightness.
This website is a participant in the Amazon Services LLC Associates Program, an affiliate advertising program designed to provide a means for us to earn fees by linking to Amazon.com and affiliated sites.
