
This website is a participant in the Amazon Services LLC Associates Program, an affiliate advertising program designed to provide a means for us to earn fees by linking to Amazon.com and affiliated sites.
Finding the best projector for home theater is about balancing lumens, contrast, and smart features. The ideal model transforms any room into a cinematic escape. Our expert picks cut through the noise to highlight top performers.
This complete guide solves the confusion of technical specs and overwhelming choices. We provide clear comparisons to match the perfect projector to your room and budget. You’ll learn what truly matters for an immersive viewing experience.
We will analyze key factors like 4K resolution, HDR support, and lamp life. You’ll get proven methods for setting up your space like a pro. Let’s find your ultimate home cinema centerpiece.
Best Projectors for Home Theater – Detailed Comparison
Epson Home Cinema 5050UB – Best Overall Choice
The Epson 5050UB is our top pick for its stunning picture quality. It features true 4K PRO-UHD with advanced 3LCD technology for incredible color brightness. With 2,600 lumens and a 1,000,000:1 dynamic contrast ratio, it delivers deep blacks and vibrant HDR content. This model is ideal for dedicated media rooms with controlled lighting.

- 4K PRO-UHD (1) Projection Technology – A new type of 4K home theater experience utilizing advanced processing for resolution enhancement, color and image…
- True 3-Chip Projector Design – Advanced 3LCD technology displays 100% of the RGB color signal for every frame. This allows for an outstanding color gamut while…
Sony VPL-VW325ES – Best for True 4K Fidelity
For unparalleled native 4K clarity, the Sony VPL-VW325ES excels. Its SXRD panel technology provides exceptional detail and smooth motion handling. It boasts high dynamic range support and realistic color reproduction out of the box. This projector is the best option for videophiles who demand reference-grade image accuracy.

- X1 processor for projector brings you the best of Sony’s image processing
- Dynamic HDR Enhancer brings a wider contrast range scene by scene for striking and realistic picture quality
BenQ HT3550 – Best Value 4K Projector
The BenQ HT3550 offers premium features at an accessible price point. It uses a DLP chip with pixel-shifting for sharp 4K imagery and covers 100% of the Rec.709 color space. Its compact design and low input lag also make it a versatile choice. This is the ideal for budget-conscious enthusiasts seeking a high-quality cinematic experience.
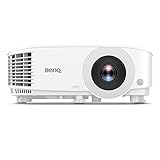
- NEW 2023 MODEL: Upgraded 3800 ANSI Lumens paired with an improved 15,000:1 contrast ratio (FOFO) when compared to its predecessor, TH585P.
- 1080P RESOLUTION: 1080p Full HD image quality with 3800 ANSI lumen for ultimate gaming experiences in well-lit environment, one of our best gaming projectors
Key Features to Evaluate in a Home Theater Projector
Choosing the right home cinema projector requires understanding key specifications. These features directly impact your viewing experience and room compatibility. Let’s break down the most critical technical aspects to compare.
Understanding Resolution and Image Quality
Resolution determines the sharpness and detail of your projected image. While 4K is the current gold standard, understanding the technology behind it is crucial for your purchase decision.
- True 4K vs. Pixel-Shifting: True 4K projectors use a native 4K chip for maximum detail. Pixel-shifting (or “4K UHD”) models use a fast-moving 1080p chip to simulate 4K, often at a lower cost.
- HDR Compatibility: High Dynamic Range expands contrast and color for more lifelike images. Look for support for HDR10 and HLG formats for future-proofing your setup.
- Color Accuracy & Gamut: A wide color gamut, like DCI-P3 or Rec. 709, ensures vibrant, true-to-life colors. This is essential for a cinematic feel.
Brightness, Contrast, and Room Considerations
Your room’s lighting conditions are the biggest factor in choosing brightness and contrast specs. A projector perfect for a dark basement may fail in a living room with ambient light.
Brightness (Lumens): Measured in ANSI lumens, this dictates how well the image holds up against ambient light. For a dedicated dark room, 1,500-2,000 lumens is sufficient. For rooms with some light control, aim for 2,500-3,000+ lumens.
Contrast Ratio: This is the difference between the brightest white and the darkest black. A high contrast ratio, like 1,000,000:1, is vital for deep blacks and detailed shadow scenes, creating depth and realism.
Projector Technology: DLP, LCD, and LCoS
The core imaging technology inside your projector defines its performance characteristics. Each has distinct advantages for home theater use.
| Technology | Key Advantage | Potential Consideration |
|---|---|---|
| DLP (Digital Light Processing) | Excellent contrast, sharp pixels, no screen door effect. | Some viewers may see a “rainbow effect” (RGB color flashes). |
| 3LCD | Superior color brightness and consistency, rainbow-free. | Generally lower native contrast compared to DLP. |
| LCoS (SXRD/D-ILA) | Combines strengths of both: smooth image, high contrast, great color. | Typically found in higher-end, more expensive models. |
How to Set Up Your Home Theater Projector for Optimal Performance
Proper setup is just as critical as your projector choice. A great model can deliver a poor image if installed incorrectly. Follow these steps to achieve a professional-quality home cinema.
Choosing the Right Screen and Placement
Your screen is the canvas for your projector’s image. The right screen material and size dramatically enhance contrast, color, and viewing angles. First, determine your ideal screen size based on viewing distance.
- Screen Material: A high-gain screen boosts brightness in rooms with ambient light. A neutral matte white screen offers the widest viewing angle and accurate color for dark rooms.
- Placement Math: Use the projector’s throw ratio from its specs. For example, a 1.5:1 ratio means for every 1 foot of screen width, the projector must be 1.5 feet away.
- Ceiling Mount vs. Shelf: A ceiling mount provides a clean, permanent installation. Ensure it has adjustable pitch and roll for precise alignment. A rear shelf is a simpler, non-invasive option.
Calibration and Image Fine-Tuning
Out-of-the-box settings are rarely perfect. Calibration tailors the image to your specific room and screen. This process unlocks your projector’s full potential.
- Use a Calibration Disc or App: Tools like Disney’s WOW or Spears & Munsil discs provide test patterns. They guide you through adjusting brightness, contrast, color, and tint.
- Adjust Key Picture Settings: Set brightness so black is deep but shadow detail is visible. Adjust contrast to make whites bright without blooming. Fine-tune color and tint for natural skin tones.
- Select the Correct Picture Mode: Always start in the projector’s “Cinema” or “Film” mode. These modes are typically the most accurate and closest to the director’s intent.
Managing Sound and Connectivity
A cinematic experience requires immersive audio to match the stunning video. Plan your audio system and cable management from the start.
Most projectors have weak built-in speakers. You will need a separate audio system. Connect your media sources (streaming box, Blu-ray player) directly to an AV receiver, not the projector.
For video, use high-speed HDMI cables that support 4K, HDR, and high frame rates. Consider running cables through walls or using raceways for a clean look. Ensure your setup supports HDMI ARC or eARC if routing audio from smart projector apps.
Smart Features, Lamp Life, and Long-Term Value
Modern projectors offer more than just a great picture. Convenient smart features and long-term reliability are key to satisfaction. Evaluating these aspects ensures your investment pays off for years.
Built-in Smart Platforms and Connectivity
Smart projectors integrate streaming apps directly, eliminating the need for an external box. This simplifies your setup but locks you into a specific platform’s interface and app selection.
- Popular Platforms: Look for Android TV, Google TV, or Roku TV built-in. These offer vast app libraries, voice search, and regular updates.
- Essential Connectivity: Ensure multiple HDMI ports, including at least one HDMI 2.0/2.1 for 4K HDR. USB ports for powering a streaming stick, and audio-out for external sound systems are crucial.
- Wireless Capabilities: Screen mirroring (Miracast/AirPlay) and Bluetooth for connecting speakers add significant convenience. Some models offer wireless HDMI solutions for cleaner installations.
Understanding Lamp Life and Maintenance Costs
The light source is a consumable part with a finite lifespan. Projector lamp life directly impacts your total cost of ownership and maintenance schedule.
Manufacturers state lamp life in hours, often with two modes: a bright mode (fewer hours) and an eco mode (more hours). Using Eco Mode can double the lamp’s lifespan with a slight reduction in brightness.
| Light Source Type | Typical Lifespan | Replacement Cost | Key Consideration |
|---|---|---|---|
| Traditional Lamp | 3,000 – 5,000 hours | $150 – $400 | Brightness dims gradually over time. |
| Laser/LED Hybrid | 20,000 – 30,000 hours | Higher upfront cost | Maintains peak brightness longer; often “maintenance-free.” |
Future-Proofing Your Home Theater Projector
Technology evolves quickly. Choosing a projector with forward-looking features protects your investment from premature obsolescence.
Consider how you might use the system in 3-5 years. If gaming is a priority, ensure low input lag and high refresh rate support. For movie collections, robust HDR handling is non-negotiable. A flexible lens with zoom, shift, and focus allows for easier upgrades, like a larger screen.
Budgeting for Your Home Theater Projector: Cost vs. Performance
Projector prices range from a few hundred to several thousand dollars. Defining your budget tier helps narrow choices and set realistic expectations. You can achieve a fantastic home cinema experience at any price point with the right priorities.
Projector Price Tiers and What to Expect
Each budget tier offers a distinct balance of features and performance. Knowing the trade-offs prevents disappointment and guides a smart purchase.
- Entry-Level ($500 – $1,200): Expect good 1080p or pixel-shift 4K models. Focus on brightness for your room and reliable brands. This tier is ideal for first-time buyers or multi-purpose living rooms.
- Mid-Range ($1,200 – $3,000): This is the sweet spot for serious home theater. You’ll find native 4K, better HDR, higher contrast, and more lens flexibility. Our top picks like the BenQ HT3550 reside here.
- High-End ($3,000+): Here you get reference-quality images with true 4K, exceptional contrast (like the Epson 5050UB), advanced calibration, and robust build quality. This is for dedicated theater rooms.
Allocating Funds for Essential Accessories
The projector is only part of the total system cost. A proper setup requires supporting equipment that significantly enhances the experience.
Allocate 20-30% of your total budget for essential accessories. Neglecting these can undermine the performance of even the best projector. Prioritize based on your specific room and needs.
| Accessory | Budget Estimate | Why It’s Critical |
|---|---|---|
| Quality Screen | $200 – $1,500+ | A proper screen improves contrast, color, and viewing angles more than a projector upgrade. |
| Ceiling Mount & Cables | $50 – $300 | Ensures secure, stable placement and clean signal transmission with high-speed HDMI cables. |
| Audio System | $300 – $2,000+ | Projector speakers are weak. A soundbar or surround system is non-negotiable for immersion. |
Finding the Best Value for Your Money
Value isn’t about the lowest price; it’s about optimal performance for your specific needs and budget. Avoid overpaying for features you won’t use.
Read professional and user reviews focusing on performance in scenarios like yours. A slightly older, discontinued model can offer tremendous value as retailers clear stock. Remember, the best projector is the one that fits your room, your content, and your budget perfectly.
Common Home Theater Projector Mistakes and How to Avoid Them
Even with great equipment, simple errors can ruin your home cinema experience. Being aware of these common pitfalls saves time, money, and frustration. Learn from others’ mistakes to ensure a flawless setup from day one.
Ignoring Room Environment and Ambient Light
The single biggest mistake is buying a projector without planning for the room. Projectors are highly sensitive to ambient light, which washes out contrast and color instantly.
- Uncontrolled Windows: Direct sunlight is a projector’s enemy. Use blackout curtains or shades. For rooms with some light, a high-brightness projector and an ALR (Ambient Light Rejecting) screen are mandatory.
- Reflective Surfaces: Light walls, ceilings, and floors bounce light back onto the screen, reducing perceived contrast. Paint walls a dark, matte color and use dark carpets or rugs.
- Incorrect Screen Size: A screen too large for the room’s brightness or seating distance looks dim and pixelated. Follow the 1.5x rule: seating distance should be 1.5 times the screen width for 4K.
Overlooking Critical Specs and Compatibility
Focusing on resolution alone while ignoring other vital specifications leads to buyer’s remorse. These technical details determine real-world usability.
Throw Distance and Lens Shift: Not checking if the projector fits your room is a major error. Use online throw calculators before buying. Lens shift (optical image adjustment) is invaluable for flexible placement without digital keystone correction, which degrades image quality.
Poor Setup and Calibration Practices
Rushing the installation process guarantees a subpar image. Taking time to do it right makes a dramatic difference in final quality.
Avoid using digital keystone correction for final alignment; it softens the image. Physically square the projector to the screen instead. Never rely on “Vivid” or “Dynamic” picture modes; they oversaturate colors and crush black details. Always start calibration from the “Cinema” mode.
Finally, neglecting audio is a classic mistake. Budget for at least a quality soundbar. The immersive impact of a great projector is completely lost with tinny, built-in speakers. Plan your audio solution as part of the initial purchase.
Advanced Home Theater Projector Tips and Pro Insights
Once your basic setup is complete, these advanced techniques elevate your home cinema to professional levels. These pro insights focus on fine-tuning and optimization for the absolute best performance. They bridge the gap between a good setup and a great one.
Optimizing for Gaming and Sports
Gaming and fast-action sports have unique demands beyond movie watching. Low latency and smooth motion are paramount for an immersive, responsive experience.
- Enable Game Mode: This setting bypasses unnecessary video processing, drastically reducing input lag. Aim for a lag of 30ms or less for competitive gaming.
- Motion Enhancement Settings: For sports, use judicious motion interpolation (e.g., Sony’s Motionflow, Epson’s Frame Interpolation). Set it to low or medium to reduce blur without creating the “soap opera effect.”
- Prioritize Brightness and Refresh: A brighter image helps track fast-moving objects. If your projector supports a high refresh rate (120Hz), enable it in the source and projector settings for smoother gameplay.
Creating a Dedicated Theater Room Environment
For the ultimate experience, transform your space. Room treatments have a massive return on investment for perceived image quality.
Acoustic panels absorb sound reflections, clarifying dialogue and music. Bass traps in corners manage low frequencies. For video, use black felt or velvet on the wall around the screen and on the front ceiling to dramatically improve perceived contrast by absorbing stray light.
Leveraging Professional Calibration Tools
While DIY calibration improves the image, professional tools offer precision. Understanding them helps you appreciate what a pro calibrator does or guides a deeper personal dive.
The core tools are a colorimeter (measures light) and calibration software (like CalMan or HCFR). These tools read the actual light output from your screen and create graphs. You then adjust the projector’s hidden CMS (Color Management System) to match industry color standards exactly.
This process corrects for your screen’s gain, the room’s ambient light, and the projector’s aging lamp. The result is perfect color, gamma, and grayscale that reveals details and intent invisible in default modes. Consider it the final, masterful touch.
Frequently Asked Questions About Home Theater Projectors
Choosing and setting up a projector raises many common questions. This FAQ section provides clear, direct answers to help you make confident decisions. We address the most pressing concerns from first-time buyers and enthusiasts alike.
Projector vs. TV: Which is Better for a Home Theater?
This is the fundamental starting question. The best choice depends entirely on your room, usage, and desired experience.
- Choose a Projector for: Screen sizes over 100 inches, a dedicated or light-controlled room, and a truly cinematic, immersive feel. Projectors offer more size per dollar for large images.
- Choose a TV for: Bright rooms with lots of ambient light, casual daytime viewing, and simpler installation with no calibration needed. Modern TVs also excel at contrast and smart features.
- The Hybrid Approach: Many enthusiasts use both: a TV for daily viewing and a projector with a drop-down screen for weekend movie nights.
How Long Do Home Theater Projectors Last?
Projector longevity involves two components: the lamp/light source and the device itself. Understanding this helps plan for maintenance and replacement.
The light source is the main consumable. Traditional lamps last 3,000-5,000 hours, while laser models can last 20,000+ hours. The projector’s electronics typically last for many years, often beyond 10,000 hours of total use, making it a long-term investment.
| Component | Typical Lifespan | Action Required |
|---|---|---|
| Projector Lamp | 3,000 – 5,000 hrs | Replace bulb; cost $150-$400. |
| Laser/LED Light Source | 20,000 – 30,000 hrs | Often considered “lifetime”; no replacement needed. |
| Projector Electronics | 10,000+ hrs | Device may become obsolete before it fails. |
Can I Use a Projector in a Room with Windows?
Yes, but it requires careful planning. Ambient light is the primary challenge, but it can be managed effectively with the right combination of gear.
For a living room with some light, prioritize brightness and an ALR screen. For a dedicated theater, prioritize contrast and control all light. The key is matching the projector’s capability to the room’s reality.
Conclusion: Building Your Ultimate Home Theater Experience
Choosing the best projector for home theater transforms movie nights and gaming sessions. It creates an immersive, large-scale cinematic experience that a TV cannot match. The right model balances resolution, brightness, and contrast for your specific room.
The key takeaway is to prioritize your room’s conditions and viewing habits. Match the projector’s specs to your environment for the best results. A proper setup and calibration are just as important as the purchase itself.
Start by measuring your space and defining your budget. Use our detailed comparisons and pro tips to guide your selection. Then, enjoy the process of creating a personal cinema that delivers for years to come.
Your perfect home theater is within reach. Begin your journey to breathtaking entertainment today.
Frequently Asked Questions about Home Theater Projectors
What is the ideal screen size for a home theater projector?
The ideal screen size depends on your seating distance and room dimensions. A common guideline is that your seating distance should be 1.5 to 2.5 times the screen’s diagonal width. For a truly immersive 4K experience, a 100 to 120-inch screen is a popular sweet spot.
This allows you to appreciate the enhanced detail without seeing individual pixels. Always consider your projector’s brightness and throw distance capabilities, as a larger screen requires more lumens to maintain a bright, vibrant image.
How to connect sound to a home theater projector?
Most projectors have limited built-in audio. For quality sound, connect your media sources (like a Blu-ray player or streaming device) directly to an AV receiver or soundbar via HDMI. Then, run a single HDMI cable from the receiver’s output to the projector.
This method, using HDMI ARC (Audio Return Channel) or eARC, ensures the best audio format support. Alternatively, use the projector’s optical audio or 3.5mm output to connect to an external speaker system, though this may limit audio quality.
What is the difference between lumens and ANSI lumens?
Lumens measure total light output, but the term is often used loosely. ANSI lumens is a standardized measurement created by the American National Standards Institute. It provides a consistent, reliable way to compare projector brightness under specific testing conditions.
Always look for the ANSI lumens rating when comparing models. A projector advertised with a high “lumens” rating but no “ANSI” prefix may appear brighter on paper but deliver less actual screen brightness.
Can you use a home theater projector for everyday TV watching?
Yes, but it depends on the projector type and your room. Laser or LED projectors with long-lasting light sources (20,000+ hours) are better suited for daily use, as you won’t need frequent lamp replacements. The room must also have good light control for daytime viewing.
For casual, all-day TV watching in a bright living room, a high-quality TV is often more practical and energy-efficient. A projector excels as a dedicated entertainment system for movies, sports, and gaming sessions.
What is the best way to clean a projector lens?
First, use a rocket blower to gently remove loose dust particles. Never blow with your mouth, as saliva can damage the coating. For smudges or fingerprints, use a microfiber cloth designed for camera lenses, applying minimal pressure in a circular motion.
Avoid household cleaners, alcohol, or paper towels, which can scratch the delicate lens coating. For stubborn marks, use a single drop of lens cleaning fluid on the cloth, not directly on the lens. Regular, careful cleaning maintains optimal image clarity.
Why is my projector image blurry or out of focus?
A blurry image is often due to incorrect focus or placement. First, use the projector’s focus ring to sharpen the image. If it remains blurry, check the throw distance; the projector may be too close or too far from the screen for its lens zoom range.
Also, ensure the projector is perfectly perpendicular to the screen. If you’ve used digital keystone correction to fix a tilted image, disable it and physically square the projector, as keystone adjustment degrades sharpness. Finally, check that your source is outputting its native resolution.
What is an ALR screen and do I need one?
An ALR (Ambient Light Rejecting) screen has a special optical coating that reflects projector light toward viewers while rejecting light from other angles, like windows or ceiling lights. This significantly improves contrast and color saturation in rooms with ambient light.
You need an ALR screen if your viewing room has windows or lights you cannot completely control during daytime viewing. For a dedicated, pitch-black theater room, a high-quality matte white screen is usually preferable and more cost-effective.
How often should you replace a projector lamp?
Replace the lamp when you notice a significant drop in brightness, colors appear washed out, or the projector warns you. Most lamps are rated for 3,000 to 5,000 hours in normal mode. Using Eco Mode can extend this lifespan by 50-100%.
It’s wise to keep a spare lamp on hand to avoid downtime. Always reset the lamp timer in the projector’s menu after installing a new bulb. For laser models, replacement is rarely needed, as the light source lasts the lifetime of the projector.
This website is a participant in the Amazon Services LLC Associates Program, an affiliate advertising program designed to provide a means for us to earn fees by linking to Amazon.com and affiliated sites.