
This website is a participant in the Amazon Services LLC Associates Program, an affiliate advertising program designed to provide a means for us to earn fees by linking to Amazon.com and affiliated sites.
How to make projector screen paint is a cost-effective DIY project. You can create a high-quality viewing surface at home. This guide reveals the proven methods.
Commercial screens are expensive and lack customization. Homemade projector paint offers a brilliant, tailored solution. Achieve a perfect cinema experience on your budget.
This complete guide provides expert tips on materials, mixing, and application. You will learn the best paint formulas and application techniques for a flawless, professional-grade result.
Best Projector Screen Paints for DIY Home Theaters
Rust-Oleum 249128 Specialty Magnetic Primer – Best Overall Choice
This innovative paint creates a magnetic, smooth white surface perfect for projection. Its **high-reflectivity formula** enhances brightness and color vibrancy. It’s the best option for a permanent, high-performance DIY screen with excellent light diffusion. Ideal for dedicated media rooms.

- PAINT AND CLEANING SUPPLIES
- SPECIALTY PAINTS
- COATINGS
Sherwin-Williams ProClassic Interior Acrylic Latex – Best Premium Paint Base
Use this ultra-white, high-hiding paint as your perfect base coat. Its **smooth, non-textured finish** minimizes hotspots and provides a consistent viewing surface. Mix with recommended additives for a custom screen. Recommended for those seeking professional-grade results.

- 45 year warranty
- 12-Pcak
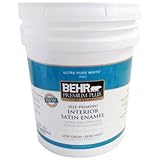
BEHR Premium Plus Ultra Pure White – Best Budget-Friendly Base
This affordable, high-quality white paint offers **excellent opacity and a flat sheen**. It provides a neutral, reflective base for your screen paint mixture without breaking the bank. An ideal starting point for first-time DIYers experimenting with homemade projector screens.
- Great tools at an affordable price
Essential Materials and Tools for Your DIY Screen Paint Project
Gathering the right supplies is the first critical step. Using incorrect materials can ruin your projection surface. This checklist ensures professional results.
Core Paint and Primer Components
Your paint mixture requires specific ingredients for optimal reflectivity. The base paint determines brightness, while additives control light diffusion.
- Ultra-White Base Paint: Choose a flat or matte interior latex paint. **”Ultra Pure White” or “Bright White”** shades provide the best neutral canvas.
- High-Quality Primer: A white, high-hiding primer is non-negotiable. It seals the wall and creates a uniform base for the screen paint.
- Light-Reflective Additives: **Aluminum powder or glass bead beads** are mixed into the paint. They enhance gain and viewing angles.
Must-Have Application Tools
Proper tools prevent streaks, brush marks, and texture. They ensure a perfectly smooth finish critical for image quality.
You will need a high-density foam roller and a paint tray. A quality **synthetic brush** is necessary for cutting in edges. Don’t forget painter’s tape and drop cloths for protection.
Surface Preparation Supplies
Preparing your wall is as important as the paint itself. A flawless surface leads to a flawless image.
- Sandpaper (220-grit): For lightly sanding the primed surface to a smooth finish.
- Tack Cloth: To remove all dust after sanding before painting.
- Spackle & Putty Knife: For filling any holes, dents, or imperfections in the wall.
- Level & Measuring Tape: To mark and tape off a perfectly rectangular screen area.
Step-by-Step Guide to Mixing and Applying Screen Paint
This process transforms ordinary paint into a high-performance projection surface. Precision in mixing and application is key. Follow these steps for a flawless, professional finish.
Creating the Perfect Paint Mixture Formula
The ratio of additive to base paint controls your screen’s gain. Too much additive can create sparkle, while too little reduces reflectivity.
- Prepare Your Base: Stir one quart of your ultra-white, flat latex paint thoroughly. Ensure it is completely smooth with no lumps.
- Add Reflective Medium: Slowly mix in **2-3 tablespoons of aluminum powder or glass beads**. Use a drill with a mixing paddle for even distribution.
- Test and Adjust: Paint a small sample board. Let it dry completely and project onto it to check for hotspots or sparkle before your main application.
Professional Application Techniques for a Smooth Finish
Your application method determines the final texture. A smooth, even coat is essential for uniform brightness.
Always use a **high-density foam roller** for the main surface. Apply the paint in a “W” or “M” pattern, then smooth it out without lifting. Maintain a wet edge to prevent lap marks and work in manageable sections.
| Common Mistake | Result | How to Avoid |
|---|---|---|
| Rolling over drying paint | Visible lap marks & texture | Work quickly in small sections |
| Using a nap roller | Orange-peel texture on screen | Use only foam rollers |
| Applying too thick a coat | Long dry time, potential runs | Apply two thin, even coats |
Drying and Curing for Optimal Performance
Rushing this stage can ruin your screen. The paint must cure fully to reach its maximum reflectivity and durability.
- Initial Dry: Allow at least 4-6 hours for the first coat to dry to the touch before applying the second.
- Final Cure: Let the final coat cure for a **minimum of 48-72 hours** before projecting onto it. This ensures the surface has fully hardened.
- Environment: Maintain good ventilation and a stable room temperature (65-75°F) during the entire drying process.
Advanced Tips and Troubleshooting Common Screen Paint Issues
Master these pro techniques to elevate your DIY screen. Anticipate and solve common problems for a perfect result. This knowledge separates good screens from great ones.
Optimizing Your Screen for Different Projector Types
Your projector’s technology should influence your paint mixture. Tailoring the surface maximizes your specific projector’s performance.
- For DLP/LCD Projectors: Use a slightly higher ratio of reflective additive. This boosts brightness and can help mitigate the **”rainbow effect”** sometimes seen with DLP models.
- For 4K/UHD Projectors: Prioritize an ultra-smooth surface. Any texture will be more visible with high-resolution content. Apply thinner coats and sand lightly between them.
- For Low-Lumen Projectors: Maximize gain with your additive mix. A brighter screen compensates for less projector output, improving image vibrancy in darker rooms.
Solving Frequent DIY Screen Paint Problems
Even with care, issues can arise. Most are easily fixable if you identify the cause correctly.
| Problem | Likely Cause | Solution |
|---|---|---|
| Hotspots (bright center) | Uneven additive distribution or overly thick center coat. | Remix paint thoroughly. Apply more consistent, thinner coats across the entire surface. |
| Sparkly or gritty appearance | Too much reflective additive or insufficient mixing. | Lightly sand the surface and apply a new, properly mixed thinned top coat. |
| Visible brush/roller marks | Using wrong tools or paint drying too fast. | Use only foam rollers. Work in smaller sections and maintain a wet edge. |
Long-Term Maintenance and Care
Protect your investment to ensure years of viewing pleasure. A painted screen requires specific care compared to a fabric one.
Dust the screen gently with a microfiber cloth or a soft brush attachment on a vacuum. Never use chemical cleaners or abrasive materials. For marks, lightly dab with a damp cloth—do not rub. Consider the screen area a **”no-touch” zone** to prevent oils from skin affecting the surface.
DIY Screen Paint vs. Commercial Screens: Cost & Performance Analysis
Is a homemade projector screen the right choice for you? This comparison breaks down the key differences. It helps you decide based on your budget, skill, and performance needs.
Breaking Down the Cost Savings
The financial advantage of a DIY painted screen is significant. You pay primarily for materials, not for branding, packaging, or retail markup.
- DIY Paint Screen: Total cost typically ranges from **$50 to $150**. This covers premium paint, primer, additives, and tools for a large wall-sized screen.
- Commercial Fixed-Frame Screen: A quality 100-inch screen often costs $200-$600+. Larger sizes or premium materials like ALR (Ambient Light Rejecting) surfaces can exceed $1,000.
- Key Insight: For the price of a mid-range commercial screen, you can paint a massive, wall-filling surface and purchase a better projector.
Performance and Customization Comparison
Each option has distinct strengths in image quality and flexibility. Your room and priorities determine the best fit.
| Feature | DIY Painted Screen | Commercial Fixed-Frame Screen |
|---|---|---|
| Custom Size/Shape | Perfect. Fills any wall space seamlessly. | Limited to standard sizes; bezels create hard edges. |
| Surface Flatness | Depends entirely on your wall’s condition and skill. | Guaranteed perfectly flat and taut by manufacturer. |
| Gain & Viewing Angle | Fully customizable via your paint mixture formula. | Fixed based on the purchased screen material. |
| Portability | Zero. It is a permanent wall finish. | High. Can be moved or taken down. |
Making the Right Choice for Your Home Theater
Your decision should balance practical constraints with desired outcomes. Consider these final factors before starting your project.
Choose a commercial screen if portability is key, your walls are textured, or you want guaranteed, out-of-the-box performance without testing mixtures. It’s the simpler, more reliable plug-and-play solution.
Proven Formulas and Recipes for Homemade Projector Screen Paint
Not all DIY screen paint mixes are created equal. These tested recipes target specific viewing environments and projector setups. Find the formula that matches your home theater conditions.
The Standard High-Gain White Screen Formula
This is the most versatile recipe for dark, controlled rooms. It provides excellent brightness and color accuracy for most users.
- Base: 1 Quart of high-quality, flat sheen, “Ultra Pure White” latex paint (e.g., Behr Premium Plus).
- Additive: 3 tablespoons of fine-grit (< 50 micron) aluminum powder. Ensure it is non-tarnishing.
- Mixing: Stir base paint thoroughly. Slowly sift in aluminum powder while mixing with a drill paddle for 5+ minutes until completely uniform.
Ambient Light Rejecting (ALR) Style Paint Mix
This advanced formula improves contrast in rooms with some uncontrolled light. It directs more light back to the viewer’s position.
Start with the Standard Formula above. Then, add **1 tablespoon of neutral gray paint tint** to the mixture. This slightly darkens the base to improve black levels. The reflective additive still boosts brightness where you sit, fighting ambient light.
| Formula | Best For | Key Benefit | Consideration |
|---|---|---|---|
| Standard High-Gain | Pitch-black dedicated theaters | Maximum brightness & pop | Can show hotspots if applied unevenly |
| ALR Style Gray Mix | Living rooms with some light | Improved contrast & blacks | Reduces overall peak brightness slightly |
| Glass Bead Formula | Wide seating arrangements | Superior wide viewing angle | Less “sparkle” than aluminum powder |
Wide-Angle Viewing Formula with Glass Beads
Use this if your seating is spread wide, not just centered. It sacrifices some peak gain for more consistent brightness off-axis.
- Base: 1 Quart of flat white latex paint.
- Additive: Substitute aluminum powder with **4 tablespoons of clear glass bead blasting media** (70-100 micron size).
- Result: Glass beads scatter light more evenly. This creates a wider **sweet spot** so image quality remains consistent for viewers on the sides of the room.
Final Installation and Calibration for Best Image Quality
Your screen is painted and cured. Now, optimize the final setup for a stunning picture. Proper projector placement and calibration are the final, crucial steps.
Optimal Projector Placement and Alignment
Positioning your projector correctly maximizes sharpness and eliminates distortion. This requires precise measurement.
- Find the Throw Ratio: Check your projector’s manual for its throw ratio (e.g., 1.5:1). This number tells you the distance needed for a specific screen width.
- Calculate Distance: For a 100-inch wide screen with a 1.5:1 throw ratio, place the lens **150 inches (12.5 feet)** from the wall. Use a projector placement calculator online for accuracy.
- Square and Keystone: Position the projector so its lens is perfectly perpendicular to the screen center. Use physical adjustment, not digital keystone correction, for the sharpest image.
Essential Post-Paint Calibration Steps
Calibrating your projector to your new screen’s characteristics unlocks its full potential. Start with these basic settings.
- Brightness & Contrast: Use a calibration pattern. Adjust brightness until black details are visible but not gray. Set contrast so white details are clear but not blooming.
- Color Temperature: Your white screen may shift colors. Set the color temp to **6500K (D65)** for the most accurate, cinema-standard white point.
- Sharpness: Turn sharpness down to zero, then increase slightly until the image is crisp without visible edge halos or noise.
Managing Room Lighting and Reflections
Your screen’s performance is affected by its environment. Control ambient light to achieve the intended contrast.
Treat walls and ceilings near the screen with dark paint or fabric. This minimizes reflected light bouncing back onto the screen and washing out the image. Use blackout curtains and consider bias lighting behind the TV or a small lamp behind the seating to reduce eye strain without affecting screen contrast.
Frequently Asked Questions About DIY Projector Screen Paint
This section addresses the most common concerns from DIY enthusiasts. Get clear, expert answers before you start your project. These FAQs help you avoid pitfalls and set realistic expectations.
Common Concerns and Practical Solutions
First-time users often worry about the same issues. Understanding these points builds confidence in the DIY approach.
- Can I paint over an existing colored wall? No. You must prime with a high-hiding white primer first. Painting directly over color will drastically alter brightness and color accuracy.
- How long does a painted screen last? With proper application and care, it can last for many years. It is as durable as any other high-quality wall paint in a low-traffic area.
- Is it easy to remove or paint over? Yes. You can paint over it with standard interior paint just like any other wall. No special removal is required.
Technical Specifications and Performance
These questions delve into the measurable outcomes of your DIY screen. They relate directly to image quality.
| Question | Short Answer | Detailed Explanation |
|---|---|---|
| What gain can I expect? | 1.0 to 1.3 | This depends on your formula and number of coats. A well-mixed standard formula typically achieves a gain slightly above 1.0, similar to a good matte white commercial screen. |
| Does it work with short-throw projectors? | Yes, excellently. | The smooth, non-textured surface is ideal for short-throw projectors, which can exaggerate any surface imperfection. |
| Can I create a 16:9 aspect ratio mask? | Yes, easily. | Use painter’s tape to mask off the top and bottom of your rectangular painted area. Paint the masked areas with a flat black paint to create a permanent border. |
Material Sourcing and Alternatives
Finding the right materials can be a hurdle. Here are solutions for common sourcing problems.
Can I use Behr Silver Screen paint instead? While marketed for screens, it is a light gray. It may reduce peak brightness. For maximum versatility, mixing your own allows precise control over the white point and gain.
What if my wall has a slight texture? A light orange-peel texture is usually acceptable. A heavy knockdown or popcorn texture will be visible in the image. You must skim-coat the wall smooth before priming.
Conclusion: Mastering the Art of DIY Projector Screen Paint
Creating your own projector screen paint is a rewarding and cost-effective project. You can achieve a custom, high-performance viewing surface tailored to your room. The process offers significant savings over commercial screens.
The key to success lies in meticulous preparation and precise mixing. Follow the formulas and application steps closely for a flawless finish. Test your mixture on a sample board before the final application.
Now, gather your materials and transform your wall into a brilliant home theater canvas. Enjoy the pride and satisfaction of a professional-grade result you built yourself.
Your perfect cinematic experience is just a paint roller away. Start your project this weekend and see the dramatic difference.
Frequently Asked Questions About DIY Projector Screen Paint
What is the best type of paint to use for a DIY projector screen?
The best base is a high-quality, flat or matte sheen interior latex paint in “Ultra Pure White.” This provides a neutral, non-reflective canvas. Avoid satin or eggshell finishes as they create hotspots.
Brands like Behr Premium Plus or Sherwin-Williams ProClassic are excellent choices. Their high-hiding formulas ensure a consistent white base for optimal light reflection and color accuracy.
How do you mix reflective additives into screen paint properly?
First, stir your base paint thoroughly to ensure uniformity. Slowly sift in your aluminum powder or glass beads while mixing with a power drill and paint paddle attachment.
Mix for at least 5 minutes to achieve a completely homogeneous blend. Any clumps will create visible sparkle or uneven brightness on your final screen surface during projection.
Can you make projector screen paint that works in a lit room?
Yes, you can create an Ambient Light Rejecting (ALR) style mix. Start with the standard high-gain white formula and add a small amount of neutral gray paint tint.
This darkens the base to improve black levels and contrast. The reflective additives still boost brightness directed toward the viewer, helping the image compete with ambient light.
What is the difference between aluminum powder and glass beads for screen paint?
Aluminum powder typically provides higher peak gain (brightness) for viewers seated directly in front. Glass beads offer a wider, more even viewing angle with less potential for sparkle.
Choose aluminum for a dedicated theater with centered seating. Opt for glass beads if your seating arrangement is wide, as it maintains image consistency for off-axis viewers.
How many coats of DIY screen paint should you apply?
Apply two thin, even coats for the best results. The first coat seals the primed surface. The second coat builds the final reflective layer and ensures perfect uniformity.
Always let the first coat dry completely (4-6 hours) before applying the second. Applying one thick coat can lead to runs, drips, and uneven drying which affects performance.
Why does my homemade screen have a sparkly or gritty appearance?
A sparkly appearance is almost always caused by too much reflective additive or insufficient mixing. The particles are not fully dispersed and clump together on the wall.
To fix this, lightly sand the surface with fine-grit sandpaper. Then apply a new, properly mixed top coat with a slightly reduced additive ratio to smooth it out.
How long does homemade projector screen paint need to dry before use?
Allow the final coat to cure for a minimum of 48-72 hours before projecting an image onto it. While it may feel dry to the touch sooner, full curing is essential.
This waiting period lets the paint fully harden and the solvents evaporate. Using it too early can damage the surface and will not show the screen’s true final performance.
Is it cheaper to make your own projector screen paint or buy a screen?
Making your own paint is significantly cheaper for large formats. A DIY project typically costs $50-$150 for a wall-sized screen. A comparable commercial fixed-frame screen often costs $200-$600+.
The savings allow you to allocate more budget to a better projector. However, a commercial screen offers guaranteed flatness and is less labor-intensive, providing a simpler setup.
Can You Put HID in Halogen Projectors?why you need to know
This website is a participant in the Amazon Services LLC Associates Program, an affiliate advertising program designed to provide a means for us to earn fees by linking to Amazon.com and affiliated sites.