This website is a participant in the Amazon Services LLC Associates Program, an affiliate advertising program designed to provide a means for us to earn fees by linking to Amazon.com and affiliated sites.
Cleaning dust from inside your BenQ TH671ST projector is essential for maintaining optimal image quality and extending its lifespan. Dust accumulation inside the unit can cause overheating, dimming, and color distortion. This complete guide provides expert tips and proven methods to safely perform this critical maintenance task.
You will learn the step-by-step process, necessary tools, and common pitfalls to avoid. We cover everything from external cleaning to safely accessing the internal optics and lens. Follow our instructions to restore your projector’s brilliant performance and prevent future damage.
Best Tools for Cleaning Dust From Inside BenQ TH671ST
Metro Vacuum ED500 DataVac Electric Duster – Best Overall Choice
This powerful, reusable electric duster provides strong, consistent airflow without canned air’s limitations. It’s ideal for blowing dust from the projector’s internal vents, lens assembly, and filters. Its static-free operation and lack of moisture make it the safest, most cost-effective long-term solution for projector maintenance.
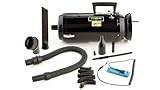
- ESD-SAFE FOR SENSITIVE ELECTRONICS – The DataVac 3 ESD is a powerful and…
- 2-SPEED OPERATION FOR VERSATILITY – The DataVac 3 ESD has two speed…
- HEPA FILTER CAPTURES 99.97% OF PARTICLES – Equipped with a HEPA filter that…
iFixit Pro Tech Toolkit – Best Precision Tool Kit
To safely open your TH671ST’s casing, you need the right tools. This kit includes all necessary precision screwdrivers, spudgers, and anti-static tools. The high-quality, magnetized bits prevent damage to tiny screws, making it the perfect companion for accessing and cleaning internal components without causing harm.

- COMPLETE: Everything you need to start a repair business—in one handy…
- UNIVERSAL: Tools chosen by iFixit technicians to tackle any household or…
- FUNCTIONAL: Robust iFixit messenger bag lets you take your business mobile.
LensPen NLP-1 Lens Cleaning System – Best for Optics
After removing dust, use this two-step tool for a flawless finish. The brush sweeps away loose particles, while the specialty cleaning pad safely removes oils and smudges from the delicate lens surface. It’s the recommended, non-liquid option for achieving crystal-clear projection without risking damage to lens coatings.

- Safely clean your DSLR Sensor
- Detect dust on your sensor
- Easily watch your sensor while removing dust
How to Safely Clean Your BenQ TH671ST Projector: A Step-by-Step Guide
Properly cleaning your projector requires a careful, methodical approach. Rushing or using the wrong tools can cause permanent damage to sensitive internal components. Follow this proven process to ensure a safe and effective cleaning session that restores performance.
Essential Safety Precautions Before You Begin
Your safety and the projector’s integrity are the top priorities. Neglecting these steps risks electric shock and irreversible damage to the device’s electronics and optical system.
- Unplug and Cool Down: Always disconnect the power cable and wait at least 45 minutes for the bulb and internal parts to cool completely to avoid burns.
- Work in a Clean, Static-Safe Area: Choose a flat, well-lit surface like a clean table. An anti-static mat is ideal to prevent electrostatic discharge from damaging circuit boards.
- Handle with Care: Never touch the projector’s bulb with bare fingers, as oils can create hot spots. Avoid pressing on the lens or color wheel assembly.
Step 1: External Cleaning and Filter Maintenance
Start with the exterior and air filters. This is the most frequent maintenance task and prevents dust from being pulled inside in the first place.
Locate the filter cover on the side of the TH671ST. Gently remove the foam filter. Use your electric duster to blow dust off it from the inside out. For stubborn particles, you can lightly rinse it with water, but it must be completely dry before reinstallation.
Wipe the projector’s casing with a dry, lint-free microfiber cloth. Use a slightly dampened cloth for tougher spots, but never spray liquid directly onto the unit. Ensure all vents are clear of obstruction.
Step 2: Accessing and Cleaning Internal Components
This step is for visible dust on the lens or inside the vent openings. You do not need to fully disassemble the projector for basic cleaning.
- Remove the Lens Cover: If your model has one, twist it off counter-clockwise.
- Blow Out Vents: Using your electric duster, blow short bursts of air into the intake and exhaust vents to dislodge loose internal dust. Angle the projector to let debris fall out.
- Clean the Lens: First, use the blower to remove loose dust. Then, gently use the LensPen in a circular motion from center to edge. Never use household cleaners or paper towels.
If dust is visibly settled deep inside or image issues persist, consider professional service. Forcing open sealed sections can misalign the optics.
Common Mistakes and Pro Tips for Projector Maintenance
Avoiding common errors is just as important as following the correct steps. These pro tips will help you maintain your BenQ TH671ST’s image quality and extend its operational life for years to come.
Critical Mistakes to Avoid When Cleaning
These actions can cause immediate and costly damage to your projector’s sensitive internal systems. Always err on the side of caution.
- Using Compressed Air Incorrectly: Holding canned air upside down or too close can spray freezing liquid onto the lens or electronics. Always hold the can upright and use brief bursts from a safe distance.
- Applying Liquid Cleaners Directly: Never spray window cleaner, alcohol, or water directly onto the lens or casing. Moisture can seep into seams and short-circuit components or damage anti-reflective coatings.
- Overlooking the Filter: A clogged filter is the primary cause of overheating. Clean it every 100-200 hours of use in dusty environments. Neglecting it forces the fan to work harder and pulls more dust inside.
Advanced Tips for Optimal Performance and Longevity
Go beyond basic cleaning with these expert practices. They focus on prevention and creating an ideal operating environment.
Control your projector’s environment meticulously. Using the TH671ST in a very dusty room or near a kitchen can accelerate internal contamination. Consider an aftermarket external air filter for extreme cases.
Establish a regular maintenance schedule based on your usage. Here is a simple reference table:
| Usage Level | Filter Check/Clean | External Wipe Down | Internal Air Blow-Out |
|---|---|---|---|
| Light (Few hours/week) | Every 3 months | Monthly | Every 6-12 months |
| Heavy (Daily use) | Monthly | Bi-weekly | Every 3-6 months |
Finally, always power down the projector using the proper shutdown sequence on the remote. This allows the internal fan to cool the bulb completely before the power is cut, reducing thermal stress.
When to Seek Professional BenQ TH671ST Cleaning Service
While DIY cleaning is effective for surface maintenance, some situations require a technician’s expertise. Knowing the limits of home maintenance protects your investment and ensures complex repairs are done correctly.
Signs Your Projector Needs Professional Attention
If you notice these symptoms after a basic cleaning, the issue may be internal. Persistent problems often indicate deeper contamination or component failure.
- Visible Dust Specks or Hair in the Projected Image: These are often on the internal lens, color wheel, or DLP chip. Removing them requires precise disassembly in a dust-free environment.
- Overheating Warnings or Unexpected Shutdowns: This suggests blocked internal cooling pathways or a failing fan, not just a dirty filter. A technician can diagnose and replace faulty parts.
- Flickering, Colored Spots, or Severe Focus Issues: These can signal dust on the optical path or misaligned components. DIY attempts can worsen the alignment, leading to costly repairs.
Benefits of Professional vs. DIY Cleaning
Understanding what a professional service offers helps you make an informed decision. It’s often about precision and warranty protection.
| Factor | Professional Service | DIY Cleaning |
|---|---|---|
| Depth of Cleaning | Full disassembly, cleaning of optics, light path, and sensors. | External, filter, vent, and surface lens cleaning only. |
| Risk | Very low. Technicians use controlled environments and proper tools. | Moderate. Risk of ESD damage, lens scratches, or misalignment. |
| Warranty | May preserve or be offered by authorized service centers. | Voids manufacturer warranty if damage occurs during the process. |
| Cost | Higher upfront cost ($100-$300+). | Low cost (tools are a one-time purchase). |
For units still under warranty, always contact BenQ support first. They can authorize service that keeps your coverage intact. For out-of-warranty projectors, seek reputable AV repair specialists with strong reviews.
Preventative Care and Long-Term Maintenance Schedule
Proactive maintenance is the most effective strategy for keeping your BenQ TH671ST dust-free. A consistent care routine prevents major cleanings and extends the projector’s lifespan significantly.
Creating an Ideal Operating Environment
Your projector’s surroundings have the biggest impact on dust accumulation. Simple environmental controls can drastically reduce the need for internal cleaning.
- Elevate and Isolate the Unit: Place the projector on a high shelf or mount it on the ceiling. Dust settles lower to the ground, so elevation keeps intake vents cleaner.
- Control Room Air Quality: Use an air purifier with a HEPA filter in the viewing room. This reduces the overall airborne dust particles that the projector’s cooling system pulls in.
- Seal the Space: Ensure the room is well-sealed from high-dust areas like unfinished basements or workshops. Avoid using the projector during or immediately after activities like vacuuming or dusting.
Establishing a Routine Maintenance Checklist
Adopt this simple, recurring schedule based on your usage hours. Consistency is easier than reacting to problems.
Keep a small logbook or note in your phone to track cleaning dates. Refer to your projector’s menu system to check the lamp hour counter for accurate timing.
Weekly, Monthly, and Quarterly Tasks
Break down maintenance into manageable tasks. This prevents overwhelm and ensures nothing is forgotten.
- Weekly (Quick Visual Check): Power off and visually inspect the exterior vents and lens for obvious dust. Give the casing a quick wipe with a dry microfiber cloth.
- Monthly (Basic Cleaning): Remove and clean the air filter thoroughly. Use your electric duster on the external vents and gently clean the lens with a blower brush.
- Quarterly (Deep Inspection): Perform a more thorough monthly cleaning. Check the projected image on a pure white screen for any new specks or anomalies. This is your signal for potential internal issues.
Additionally, plan for an annual “deep clean” where you carefully blow out the internal vents with the projector angled to eject debris. This mimics a light professional service.
Troubleshooting Post-Cleaning Issues and Final Checks
After cleaning your BenQ TH671ST, it’s crucial to verify everything functions correctly. This final step ensures your maintenance was successful and helps you identify any new or unresolved problems.
What to Do If Problems Persist After Cleaning
If image issues or warnings continue, don’t panic. Systematic troubleshooting can identify the root cause, which may be separate from dust.
- Image Still Blurry or Has Specks: Re-check the lens with a bright flashlight for missed smudges or debris. Ensure the lens cover is fully removed and the focus/zoom rings are not loose.
- Fan Noise or Overheating Continues: Double-check that the air filter is completely dry and correctly seated. Listen to identify if the noise is a grinding fan bearing, which requires part replacement.
- Projector Won’t Power On: Verify all cables are securely reconnected. Ensure the power outlet is functional. A tripped internal fuse from static discharge is a rare but possible issue.
Performing the Final Quality Assurance Test
Before declaring the job complete, run this simple three-step test. It confirms optical clarity and proper system operation.
- Power On and Listen: Turn on the projector. The fan should spin up smoothly without rattling or grinding noises. Unusual sounds indicate a loose component or failing fan.
- Display a Test Pattern: Project a pure white, red, green, and blue image from a test pattern generator or YouTube. Look closely for any remaining dust shadows, color uniformity issues, or dead pixels.
- Check Focus and Alignment: Display a sharpness test pattern with fine lines. Use the focus and keystone adjustments to ensure the image is sharp and square across the entire screen.
If all tests pass, your cleaning was successful. If specific issues appear only on certain colors, the problem may be with the color wheel—a job for a professional.
Documenting Your Maintenance for the Future
Keep a simple record of your cleaning date and any observations. Note the lamp hours from the projector’s menu. This log is invaluable for tracking the unit’s health, predicting future service needs, and providing history if you ever sell it.
FAQs: Answering Common BenQ TH671ST Cleaning Questions
This section addresses the most frequent concerns users have about maintaining their projector. Clear, direct answers help you proceed with confidence and avoid common pitfalls.
How Often Should I Clean the Inside of My Projector?
There’s no universal hour count, as it depends entirely on your environment. For most home theaters in clean living spaces, a thorough internal vent cleaning every 12-18 months is sufficient.
In dusty workshops, pet-friendly homes, or rooms with high airflow, you may need to clean every 6-9 months. Let performance be your guide: increased fan noise, dimming, or visible image artifacts signal it’s time.
Can I Use a Regular Vacuum Cleaner to Remove Dust?
No, this is not recommended. Standard household vacuums generate significant static electricity (ESD) that can fry sensitive projector circuitry.
- Risk: High static discharge from a plastic nozzle or hose.
- Alternative: Use a static-safe electric duster (DataVac) or a vacuum specifically designed for electronics with a grounded nozzle.
- Safe Practice: If you must use a vacuum, only use a soft brush attachment on the exterior casing and never near internal vents.
Will Cleaning Void My BenQ Warranty?
It depends on the type of cleaning and any resulting damage. BenQ’s warranty typically covers defects in materials and workmanship, not user-inflicted damage.
| Action | Warranty Impact |
|---|---|
| Cleaning the external case and user-accessible filter | No impact. This is expected routine maintenance. |
| Opening the chassis for internal cleaning | Likely voids warranty if you cause damage (scratched lens, broken clips, ESD). |
| Professional cleaning by an authorized service center | No impact. This preserves your warranty coverage. |
What’s the Difference Between Dust on the Lens vs. Inside the DLP Chip?
This is a critical distinction for diagnosis. Dust on the outer lens appears as soft, slightly out-of-focus blobs or haze that may shift if you tap the projector.
Dust on the internal DLP chip or color wheel appears as sharp, distinct, and often colored specks that are permanently fixed in the image. Chip-level dust almost always requires professional disassembly for safe removal.
Conclusion: Protecting Your Investment in the BenQ TH671ST
Regular, careful cleaning is the most effective way to preserve your projector’s performance and value. By following the methods outlined in this guide, you take proactive control of your device’s longevity.
Key Takeaways for Successful Projector Maintenance
Let’s recap the most critical principles. Internalizing these will ensure you approach every cleaning session with the right mindset and tools.
- Prevention is Paramount: A clean environment and regular filter care drastically reduce how often you need to clean inside the projector.
- Use the Right Tools: Invest in an electric duster, precision screwdrivers, and a LensPen. These prevent damage and make the job easier.
- Know Your Limits: External and vent cleaning is safe DIY. For deep internal dust or persistent image artifacts, professional service is the wise choice.
The Long-Term Benefits of Consistent Care
View maintenance not as a chore, but as an investment. The rewards extend far beyond a dust-free lens.
You will enjoy a brighter, sharper image for the full lifespan of the lamp. Proper cooling from clean vents prevents premature bulb failure and protects expensive internal components like the DLP chip and color wheel.
Ultimately, a well-maintained BenQ TH671ST delivers reliable home theater enjoyment for years. It also retains higher resale value should you choose to upgrade in the future.
We hope this complete guide has empowered you to maintain your BenQ TH671ST with confidence. For further assistance, always consult your official user manual or contact BenQ customer support.
Conclusion: Mastering BenQ TH671ST Dust Cleaning
Properly cleaning dust from inside your BenQ TH671ST restores image brilliance and prevents overheating. This guide provides the safe, step-by-step methods to achieve this. You now have the knowledge to perform both routine and deep cleaning with confidence.
The key takeaway is consistent, preventative maintenance. A clean filter and environment are your best defenses. Schedule regular checks to avoid major issues.
Gather the recommended tools and perform your first maintenance session this week. Your projector will thank you with a brighter, sharper picture and a longer life.
Take control of your home theater investment today and enjoy flawless viewing for years to come.
Frequently Asked Questions about Cleaning the BenQ TH671ST
What is the safest way to clean a projector lens?
The safest method is dry cleaning. First, use a blower or air duster to remove loose particles. Then, gently wipe with a microfiber cloth designed for optics, using circular motions from the center outward.
Never use household cleaners, paper towels, or your breath. For stubborn smudges, use a dedicated lens cleaning pen with a dry carbon-based pad. This prevents scratches and damage to delicate coatings.
How often should I clean the air filter on my TH671ST?
Clean the filter every 100-200 hours of use, or monthly in dusty environments. A clogged filter is the primary cause of overheating and forces dust into the internal optics.
Check your projector’s lamp hour counter in the settings menu to track usage. Regular filter maintenance is the single most effective preventative step you can take to avoid internal dust problems.
Can I use compressed air cans for internal cleaning?
You can, but with extreme caution. Always hold the can upright to prevent spraying freezing liquid. Use short, controlled bursts from several inches away.
An electric duster is a superior, more economical choice. It provides consistent, powerful airflow without the risk of propellant moisture or running out mid-cleaning.
What are the signs of dust inside the DLP chip?
Dust on the DLP chip appears as tiny, sharp, and permanently fixed specks in the projected image. These spots are often black or colored and will not blur or move if you adjust focus.
This is distinct from dust on the outer lens, which looks like soft, hazy blobs. Cleaning the DLP chip requires professional disassembly in a cleanroom environment.
Is it worth paying for professional projector cleaning?
Yes, for deep internal issues or if you’re uncomfortable with DIY. Professionals have cleanrooms, specialized tools, and expertise to safely disassemble and clean the entire optical path without causing damage.
For out-of-warranty projectors with visible internal dust or image artifacts, professional service is often more cost-effective than risking a costly mistake during a DIY attempt.
What should I do if my projector overheats after cleaning?
Immediately power it off and unplug it. The most likely cause is an improperly seated or still-damp air filter. Double-check that the filter is completely dry and snapped securely into place.
Also, verify you haven’t accidentally blocked the intake or exhaust vents. If the problem persists, a cooling fan may have been damaged or disconnected during cleaning.
Can dust permanently damage my BenQ projector?
Yes, over time. Excessive dust acts as an insulator, causing components like the lamp and power supply to overheat and fail prematurely. Dust on the lens or color wheel directly degrades image quality.
Consistent overheating from clogged vents can also warp internal plastics and solder joints. Regular cleaning prevents this cumulative, damaging effect.
What is the best environment to prevent dust buildup?
An elevated, climate-controlled room is ideal. Use an air purifier with a HEPA filter to reduce airborne particles. Keep the projector away from floor level, HVAC vents, and high-traffic areas.
Consider using a projector case or cover when not in use for extended periods. These simple environmental controls significantly reduce the frequency of required cleanings.
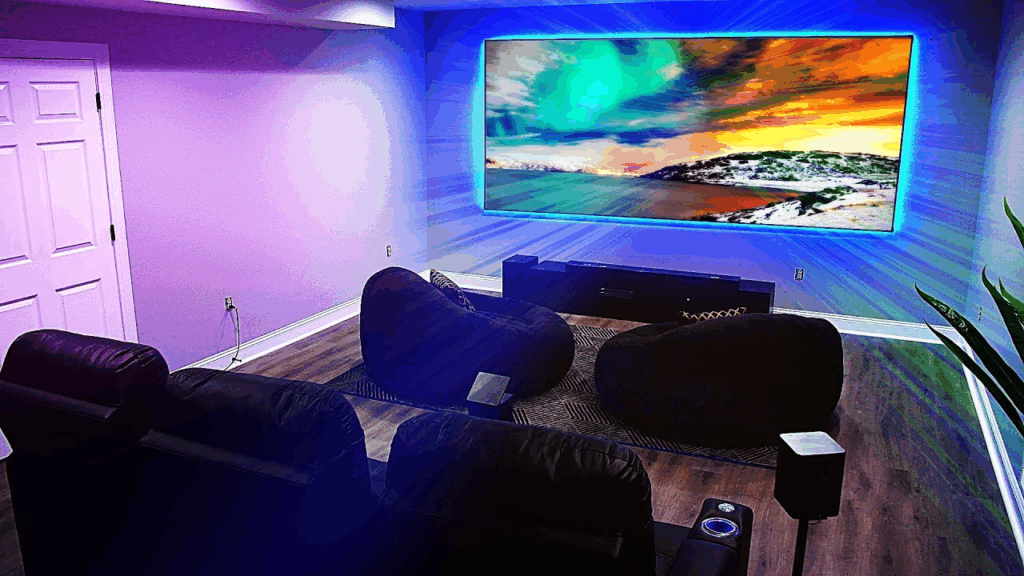
4K Projector with HDR10+: Ultimate Guide to Stunning Home Theater Visuals in 2026
Can You Put HID in Halogen Projectors?why you need to know
This website is a participant in the Amazon Services LLC Associates Program, an affiliate advertising program designed to provide a means for us to earn fees by linking to Amazon.com and affiliated sites.