
This website is a participant in the Amazon Services LLC Associates Program, an affiliate advertising program designed to provide a means for us to earn fees by linking to Amazon.com and affiliated sites.
Transform your small space with the best projector setup for apartment living. This complete guide reveals how to achieve a cinematic experience without sacrificing precious square footage.
You will learn expert tips for choosing the right projector, mounting solutions, and sound systems. Discover proven methods to maximize your viewing area while maintaining a clean, modern aesthetic. Continue reading to unlock your home theater potential.
Best Projectors for Apartment Living – Detailed Comparison
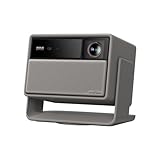
BenQ TK700STi – Best Overall Choice
The BenQ TK700STi delivers 4K HDR with a short-throw lens, ideal for small apartments. It projects a 100-inch image from just 5 feet away, eliminating distance constraints. This model includes built-in Android TV, removing the need for external streaming devices.

- BRIGHTEN YOUR LIVING ROOM: This Tv projector is great addition to your home…
- DURABLE LASER LIGHT SOURCE: Enjoy superior saturation and vibrant colors…
- BREATHTAKING 4K BIG SCREEN: Enjoy this 4K Projector, Immerse yourself in…
XGIMI Horizon Pro – Best Portable Option
The XGIMI Horizon Pro offers automatic keystone correction and a compact, stylish design. It features 2200 ANSI lumens for daytime viewing without blackout curtains. Its built-in Harman Kardon speakers provide excellent sound, saving space on external audio equipment.
- Lossless Optics: Flexible lens shift and optical zoom give you more freedom…
- Daylight Ready, Triple Laser Powered: Our advanced X-Master RGB triple…
- Epic Gaming Performance: Game on a massive 300″ screen with lightning-fast…
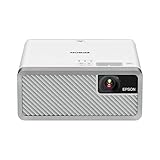
Epson EF-100 Mini – Best for Tight Budgets
The Epson EF-100 Mini uses 3LCD technology for vibrant colors and a portable 2.7-pound body. It projects up to 150 inches with a laser light source rated for 20,000 hours. This is the best option for renters needing a setup that packs away easily.
- STUNNING PICTURE QUALITY – Imagine an incredibly bright and colorful…
- INCLUDED ANDROID TV – Built-in Android TV with a simple-to-use remote…
- INTEGRATED AUDIO SYSTEM – Internal high-quality bass-reflex speaker for…
How to Choose the Perfect Projector for Small Rooms
Selecting the right projector for an apartment requires focusing on throw distance, brightness, and noise levels. Unlike a dedicated home theater, your living space demands flexibility and compact design. These three factors will determine your overall viewing satisfaction.
Understanding Throw Ratio for Tight Spaces
The throw ratio dictates how far the projector must sit from the wall to produce a large image. A short-throw or ultra-short-throw projector is essential for apartments where space is at a premium. Look for a ratio of 0.5:1 or lower to place the unit inches from the wall.
- Standard throw (1.5:1): Requires 8-10 feet for a 100-inch image. Best for larger living rooms.
- Short throw (0.5:1): Projects a 100-inch image from 3-5 feet. Ideal for most apartments.
- Ultra-short throw (0.25:1): Sits on a TV stand and projects from inches away. Perfect for tiny spaces.
Brightness: ANSI Lumens vs. Ambient Light
Apartment living often means windows, white walls, and overhead lights that wash out the picture. You need a projector with at least 2,000 ANSI lumens for comfortable daytime viewing. Models with 3,000+ lumens perform best in rooms without blackout curtains.
For darker rooms or dedicated movie nights, 1,500 ANSI lumens is sufficient. Always prioritize lumens over resolution when dealing with uncontrolled lighting. A bright 1080p image beats a dim 4K picture every time.
Noise Levels and Fan Placement
Projector fans generate noise that can be distracting in a quiet apartment. Look for units with a noise rating below 30 dB for whisper-quiet operation. Many modern projectors offer an Eco mode that reduces fan speed and extends lamp life.
Place the projector on a shelf behind your seating area to minimize audible distraction. Alternatively, ceiling mounting keeps the fan noise above your head and out of your ears.
Best Projector Mounting and Screen Solutions for Renters
Apartment dwellers face unique challenges when installing a projector, especially with no-drill walls and strict lease agreements. The best projector setup for apartment living relies on non-permanent mounting and portable screen options. You can achieve a stunning setup without losing your security deposit.
No-Drill Mounting Options for Apartment Walls
Use adhesive hooks, tension rods, or freestanding shelves to mount your projector without drilling holes. Heavy-duty command strips can hold projectors up to 10 pounds on smooth surfaces. For heavier units, a floor-standing tripod projector stand offers stability without wall damage.
- Ceiling tension rods: Perfect for hanging lightweight screens between two walls. No tools required.
- Floating shelves: Install using removable adhesive strips for a clean look. Supports projectors up to 15 pounds.
- Corner shelves: Ideal for ultra-short-throw projectors placed near the wall. Maximizes unused space.
Choosing the Right Screen for Small Spaces
A pull-down or fixed-frame screen dramatically improves image quality over a bare white wall. Look for screens with a 1.1 gain rating to boost brightness in rooms with ambient light. For renters, a portable tripod screen packs away in minutes and can be stored in a closet.
Ambient light rejecting (ALR) screens are a game-changer for apartments with large windows. They reflect projector light toward the viewer while absorbing stray light from the room. This allows you to enjoy clear images even with curtains open.
Managing Cables and Power in a Rental
Conceal cables using adhesive cord channels that paint over easily when you move out. Run power cables along baseboards or under area rugs to prevent tripping hazards. For a truly wireless setup, invest in a projector with built-in streaming and Bluetooth audio to eliminate HDMI and speaker wires.
Optimizing Sound and Lighting for Your Apartment Theater
Great visuals are only half the battle; audio quality and light control make or break your home cinema experience. Apartment living adds constraints like thin walls and limited floor space for speakers. The best projector setup for apartment living integrates these elements without disturbing neighbors.
Soundbar vs. Surround Sound for Small Rooms
A quality soundbar with a wireless subwoofer is the most apartment-friendly audio solution. It delivers clear dialogue and deep bass without the clutter of rear speakers. For a more immersive experience, a 2.1-channel system with two small bookshelf speakers offers better stereo separation.
- Soundbar (e.g., Sonos Beam): Slim design, virtual surround sound, easy wall-mounting. Best for minimalists.
- Bookshelf speakers (e.g., Edifier R1280T): Compact size, excellent audio clarity, no subwoofer needed. Ideal for music and movies.
- Bluetooth headphones: Perfect for late-night viewing. Zero noise complaints from neighbors.
Blackout Curtains and Ambient Light Control
Invest in blackout curtains with a light-blocking rating of 100% to transform your living room into a dark theater. Even a 2,000-lumen projector struggles against direct sunlight. Pair these curtains with blackout roller shades for a cleaner, permanent look that renters can install without drilling.
For daytime viewing, use bias lighting behind your screen to reduce eye strain and improve perceived contrast. A simple LED strip with a color temperature of 6500K works wonders. This trick makes your image pop without needing a completely dark room.
Soundproofing Tips for Apartment Dwellers
Reduce sound transfer to neighbors by placing rubber isolation pads under your subwoofer. Thick area rugs and foam panels absorb echo within your room while dampening noise traveling through floors. Focus on acoustic panels at first reflection points for the best balance of cost and effectiveness.
Step-by-Step Guide to Setting Up Your Apartment Projector
Setting up a projector in an apartment can feel overwhelming, but a clear step-by-step process simplifies the task. Follow this methodical approach to achieve the best projector setup for apartment living in under an hour. You will avoid common mistakes like poor placement or tangled cables.
Step 1: Measure Your Room and Wall Space
Start by measuring the distance from your seating area to the wall and the available wall height. Use a projector calculator app to determine the ideal throw distance for your chosen model. Write down the maximum screen size your wall can accommodate without overlapping windows or doorways.
- Measure wall width: Subtract 12 inches for framing and furniture clearance.
- Measure seating distance: Divide by 1.5 to find the optimal screen width.
- Check ceiling height: Ensure the screen bottom sits at least 24 inches above the floor.
Step 2: Position the Projector and Screen
Place your projector on a stable surface or tripod stand at the correct distance from the wall. Use the projector’s built-in keystone correction to square the image, but avoid extreme adjustments that degrade quality. For a permanent setup, mark the projector’s position with removable painter’s tape before finalizing.
Hang or set up your screen at the same time to ensure alignment. A laser level tool helps you achieve perfectly straight edges. This prevents the common frustration of a tilted or crooked image.
Step 3: Connect Audio and Streaming Devices
Connect your soundbar or speakers to the projector using HDMI ARC or optical cable for the best audio quality. For wireless streaming, log into your projector’s built-in apps like Netflix or Disney+. If your projector lacks smart features, plug in a streaming stick like a Fire TV Stick into the HDMI port.
Step 4: Calibrate Picture Settings for Your Room
Access the projector’s menu and select a preset picture mode like “Cinema” or “Movie” for accurate colors. Adjust brightness and contrast based on your ambient light conditions. Finally, run a free calibration video from YouTube to fine-tune sharpness and color temperature for your specific wall or screen.
Common Apartment Projector Setup Mistakes to Avoid
Even with the best equipment, small mistakes can ruin your viewing experience. Knowing what to avoid is just as important as knowing what to buy. These common pitfalls can turn your best projector setup for apartment living into a frustrating ordeal.
Mistake 1: Ignoring Throw Distance Calculations
Many buyers purchase a standard-throw projector without measuring their room first. This often results in an image that is too large for the wall or requires the projector to sit in the middle of the room. Always verify the throw ratio against your room dimensions before making a purchase.
- The result: A blurry or cropped image that cannot be fixed with keystone correction.
- The fix: Use a short-throw projector if your seating-to-wall distance is under 8 feet.
- The cost: Returning a projector due to size mismatch wastes time and shipping fees.
Mistake 2: Mounting the Projector Too High or Low
Placing the projector at the wrong height forces you to use heavy keystone correction, which degrades image quality. The lens should align with the center of your screen or slightly above it. For ceiling mounts, ensure the projector has vertical lens shift to compensate for the height difference.
A common error is mounting the projector near the ceiling without considering seating eye level. This creates an unnatural viewing angle that causes neck strain. Test the height with a temporary shelf before drilling any holes.
Mistake 3: Overlooking Ventilation and Heat Management
Projectors generate significant heat, and placing them in enclosed cabinets or tight shelves can cause overheating. Always leave at least 6 inches of clearance around the exhaust vents. Overheating leads to premature lamp failure and automatic shutdowns during movies.
Mistake 4: Using the Wrong Wall Color or Texture
White walls with a flat or matte finish work best for projector images. Glossy or textured walls scatter light and create a washed-out, blurry picture. If your wall has an eggshell or satin finish, invest in a portable projector screen for drastically improved clarity.
| Mistake | Consequence | Solution |
|---|---|---|
| Wrong throw distance | Image too large or small | Use short-throw projector |
| Poor mounting height | Neck strain, distorted image | Align lens with screen center |
| Inadequate ventilation | Overheating, lamp failure | Keep 6 inches clearance around vents |
| Wrong wall finish | Washed-out, blurry picture | Use matte screen or paint |
Maintaining Your Apartment Projector for Long-Term Use
Proper maintenance ensures your projector delivers crisp images for years without costly repairs. Apartment environments present unique challenges like dust, humidity, and frequent moving. Following a simple care routine will protect your investment and keep your best projector setup for apartment living performing like new.
Cleaning the Lens and Vents Regularly
Dust buildup on the lens causes soft, hazy images that no amount of focus adjustment can fix. Use a microfiber cloth and lens cleaning solution to gently wipe the lens in a circular motion. Clean the intake and exhaust vents every two weeks with a compressed air duster to prevent overheating.
- Lens cleaning frequency: Every 2-4 weeks depending on room dust levels.
- Vent cleaning method: Spray compressed air from outside the unit to blow dust out.
- Warning: Never use household cleaners or paper towels on the lens. They cause scratches.
Replacing the Lamp or Filter on Schedule
Most projectors have a lamp life of 3,000 to 20,000 hours depending on the model and usage mode. Check your projector’s menu for the remaining lamp hours and replace it when it reaches 90% of its rated life. For laser projectors, clean or replace the air filter every 6 months to maintain airflow.
Ignoring filter maintenance leads to thermal shutdowns and permanent damage to internal components. Set a recurring reminder on your phone to check the filter status. This simple habit can double the lifespan of your projector.
Proper Storage for Renters Who Move Often
If you plan to move apartments, store your projector in its original foam packaging or a padded hard case. Remove the lamp before transport if possible, as it is the most fragile component. Keep the projector in a cool, dry place away from direct sunlight and moisture to prevent internal corrosion.
For long-term storage, run the projector for 30 minutes every three months to prevent capacitors from drying out. This practice is especially important for LCD and DLP projectors that rely on sensitive electronic components. A little preparation saves you from discovering a dead unit on movie night.
Budget-Friendly Accessories to Enhance Your Apartment Projector Setup
You do not need to spend a fortune to elevate your viewing experience. Smart accessory choices can dramatically improve sound, image quality, and convenience. These budget-friendly additions complete the best projector setup for apartment living without breaking the bank.
Affordable Streaming Devices for Smart Features
If your projector lacks built-in apps, a streaming stick under $50 unlocks thousands of movies and shows. The Amazon Fire TV Stick Lite or Google Chromecast with Google TV plug directly into your projector’s HDMI port. Both devices support 4K streaming and voice control for hands-free navigation.
- Fire TV Stick Lite ($30): Great for Prime members. Includes Alexa voice remote.
- Chromecast with Google TV ($40): Clean interface. Casts from your phone or laptop.
- Roku Express ($25): Simple menu. Best for users who want no-fuss streaming.
Inexpensive Audio Upgrades for Clearer Sound
Projector speakers are notoriously weak and tinny. A budget soundbar under $100 transforms your audio quality instantly. The Vizio V-Series 2.0 or Creative Stage V2 offer clear dialogue and surprising bass for their size.
For an even cheaper solution, use a pair of wired PC speakers with a subwoofer from brands like Logitech. These cost under $50 and connect via a standard 3.5mm audio jack. Position them on either side of your seating area for a basic stereo effect.
Low-Cost Screen Alternatives That Work
You do not need a $500 screen to get a great picture. A blackout cloth from a fabric store stretched over a wooden frame costs under $30 and rivals commercial screens. Alternatively, a white shower curtain liner hung with binder clips creates a wrinkle-free surface for less than $15.
- Blackout cloth ($20-30): Blocks light bleed. Provides a smooth, professional surface.
- Shower curtain liner ($10-15): Lightweight and easy to store. Works well for temporary setups.
- Paintable screen wall ($40): Use special projector screen paint for a permanent solution.
Essential Cable Management Tools Under $20
Tangled cables ruin the clean look of your setup. Invest in adhesive cable clips and a cable sleeve for under $10 each. A short 3-foot HDMI cable reduces clutter compared to the standard 6-foot cable that comes with most devices.
Conclusion: Achieve the Best Projector Setup for Apartment Living
You now have all the tools to create a stunning home theater in your apartment. From choosing the right projector to mounting it without drilling holes, every step is manageable. The best projector setup for apartment living is about smart choices, not expensive equipment.
Your key takeaway is simple: prioritize short-throw models, non-permanent mounting, and budget-friendly accessories. These elements work together to deliver a cinematic experience in any small space.
Start with one upgrade today. Measure your room, pick a projector from our recommendations, and transform your living room tonight. Your apartment movie nights will never be the same.
Frequently Asked Questions about Projector Setup for Apartment Living
What is the best projector for a small apartment with limited space?
The BenQ TK700STi is the top choice for small apartments due to its short-throw lens and compact design. It projects a 100-inch image from just 5 feet away, making it perfect for tight rooms.
For an even smaller footprint, consider the XGIMI Horizon Pro with automatic keystone correction. Both models deliver 4K quality without requiring excessive distance from the wall.
How do I mount a projector in an apartment without drilling holes?
Use heavy-duty adhesive hooks or command strips rated for your projector’s weight. These hold units up to 10 pounds on smooth surfaces without damaging walls.
Alternatively, invest in a floor-standing tripod projector stand for complete flexibility. This option requires no wall contact and can be repositioned easily for different viewing angles.
Can I use a projector in a room with windows and ambient light?
Yes, but you need a projector with at least 2,000 ANSI lumens for comfortable daytime viewing. Models like the Epson EF-100 Mini with 2,000 lumens perform well in moderately lit rooms.
Pair your projector with 100% blackout curtains and an ambient light rejecting screen for the best results. These additions dramatically improve contrast and color accuracy in bright conditions.
What is the ideal screen size for an apartment living room?
The ideal screen size depends on your seating distance and wall dimensions. A general rule is to divide your seating distance in inches by 1.5 to find the optimal screen width.
For most apartments, a 100 to 120-inch diagonal screen provides an immersive experience without overwhelming the room. Measure your wall height first to ensure the screen fits without touching the ceiling or floor.
How do I prevent my projector from overheating in a small room?
Ensure at least 6 inches of clearance around all ventilation vents on your projector. Never place the unit inside an enclosed cabinet or against a wall.
Clean the air filter every 2-3 months using compressed air to maintain proper airflow. Running the projector in Eco mode also reduces heat output and extends lamp life.
What is the best way to connect sound to a projector without wires?
Use a Bluetooth soundbar or wireless speakers that pair directly with your projector. Most modern projectors support Bluetooth 5.0 for stable, low-latency audio streaming.
For better sound quality, connect a streaming device like a Fire TV Stick to your soundbar via HDMI ARC. This setup delivers lossless audio while keeping your space completely cable-free.
Can I use a white wall instead of buying a projector screen?
Yes, but the wall must have a flat, matte finish without texture or gloss. Glossy walls create hotspots and reflections that degrade image quality significantly.
For best results, paint a dedicated wall section with specialized projector screen paint. This costs under $50 and provides near-professional screen performance for a fraction of the price.
How do I fix a blurry or distorted projector image in my apartment?
First, adjust the focus ring on the projector lens until the image becomes sharp. If the image is trapezoid-shaped, use the keystone correction feature in the projector settings menu.
For persistent distortion, ensure the projector is perfectly perpendicular to the screen surface. Even a slight angle causes image warping that keystone correction cannot fully fix.
What is the average lifespan of a projector lamp in an apartment setting?
Most projector lamps last between 3,000 and 5,000 hours in normal mode. In Eco mode, this extends to 6,000-10,000 hours depending on the model.
For a typical apartment user watching 3-4 hours daily, a lamp should last 2-4 years before replacement. Laser projectors like the Epson EF-100 Mini last up to 20,000 hours without needing a new light source.
Can a Projector Get a Virus?why you need to know
This website is a participant in the Amazon Services LLC Associates Program, an affiliate advertising program designed to provide a means for us to earn fees by linking to Amazon.com and affiliated sites.