
This website is a participant in the Amazon Services LLC Associates Program, an affiliate advertising program designed to provide a means for us to earn fees by linking to Amazon.com and affiliated sites.
For projection mapping, the best projectors are high-lumen laser models with precise geometric correction and high contrast ratios. These projectors deliver the brightness and clarity needed to transform irregular surfaces into dynamic visual displays.
This complete guide reveals expert tips for selecting the right projector for your mapping project. You will learn about lumen requirements, resolution standards, and proven methods to match hardware to your specific creative goals. Keep reading to find your ideal projection mapping solution.
Best Projectors for Projection Mapping – Top 3 Picks
Panasonic PT-RZ970BU – Best Overall Choice
This 3-Chip DLP laser projector delivers **9,600 lumens** and a 20,000:1 contrast ratio for stunning clarity. It features built-in geometric adjustment and edge blending. Ideal for large-scale architectural mapping and permanent installations requiring reliable, maintenance-free operation.

- Native Resolution: 1920 x 1200
- Light Source: 2000 Hour Lifespan
- Form Factor: Desktop Projector
Epson PowerLite L1755U – Best for Bright Environments
With **8,000 lumens** and WUXGA resolution, this laser model excels on textured surfaces. It offers advanced warping tools and seamless multi-projector stacking. Best option for mid-sized venues, museums, and stage shows where ambient light is a challenge.

- Projection Method: Front
- Projection Method: Rear
- Projection Method: Ceiling
BenQ LU9715 – Best Budget-Conscious Laser
This single-chip DLP projector provides **8,500 lumens** and 100,000:1 dynamic contrast. It includes a 1.8x zoom lens and a suite of mapping tools. Highly recommended for small businesses and artists needing professional results without the premium price tag.
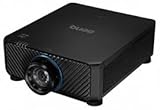
- Vibrant Visuals: Up to 8,000 ANSI Lumens and 100,000:1 Contrast Ratio
- Enhanced Resolution: WUXGA Native (1920×1200), Exceeding Full HD 1080p
- Long-Lasting Light Source: 20,000 Hours for Minimal Maintenance
Key Specifications for Choosing a Projection Mapping Projector
Selecting the right projector requires understanding three critical technical specs. These factors directly determine image quality, brightness, and flexibility on complex surfaces. Ignoring any one can ruin your entire mapping project.
Brightness and Lumen Requirements
Lumens measure light output, which is the most important spec for projection mapping. For indoor installations, aim for 5,000 to 10,000 lumens. Outdoor or ambient-light environments require 15,000 lumens or more to maintain visibility and color saturation.
- Small indoor art (5,000-7,000 lm): Ideal for gallery pieces and small objects.
- Medium stages (8,000-12,000 lm): Works well for theater backdrops and retail displays.
- Large buildings (15,000+ lm): Necessary for architectural mapping and live events.
Resolution and Aspect Ratio
Higher resolution ensures sharp edges on irregular surfaces like statues or columns. WUXGA (1920×1200) is the baseline for professional mapping. For detailed textures or small objects, 4K resolution prevents pixelation and creates immersive visuals.
Always match your aspect ratio to your projection surface. A 16:10 ratio offers more vertical flexibility for tall structures. Standard 16:9 is best for wide, flat walls or screens.
Laser vs. Lamp Light Sources
Laser projectors are the clear winner for mapping due to their longevity and brightness consistency. They last 20,000+ hours without dimming. Lamp projectors are cheaper upfront but require frequent bulb replacements and lose brightness over time.
Essential Features for Professional Projection Mapping
Beyond raw specs, specific built-in features make a projector truly mapping-ready. These tools save hours of manual setup time. They also enable complex projections that standard projectors cannot achieve.
Geometric Correction and Warping
This feature allows you to bend and reshape the image to fit curved or angled surfaces. Without warping, a projector can only display a flat rectangle. Look for projectors with at least 9-point or 17-point grid warping for precise alignment on pillars, domes, or corners.
- Auto-warping: Uses a camera to calibrate the image automatically.
- Manual grid warping: Gives you total control over every pixel.
- Blend masks: Soften edges where multiple projectors overlap.
Edge Blending Capabilities
When using multiple projectors for a single large surface, edge blending hides the seams. This creates one seamless, ultra-wide image. Dedicated blending hardware or software built into the projector is essential for professional results.
Most high-end laser projectors include this feature. It allows you to stack or tile projectors without visible overlap lines. This is critical for mapping entire building facades or immersive room interiors.
Connectivity and Input Lag
Projection mapping often uses live video feeds or interactive triggers. Low input lag (under 50ms) ensures your visuals stay synchronized with sound or motion sensors. HDMI 2.0 and HDBaseT inputs are standard for high-bandwidth 4K signals.
How to Match Projector Specs to Your Mapping Surface
Different surfaces demand different projector characteristics. A flat wall behaves very differently from a textured statue or a moving stage prop. Matching your projector to the surface type ensures crisp, distortion-free visuals every time.
Flat Walls and Screens
Standard flat surfaces are the easiest to map. You can use projectors with basic keystone correction and standard throw ratios. For large walls, prioritize high lumens and edge blending over advanced warping features.
- Throw ratio: Choose 1.2-1.5:1 for typical room depths.
- Resolution: WUXGA is sufficient for most wall projections.
- Brightness: 6,000-8,000 lumens works well indoors.
Curved and Irregular Objects
Mapping onto columns, spheres, or furniture requires advanced geometric warping. You need a projector with a flexible grid system and high pixel density. 4K resolution is recommended here to prevent image stretching on curved surfaces.
Laser projectors are ideal because they maintain consistent brightness across the entire warped image. Lamp projectors can create hot spots on curved edges. Always test your projector on the actual object before final installation.
Outdoor and Architectural Surfaces
Building facades demand extreme brightness and weather resistance. You need projectors with 15,000 lumens or more and IP-rated enclosures for dust and moisture. Short-throw lenses help avoid obstacles like trees or street signs.
Budget Considerations for Projection Mapping Projectors
Projection mapping projectors range from affordable entry-level units to professional cinema-grade systems. Your budget directly dictates the brightness, resolution, and feature set you can access. Knowing where to invest and where to save is crucial for a successful project.
Entry-Level Budget (Under $3,000)
This range is suitable for small-scale art installations and hobbyist projects. You will find lamp-based projectors with 4,000-5,000 lumens and basic keystone correction. These units lack advanced warping, so you will need external mapping software to compensate.
- Pros: Affordable entry point, good for learning.
- Cons: Lower brightness, frequent lamp replacements, limited geometric control.
- Best for: Small indoor objects and experimental art.
Mid-Range Investment ($3,000 – $10,000)
This sweet spot offers laser projectors with 6,000-10,000 lumens and built-in warping tools. You get reliable performance for medium-sized venues without breaking the bank. These projectors often include edge blending for multi-unit setups.
Epson and BenQ dominate this category with models like the L1755U and LU9715. They provide professional-grade features at a fraction of the cost of high-end units. This is the most popular budget range for rental companies and small studios.
Professional Systems ($10,000+)
High-end projectors from Panasonic and Christie deliver 15,000+ lumens and 4K resolution. They include advanced auto-calibration, motorized lenses, and rugged enclosures for outdoor use. These are the industry standard for large-scale architectural mapping and touring productions.
Software Compatibility and Workflow Integration
Your projector must work seamlessly with mapping software to create stunning visuals. Hardware and software compatibility directly impacts your workflow efficiency. Choosing the wrong combination can lead to frustrating setup delays and limited creative control.
Popular Mapping Software Options
Most professional mapping software supports standard projectors, but advanced features require specific hardware compatibility. MadMapper works best with projectors offering native Art-Net support for DMX control. Resolume Arena excels with low-latency projectors for live performance mapping.
- MadMapper: Ideal for small to mid-scale installations with simple warping needs.
- Resolume Arena: Best for VJs and live event mapping with real-time video mixing.
- HeavyM: Beginner-friendly software with intuitive grid-based warping tools.
- TouchDesigner: Advanced node-based system for complex interactive installations.
Essential Connectivity for Software Control
Projectors with Ethernet (RJ45) and RS-232 ports allow direct software control over power, input switching, and lens settings. This eliminates the need for manual adjustments during shows. USB-C with video passthrough is becoming standard for modern mapping workflows.
Always check if your projector supports EDID emulation. This feature prevents signal loss when the projector is powered off but the software is still running. It maintains your mapping layout and prevents frustrating re-calibration sessions.
Testing Before You Buy
Download trial versions of your chosen software before purchasing a projector. Connect your laptop to the projector and test warping grids and edge blending. This simple test reveals compatibility issues that spec sheets never mention.
Installation Tips for Projection Mapping Setups
Proper installation is just as important as choosing the right projector. A poorly mounted unit can ruin image alignment and create safety hazards. Follow these best practices to ensure a smooth, professional setup every time.
Mounting and Rigging Best Practices
Always use sturdy, rated mounting brackets designed for the projector’s weight. Ceiling mounts work best for permanent installations. For temporary setups, use truss systems with safety cables to prevent accidents.
- Safety cables: Always attach a secondary cable as a backup.
- Vibration isolation: Use rubber mounts near speakers or heavy foot traffic.
- Accessibility: Leave room for lens adjustments and cable connections.
Lens Selection and Throw Distance
The lens determines how far the projector must sit from the surface. A short-throw lens (0.8:1 or less) works in tight spaces. A long-throw lens (2.0:1 or more) is needed for large venues or outdoor facades.
Calculate your throw distance using the formula: distance = throw ratio x image width. Always add 10% extra distance for lens adjustments. Test the position with a live image before drilling any holes.
Cable Management and Signal Integrity
Long HDMI runs over 50 feet require active signal boosters or fiber optic cables. Standard copper cables lose signal quality over distance. Use HDBaseT transmitters for runs up to 330 feet without degradation.
Label every cable at both ends for quick troubleshooting. Keep power cables separate from signal cables to avoid electrical interference. This simple step prevents flickering and signal dropouts during live shows.
Common Mistakes to Avoid When Choosing a Mapping Projector
Many beginners make costly errors when selecting their first projection mapping projector. These mistakes lead to poor image quality, wasted budgets, and project delays. Learn from these common pitfalls to save time and money.
Underestimating Brightness Requirements
The most frequent mistake is choosing a projector with too few lumens. A 4,000-lumen projector looks bright in a dark room but washes out completely with any ambient light. Always add 30% more lumens than you think you need for safety margin.
- Indoor with controlled light: Minimum 5,000 lumens.
- Indoor with windows: Minimum 8,000 lumens.
- Outdoor at dusk: Minimum 15,000 lumens.
Ignoring Lens Throw Ratio
Buying a projector without calculating the throw ratio is a critical error. A standard zoom lens may not fit your space. You might end up with an image that is too large or too small for your surface.
Measure your room depth and desired image width before purchasing. Use online throw ratio calculators to verify compatibility. Consider interchangeable lens models for maximum flexibility.
Overlooking Cooling and Noise Levels
High-lumen projectors generate significant heat and fan noise. In quiet venues like galleries or museums, noise levels above 40 dB can distract audiences. Look for laser projectors with quiet modes or install them in soundproof enclosures.
Always check the projector’s decibel rating in its spec sheet. Position the unit away from seating areas or use acoustic baffles to reduce noise impact.
Conclusion: Choosing the Best Projector for Projection Mapping
Selecting the best projector for projection mapping comes down to lumens, laser technology, and geometric warping features. Prioritize brightness and surface compatibility above all other specs. These factors will determine your final image quality and creative potential.
Start with your surface and ambient light conditions. Then match your projector’s specs to those requirements. Use the product recommendations in this guide as your starting point for research.
Ready to begin your next mapping project? Choose a laser projector with at least 6,000 lumens and built-in warping. Your audience will thank you for the stunning results.
Frequently Asked Questions about Projection Mapping Projectors
What is the best projector for projection mapping beginners?
The BenQ LU9715 is the best entry-level choice for beginners. It offers 8,500 lumens, laser technology, and built-in warping tools at an affordable price point.
This projector pairs well with HeavyM software for easy grid-based mapping. You can learn professional techniques without the complexity of high-end systems.
How many lumens do I need for projection mapping?
For indoor mapping with controlled lighting, you need at least 5,000 lumens. For venues with ambient light, choose 8,000-10,000 lumens. Outdoor projections require 15,000 lumens or more.
Always add a 30% brightness buffer to your calculated needs. This ensures your visuals remain vibrant even if lighting conditions change unexpectedly.
Can I use a regular home theater projector for projection mapping?
Standard home theater projectors lack the brightness and geometric correction needed for mapping. They typically output under 3,000 lumens and offer only basic keystone adjustment.
You can experiment with small objects in a dark room, but results will be limited. For professional results, invest in a dedicated laser mapping projector with warping capabilities.
What is the difference between lamp and laser projectors for mapping?
Laser projectors last 20,000+ hours with consistent brightness. Lamp projectors require bulb replacements every 2,000-4,000 hours and lose brightness over time. Laser units also turn on instantly without warm-up time.
For projection mapping, laser is the clear winner. The higher upfront cost is offset by lower maintenance and reliable performance during long installations.
How do I calculate the throw distance for my mapping projector?
Use the formula: throw distance = throw ratio x desired image width. For example, a 1.5:1 lens creating a 10-foot wide image needs to sit 15 feet from the surface.
Always add 10% extra distance for lens adjustment flexibility. Use online throw ratio calculators to verify your measurements before purchasing equipment.
What software works best with projection mapping projectors?
MadMapper is excellent for small to mid-scale installations. Resolume Arena is ideal for live performance mapping. TouchDesigner offers advanced node-based control for complex interactive projects.
Always test your chosen software with your projector before purchasing. Download trial versions and verify warping, edge blending, and DMX control compatibility.
Can I use multiple projectors for one large mapping surface?
Yes, using multiple projectors is common for large surfaces like building facades. You need projectors with edge blending capabilities to hide the seams between overlapping images.
Use matching projector models for consistent color and brightness. Calibrate each unit carefully using built-in blending tools or external software like MadMapper.
What is the best resolution for projection mapping?
WUXGA (1920×1200) is the minimum standard for professional mapping. For detailed textures on small objects, 4K resolution prevents pixelation and creates sharper images.
Higher resolution is especially important for curved surfaces where pixels stretch. Always match your content resolution to your projector’s native resolution for the best results.
How do I reduce fan noise from my mapping projector?
Use quiet mode or eco mode settings if your projector offers them. These reduce fan speed and noise output by up to 50%, though brightness decreases slightly.
For silent venues, install the projector in a soundproof enclosure with ventilation. Use a long-throw lens to position the projector farther from the audience.
What should I check before buying a used projector for mapping?
Verify the lamp hours or laser usage time. Check for dead pixels by projecting a solid white image. Test all inputs, geometric warping, and edge blending functions thoroughly.
Request a live demonstration with mapping software before purchasing. A used projector with over 10,000 hours of laser use may show diminished brightness and color accuracy.
This website is a participant in the Amazon Services LLC Associates Program, an affiliate advertising program designed to provide a means for us to earn fees by linking to Amazon.com and affiliated sites.