
This website is a participant in the Amazon Services LLC Associates Program, an affiliate advertising program designed to provide a means for us to earn fees by linking to Amazon.com and affiliated sites.
Looking for your Byintek Projector P20 remote? This guide provides the direct answers you need. We cover everything from finding replacements to mastering its functions.
A missing or malfunctioning remote can ruin your viewing experience. Regain complete control over your projector’s settings and features quickly.
In this guide, you’ll learn proven methods for setup, universal remote codes, and advanced troubleshooting. Let’s restore your projector’s full functionality.
Best Replacement Remotes for Byintek Projector P20
Byintek Official P20 Replacement Remote
This is the guaranteed compatible option directly from the manufacturer. It offers plug-and-play functionality with no programming required. Ideal for users who want a perfect, hassle-free match for their projector’s original features and button layout.

- Check with us If your model number is not listed in our title
- Infrard Replacement,same as our listing pictures.which can replace your old…
- No Manual included, Any doubts, message us freely first pls !
SUPERNIGHT Universal Projector Remote
A versatile and cost-effective alternative, the SUPERNIGHT remote can be programmed for thousands of devices. It requires code setup but provides a reliable backup solution. This is the best option for households with multiple AV devices to control.

- Universal Projector Remote Control Replacement Compatible with almost All…
- Importantly: This is a universal remote control replacement works for…
- Battery needed: 2 Pcs AAA alkaline Batteries;
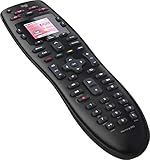
Logitech Harmony 665 Universal Remote
For advanced users seeking premium control, the Harmony 665 allows you to create custom activities (like “Watch Movie”). It can control your P20 projector and connected sound system simultaneously, offering superior macro functionality and a streamlined experience.
- No need for multiple remotes or remembering what to turn on or which input…
- Say goodbye to that jumble of remotes once and for all. Combine up to…
- Go directly to the shows, movies, and music you love with 23 customizable…
How to Set Up and Program Your Byintek P20 Remote
Proper setup is crucial for seamless control. This section covers initial pairing and programming for universal remotes. Follow these steps to ensure reliable operation.
Initial Setup and Pairing Instructions
For the official Byintek remote, setup is typically automatic. Ensure you have fresh batteries installed. Point the remote directly at the projector’s infrared sensor on the front.
If the remote doesn’t work immediately, try this reset sequence:
- Turn on the Byintek P20 projector.
- Press and hold the “OK” and “Menu” buttons simultaneously for 5 seconds.
- Release the buttons when the projector’s indicator light blinks.
Programming a Universal Remote Control
Using a universal remote requires a specific code. You will need to enter a programming mode and input the correct code for Byintek devices.
Follow this general process:
- Turn on your projector.
- Press and hold the “Setup” or “Code Search” button on your universal remote.
- Enter the 3- or 4-digit code for Byintek (common codes include 1756, 1175, or 0205).
- Test the power button to see if the projector turns off.
Key Takeaway: Official remotes pair automatically. Universal remotes require a specific code entry process, which may involve trial and error with common manufacturer codes.
Essential Button Functions and Layout
Understanding your remote’s layout maximizes its utility. The Byintek P20 remote is designed for intuitive navigation and quick access.
Key functional areas include:
- Power & Source: Turns the projector on/off and cycles through input options (HDMI, USB, AV).
- Navigation Cluster: The directional arrow and OK button for menu control and media playback.
- Keystone & Focus: Dedicated buttons for digitally adjusting image shape and clarity.
- Menu & Return: Accesses the main settings and exits back to previous screens.
Troubleshooting Common Byintek Remote Control Issues
Is your remote unresponsive? This section solves the most frequent problems. We provide clear diagnostics and proven fixes to restore functionality.
Remote Not Working: Diagnosis and Fixes
An unresponsive remote is often caused by simple issues. Methodically check these points before assuming a major failure.
Follow this diagnostic checklist:
- Check Battery Power: Replace old batteries, ensuring correct polarity (+/-).
- Clear the Signal Path: Remove any obstacles between the remote and projector’s IR sensor.
- Test Proximity: Operate the remote within 20 feet, pointing it directly at the projector.
- Reset the Connection: Power cycle the projector by unplugging it for 60 seconds.
Solving Specific Button Malfunctions
Sometimes only certain buttons fail. This indicates a different problem than a completely dead remote.
Common causes and solutions include:
- Sticky Buttons: Clean around the button with isopropyl alcohol and a cotton swab to remove debris.
- Worn Contacts: For a heavily used remote, internal rubber pads may be worn, requiring replacement.
- Programming Error: On universal remotes, re-enter the correct device code to restore all functions.
When to Seek a Replacement Remote
Not all issues can be fixed at home. Recognize the signs that indicate you need a new remote control for your projector.
Consider a replacement if you encounter:
- Physical Damage: A cracked casing or broken circuit board from a drop.
- Chronic Signal Issues: The remote only works at awkward angles or very short distances.
- Failed DIY Repair: You’ve replaced batteries, cleaned contacts, and reset without success.
Advanced Tips and Alternative Control Methods
Master your projector beyond the basic remote. Explore smart integrations and maintenance strategies for long-term convenience and reliability.
Using Smartphone Apps as a Remote Alternative
Your phone can be a powerful backup controller. Several app-based solutions work if your physical remote is lost or broken.
Effective options include:
- Universal Remote Apps: Apps like “Sure Universal” or “Remote Control for Projector” use your phone’s IR blaster (if available) to send signals.
- Wi-Fi Control: If your Byintek P20 supports Wi-Fi, manufacturer-specific apps may offer control over the network.
- Bluetooth Pairing: Check your projector’s manual for Bluetooth compatibility with control applications.
Extending Your Remote’s Lifespan and Range
Proper care ensures your remote lasts for years. Simple habits can significantly improve performance and durability.
Follow these best practices:
- Battery Management: Remove batteries if the remote will be unused for months to prevent corrosion.
- Clean Regularly: Wipe the remote with a dry cloth and clean button crevices to prevent grime buildup.
- Maximize Signal: Ensure the projector’s infrared receiver window is clean and unobstructed for better range.
Integrating with Home Entertainment Systems
For a streamlined experience, control your projector as part of a larger system. This reduces clutter and simplifies operation.
Common integration setups involve:
- HDMI-CEC: Use your smart TV remote to control basic projector functions if connected via HDMI-CEC (check compatibility).
- Universal Hub Remotes: Advanced remotes like the Logitech Harmony can create “Watch Movie” activities that power on the projector, sound system, and lower shades.
- Voice Assistants: Some smart plugs and IR blasters (like BroadLink) allow voice control through Alexa or Google Assistant.
Where to Buy a Byintek P20 Remote and Accessories
Finding a genuine or compatible remote is crucial. This guide covers trusted retailers, price comparisons, and essential accessory purchases.
Official and Trusted Third-Party Retailers
Purchase from reputable sources to avoid counterfeit products. Authentic remotes ensure perfect compatibility and durability.
Recommended purchasing channels include:
- Official Byintek Channels: Check the Byintek website or their official storefronts on Amazon or AliExpress.
- Major Electronics Retailers: Websites like Walmart.com or BestBuy.com sometimes carry universal remotes with confirmed compatibility.
- Specialized AV Parts Stores: Online retailers like ReplacementRemotes.com or RemoteControls.com specialize in OEM and universal replacements.
Price Comparison and What to Expect
Costs vary significantly based on the type of remote. Understanding the price range helps you budget and avoid overpaying.
| Remote Type | Average Price Range | Key Consideration |
|---|---|---|
| Official Byintek Replacement | $15 – $30 | Guaranteed compatibility, may include shipping fees. |
| Universal Remote (Basic) | $8 – $20 | Requires programming, may control multiple devices. |
| Universal Remote (Advanced) | $40 – $100+ | Macro functions, touchscreen, controls entire home theater. |
Essential Accessories to Purchase Together
Enhance your experience and protect your investment with key add-ons. Consider bundling these items with your remote purchase.
Highly useful accessories include:
- High-Quality Batteries: Invest in reliable, long-lasting rechargeable or alkaline batteries (e.g., Energizer Lithium).
- Remote Control Holder: A simple couch-side organizer prevents loss and damage.
- IR Repeater Kit: If your projector is in a cabinet, this device relays the remote signal for hidden equipment.
Maintenance and Care for Your Projector Remote
Proper maintenance prevents most common remote failures. Implement these simple routines to keep your controller functioning like new for years.
Routine Cleaning and Battery Care
Dirt and old batteries are the top causes of remote malfunction. A regular, gentle cleaning schedule is your first line of defense.
Follow this safe cleaning procedure:
- Remove the batteries from the remote compartment.
- Use a dry, soft microfiber cloth to wipe the entire exterior surface.
- For sticky buttons, dip a cotton swab in isopropyl alcohol (70%), wring it out, and gently clean around the edges of each button.
- Allow the remote to dry completely before reinserting batteries.
Proper Storage Solutions to Prevent Loss
A lost remote is an unusable remote. Creating a dedicated home for your controller is a simple but highly effective habit.
Effective storage strategies include:
- Designated Caddy: Use a small decorative bowl or a remote control caddy placed on a side table.
- Adhesive Holder: Mount a simple silicone remote holder to the side of your couch or bed frame.
- Technology Tray: Implement a “charging station” tray that holds the remote, projector glasses, and other accessories.
When to Repair vs. Replace Your Remote
Not every broken remote needs to be thrown away. Evaluate the damage to make a cost-effective decision.
Consider this decision matrix:
- Repair If: Buttons are sticky (cleanable), battery contacts are corroded (can be cleaned with vinegar), or it’s a simple universal remote programming issue.
- Replace If: The infrared LED is broken, the circuit board is cracked, the casing is shattered, or repair costs approach 50% of a new remote’s price.
- Upgrade If: You desire new features like backlighting, macro commands, or control over additional devices in your setup.
Expert User Tips and Hidden Features
Unlock the full potential of your Byintek P20 remote. These pro tips and lesser-known functions can significantly enhance your daily user experience.
Mastering Keystone and Focus Adjustments
The remote provides quick digital correction for a perfect picture. Understanding these buttons saves time during setup.
For optimal results:
- Use Keystone Last: Physically position the projector as squarely as possible first. Use the digital keystone buttons only for minor final adjustments to avoid image quality loss.
- Focus Precisely: Display a test image with fine text. Use the remote’s focus buttons slowly until the text is razor-sharp.
- Memory Function: Some models save your last keystone and focus settings per input source, automatically applying them next time.
Navigating Menus and Settings Efficiently
Speed up configuration by learning shortcut commands. The menu structure can be navigated faster with a few key techniques.
Efficient navigation tips:
- Press the “Menu” button once to enter settings. Use the directional pad to move between icons or lists.
- Hold down the “Right” or “Left” arrow in slider settings (like brightness) to change values rapidly.
- Use the “Return” or “Back” button to exit sub-menus instead of cycling through all options.
Leveraging the Remote for Media Playback
Your remote isn’t just for turning the projector on. It can control media played directly from the projector’s USB port.
When playing files via USB:
- Play/Pause: The “OK” button often serves as a play/pause toggle during video playback.
- Skip Chapters/Scenes: Use the Left and Right arrow buttons to skip backward or forward.
- Access File Browser: The “Source” or “Input” button can cycle to USB mode, where the directional pad navigates folders.
Safety, Warranty, and Support Information
Protect your investment and know your rights. This section covers important safety guidelines, warranty details, and how to get official help.
Important Safety and Usage Guidelines
Using your remote correctly ensures safety and longevity. Avoid common mistakes that can lead to damage or hazards.
Critical safety rules include:
- Battery Safety: Never mix old and new batteries or different battery types (alkaline with lithium).
- Liquid Exposure: Keep the remote away from drinks and humid environments to prevent internal corrosion.
- Physical Stress: Avoid dropping the remote or placing heavy objects on it, which can crack the internal circuit board.
Understanding Your Remote’s Warranty Coverage
Warranty terms vary by where and how you purchased the remote. Knowing your coverage can save money on replacements.
Typical warranty scenarios:
| Purchase Source | Typical Warranty | Claim Process |
|---|---|---|
| Official Byintek Store | 90 days to 1 year | Contact seller with proof of purchase (invoice/order number). |
| Major Retailer (Amazon, Walmart) | 30-day return policy, possible mfr. warranty | Use retailer’s return portal first, then contact manufacturer. |
| Third-Party Seller | Varies widely; may be “as-is” | Check seller’s policy page before purchasing. |
How to Contact Byintek Customer Support
For issues beyond basic troubleshooting, official support is your best resource. Have your information ready for a faster resolution.
Prepare these items before contacting support:
- Product Details: The projector model (P20) and the remote’s model number (often on a sticker inside the battery compartment).
- Proof of Purchase: A digital or physical copy of your sales receipt or order confirmation.
- Problem Description: A clear summary of the issue, the troubleshooting steps you’ve already tried, and any error messages.
Contact methods are typically found on the official Byintek website, including email support or a contact form.
Conclusion: Mastering Your Byintek Projector P20 Remote
Your Byintek P20 remote is the key to a seamless viewing experience. This guide has provided solutions for setup, troubleshooting, and advanced control.
The best practice is regular maintenance and having a backup control plan. This ensures you’re never locked out of your projector’s features.
Review the sections on replacement products and smartphone apps to prepare for any situation. Take action to secure your preferred backup method today.
With this knowledge, you can confidently enjoy your home theater, knowing you have complete control.
Frequently Asked Questions about the Byintek P20 Remote
What is the best universal remote for Byintek P20 projector?
The Logitech Harmony 665 is the best premium universal remote for the Byintek P20. It offers advanced macro functions to control multiple devices with one button. This creates a seamless home theater experience.
For a budget-friendly option, the SUPERNIGHT Universal Projector Remote is a reliable choice. It requires manual code programming but provides broad compatibility and essential functions at a lower cost.
How to program a universal remote to a Byintek projector?
First, turn on your Byintek P20 projector. Press and hold the “Setup” button on your universal remote until the indicator light stays on. Then, enter the manufacturer code for Byintek, such as 1756 or 1175.
Finally, press the power button to test if the projector turns off. If it doesn’t work, repeat the process with another common code listed in your universal remote’s manual until you find a match.
Why is my Byintek remote not working even with new batteries?
This is often due to a poor infrared signal path or internal damage. Ensure you are pointing the remote directly at the projector’s front sensor from within 20 feet. Remove any obstacles blocking the path.
If the line of sight is clear, the internal infrared LED may be broken. Try using your smartphone camera to see if the LED lights up when pressing buttons. No light indicates a need for replacement.
What to do if I lost my Byintek P20 remote control?
First, try using a universal remote as an immediate replacement, as detailed in our programming section. You can also explore smartphone remote apps that use an IR blaster, if your phone has one.
For a long-term solution, purchase an official Byintek P20 replacement remote from their website or authorized seller. This guarantees full compatibility without any programming hassle.
How do I clean a sticky Byintek projector remote?
Remove the batteries first. Dampen a cotton swab with a small amount of isopropyl alcohol (70%). Gently clean around the edges of the sticky button to dissolve any spilled residue.
Wipe the area with a dry cloth and let the remote air dry completely for 30 minutes before reinserting batteries. Avoid pouring liquid directly onto the remote or inside the button mechanisms.
Can I use my phone as a remote for Byintek P20?
Yes, if your smartphone has a built-in infrared (IR) blaster. Download a universal remote app like “Sure Universal” and select “Byintek” or “Projector” as the device type. Follow the in-app setup instructions.
If your phone lacks an IR blaster, this method will not work. Instead, check if your projector model supports Wi-Fi control via a dedicated manufacturer’s app, though this is less common on the P20.
Where is the reset button on the Byintek P20 remote?
There is no physical reset button on the remote itself. To reset the connection, you reset the projector. Unplug the projector from power for 60 seconds, then plug it back in.
For the remote, the closest action is removing the batteries for a full minute to clear its memory. Reinsert the batteries and try pairing it again by pointing it at the projector and pressing the power button.
What are the most important buttons on the P20 remote?
The most critical buttons are Power, Source/Input, and the Navigation Arrows with OK. These control turning the device on, switching between HDMI/USB, and navigating all on-screen menus.
For picture setup, the dedicated Keystone and Focus buttons are essential for adjusting image shape and clarity. The Menu and Return buttons are also vital for accessing and exiting all settings.
4K Projector with HDR10+: Ultimate Guide to Stunning Home Theater Visuals in 2026
Can You Put HID in Halogen Projectors? (Complete Guide)Can You Use a Projector Without a Laptop? 5 Easy Alternatives to Try Today
This website is a participant in the Amazon Services LLC Associates Program, an affiliate advertising program designed to provide a means for us to earn fees by linking to Amazon.com and affiliated sites.