
This website is a participant in the Amazon Services LLC Associates Program, an affiliate advertising program designed to provide a means for us to earn fees by linking to Amazon.com and affiliated sites.
To replace an Epson projector lamp 8350, turn off and unplug the projector, allow the lamp to cool completely, remove the lamp cover, install the correct replacement lamp, and reset the lamp timer. The Epson PowerLite Home Cinema 8350 uses the genuine V13H010L49 replacement lamp, according to Epson’s product documentation.
Is your Epson 8350 producing a noticeably darker image, displaying a lamp replacement warning, or showing a flashing lamp indicator? These are common signs that the projection lamp has reached the end of its useful life. Epson specifies lamp life of up to 4,000 hours, although actual life varies depending on operating mode, environmental conditions, and usage.
Fortunately, replacing the lamp is a user-serviceable maintenance task when performed carefully. The most important safety precaution is to let the projector cool for about one hour before opening the lamp compartment. You should also avoid touching the glass portion of the new lamp with bare hands because oils from your skin can shorten lamp life.
In this guide, you’ll learn how to identify the correct Epson 8350 lamp, safely remove the old lamp, install the replacement, reset the lamp usage timer, and avoid common installation mistakes.
Best for Replacing an Epson Projector Lamp 8350
Choosing the correct replacement lamp is the most important step before opening your Epson PowerLite Home Cinema 8350. Epson identifies V13H010L49 (ELPLP49) as the replacement lamp for the 8350, and its specifications list a 200W UHE E-TORL lamp.
Genuine Epson ELPLP49 / V13H010L49 Replacement Lamp
Why we picked it ?
The genuine Epson ELPLP49 is specifically designed for the Home Cinema 8350, providing the correct fit, power rating, compatibility, and manufacturer-approved replacement option for reliable installation.

- Waaiyawa only uses original bulbs from OEM manufacturers (UHP, P-VIP, NSH, SHP, HS, UHE and UHM) With durable housing and will fit your machine properly.
- The lifespan Of The Original OEM Bulb is 3 times longer than economic lamps,And can display a very stable light output in 3000-5000 hours.Superior brightness with…
This is the best overall choice when replacing an Epson 8350 lamp because it is the exact part number specified by Epson. The manufacturer lists V13H010L49 as compatible with the PowerLite Home Cinema 8350 and describes the lamp as user-replaceable.
Epson V13H010L49 Lamp Assembly With Housing
Why we picked it ?
A complete V13H010L49 lamp assembly with housing simplifies installation because the replacement lamp arrives mounted correctly, reducing handling of the fragile bulb during installation.

- Projector Lamp Assembly with High Quality Genuine Original OSRAM Bulb inside.
- Superior brightness with high illumination,Perfectly match and compatible for your Projector.
For many users, a complete lamp module is more convenient than replacing only the bare bulb. The Epson 8350’s replacement lamp uses the V13H010L49 designation, so verify that the seller explicitly states compatibility with the Home Cinema 8350 before purchasing.
A complete housing can also make the physical replacement process easier because you are replacing the lamp module rather than transferring a new bulb into the old frame. However, quality varies among third-party replacements, so check the seller’s warranty, bulb origin, and exact model compatibility.
High-Quality V13H010L49-Compatible Replacement Lamp
Why we picked it ?
A reputable compatible V13H010L49 lamp can provide a lower-cost alternative while retaining the correct 200W specification, provided the seller clearly verifies Epson 8350 compatibility.
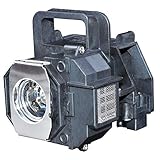
- This Replacement lamp V13H010L49 Projector lamp solution is a 200W replacement that provides the best picture quality, brightness, and lifespan.
- This Replacement lamp is a Compatible with ELPLP49,and with premium housing,minimize installation time to make sure your device is back in action quick!
This option can make sense when a genuine Epson lamp is difficult to source, particularly because the 8350 is an older projector. However, compatibility should never be determined solely by the appearance of the lamp. Look specifically for V13H010L49 or ELPLP49 and confirmation that it works with the Epson PowerLite Home Cinema 8350.
Related Products to Consider
When replacing the lamp, a few related maintenance products can also be useful:
- Epson V13H134A21 replacement air filter — Epson lists this as the replacement filter for the 8350/8700 UB.

- Replacement Air Filter for Epson Projector: ELPAF21 / V13H134A21
- Compatible for Epson PowerLite Home Cinema 8350 6100 6500UB 7100 7500UB 8100 8345 8500UB 8700UB 9100 9350 9500UB 9700UB G5150NL G5200WNL G5350NL EH-TW2800 EH-TW…
- Microfiber cleaning cloth — useful for handling the projector exterior without scratching surfaces.

- Microfiber 16 x 12-inch cleaning cloth (24-pack); ideal for cleaning cars, trucks, boats, and more
- Ultra-soft and non-abrasive car drying towels; will not scratch paints, vinyl, glass, finishes, or other surfaces

- Nitrile or clean cotton gloves — helpful for avoiding fingerprints on the replacement lamp.

- 【Premium Nitrile Material & All-Around Protection】ThxToms Cotton Flocked Nitrile Dishwashing Gloves are made from high-strength nitrile, offering excellent…
- 【Latex-Free & Hypoallergenic — Ideal for Sensitive Skin】Made with 100% latex-free nitrile material, these gloves eliminate the risk of latex allergy reactions…
- Small Phillips screwdriver — needed to remove the lamp-cover and lamp-module screws.
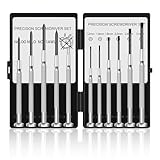
- Different Size: Our tiny screwdriver set includes11 different screwdrivers. 3 Phillips head screwdriver sizes (#00, #0, #1) and 6 flat head screwdriver sizes (1.2mm…
- Ergonomic Design: Our small screwdriver set uses nickel-plated handles that are ergonomically designed to provide a comfortable grip and reduce hand fatigue during…
Important: Do not buy an Epson lamp simply because its model number looks similar. For example, Epson’s ELPLP31/V13H010L31 is designed for different projectors, while the 8350 specifically uses V13H010L49.
The safest approach is therefore to match the exact projector model and lamp part number, rather than relying on generic descriptions such as “Epson 8350 compatible bulb.”
How Do You Know When the Epson 8350 Projector Lamp Needs Replacing?
Knowing when to replace the lamp in an Epson PowerLite Home Cinema 8350 can prevent unexpected shutdowns and a disappointing viewing experience. The most obvious warning sign is a noticeably darker or deteriorating projected image. Epson states that the 8350 uses a 200W UHE E-TORL lamp rated for up to 4,000 hours, although actual lamp life varies with usage, operating mode, and environmental conditions.
Another important warning is the lamp indicator. If the projector’s lamp light flashes red at half-second intervals, Epson identifies this as an indication that the lamp needs replacement. You may also see a “Replace the lamp” message when starting the projector.
Before purchasing a replacement, you can check the accumulated lamp hours through the projector’s Info menu. This gives you a useful indication of how heavily the existing lamp has been used, but lamp hours should not be the only factor you consider because brightness can decline before the maximum rated life is reached.
Look for these common signs:
- Dimmer picture: Images appear less bright than they previously did.
- Image deterioration: Overall projection quality begins to decline.
- Flashing lamp indicator: The lamp warning light flashes red.
- Replacement message: The projector displays a lamp replacement warning.
- High lamp-hour count: The lamp has approached or exceeded its expected service life.
If several of these symptoms appear together, replacing the lamp is generally more appropriate than continuing to operate an aging bulb. For the Epson 8350, the correct genuine replacement is V13H010L49 (ELPLP49).
Most importantly, do not immediately open the projector after switching it off. The lamp becomes extremely hot during operation, so Epson recommends allowing it to cool completely before replacement.
What You Need Before Replacing the Epson 8350 Projector Lamp
Before replacing the Epson 8350 projector lamp, gather the correct replacement lamp and a few basic tools so the job can be completed safely and without unnecessary interruptions. Epson specifies V13H010L49 as the replacement lamp for the PowerLite Home Cinema 8350.
The most important item is a genuine or properly verified V13H010L49/ELPLP49 lamp. Check the part number before installation because a lamp that looks similar may not be electrically or physically compatible with the projector.
You should also have the following items ready:
- Replacement Epson V13H010L49 lamp — the correct replacement part for the 8350.
- Phillips screwdriver — useful for loosening and tightening the lamp-module screws.
- Clean cloth or gloves — helps prevent fingerprints and oils from contacting the lamp glass.
- A stable, well-lit work area — gives you enough visibility to remove and install the lamp carefully.
- Approximately one hour of cooling time — the lamp must be completely cool before you begin.
Epson specifically warns against touching the glass portion of the replacement lamp with bare hands because oils from your skin can shorten lamp life. The manufacturer’s instructions also recommend allowing the projector to cool fully, approximately one hour, before replacing the lamp.
Before starting, shut the projector down normally and wait until its power indicator has stopped flashing. Then switch off the main power switch on the rear and unplug the power cord and other connected cables.
It is also worth inspecting the air filter while the projector is open. Epson lists V13H134A21 as the replacement air-filter part, and keeping the projector’s ventilation system clean can help maintain proper operating conditions.
Finally, keep the old lamp contained until you can dispose of it according to applicable local requirements. Once everything is prepared and the projector is completely cool, you can move on to removing the old lamp module.
How to Remove the Old Epson 8350 Projector Lamp
Removing the old Epson 8350 projector lamp is straightforward, but safety should come first because the lamp becomes extremely hot during normal operation. Epson recommends shutting the projector down, disconnecting the power and cables, and allowing approximately one hour for the lamp to cool completely before opening the lamp compartment.
Once the projector is completely cool, place it on a stable surface where you can comfortably access the lamp cover. Then follow these steps:
- Turn the projector off normally. Press the power button and wait until the power indicator has stopped flashing.
- Switch off the rear power switch. This provides an additional layer of protection before you disconnect the projector.
- Unplug the power cord and connected cables. Do not attempt to replace the lamp while the projector remains connected to power.
- Wait approximately one hour. Even after shutdown, the lamp can remain dangerously hot for some time.
- Remove the lamp cover. Insert the supplied screwdriver, or a suitable similar tool, into the release slot at the rear of the projector and lift the cover away.
- Loosen the two lamp screws. These screws secure the lamp assembly and are designed to remain attached rather than coming completely out.
- Pull the lamp straight out. Hold the lamp assembly by its designated handle or housing and carefully remove it from the projector.
Avoid touching or disturbing other internal components. Epson specifically identifies the lamp and air filter as user-replaceable components and advises against attempting other internal repairs yourself.
If the old lamp has actually broken, use extra caution because small glass fragments may remain inside the projector. The lamp also contains mercury, so follow applicable local disposal or recycling requirements rather than placing it in ordinary household trash.
After removing the old module, keep the replacement V13H010L49/ELPLP49 nearby and prepare to install it without touching its glass portion. Epson lists V13H010L49 as the replacement lamp for the PowerLite Home Cinema 8350.
How to Install the New Epson 8350 Projector Lamp
Installing the new Epson 8350 projector lamp is essentially the reverse of removing the old module, but careful handling is important. The Epson PowerLite Home Cinema 8350 uses the V13H010L49 (ELPLP49) replacement lamp, and Epson identifies this lamp as user-replaceable.
Before handling the new lamp, make sure the projector is completely cool and disconnected from power. Use a clean cloth or glove when handling the lamp and avoid touching the glass portion with your fingers, since Epson warns that residue from skin oils can contribute to premature lamp failure.
Follow these installation steps:
- Inspect the replacement lamp. Check the V13H010L49/ELPLP49 part number and make sure the housing and electrical contacts appear undamaged.
- Position the lamp correctly. Hold the lamp by its handle or housing and gently lower it into the empty lamp compartment.
- Seat the lamp fully. Make sure the module sits firmly in its designated position rather than resting at an angle.
- Tighten the two lamp screws. Secure the replacement module without overtightening the screws.
- Replace the lamp cover. Position the cover correctly and secure it. The projector will not operate if the lamp cover is open or improperly secured.
- Reconnect the projector. Plug the power cord back in and switch on the rear power switch.
- Turn on the projector. Allow it to start normally before checking the projected image.
After installation, you should reset the lamp usage timer so the projector begins tracking the new lamp from the correct baseline. Epson’s instructions place the timer-reset procedure immediately after lamp installation.
Do not reset the timer before installing a new lamp simply to remove a warning. The reset is intended to be performed after the replacement lamp has been installed. Once the timer has been reset, check the image for normal brightness and confirm that the projector starts without a lamp warning.
How to Reset the Epson 8350 Lamp Timer After Replacement
After installing the new lamp, you should reset the Epson 8350 lamp usage timer so the projector can accurately track the operating time of the replacement lamp. Epson specifically instructs users to reset the timer only after installing a new lamp; resetting it without replacing the lamp would make the displayed lamp-hours information inaccurate.
The reset process is simple and can be completed using either the projector’s control panel or remote control. First, reconnect the projector, switch on the power switch at the rear, and press the Power button. Allow the projector to start normally before accessing the menu.
Follow these steps:
- Press the Menu button on the projector or remote control.
- Open the Reset menu using the navigation buttons.
- Select Reset Lamp Hours.
- When the confirmation prompt appears, highlight Yes.
- Press Enter to confirm the reset.
- Press Menu to exit the settings screen.
After the reset, the lamp timer will begin tracking the newly installed lamp. The Epson manual notes that the display can remain at 0H until the projector has accumulated at least 10 hours of lamp use, so don’t be concerned if the timer does not immediately begin displaying individual operating hours.
You can later check the accumulated lamp hours through the Info menu. The same screen provides information about the projector’s current operating status and other display information.
Important Lamp-Timer Reminder
Do not use Reset Lamp Hours as a way to clear a lamp warning while continuing to use an old lamp. The timer is a maintenance counter, not a way to extend the physical life of the bulb. Epson specifically says the timer should be reset when a new projector lamp is installed.
Once the timer has been reset, test the projector by displaying a familiar image or video. Check that the picture is bright and stable, that there are no unusual lamp warnings, and that the projector operates normally. If the replacement lamp does not illuminate or the projector reports an error, switch it off and check that the lamp and lamp cover are properly seated before attempting further troubleshooting.
Common Mistakes to Avoid When Replacing an Epson 8350 Projector Lamp
Replacing the Epson 8350 projector lamp is relatively simple, but several mistakes can damage the new lamp or create unnecessary safety risks. Following Epson’s original maintenance instructions closely is the best way to avoid problems.
Replacing the Lamp While It Is Still Hot
The most serious mistake is opening the projector immediately after use. Epson recommends switching off and unplugging the projector and waiting about one hour so the lamp can cool completely before replacement.
Touching the Lamp Glass
Avoid touching the glass portion of the new lamp with bare fingers. Oils and residue from your skin can shorten lamp life, so handle the lamp by its housing or use a clean cloth or suitable gloves.
Buying the Wrong Replacement Lamp
The Epson 8350 requires lamp part number V13H010L49, also identified as ELPLP49. Check the exact part number before purchasing rather than choosing a lamp based only on appearance or a generic “Epson compatible” description. Epson’s official product page confirms compatibility with the PowerLite Home Cinema 8350.
Leaving the Lamp Cover Loose
The lamp cover must be properly secured after installation. Epson’s documentation warns that the projector will not operate if the lamp cover is open or loose.
Forgetting to Reset the Lamp Timer
After installing the new lamp, reset the lamp usage timer through the projector’s Reset menu. This allows the projector to track the replacement lamp correctly; Epson’s instructions specifically place this step after lamp installation.
Resetting the Timer Without Replacing the Lamp
Do not reset the lamp counter simply to clear a warning while continuing to use an old bulb. The timer is intended to track a newly installed lamp, not extend the physical life of an aging one.
Finally, dispose of the old lamp responsibly. The Epson 8350 manual notes that its lamp contains mercury and should be handled according to applicable local disposal or recycling requirements rather than simply being placed in household trash.
Taking a few extra minutes to cool the projector, verify the correct V13H010L49/ELPLP49 lamp, handle it carefully, secure the cover, and reset the timer can make the replacement process considerably safer and more reliable.
Conclusion
Replacing an Epson 8350 projector lamp is a manageable maintenance task when you follow the manufacturer’s safety and installation instructions carefully. The PowerLite Home Cinema 8350 uses the V13H010L49 (ELPLP49) replacement lamp, and Epson confirms that the lamp is user-replaceable.
The most important steps are allowing the old lamp to cool completely, disconnecting the projector from power, installing the replacement without touching the lamp glass, securely replacing the lamp cover, and resetting the lamp timer afterward. Epson also recommends monitoring lamp performance because image deterioration, a lamp warning indicator, or a replacement message can indicate that the lamp needs attention.
With the correct V13H010L49/ELPLP49 lamp and careful handling, you can restore your Epson 8350’s brightness and continue enjoying your home theater projector with confidence.
Frequently Asked Questions About How to Replace an Epson Projector Lamp 8350
How often should I replace the Epson 8350 projector lamp?
The Epson 8350 lamp is rated for up to 4,000 hours, although actual lamp life varies according to operating mode, environment, and usage. Epson recommends replacement when the projected image becomes darker or deteriorates, the lamp indicator flashes red, or a “Replace the lamp” message appears.
What replacement lamp does the Epson 8350 use?
The correct replacement lamp is V13H010L49, also identified as ELPLP49. Epson’s official accessory information specifically lists this lamp as compatible with the PowerLite Home Cinema 8350.
How long should I let the Epson 8350 cool before changing the lamp?
Allow the projector to cool for approximately one hour after shutting it down and unplugging it. The lamp becomes extremely hot during operation, so opening the lamp compartment too soon can create a burn hazard.
Can I touch the glass on the new Epson 8350 lamp?
No. Avoid touching the glass portion of the replacement lamp with your bare fingers. Epson explains that oils left by your hands can shorten lamp life, so handle the lamp by its housing or use a clean cloth or glove.
Do I need to reset the lamp timer after replacement?
Yes. After installing the new lamp, use the projector’s Reset menu and select Reset Lamp Hours. The timer should be reset only after installing a replacement lamp. Epson’s instructions note that the timer can display 0H until the new lamp has been used for at least 10 hours.
What if the Epson 8350 does not turn on after replacing the lamp?
First, switch the projector off and disconnect it from power. Check that the replacement lamp is seated correctly, its screws are secure, and the lamp cover is properly installed because Epson states that the projector will not operate when the lamp cover is open or loose.
Should I replace the air filter at the same time?
It is worth inspecting the air filter whenever you replace the lamp. Epson lists V13H134A21 as the replacement air filter for the 8350, so replacing a dirty or worn filter can be sensible maintenance.
Can I install only the bulb instead of the complete lamp assembly?
Replacement options vary, but the safest approach is to use the correct V13H010L49/ELPLP49 lamp assembly and follow Epson’s installation instructions. This reduces the need to transfer a bulb between housings and minimizes unnecessary handling of the fragile lamp.
How do I dispose of the old Epson 8350 lamp?
Do not automatically place the old lamp in household trash. Epson’s documentation states that the lamp contains mercury and recommends following applicable local regulations for disposal or recycling.
Is replacing the Epson 8350 lamp difficult?
For most users, it is a straightforward maintenance procedure. The basic process involves cooling and unplugging the projector, removing the lamp cover, loosening two retaining screws, pulling out the old lamp, installing the new lamp, securing the cover, and resetting the lamp timer.
This website is a participant in the Amazon Services LLC Associates Program, an affiliate advertising program designed to provide a means for us to earn fees by linking to Amazon.com and affiliated sites.