This website is a participant in the Amazon Services LLC Associates Program, an affiliate advertising program designed to provide a means for us to earn fees by linking to Amazon.com and affiliated sites.
Struggling to fit a big screen into a small space? A projector setup for studio apartment living is the ultimate solution for maximizing your square footage without sacrificing cinematic quality. This approach transforms any blank wall into an immersive entertainment hub while keeping your floor plan clutter-free.
In this complete guide, you will discover expert tips for selecting the right short-throw projector, mastering screen placement in tight corners, and hiding cables without drilling. Proven methods for optimizing sound and light in compact rooms are also covered. Read on to unlock your studio’s full entertainment potential.
Best Projectors for Studio Apartment Setup – Detailed Comparison
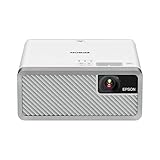
Epson EF-100 Mini-Laser Projector – Best Overall Choice
The Epson EF-100 is a compact laser projector ideal for tight studio spaces. It delivers sharp 1080p resolution with 2,000 lumens, making it viewable even with ambient light. Its ultra-short throw distance lets you place it inches from the wall, saving valuable floor space.
- STUNNING PICTURE QUALITY – Imagine an incredibly bright and colorful…
- INCLUDED ANDROID TV – Built-in Android TV with a simple-to-use remote…
- INTEGRATED AUDIO SYSTEM – Internal high-quality bass-reflex speaker for…
BenQ GV30 Portable Projector – Best for Flexibility
The BenQ GV30 features a unique 135-degree rotating lens, perfect for projecting onto ceilings or angled walls in small apartments. Its built-in battery and 2.1-channel speaker system eliminate the need for extra cables or speakers. This is the best option for renters who move frequently.
- Portable Entertainment: Compact design for outdoor movies, camping, travel…
- ALWAYS SQUARED IMAGES: Auto Focus, Auto 2D Keystone & Rotation for…
- UPGRADED ENTERTAINMENT HUB: This TV Projector comes with Built-in Google TV…
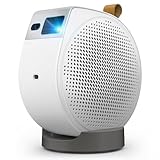
Anker Nebula Capsule Air – Best Ultra-Compact Design
The Anker Nebula Capsule Air is a soda-can-sized projector with Android TV built in. Its 200 ANSI lumens are ideal for dark studio rooms, and its auto-keystone correction simplifies setup. This is the recommended choice for minimalists who prioritize portability and streaming convenience.

- Super-Sized Screen, Portable Design: Capsule 3 is an all-new ultra-portable…
- Take the Big Screen Anywhere: With a max screen size of 120 inches, Capsule…
- Next-Level Image Quality: The 1080p display with 200 Lumens of brightness…
How to Choose the Right Projector Setup for Studio Apartment Walls
Selecting the right projector for a studio apartment requires careful consideration of room dimensions, lighting conditions, and wall space. Your goal is to avoid bulky equipment while still delivering a crisp, immersive image. The following factors will guide you toward the perfect compact solution.
Understanding Throw Distance in Small Rooms
Throw distance determines how far the projector must sit from the wall to produce a large image. In a studio apartment, a short-throw or ultra-short-throw projector is essential, as it can project a 100-inch screen from just a few feet away.
- Standard throw: Requires 8–12 feet of space for a large image. Not ideal for studios.
- Short throw: Needs only 3–6 feet. A great middle ground for most layouts.
- Ultra-short throw: Sits inches from the wall. The best option for tight corners and small living areas.
Managing Ambient Light for Better Picture Quality
Most studio apartments have large windows or open floor plans that let in significant light. A projector with at least 2,000 ANSI lumens is recommended to maintain visibility during daytime viewing. Pairing it with blackout curtains or a high-gain screen further improves contrast and color accuracy in bright conditions.
Maximizing Wall Space Without a Screen
If you lack room for a traditional screen, a clean, flat white wall works perfectly. Ensure the wall is free of texture or imperfections to avoid distorting the image. For renters, peel-and-stick projector paint or a retractable floor screen offers a non-permanent, high-quality solution that disappears when not in use.
Step-by-Step Guide to Installing Your Projector Setup in a Studio Apartment
Installing a projector in a studio apartment requires a strategic approach to avoid clutter and ensure optimal viewing. Follow this step-by-step process to achieve a clean, professional-looking setup that blends seamlessly with your living space. Each step addresses common pain points for small-room owners.
Step 1: Choose the Perfect Mounting Location
Your mounting location depends on your projector’s throw distance and your room’s layout. For ultra-short-throw projectors, place the unit on a low media console directly below the wall. For standard projectors, a ceiling mount is the best option to keep floors clear and prevent tripping hazards.
- Ceiling mount: Ideal for standard throw projectors. Frees up floor space entirely.
- Wall shelf: A floating shelf at eye level works well for short-throw models.
- Mobile cart: Best for renters who want flexibility to move the projector between rooms.
Step 2: Manage Cables for a Clean Look
Visible cables ruin the aesthetic of a small apartment. Use cable raceways or cord covers that match your wall color to hide wires neatly. For a wireless setup, invest in a streaming stick like a Chromecast or Fire TV Stick to eliminate HDMI cable runs from your media source.
Step 3: Optimize Audio Without Extra Speakers
Studio apartments often lack space for a full surround sound system. Look for projectors with built-in Bluetooth to connect to a single, compact soundbar placed under the screen. Alternatively, many modern projectors like the BenQ GV30 feature high-quality built-in speakers that reduce the need for external audio gear entirely.
Essential Accessories for a Streamlined Projector Setup in a Studio Apartment
Even the best projector needs the right accessories to function perfectly in a compact living space. Choosing the correct add-ons can dramatically improve image quality, sound, and overall convenience. Below are the must-have items that complete your studio projector system.
Projector Screens vs. Painted Walls – What Works Best?
A dedicated screen enhances contrast and brightness, but a white wall is a viable zero-cost alternative. For studio apartments, a pull-down or retractable screen offers the best of both worlds by hiding away when not in use. Fixed-frame screens are generally too permanent and bulky for small rental spaces.
| Screen Type | Best For | Space Required |
|---|---|---|
| Pull-down Screen | Renters needing flexibility | Minimal wall space |
| Fixed Frame | Permanent home theaters | Dedicated wall area |
| Projector Paint | Seamless wall integration | No physical footprint |
Smart Streaming Devices for Cord-Free Viewing
Eliminate the need for a separate laptop or Blu-ray player by using a streaming stick. Devices like the Amazon Fire TV Stick 4K or Roku Streaming Stick+ plug directly into the projector’s HDMI port and offer access to Netflix, Hulu, and YouTube. This keeps your setup minimal and your cables hidden.
Compact Sound Solutions for Small Spaces
While projector speakers are convenient, they often lack depth. A Bluetooth soundbar like the Bose Solo 5 or Sonos Beam provides rich audio without taking up floor space. Place it directly under the projected image on a shelf or media console for a clean, integrated look.
Common Mistakes to Avoid When Planning a Projector Setup for a Studio Apartment
Many first-time buyers make errors that ruin their viewing experience or damage their equipment. Avoiding these common pitfalls will save you time, money, and frustration. Learn from these mistakes to ensure your small-space projector system performs flawlessly from day one.
Ignoring Keystone Correction and Lens Shift
Placing a projector off-center in a small room is often unavoidable. Relying heavily on digital keystone correction can degrade image quality by reducing resolution and creating halos around text. Instead, prioritize projectors with optical lens shift, which physically moves the lens to adjust the image without losing clarity.
- Digital keystone: Convenient but lowers picture sharpness. Use as a last resort.
- Optical lens shift: Maintains full resolution and image integrity. Ideal for off-center placements.
- Pro tip: Physically center the projector on the wall whenever possible for the best results.
Overlooking Ventilation and Heat Management
Projectors generate significant heat, especially during long movie marathons. Placing a projector in a closed cabinet or against a wall can cause overheating and shorten its lifespan. Always ensure at least 6 inches of clearance around the ventilation vents to allow proper airflow and prevent automatic shutdowns.
Forgetting About Ambient Light Control
Many users buy a high-lumen projector but fail to control room lighting, resulting in a washed-out image. Even a 3,000-lumen projector struggles against direct sunlight. Install blackout curtains or cellular shades to block 90% of external light, transforming your studio into a true home theater environment during the day.
Budget-Friendly Tips for Your Projector Setup in a Studio Apartment
Creating a high-quality home theater in a small space doesn’t have to break the bank. With smart shopping and a few DIY tricks, you can achieve a premium experience for under $500. These budget-friendly strategies focus on maximizing value without sacrificing performance.
Finding Affordable Projectors Under $400
You don’t need a flagship model to enjoy crisp 1080p visuals in a studio apartment. Brands like XGIMI, Vankyo, and Yaber offer reliable projectors with built-in speakers and short-throw capabilities for under $400. Look for models with at least 4.5-star ratings and a minimum of 300 ANSI lumens for decent daytime viewing.
- Vankyo Leisure 470: 1080p support, 300 lumens, under $150. Great for dark rooms.
- Yaber Pro U10: 6500 lumens (LED), keystone correction, under $200. Ideal for budget buyers.
- XGIMI Mogo Pro: Auto-focus, Android TV, 400 lumens, under $400. Best feature-rich option.
DIY Screen Solutions That Cost Under $50
A professional screen can cost hundreds, but a high-quality DIY alternative works almost as well. Purchase a blackout cloth or white spandex fabric from a local hardware store and stretch it over a simple wooden frame. This creates a smooth, wrinkle-free surface that rivals entry-level screens at a fraction of the price.
Using Free Content Sources to Save on Streaming
Maximize your projector setup without monthly subscription fees by using free streaming platforms. Services like Pluto TV, Tubi, and YouTube offer thousands of movies and shows at no cost. Simply connect your streaming stick to the projector and enjoy unlimited content without adding to your monthly bills.
How to Optimize Sound and Lighting for Your Studio Apartment Projector Setup
A great picture is only half the experience; sound and lighting make or break your home theater. In a studio apartment, where the living area and bedroom share one space, balancing these elements is crucial. Follow these expert tips to create an immersive environment without disturbing your daily routine.
Positioning Speakers for Maximum Impact in a Small Room
Traditional surround sound systems require rear speakers and subwoofers that clutter a studio. Instead, invest in a single high-quality soundbar with Dolby Atmos, like the Sonos Beam or Samsung HW-B650. Place it directly under the screen to create virtual surround sound that bounces audio off your walls.
- Soundbar placement: Center it below the projected image for coherent dialogue and effects.
- Subwoofer tip: Place a wireless subwoofer under your bed or sofa to hide it while preserving bass.
- Volume control: Use a projector with Bluetooth to adjust audio levels from your streaming device.
Controlling Ambient Light for Daytime and Nighttime Viewing
Studio apartments often lack separate rooms for sleeping and watching movies. Use layered lighting solutions like dimmable floor lamps and smart bulbs to create a theater-like atmosphere. For daytime viewing, blackout curtains are essential; for nighttime, bias lighting behind the screen reduces eye strain and improves perceived contrast.
Using Smart Home Automation for One-Tap Setup
Simplify your viewing experience by integrating your projector with smart home devices. Connect your projector, soundbar, and blackout shades to a smart hub like Amazon Alexa or Google Home. With a single voice command like “Movie Time,” your lights dim, curtains close, and projector turns on instantly.
Renter-Friendly Projector Setup for Studio Apartment – No Drilling Required
Many studio dwellers cannot drill into walls due to lease agreements or landlord restrictions. Fortunately, you can achieve a secure and polished projector setup without a single screw. These renter-friendly solutions keep your security deposit safe while delivering a theater-quality experience.
Using Tension Rods and Command Strips for Mounting
Heavy-duty Command Picture Hanging Strips can hold lightweight projectors and screens securely against walls without causing damage. For a retractable screen, install a tension rod between two walls or inside a closet frame to hang the screen when needed. Both methods are completely removable and leave zero marks behind.
- Command strips: Use for mounting small projectors (under 5 lbs) and cable clips.
- Tension rod: Ideal for hanging a pull-down screen in a doorway or alcove.
- Adhesive hooks: Perfect for routing cables along baseboards and ceiling corners.
Choosing a Floor-Standing Projector Cart
A mobile projector cart is the ultimate no-drill solution for renters. These adjustable stands hold your projector at the perfect height and can be rolled out of the way when not in use. Look for carts with locking wheels and cable management trays to keep your setup stable and tidy.
Protecting Walls with Removable Screen Paint
If you want a dedicated projection surface without a physical screen, use removable projector wall paint like Goo Systems’ Paint-on Screen. This water-based coating applies directly to your wall and peels off cleanly when you move out. It enhances brightness and contrast significantly compared to a standard white wall.
Conclusion: Mastering Your Projector Setup for a Studio Apartment
A well-planned projector setup for studio apartment living transforms your small space into a versatile entertainment hub without sacrificing comfort or style. By choosing the right short-throw projector, managing cables intelligently, and optimizing sound and light, you can enjoy a cinematic experience every day.
The key takeaway is to prioritize flexibility and minimalism. Use renter-friendly mounting solutions, invest in a quality soundbar, and control ambient light to get the most from your system. Start with one of the recommended projectors above and build your setup gradually.
Your studio apartment has more potential than you think. Take the first step today and turn that blank wall into your personal movie theater.
Frequently Asked Questions about Projector Setup for Studio Apartment
What is the best projector for a small studio apartment?
The best projector for a small studio apartment is an ultra-short-throw model with at least 1080p resolution and 2,000 lumens. The Epson EF-100 and BenQ GV30 are top choices due to their compact size and built-in speakers.
These projectors sit close to the wall, eliminating the need for a large room. They also feature auto-keystone correction, making setup quick and hassle-free for renters.
How do I set up a projector in a studio apartment without a screen?
You can project directly onto a clean, flat white wall for a no-screen setup. Ensure the wall is free of texture or imperfections to avoid image distortion.
For better contrast, apply removable projector paint to a section of the wall. Alternatively, use a tension rod to hang a pull-down screen only when needed.
Can I use a projector in a bright studio apartment?
Yes, but you need a projector with at least 2,500 ANSI lumens for daytime viewing. Pair it with blackout curtains to block sunlight and improve image clarity.
For moderate light, a high-gain screen also helps maintain brightness. Avoid projecting near windows and position the screen away from direct light sources.
What is the ideal throw distance for a studio apartment projector?
The ideal throw distance for a studio apartment is under 5 feet for a 100-inch image. Ultra-short-throw projectors require only inches from the wall, making them perfect for tight spaces.
Standard projectors need 8–12 feet, which is rarely available in studios. Always check the throw ratio before purchasing to ensure compatibility with your room size.
How do I hide projector cables in a rental apartment?
Use adhesive cable raceways that match your wall color to hide wires along baseboards and corners. Command strips hold cables securely without damaging paint.
For a wireless setup, invest in a streaming stick like a Fire TV Stick. This eliminates HDMI cables and reduces clutter significantly.
What is the best way to get sound from a projector in a small room?
The best way to get sound is by connecting a Bluetooth soundbar placed directly under the screen. This provides clear dialogue and rich bass without taking up floor space.
If you prefer a minimalist setup, choose a projector with high-quality built-in speakers like the BenQ GV30. This eliminates the need for external audio gear entirely.
Can I mount a projector on the ceiling in a rented studio?
Yes, but only with a no-drill ceiling mount that uses tension rods or adhesive brackets. These options are fully removable and leave no holes behind.
Always check your lease agreement before installing any mount. If drilling is prohibited, a floor-standing cart is a safer and equally effective alternative.
How do I prevent my projector from overheating in a small space?
Ensure at least 6 inches of clearance around all ventilation vents to allow proper airflow. Never place the projector inside a closed cabinet or against a wall.
Use a small USB fan to improve circulation if the room lacks ventilation. Regular cleaning of the air filter also prevents dust buildup and overheating.
Can a Projector Get a Virus?why you need to know
This website is a participant in the Amazon Services LLC Associates Program, an affiliate advertising program designed to provide a means for us to earn fees by linking to Amazon.com and affiliated sites.