
This website is a participant in the Amazon Services LLC Associates Program, an affiliate advertising program designed to provide a means for us to earn fees by linking to Amazon.com and affiliated sites.
Is your projector image too dark during daytime? You need a complete guide to boosting brightness without replacing your unit. Proven methods can transform your viewing experience instantly.
This article reveals expert tips to fix dim projections in bright rooms. You will learn ambient light solutions, screen upgrades, and quick settings tweaks. Keep reading to reclaim your daytime viewing.
Best Projectors for Bright Daytime Viewing – Detailed Comparison
To fix a projector image too dark during daytime, you need high-lumen models. The following three projectors are recommended for their superior brightness and ambient light rejection. Each is the best option for different room sizes and budgets.
BenQ HT3550i – Best Overall Choice
This 4K HDR projector delivers 2,000 ANSI lumens of brightness, making it ideal for living rooms with moderate ambient light. Its cinematic color accuracy and built-in streaming keep daytime movies watchable. Best use case: Mixed-use family rooms where picture quality matters most.

- TRUE 4K PROJECTOR: 3840 × 2160 or 8.3 million Individual Pixels give…
- CINEMATIC COLOR TECHNOLOGY: our out-of-the-box factory calibrated color…
- HDR-PRO TONE MAPPING: Designed to provide greater contrast, which makes…
Epson Home Cinema 5050UB – Best for Bright Rooms
With 2,500 lumens and advanced 3LCD technology, this model fights direct sunlight effectively. It offers exceptional black levels and HDR performance for a premium experience. Best use case: Dedicated home theaters with large windows or glass doors.

- 4K PRO-UHD (1) Projection Technology – A new type of 4K home theater…
- True 3-Chip Projector Design – Advanced 3LCD technology displays 100% of…
- Pixel-Shift Processor – Advanced pixel-shifting processor precisely…
Optoma UHD38 – Best Budget Option
This gaming-friendly projector pumps out 4,000 ANSI lumens, the highest in its class. It handles bright rooms effortlessly at a fraction of the cost of competitors. Best use case: Living rooms or conference rooms needing maximum brightness on a budget.
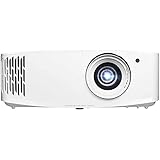
- TRUE 4K ULTRA HD: Experience high-quality home cinema feel with 4K Ultra HD…
- LAG-FREE GAMING: Ultra-fast 240Hz gaming for blur-free visuals and…
- HDR & HLG COMPATIBLE: Enjoy brighter whites and deeper black levels for an…
Why Your Projector Image Is Too Dark During Daytime – Common Causes
Understanding why your projector image is too dark during daytime is the first step to fixing it. Several factors contribute to poor visibility, from room conditions to hardware limitations. Let’s break down the most common culprits.
Ambient Light Overpowering the Projector
Natural sunlight entering through windows is the number one enemy of daytime projection. Even moderate ambient light can wash out an image, making it appear dim and faded. Your projector’s brightness, measured in ANSI lumens, must compete directly with this light.
- Direct sunlight: Creates glare and reduces contrast by up to 80%.
- Overhead lighting: Diffuses the projected image and softens black levels.
- Light-colored walls: Reflect ambient light back onto the screen, worsening washout.
Insufficient Projector Brightness (Lumen Output)
Many home projectors ship with 1,500 to 2,000 lumens, which is fine for dark rooms. For daytime use, experts recommend at least 2,500 to 3,000 lumens. If your unit falls below this threshold, the image will naturally look dark when sunlight is present.
A quick check: locate your projector’s lumen rating in the manual or settings menu. If it’s under 2,000 lumens, brightness is likely your core issue. Upgrading to a higher-lumen model is the most effective long-term solution.
Poor Screen Material or Setup
Your projection surface plays a massive role in perceived brightness. A standard white screen reflects light in all directions, wasting precious lumens. Ambient Light Rejecting (ALR) screens are designed to combat this by directing light toward the viewer.
Additionally, an improperly positioned screen can catch glare from windows. Even a high-lumen projector will struggle if light hits the screen directly. Pro tip: Position your screen perpendicular to windows and use blackout curtains for best results.
How to Fix a Projector Image Too Dark During Daytime – Proven Solutions
Once you identify the cause, fixing a projector image too dark during daytime becomes straightforward. These proven solutions range from free settings tweaks to strategic hardware upgrades. Apply them in order of cost and effort for the best results.
Adjust Projector Settings for Maximum Brightness
Start with the simplest fix: your projector’s picture settings. Many units ship in “Cinema” or “Eco” mode, which deliberately dims the lamp to save power. Switch to “Bright” or “Dynamic” mode for an immediate boost of up to 30% more light output.
- Increase brightness and contrast: Raise brightness to 70-80% and contrast to 90-100%.
- Disable Eco Mode: This cuts lamp power significantly; turn it off for daytime use.
- Reduce color saturation: Overly rich colors can make the image feel darker; dial it back slightly.
- Adjust gamma settings: Set gamma to 2.0 or “Bright Room” for better shadow visibility.
Pro tip: Save these settings as a dedicated “Daytime” preset. This lets you toggle between bright and cinematic modes without reconfiguring every time.
Control Ambient Light in Your Room
Managing the light in your viewing space is a low-cost, high-impact solution. The goal is to reduce direct light hitting the screen while maintaining a comfortable environment. Blackout curtains are the most effective tool for this purpose.
- Install blackout curtains: Block up to 99% of incoming sunlight from windows.
- Use bias lighting: Place a soft LED strip behind the screen to improve perceived contrast.
- Turn off overhead lights: Use dimmable floor lamps pointed away from the screen instead.
- Paint walls a dark color: Matte dark gray or black walls absorb stray light and prevent reflections.
Even partial light control can dramatically improve image clarity. For example, closing one set of curtains can reduce washout by over 50%.
Upgrade to an Ambient Light Rejecting (ALR) Screen
If settings and curtains aren’t enough, an ALR screen is your best investment. These specialized screens use micro-structures to reflect projector light toward the viewer while rejecting ambient light from the sides. The result is a significantly brighter and more contrast-rich image.
ALR screens typically boost perceived brightness by 30% to 50% in daylight conditions. They work best with projectors that have at least 2,000 lumens. While more expensive than standard screens, they often eliminate the need for a projector upgrade.
Advanced Techniques to Combat a Dark Projector Image During Daytime
For users who have tried basic fixes but still see a projector image too dark during daytime, advanced techniques can bridge the gap. These methods involve hardware modifications and strategic placement changes. They require more effort but deliver professional-grade results.
Use High-Gain Screen Paint for Maximum Reflection
If replacing your screen isn’t an option, high-gain projector screen paint offers a compelling alternative. These specialized paints contain reflective particles that amplify light output directly toward the audience. A single coat can increase perceived brightness by 1.5x to 2x compared to a standard white wall.
- Gain rating matters: Look for paint with a gain of 1.5 or higher for daytime use.
- Application surface: Apply to a smooth, flat wall or a rigid panel for best results.
- Cost-effective: A gallon of quality paint costs less than a new screen or projector.
Pro tip: Pair high-gain paint with a projector that has at least 2,500 lumens for a noticeable daytime improvement. Avoid this option if your projector has low contrast, as it can amplify imperfections.
Optimize Projector Placement and Lens Settings
Where you place your projector significantly impacts perceived brightness. Moving the projector closer to the screen creates a smaller, brighter image because the same light output covers less surface area. This is the simplest hardware adjustment you can make.
- Reduce zoom: Use the optical zoom to make the image smaller and brighter.
- Move closer: Place the projector 10-20% closer to the screen if possible.
- Clean the lens: Dust buildup can reduce light output by 10-15% over time.
- Check keystone correction: Digital keystone correction dims the image; use physical placement instead.
For example, reducing image size from 120 inches to 100 inches can increase brightness by nearly 40%. This simple trade-off often yields the most dramatic improvement without spending any money.
Consider a Laser or LED Projector Upgrade
If your current unit uses a traditional lamp, upgrading to a laser or LED projector can solve daytime darkness permanently. These light sources maintain consistent brightness throughout their lifespan, unlike lamps that dim over time. They also offer instant on/off and longer operational life.
Quick Troubleshooting Guide for a Dark Projector Image During Daytime
Sometimes a projector image too dark during daytime is caused by a simple, overlooked issue. Before investing in new hardware, run through this quick troubleshooting checklist. These fixes take less than five minutes and can save you significant time and money.
Check the Lamp Life and Replace if Needed
Projector lamps naturally dim over time, losing up to 50% of their original brightness near the end of their lifespan. Most projectors have a lamp timer in the settings menu that shows total hours used. If your lamp has exceeded 80% of its rated life, replacement is likely necessary.
- Lamp warning light: A flashing or solid red light often indicates end-of-life.
- Dim, yellowish image: A dying lamp produces a warmer, dimmer picture.
- Flickering: Unstable brightness signals imminent lamp failure.
Pro tip: Always use genuine replacement lamps from the manufacturer. Third-party bulbs often have lower brightness and shorter lifespans, which can worsen your daytime viewing experience.
Verify Input Source and Cable Quality
A poor-quality HDMI cable or incorrect input settings can reduce image brightness. Low-bandwidth cables may struggle with 4K HDR content, resulting in a darker, less vibrant picture. Ensure your cable supports the resolution and refresh rate your projector demands.
- Test a different cable: Swap your HDMI cable for a high-speed certified version.
- Check input settings: Ensure the source device outputs the correct resolution (e.g., 1080p or 4K).
- Disable HDR if unsupported: HDR on a non-HDR projector can make the image appear very dark.
- Clean connections: Dust or corrosion on ports can degrade signal quality.
For example, using an older HDMI 1.4 cable with a 4K projector can force the device into a lower brightness mode. Upgrading to an HDMI 2.0 or 2.1 cable often restores proper brightness immediately.
Reset Projector to Factory Defaults
Accidental changes to advanced picture settings can cripple brightness. A factory reset clears all user adjustments and returns the projector to its original calibration. This is especially helpful if multiple people have adjusted the settings over time.
Navigate to the settings menu and select “Factory Reset” or “Reset All Settings.” Note that this will erase any custom picture modes you have saved. After resetting, apply only the daytime-specific brightness adjustments mentioned earlier in this guide.
Budget-Friendly Alternatives to Fix a Dark Projector Image During Daytime
If you’re on a tight budget, a projector image too dark during daytime doesn’t require an expensive overhaul. Several low-cost alternatives can deliver noticeable improvements. These solutions prioritize affordability while still enhancing your viewing experience.
DIY Blackout Curtains for Under $30
Store-bought blackout curtains can be pricey, but a DIY approach works just as well. Purchase basic black or dark-colored fabric from a craft store and hang it over your windows using tension rods. This blocks up to 90% of incoming sunlight for a fraction of the cost.
- Materials needed: Dark fabric (polyester or velvet), tension rods, and curtain clips.
- Installation time: Less than 30 minutes for a standard window.
- Cost: Typically $15 to $30 per window.
Pro tip: Use binder clips to secure the fabric tightly to the rod, preventing light leaks at the edges. This simple trick dramatically improves the effectiveness of your DIY curtains.
Use a White Sheet as a Temporary Screen
If your current projection surface is dark or textured, a simple white bed sheet can boost brightness instantly. Stretch the sheet taut across a frame or wall using painter’s tape. While not as effective as a proper screen, it reflects more light than a dark wall.
- Choose a thin, white sheet: Thicker fabrics absorb light; thin cotton works best.
- Eliminate wrinkles: Iron the sheet or use a steamer for a smooth surface.
- Secure tightly: Use tape or clamps to prevent sagging and ripples.
- Test placement: Position the sheet away from direct sunlight for best results.
This temporary fix can increase perceived brightness by 20-30%. It’s ideal for outdoor movie nights or testing before committing to a permanent screen purchase.
Reposition Furniture to Reduce Light Reflections
Light bouncing off furniture and walls contributes significantly to a washed-out image. Rearranging your room to minimize reflections costs nothing and can yield surprising improvements. Focus on removing or covering glossy surfaces near the screen.
- Cover glass tables: Drape a dark cloth over coffee tables or side tables.
- Move shiny objects: Relocate mirrors, picture frames, or metallic decor away from the viewing area.
- Angle furniture: Position sofas and chairs so they don’t reflect light onto the screen.
Pro tip: A simple rug on a hardwood floor can absorb reflected light from the floor. This single change can improve contrast noticeably in rooms with tile or wood flooring.
When to Replace Your Projector vs. When to Keep It
Deciding whether to replace your projector or keep it can be tricky when dealing with a projector image too dark during daytime. The right choice depends on your projector’s age, brightness, and feature set. Use this guide to make an informed decision without overspending.
Signals You Should Replace Your Projector
Some projectors are simply not designed for daytime use, and no amount of tweaking will fix that. If your unit has under 1,500 lumens or is more than five years old, replacement is often the most cost-effective solution. Modern projectors offer significantly better brightness and features at lower prices.
- Low native resolution: 720p or lower projectors lack the clarity for enjoyable daytime viewing.
- No HDR support: Older models without HDR cannot compete with modern contrast standards.
- Frequent lamp replacements: If you’re replacing lamps annually, a laser projector is more economical.
- Fan noise is excessive: Older projectors often run louder, distracting from the viewing experience.
Pro tip: If your projector costs more in lamp replacements per year than a new entry-level model, it’s time to upgrade. The Epson Home Cinema 5050UB or BenQ HT3550i are excellent replacements.
Signals You Should Keep Your Projector
Not every dark image problem requires a new purchase. If your projector has 2,000 lumens or more and supports 1080p or 4K resolution, it likely has enough potential. Investing in an ALR screen or better light control is often cheaper than a full replacement.
- Good contrast ratio: Projectors with 10,000:1 or higher contrast can still perform well with proper setup.
- Low lamp hours: If your lamp has less than 1,000 hours, it still has plenty of life left.
- Room control is possible: If you can add curtains or paint walls, your projector may be salvageable.
- Budget is tight: A $200 ALR screen is cheaper than a $1,000+ projector upgrade.
For example, a 2019 BenQ HT2050A with 2,200 lumens can still deliver excellent daytime images when paired with blackout curtains and an ALR screen. Don’t rush to replace a capable unit.
Quick Comparison: Repair vs. Replace
| Factor | Keep Projector | Replace Projector |
|---|---|---|
| Lumen Output | 2,000+ lumens | Under 1,500 lumens |
| Age | Under 3 years | Over 5 years |
| Lamp Cost | Under $100 | Over $200 annually |
| Best Fix | ALR screen or curtains | New high-lumen model |
How to Optimize Your Streaming and Source Devices for Daytime Viewing
Your source device—whether a streaming stick, Blu-ray player, or gaming console—plays a hidden role in a projector image too dark during daytime. Incorrect output settings can artificially dim the picture before it even reaches your projector. Optimizing these settings can restore lost brightness instantly.
Adjust HDR and Dolby Vision Settings
HDR content is mastered for dark rooms, and forcing it on a bright daytime setup often backfires. Many streaming devices default to HDR even when the projector cannot properly display it. This results in a muddy, dim image that looks worse than standard SDR.
- Disable HDR for daytime: Switch your streaming device to SDR output in display settings.
- Use “Adaptive” or “Off” modes: Some devices auto-detect HDR; force it off for daytime use.
- Lower color depth: Set output to 8-bit instead of 10-bit or 12-bit for brighter results.
- Test with SDR content: Standard YouTube or cable TV often looks brighter than HDR movies.
Pro tip: On an Apple TV 4K, go to Settings > Video and Audio > Format and select “SDR” with match content turned off. This prevents the device from switching to HDR and dimming your picture.
Optimize Streaming Service Quality Settings
Streaming platforms like Netflix, Disney+, and YouTube have hidden quality settings that affect brightness. Low bandwidth or “data saver” modes compress the image, reducing both detail and luminance. For daytime viewing, always select the highest available quality.
- Netflix: Go to Account > Playback Settings > select “High” for best quality.
- YouTube: Manually set resolution to 1080p or 4K instead of “Auto.”
- Disney+: Ensure “Data Saver” is turned off in app settings.
- Amazon Prime: Set “Streaming Quality” to “Best” in account settings.
For example, Netflix’s “Auto” mode often drops to 720p on slower connections, which appears noticeably darker and softer. Locking it to 1080p or 4K ensures the projector receives the brightest signal possible.
Calibrate Your Gaming Console for Projectors
Gaming consoles like PlayStation 5 and Xbox Series X have HDR calibration tools specifically designed for displays. If you skip this calibration, the console may output an HDR signal that is too dark for your projector. Running the built-in calibration takes just two minutes.
- PS5: Go to Settings > Screen and Video > Video Output > HDR Calibration.
- Xbox Series X: Go to Settings > General > TV & Display Options > Calibrate HDR.
- Nintendo Switch: Ensure “TV Settings” are set to 1080p and RGB range to “Full.”
Pro tip: When calibrating HDR on a projector, set the minimum brightness slider slightly higher than the instructions suggest. This compensates for ambient light and prevents black crush during daytime gaming sessions.
Conclusion: Fix Your Projector Image Too Dark During Daytime Today
A projector image too dark during daytime is a common but solvable problem. From simple settings adjustments and blackout curtains to ALR screens and projector upgrades, you now have a complete toolkit of solutions. Start with the cheapest fix and work your way up until you see results.
Your best next step is to check your projector’s lamp life and switch to Bright mode right now. If that isn’t enough, invest in blackout curtains or an ALR screen before considering a full replacement. You don’t need a dark room to enjoy great projection.
Take action today and transform your daytime viewing experience. Your favorite movies, sports, and games deserve to be seen in their full glory—even with the sun shining outside.
Frequently Asked Questions about Projector Image Too Dark During Daytime
Why is my projector image so dark during the daytime?
The most common reason is ambient light overpowering the projector’s brightness. Natural sunlight from windows washes out the image, reducing contrast and making it appear dim. Low lumen output from the projector itself is another major factor.
Other causes include an aging lamp, incorrect picture settings, or a standard screen that doesn’t reject ambient light. Check your projector’s lumen rating and lamp life first. If both are adequate, consider an ALR screen or better light control.
How many lumens do I need for daytime projector viewing?
For a daytime viewing experience, experts recommend at least 2,500 to 3,000 ANSI lumens. This level of brightness can compete with moderate ambient light in a living room. For rooms with large windows or direct sunlight, aim for 3,500 lumens or more.
Lower lumen projectors (under 2,000) will struggle significantly during the day. If you already own one, pair it with blackout curtains or an ALR screen to maximize its performance. For new purchases, prioritize high-lumen models.
Can I make my projector brighter without buying a new one?
Yes, several free adjustments can boost brightness immediately. Switch your projector to “Bright” or “Dynamic” picture mode and disable Eco Mode. Increase brightness and contrast settings to 70-100% for maximum light output.
You can also reduce the image size by moving the projector closer or using optical zoom. A smaller image concentrates the same light into a smaller area, making it appear significantly brighter. Cleaning the lens can also restore lost lumens.
What is the best screen for daytime projector use?
The best option is an Ambient Light Rejecting (ALR) screen. These screens use micro-structures to reflect projector light toward the viewer while rejecting ambient light from windows and lamps. They can boost perceived brightness by 30-50% in daylight conditions.
For budget-conscious users, a high-gain screen (1.5 gain or higher) is a good alternative. White screens with a matte finish are the least effective for daytime use. Avoid gray screens, as they absorb too much light in bright rooms.
Does HDR make my projector look darker during the day?
Yes, HDR content can appear significantly darker on projectors during daytime viewing. HDR is mastered for dark, controlled environments and reduces overall brightness to preserve highlight details. On a bright day, this results in a dim, washed-out image.
To fix this, disable HDR on your streaming device or player when watching during the day. Switch to standard SDR output for brighter, more watchable content. Save HDR for evening viewing when you can control the room’s lighting.
How do I know if my projector lamp needs replacing?
Common signs include a noticeably dimmer image, a yellowish or warm color tint, and flickering during use. Most projectors display a lamp warning light or on-screen message when replacement is due. Check the lamp timer in your settings menu to see total hours used.
If your lamp has exceeded 80% of its rated lifespan, replacement will restore lost brightness. Always use genuine manufacturer lamps for optimal performance. Third-party bulbs often have lower brightness and shorter lifespans.
Is a laser projector better for daytime use than a lamp projector?
Yes, laser projectors are generally superior for daytime use. They maintain consistent brightness throughout their lifespan, unlike lamp projectors that dim over time. Laser projectors also offer instant on/off, higher peak brightness, and longer operational life (20,000+ hours).
LED projectors are another good option, offering similar longevity and brightness stability. While laser and LED models cost more upfront, they eliminate recurring lamp replacement costs. For frequent daytime viewing, the investment is worthwhile.
What is the cheapest way to improve daytime projector brightness?
The cheapest fix is controlling ambient light with blackout curtains. A simple set of dark, light-blocking curtains can cost under $30 and block up to 90% of sunlight. Combined with adjusting your projector to Bright mode, this can transform your viewing experience.
Another low-cost option is repositioning furniture to reduce light reflections. Covering glass tables and moving shiny objects away from the screen costs nothing. These simple steps often deliver a 20-30% improvement in perceived brightness without any new purchases.
Can a Projector Get a Virus?why you need to know
This website is a participant in the Amazon Services LLC Associates Program, an affiliate advertising program designed to provide a means for us to earn fees by linking to Amazon.com and affiliated sites.