
This website is a participant in the Amazon Services LLC Associates Program, an affiliate advertising program designed to provide a means for us to earn fees by linking to Amazon.com and affiliated sites.
Golf simulator projectors with short throw capability are the essential solution for creating a realistic golf experience in tight rooms. They project a large, bright image from just a few feet away, maximizing your available space. This complete guide will help you choose the perfect model.
These specialized projectors solve the critical problem of ceiling height and depth constraints. You avoid shadows and swing interference while enjoying a crystal-clear simulation. Our expert tips will ensure you get pro-level performance without a massive room.
You will learn how short throw technology works, key features to compare, and our top-rated picks. We cover installation considerations, brightness needs, and budget-friendly options. Transform your limited space into a premier home golf studio.
Best Golf Simulator Projectors for Limited Space – Detailed Comparison
Optoma GT1090HDR – Best Overall Choice
The Optoma GT1090HDR is a top-tier short throw laser projector. It delivers a stunning 4K UHD resolution and 4,200 lumens of brightness for incredible clarity, even in ambient light. Its ultra-short throw ratio allows for a 100-inch image from just 1.5 feet away, making it ideal for rooms with severe depth limitations.
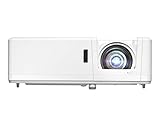
- DEPENDABLE LASER LIGHT SOURCE: DuraCore laser light source eliminates lamp…
- SHORT THROW LENS: Experience a large 120″ image projected from 4′-4″ away…
- 4K HDR INPUT: HDR10 & HLG technologies enable brigher whites and deeper…
BenQ LK936ST – Best for High-End Simulators
Specifically engineered for simulation, the BenQ LK936ST is a laser powerhouse. It offers 5,000 lumens and dedicated golf modes to enhance turf texture and ball tracking. This model provides exceptional color accuracy and low input lag, creating the most immersive and responsive experience for serious golfers.

- UNMATCHED BRIGHTNESS – Experience vibrant visuals with 5100 ANSI lumens…
- ULTIMATE 4K RESOLUTION – Immerse yourself in stunning detail with native 4K…
- LONG-LASTING LASER – Benefit from a reliable laser light source with a…
Epson CO-FH02 – Best Budget-Friendly Option
The Epson CO-FH02 delivers excellent value with 3,000 lumens and Full HD resolution. Its short throw capability and easy setup make it perfect for beginners or multi-purpose rooms. While not as bright as laser models, it provides a reliable, high-quality image for cost-effective simulator builds.
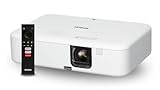
- Display Stunning Images up to 300″ — Full HD 1080p picture four times…
- Compact Design — Sleek, lightweight design easily fits in backpacks for…
- Ultra Bright Images — 3,000 lumens of color and white brightness…
Why Short Throw Projectors Are Essential for Home Golf Simulators
Choosing the right projector is critical for a functional home golf simulator. Standard projectors require significant distance, which is often impossible in garages or spare rooms. Short throw models solve this spatial challenge, creating an immersive experience where standard units fail.
Key Advantages of Short Throw Technology
Short throw projectors offer distinct benefits that directly address common installation headaches. Their design fundamentally changes how you set up your simulator space. You gain flexibility and performance previously unavailable for residential use.
- Minimal Shadow Interference: Mounting the projector close to the screen drastically reduces the chance of your body or club casting a shadow. This ensures an unobstructed view of the virtual course throughout your swing.
- Optimal Use of Limited Depth: You can achieve a large, life-like image in a room with shallow depth. This is perfect for spaces where the hitting area is close to the screen, a common constraint in home setups.
- Simplified Ceiling Mounting: With less distance needed, ceiling mounts are shorter and more stable. This often allows for installation in rooms with lower ceiling heights without the projector becoming an obstacle.
Critical Technical Specifications to Evaluate
Not all short throw projectors are equal for golf simulation. You must evaluate specific specs to ensure a clear, responsive, and durable image. Focus on these three core performance metrics.
Brightness (Lumens): Aim for a minimum of 3,000 lumens. This compensates for ambient light and ensures the image isn’t washed out. Brighter models (4,000+) are better for rooms with windows.
Native Resolution: 1080p (Full HD) is the standard, but 4K is becoming the new benchmark for sharpness. Higher resolution reveals crucial details in the simulation software, like individual blades of grass.
Input Lag: This measures the delay between your swing and the on-screen reaction. Look for a gaming or enhanced mode with lag under 50ms for a realistic, responsive feel that matches your real-world swing.
How to Choose the Right Short Throw Projector for Your Space
Selecting your projector requires matching its capabilities to your specific room dimensions and simulator goals. A perfect fit depends on precise measurements and understanding key ratios. This decision impacts your entire setup’s success and enjoyment.
Measuring Your Room and Calculating Throw Ratio
Accurate measurements are the non-negotiable first step. You must know your exact room depth, width, and ceiling height before shopping. The throw ratio is the most critical number for a short throw golf simulator.
- Measure Depth: Record the distance from your intended screen wall to the farthest point where the projector can be mounted. This is your maximum available throw distance.
- Understand Throw Ratio: This number (e.g., 0.5:1) indicates the image width achievable per unit of distance. A lower ratio means a larger image from a shorter distance, which is essential for tight spaces.
- Use a Projection Calculator: Most manufacturer websites offer tools. Input your room depth and desired screen size to see if a specific projector model will work.
Laser vs. Lamp: Choosing Your Light Source
The projector’s light source affects brightness, maintenance, and long-term cost. This is a fundamental choice between traditional lamp-based and modern laser models.
| Feature | Laser Projector | Lamp Projector |
|---|---|---|
| Lifespan | 20,000+ hours | 3,000 – 6,000 hours |
| Brightness Maintenance | Consistent over time | Gradually dims |
| Initial Cost | Higher | Lower |
| Best For | Frequent use, dedicated spaces | Occasional use, budget-conscious builds |
Laser projectors provide instant on/off capability and superior durability. They are ideal for a dedicated simulator room where you want reliability. Lamp projectors are a cost-effective entry point but require eventual replacement.
Installation and Setup Tips for Optimal Performance
Proper installation maximizes your projector’s potential and ensures a seamless golfing experience. Careful planning for mounting, alignment, and calibration is essential. These steps transform technical hardware into an immersive virtual golf environment.
Mounting Options and Positioning Guide
Choosing where and how to mount your projector is the most critical installation decision. The goal is a stable, secure position that provides a perfectly rectangular image on your screen. Consider these three primary mounting methods.
- Ceiling Mount (Most Common): Use a universal short throw ceiling mount kit. Ensure it’s rated for your projector’s weight and allows for fine-tuning tilt and yaw. Position it so the lens is perpendicular to the screen center.
- Wall Shelf Mount: A sturdy shelf on the rear wall is an excellent alternative if ceiling mounting is impractical. This method is often easier to level and adjust but requires precise depth calculation.
- Floor Enclosure: For ultimate safety and a clean look, build a protective enclosure on the floor behind the hitting area. This completely removes the risk of a stray ball strike but consumes floor space.
Calibration and Image Fine-Tuning
After mounting, precise calibration is necessary for a sharp, color-accurate, and correctly sized image. Rushing this step will degrade your simulator’s visual quality. Follow this systematic process.
- Power On and Display a Test Grid: Use a pure white grid or alignment pattern from your simulator software. This reveals distortion and focus issues immediately.
- Adjust Physical Position First: Manually adjust the mount to make the image as square as possible. Use the projector’s lens shift feature (if available) before touching digital keystone correction.
- Fine-Tune Focus and Color: Dial in the lens focus for crisp edges. Then, access the projector’s menu to adjust brightness, contrast, and color temperature to match your screen’s material.
Finally, test the calibration by playing a few virtual holes. Look for any blurring during fast panning shots and ensure text on menus is perfectly legible. Minor tweaks may be needed after this real-world test.
Maximizing Value: Budget Considerations and Cost-Saving Strategies
Building a high-quality golf simulator doesn’t require an unlimited budget. Strategic planning can deliver exceptional performance while controlling costs. Focus your investment on the components that most directly impact your experience.
Balancing Projector Cost with Overall Simulator Budget
The projector is a significant but not solitary investment. Allocate your total budget wisely across the launch monitor, screen, enclosure, software, and projector. A common mistake is overspending on one component while compromising another.
- The 20-25% Rule: As a general guideline, your projector should represent roughly 20-25% of your total simulator budget. This ensures a balanced system where no single part becomes a bottleneck.
- Prioritize Core Performance: Within your projector budget, prioritize native resolution and brightness over extra features. A 1080p, 3,500-lumen model is better than a dim 4K projector.
- Consider Refurbished or Previous-Generation Models: Authorized retailers often sell certified refurbished units with full warranties. Last year’s model can also offer substantial savings with minimal performance difference.
Essential vs. Optional Accessories
Not all add-ons are created equal. Some accessories dramatically improve functionality, while others are nice-to-haves. Spend on essentials first to ensure a reliable foundation.
| Accessory | Priority | Reason & Cost-Saving Tip |
|---|---|---|
| Quality Ceiling Mount | Essential | Prevents vibration and allows precise alignment. Don’t use a generic mount; get one designed for short throw. |
| Extra Long HDMI Cable | Essential | Ensures reliable signal. Buy a certified high-speed cable; skimping here causes signal dropouts. |
| Projector Lens Cover | Recommended | Protects from dust when not in use. A simple, inexpensive item that prolongs lens life. |
| External Streaming Device | Optional | Use an existing Apple TV or Roku instead of buying a dedicated media player for entertainment. |
This phased approach lets you start playing sooner. It also allows you to test your setup and make more informed decisions about which upgrades you truly need.
Common Setup Problems and Expert Troubleshooting Solutions
Even with careful planning, you may encounter technical issues during setup. Most common problems have straightforward solutions. This guide helps you diagnose and fix them quickly to get back to playing.
Image Quality Issues: Blur, Color, and Alignment
Poor image quality ruins immersion. These symptoms usually point to specific calibration or hardware issues. Methodically check each potential cause.
- Blurry or Soft Focus: First, manually adjust the lens focus ring while displaying a test pattern with fine details. If blur persists, check for digital keystone correction being active and disable it, as it degrades sharpness.
- Incorrect Colors or Dim Image: Navigate to the projector’s picture mode. Ensure it’s set to “Bright,” “Dynamic,” or a dedicated “Golf” mode—not “Cinema” or “Eco.” Also, verify the HDMI input is set to “Full RGB” or “Enhanced” format.
- Image Not Filling Screen / Cropped Edges: This is often a mismatch between the projector’s output resolution and the source device. Set your computer or launch monitor to output the projector’s native resolution (e.g., 1920×1080).
Connectivity and Signal Problems
Nothing is more frustrating than a “No Signal” message. These problems typically stem from the connection chain between your source device and the projector.
- Power Cycle the Entire System: Turn off and unplug the projector, computer, and launch monitor. Wait 60 seconds, then plug in and power on the projector first, followed by the other devices.
- Verify Source Input: Use the projector’s remote to cycle through its HDMI inputs (HDMI 1, HDMI 2). The active input must match the port your cable is plugged into.
- Inspect and Replace Cables: Faulty HDMI cables are a frequent culprit. Try a different, certified high-speed HDMI cable. Ensure it’s firmly seated at both ends.
- Check Source Device Display Settings: On your PC, press Windows Key + P to ensure it’s set to “Duplicate” or “Second screen only.” On a launch monitor, consult its manual for video output settings.
If problems persist, consult your projector’s manual for a factory reset. This clears any incorrect settings that may have been inadvertently changed.
Future-Proofing Your Golf Simulator Projector Investment
Technology evolves rapidly, but a strategic purchase can keep your simulator relevant for years. Future-proofing is about selecting features that extend usability and compatibility. This protects your investment against premature obsolescence.
Key Features for Long-Term Relevance
Certain specifications and capabilities ensure your projector remains a high-performance component. Prioritize these features over flashy, non-essential gimmicks. They provide a foundation for upgrades to other parts of your system.
- 4K Resolution & Pixel Shifting: Even if your current software runs at 1080p, a native 4K or high-quality 4K pixel-shifting projector is more “future-proof.” As simulator software graphics improve, you’ll be ready for enhanced detail.
- High Brightness Headroom: Buying a projector brighter than your current minimum need (e.g., 4,000+ lumens instead of 3,000) compensates for the natural dimming of lamps over time. It also allows for use in brighter environments later.
- Multiple HDMI 2.0+ Inputs: Ensure your projector has at least two HDMI inputs that support HDCP 2.2 and high bandwidth. This allows easy connection of a launch monitor and a separate media device without constant cable swapping.
Maintenance and Care for Extended Lifespan
Proper maintenance is the most effective way to future-proof any electronic device. A well-cared-for projector will deliver peak performance for its entire rated lifespan. Follow these essential care practices.
- Manage Dust and Debris: Regularly inspect and clean intake vents and filters with compressed air. In a garage simulator, consider using a projector enclosure to protect against dust and accidental impacts.
- Ensure Proper Ventilation: Never block the projector’s cooling vents. Maintain at least 6-12 inches of clearance on all sides, especially if mounted in an enclosed shelf or cabinet.
- Use Correct Power-Down Cycle: Always use the projector’s “Power Off” command, allowing its internal fan to cool the lamp or laser before disconnecting electricity. Abrupt power cuts cause heat damage.
- Calibrate Periodically: Re-check image alignment and color settings every 6-12 months. Components can shift slightly, and lamps gradually dim, requiring minor brightness or color adjustments.
By adhering to this maintenance schedule, you ensure consistent image quality. This proactive care maximizes the years before an upgrade is necessary, delivering the best return on your investment.
Integrating Your Projector with Simulator Software and Hardware
A projector doesn’t operate in isolation; it’s the visual centerpiece of a connected system. Seamless integration with your launch monitor and software is crucial for a smooth experience. Proper setup ensures all components work in harmony.
Optimizing Settings for Popular Simulator Software
Each golf simulator software has unique graphical demands and display settings. Configuring your projector to match these optimizes visual fidelity and performance. Avoid using generic display profiles.
- Foresight Sports (FSX Play/Pro): This software benefits from high contrast and vibrant colors. Set your projector to a high contrast ratio and disable any motion smoothing features to reduce input lag during fast panning shots.
- SkyTrak / The Golf Club (TGC 2019): Ensure your computer’s graphics card control panel and the projector are both set to output at the same native resolution. Mismatches here can cause blurring or interface elements to appear off-screen.
- TrackMan and Uneekor: These high-end platforms often run at very high resolutions. Use a high-quality, high-speed HDMI or DisplayPort cable to handle the data throughput without signal dropouts or artifacts.
Syncing with Launch Monitors and Avoiding Interference
Your projector must coexist with sensitive radar or camera-based launch monitors. Improper placement can cause physical or technical interference that disrupts data capture.
| Launch Monitor Type | Potential Interference | Integration Solution |
|---|---|---|
| Radar-Based (e.g., TrackMan, FlightScope) | Projector fan noise/vibration can affect microphone arrays for impact sound. | Mount the projector as far from the monitor’s microphone as possible. Use vibration-dampening mounts. |
| Camera-Based (e.g., Foresight, Uneekor) | Projector light can cause lens flare or overexposure in the monitor’s cameras. | Ensure the projector’s light path does not shine directly into the launch monitor’s camera lenses. Use baffles or hoods if needed. |
| Photometric (e.g., SkyTrak) | Minimal direct interference, but stray light can affect the unit’s sensors. | Position the SkyTrak unit so it is not in the direct beam of the projected image, which can cause distracting reflections. |
Finally, use a high-quality surge protector or UPS (Uninterruptible Power Supply) for all electronics. This prevents damage from power spikes and ensures a clean, stable power source for every component in the chain.
Conclusion: Mastering Your Space with the Right Golf Simulator Projector
Choosing a golf simulator projector with short throw capability transforms limited spaces into premier practice facilities. You overcome depth and shadow challenges while achieving a bright, immersive image. The right model elevates your entire simulation experience.
The key takeaway is to prioritize brightness, throw ratio, and resolution based on your exact room measurements. Match your projector to your simulator software and launch monitor for seamless integration. This ensures peak performance from every component.
Use the detailed comparisons and setup guides in this article to make an informed decision. Measure your space carefully, plan your budget strategically, and follow the installation steps for optimal results. Your perfect home golf setup is within reach.
Start planning your build today and enjoy professional-grade golf simulation from the comfort of your home. The right projector is the cornerstone of countless hours of practice and enjoyment.
Frequently Asked Questions about Golf Simulator Projectors
What is a short throw projector for a golf simulator?
A short throw projector is specifically designed to project a large image from a very short distance. For golf simulators, this typically means placing the projector just a few feet from the screen. This technology is essential for rooms with limited depth, as it maximizes usable space.
It solves the common problems of shadows from the golfer and interference with the golf swing. By mounting it close to the screen (often on the ceiling), you create an immersive, life-sized image without needing a deep room, making home simulator installations far more feasible.
How much brightness (lumens) do I need for a home golf simulator?
For a dedicated, light-controlled room, aim for a minimum of 3,000 lumens. This ensures a vibrant image that isn’t washed out. If your space has windows or ambient light, consider 4,000 lumens or higher for optimal clarity.
Brightness is critical for seeing fine details like fairway contours and green breaks. A brighter projector also compensates for the light-absorbing nature of many impact screens. Never sacrifice lumens for resolution; a bright 1080p image is better than a dim 4K one.
What is the ideal throw ratio for a limited space setup?
Look for an ultra-short throw (UST) projector with a ratio of 0.5:1 or less. This means the projector can cast a 100-inch wide image from just about 1.5 feet away. This is the best specification for extremely tight spaces like standard garages.
A standard short throw projector has a ratio between 0.5:1 and 1.0:1. Always use the manufacturer’s projection calculator with your exact room depth and desired screen size before purchasing. This precise calculation prevents installation headaches.
Can I use a regular projector for my golf simulator?
Technically yes, but it is not recommended for spaces under 12 feet deep. A standard (long throw) projector requires 10-15 feet of distance to create a large image. This consumes valuable room depth and increases the chance of shadows and swing interference.
You would also need a much higher ceiling to mount it far back. For most residential installations, a dedicated short throw model is a superior and often necessary choice. It is purpose-built for the constraints of a home simulator build.
How do I prevent shadows on my golf simulator screen?
The primary method is to use a short throw projector mounted close to the screen, ideally on the ceiling directly above or behind the hitting area. This positioning minimizes the angle between the projector lens and your body, drastically reducing shadow casting.
Secondly, ensure you are hitting from the correct distance as dictated by your launch monitor. Standing too close to the screen increases shadow risk. Proper positioning of both the projector and the golfer is key to a shadow-free experience.
What is the difference between laser and lamp projectors for simulators?
Laser projectors have a light source rated for 20,000+ hours, offering consistent brightness and minimal maintenance. They are more expensive upfront but ideal for frequent use. Lamp projectors use traditional bulbs that dim over time and need replacing every 3,000-6,000 hours.
Laser models are brighter, turn on instantly, and are better for dedicated spaces. Lamp models are a cost-effective entry point for occasional use. For a simulator you’ll use regularly, the long-term value and reliability of laser often justify the higher initial investment.
Why is my golf simulator projector image blurry or out of focus?
First, check the physical focus ring on the projector lens while displaying a test pattern with fine details. Second, ensure digital keystone correction is turned off, as this software adjustment degrades image sharpness. Always use the projector’s lens shift or physical positioning to square the image.
Also, verify that your computer or source device is outputting the projector’s exact native resolution (e.g., 1920×1080). A resolution mismatch is a common cause of soft, blurry images. Start with physical adjustments before changing software settings.
What is the best way to mount a short throw golf simulator projector?
A universal short throw ceiling mount is the most popular and effective method. It provides stability and allows for fine-tuning of tilt and yaw. Ensure the mount is rated for your projector’s weight and offers the necessary adjustability to perfectly align the image with your screen.
Position the projector so its lens is perpendicular to the center of the screen. Use a test grid to manually align the image as squarely as possible before tightening all adjustments. This physical alignment is superior to using digital keystone correction.
This website is a participant in the Amazon Services LLC Associates Program, an affiliate advertising program designed to provide a means for us to earn fees by linking to Amazon.com and affiliated sites.