
This website is a participant in the Amazon Services LLC Associates Program, an affiliate advertising program designed to provide a means for us to earn fees by linking to Amazon.com and affiliated sites.
You can use a projector for sewing patterns by projecting a digital PDF pattern directly onto your fabric or cutting surface, calibrating the image to the correct scale, and positioning the fabric underneath the projected lines. This method can save paper, reduce taping and cutting, and make pattern preparation much faster.
Instead of printing dozens of PDF pages and assembling them, a projector lets you work from the digital pattern itself. The key is accuracy: even a small scaling error can change garment measurements and cause pieces to fit incorrectly.
In this guide, you will learn how to choose and position a projector, calibrate a sewing pattern to its correct dimensions, project it onto fabric, trace or cut the pieces safely, and troubleshoot common problems. Whether you sew clothing, quilts, costumes, or accessories, understanding the setup process can help you turn a projector into a practical sewing-room tool.
Best for Sewing Pattern Projection: Epson EpiqVision Flex CO-FH02, BenQ TH575, and XGIMI MoGo 3 Pro
Choosing the right projector can make sewing pattern projection considerably easier because accuracy, brightness, resolution, throw distance, and placement flexibility all affect how clearly the pattern appears on your work surface. For sewing, you do not necessarily need an expensive home-theater projector, but you do want a model capable of producing a sharp, stable image at the size required by your patterns.
Epson EpiqVision Flex CO-FH02
The Epson EpiqVision Flex CO-FH02 is a strong choice for sewing rooms because its Full HD image provides clear pattern lines, while its bright projection helps maintain visibility when working in normally lit spaces.
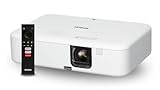
- Display Stunning Images up to 300″ — Full HD 1080p picture four times larger than a 75″ flat panel delivers an immersive experience for business presentations…
- Compact Design — Sleek, lightweight design easily fits in backpacks for easy portability on the go
BenQ TH575
The BenQ TH575 is well suited to larger sewing tables because its Full HD resolution and high brightness can produce a crisp pattern image, making measurement marks, curves, notches, and cutting lines easier to see.

- 3,800LM BRIGHTNESS FOR 120″ BIG SCREEN: Enjoy a vibrant 120-inch big-screen experience even with the lights on. The 3,800lm high brightness ensures clear visuals for…
- LICENSED GOOGLE TV DONGLE INCLUDED: Comes with an officially licensed Google TV dongle for endless streaming. Easily access Netflix, YouTube, and Disney+ with a…
XGIMI MoGo 3 Pro
The XGIMI MoGo 3 Pro is particularly convenient for compact sewing spaces because its portable design makes repositioning simple, allowing you to project patterns without permanently mounting a projector overhead.

- 𝑩𝒖𝒊𝒍𝒕-𝒊𝒏 𝑩𝒂𝒕𝒕𝒆𝒓𝒚 𝒇𝒐𝒓 𝑬𝒏𝒅𝒍𝒆𝒔𝒔 𝑭𝒖𝒏:Take big-screen entertainment anywhere with up to…
- 360° 𝑨𝒅𝒋𝒖𝒔𝒕𝒂𝒃𝒍𝒆 𝑺𝒕𝒂𝒏𝒅:Project from wall to ceiling with ease. The 360° built-in stand and ISA Technology…
Related Products for Projector Sewing
A projector is only one part of an effective digital pattern setup. Consider adding:
- Ceiling or wall projector mount — Keeps the projector securely positioned and reduces accidental movement.
- Large cutting mat — Provides a consistent surface for aligning and cutting projected patterns.
- Pattern weights — Hold fabric flat without obstructing projected lines.
- Fabric-safe marking pen or chalk — Useful when tracing projected outlines onto fabric.
- Tape measure or quilting ruler — Essential for checking calibration and verifying critical dimensions.
- Laptop or tablet — Provides a convenient way to open PDF sewing patterns and control the projected image.
- USB mouse or wireless mouse — Makes zooming, scrolling, and positioning patterns easier from the cutting table.
The most important consideration is not simply buying the brightest projector. The projector must be positioned securely and calibrated accurately so that a known measurement on the digital pattern corresponds exactly to the same measurement on your physical work surface.
What Do You Need to Use a Projector for Sewing Patterns?
Using a projector for sewing patterns does not require a complicated setup, but you need the right combination of equipment, software, and workspace. The goal is to create a stable projection that displays your digital pattern at 100% scale without distortion.
The first requirement is a digital sewing pattern, usually provided as a PDF. Look for patterns that include a clearly marked test square, such as a 2-inch or 5 cm square, because this gives you a reliable reference for checking projection accuracy.
Next, you need a projector with sufficient resolution and brightness. Full HD resolution is helpful because fine pattern details, measurements, grainlines, notches, and curved edges remain easier to distinguish.
You also need a computer or compatible device capable of opening the pattern PDF. A laptop is particularly convenient because you can adjust the pattern display while standing near your cutting table.
Your physical workspace should include:
- A large, flat cutting table for positioning fabric.
- A ceiling, wall, or overhead projector mount to prevent unwanted movement.
- A large cutting mat if you will cut directly on the table.
- Pattern weights to keep fabric from shifting.
- A fabric marker or chalk if you plan to trace projected outlines.
- A ruler or measuring tape for calibration checks.
Finally, you need suitable pattern-viewing software that allows you to display the PDF without automatically fitting it to the screen. Disable options such as “Fit to Page” or automatic scaling when necessary.
The most important piece of equipment is actually your calibration reference. Before cutting valuable fabric, always verify a known measurement from the pattern against the projected measurement on your table. A sharp projector is useful, but accurate scale is what makes projector sewing practical.
How to Set Up a Projector for Sewing Patterns
Setting up a projector for sewing patterns starts with creating a stable projection area where the digital pattern can be displayed directly over your fabric or cutting surface. A fixed overhead position is generally preferable because it minimizes movement and makes calibration more consistent.
Begin by placing your projector above the cutting table, either on a ceiling mount, wall mount, shelf, or sturdy overhead structure. Position it so the entire working area is visible without the projector sitting where your head, hands, or sewing equipment can easily block the image.
Next, connect the projector to your computer and open the PDF sewing pattern. Before adjusting the image size, turn off automatic scaling features such as “Fit to Page,” “Shrink to Fit,” or similar options. These settings can change the pattern dimensions and make the projected pieces inaccurate.
Adjust the projector’s focus until the pattern lines are sharp across the entire cutting surface. If possible, keep the projector as level and centered over the table as practical, because extreme angles can introduce geometric distortion.
Then establish your working projection area:
- Place a ruler or measuring grid on the cutting surface.
- Project the pattern’s test square onto the surface.
- Measure the projected square with an accurate ruler.
- Adjust the computer’s PDF zoom until the projected measurement matches the pattern’s stated dimensions.
- Check the measurement at several points across the projection.
Once the test square measures correctly, avoid moving the projector or changing the display resolution. Marking the projector’s position can also help you recreate the same setup later.
Do not cut fabric yet. Calibration should always be verified before using expensive fabric, because a projection that looks visually correct can still be slightly oversized or undersized.
How to Calibrate a Projector for Accurate Sewing Patterns
Projector calibration is the most important step when using digital sewing patterns because the projected image must match the pattern’s intended dimensions. A pattern that is only a few percent too large or too small can affect garment fit, seam placement, and the final proportions of the finished project.
Start with the test square included in the PDF pattern. Many digital patterns contain a calibration square with a stated measurement, such as 2 × 2 inches or 5 × 5 cm. Project this square onto your cutting surface and measure it with a physical ruler.
If the projected square does not match the stated dimensions, adjust the PDF viewer’s zoom percentage rather than randomly moving the projector. For example, if a 10 cm test square projects as 9 cm, the image needs to be enlarged until the physical measurement reaches exactly 10 cm.
After making an adjustment, measure the square again. Repeat this process until the projected measurement matches the pattern’s reference measurement as closely as your measuring equipment allows.
You should also check calibration in more than one location. Projectors can sometimes introduce distortion toward the edges, particularly when the projector is positioned at an angle.
Before cutting, verify:
- The test square measures correctly.
- The projector has not moved.
- The computer’s display resolution has not changed.
- PDF scaling remains at the calibrated setting.
- Important pattern lines remain sharp and visible.
- The fabric is lying completely flat.
Once calibration is confirmed, mark the projector position or save the computer’s display settings. This makes future sewing sessions much faster because you can return to the same setup without recalibrating from scratch.
How to Project a Sewing Pattern Directly Onto Fabric
Once your projector is calibrated, you can place the fabric on the cutting table and use the projected pattern as a visual guide. This approach can eliminate the need to print and assemble paper pattern sheets, but careful fabric positioning is essential for accurate results.
Start by laying the fabric smoothly on your cutting surface. Remove wrinkles and make sure the fabric’s grain is positioned correctly according to the pattern instructions. Use pattern weights or other suitable weights to prevent the material from shifting while you work.
Open the digital sewing pattern on your computer and display the required pattern piece. Position the projected outline over the fabric, paying particular attention to grainlines, fold lines, seam allowances, notches, darts, and other markings.
If you are tracing the pattern, use a fabric-safe marking tool to follow the projected outline. Work slowly around curves and detailed sections, and periodically check that the fabric has not moved underneath the projection.
For direct cutting, place your fabric on an appropriate cutting mat and follow the projected cutting lines with suitable fabric scissors or a rotary cutter. Keep your hands and tools clear of the projector’s lens and avoid disturbing the projector itself.
For garments with symmetrical pieces, remember that the projected pattern still needs to follow the original instructions regarding cutting on the fold, cutting mirrored pieces, and grain direction. Do not assume that simply projecting a complete shape means it can be cut as displayed.
It is also wise to begin with a test piece or inexpensive fabric. This allows you to confirm that the projector scale, fabric positioning, and cutting technique work together correctly before committing to your final material.
The projector should function as a precise visual guide—not as a substitute for reading the pattern’s construction instructions. Always follow the designer’s specified cutting and seam requirements.
How to Position and Align Fabric Under a Sewing Pattern Projector
Accurate fabric positioning is just as important as projector calibration because even a perfectly scaled pattern can produce incorrect pieces if the fabric shifts or is aligned against the wrong reference point. Before tracing or cutting, establish a consistent method for positioning every piece.
Begin by placing the fabric on a flat, stable cutting surface with the correct side facing upward. Smooth out wrinkles without stretching the material, particularly when working with knits, bias-cut pieces, or fabrics that can easily distort.
Next, identify the fabric’s grainline, center fold, selvage, and cross-grain. Compare these features with the corresponding markings displayed by the projected pattern. The grainline shown on the projection should run in the correct direction relative to the fabric rather than simply following the edge of the table.
Use pattern weights to hold the fabric securely. Avoid placing heavy objects directly over important projected markings because they can make the lines difficult to see and may interfere with accurate tracing or cutting.
For patterns that require a piece to be cut on the fold, align the projected fold line precisely with the fabric fold. If the pattern calls for a mirrored piece, check whether you need to flip the digital pattern or reposition the fabric before cutting.
It can also help to establish reference marks on your cutting table. A straight edge, grid, or removable tape guide can provide a repeatable reference for aligning fabric and pattern pieces.
Before making any cut, stop and check three things:
- Is the fabric completely flat?
- Is the grainline correctly positioned?
- Is the entire projected pattern at the calibrated scale?
Taking a few extra moments to align the fabric can prevent expensive cutting mistakes. Once everything is positioned correctly, you can trace or cut with considerably more confidence.
Common Mistakes When Using a Projector for Sewing Patterns
Using a projector for sewing patterns can make pattern preparation faster, but several common mistakes can compromise accuracy. Understanding these problems before you begin can save fabric, time, and frustration.
Skipping calibration
The biggest mistake is assuming that a pattern is automatically displayed at the correct size. A projector may enlarge or reduce the PDF depending on the viewer settings, screen resolution, or zoom level. Always measure the pattern’s test square before cutting.
Using automatic PDF scaling
Settings such as “Fit to Page” or “Fit to Screen” can alter pattern dimensions. Use a fixed zoom setting after calibration and verify the measurement whenever you change devices, display settings, or patterns.
Allowing the projector to move
Even a small movement can change the projected pattern’s position or scale. Secure the projector firmly and mark its position so you can identify if it has shifted.
Ignoring image distortion
Projecting from a sharp angle can create a trapezoid-shaped image rather than a perfectly rectangular one. Keep the projector as perpendicular to the cutting surface as practical and use geometric correction carefully, since excessive correction can affect the usable projection area.
Stretching the fabric
Pulling fabric tight while positioning it can change its dimensions. Lay the material naturally and smooth it without stretching, especially when working with stretchy or delicate fabrics.
Cutting without checking pattern details
Projected outlines do not replace written pattern instructions. Check seam allowances, grainlines, notches, darts, folds, and cutting quantities before cutting.
Finally, avoid testing a new projector setup on expensive fabric. Make your first attempt with inexpensive material or a small project, confirm the measurements, and refine your workflow before tackling an important garment.
Conclusion
Using a projector for sewing patterns can simplify pattern preparation by allowing you to work directly from digital PDF patterns without printing and assembling multiple pages. The key to successful projector sewing is accuracy: choose a suitable projector, create a stable overhead setup, calibrate the image using the pattern’s test square, and keep your fabric flat and correctly aligned.
Remember that projector sewing does not eliminate the need to follow the designer’s instructions. Grainlines, seam allowances, notches, folds, darts, and cutting quantities still need careful attention. Before using expensive fabric, test your setup with inexpensive material and verify your measurements.
With a properly calibrated projector and an organized cutting area, digital pattern projection can become a fast, convenient, and repeatable part of your sewing workflow.
Frequently Asked Questions About How to Use a Projector for Sewing Patterns
Can I use any projector for sewing patterns?
Not every projector is equally suitable, but many standard home projectors can work. Look for a model with clear resolution, adequate brightness, reliable focus, and mounting flexibility. Full HD is particularly useful for seeing small pattern markings clearly. More important than having the most powerful projector is being able to position it securely and calibrate the projected image accurately.
Do I need to print my sewing pattern?
No. One major advantage of projector sewing is that you can display a compatible digital PDF pattern directly on your cutting surface. This can eliminate the need to print, tape, and cut numerous pages. However, you should still follow any instructions provided by the pattern designer, particularly when certain pages or reference measurements are required.
How do I know if my projector is the correct scale?
Use the calibration or test square included with the digital pattern. Project the square onto your cutting table and measure it with a ruler. If a stated 10 cm square measures exactly 10 cm on the table, for example, your scale is correct at that location. Always verify calibration before cutting.
Can I cut fabric directly from the projected pattern?
Yes, provided the pattern is correctly calibrated and the fabric is properly positioned. Some sewists trace the projected outlines onto fabric, while others use the projection as a guide for direct cutting. Always account for seam allowances, folds, grainlines, notches, and other construction markings.
Should the projector be mounted overhead?
An overhead or ceiling-mounted projector is often the most convenient arrangement because it keeps the projection stable and reduces shadows from your hands. However, a secure wall, shelf, or other suitable mounting position can also work if it provides an appropriately sized, undistorted image.
Can I use projector sewing patterns on dark fabric?
It can be more difficult because projected lines may have reduced contrast on dark or highly textured materials. A fabric-safe marking tool, contrasting cutting mat, or temporary tracing method can make the pattern easier to follow. Always test your chosen marking method on a scrap of the same fabric first.
What is the biggest mistake to avoid?
The biggest mistake is cutting before verifying the projection scale. A pattern can look perfectly normal while being slightly too large or too small. Always measure the test square and confirm important dimensions before cutting your final fabric.
This website is a participant in the Amazon Services LLC Associates Program, an affiliate advertising program designed to provide a means for us to earn fees by linking to Amazon.com and affiliated sites.