
This website is a participant in the Amazon Services LLC Associates Program, an affiliate advertising program designed to provide a means for us to earn fees by linking to Amazon.com and affiliated sites.
Mounting a projector on a vaulted ceiling requires using an adjustable ceiling mount, finding the correct projection angle, and securely attaching the mount to ceiling joists for optimal image alignment.
Vaulted ceilings add architectural beauty and create a spacious feel, but they can make projector installation more challenging than mounting on a flat ceiling. The sloped design often causes alignment issues, image distortion, and difficulties in reaching the ideal projection height.
Fortunately, mounting a projector on a vaulted ceiling is entirely achievable with proper planning and the right equipment. Whether you’re creating a home theater, gaming room, classroom, or outdoor entertainment area, understanding the correct installation techniques can save time and prevent costly mistakes.
In this guide, you’ll learn the tools you need, how to choose the right projector mount, and step-by-step methods to install your projector securely while achieving a perfectly aligned image on your screen.
Best for Mounting a Projector on a Vaulted Ceiling
Choosing the right equipment can make mounting a projector on a sloped ceiling significantly easier. The following products are highly regarded for their adjustability, stability, and compatibility with most projector models.
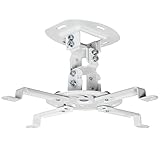
VIVO Universal Adjustable Ceiling Projector Mount
Why I picked it
The VIVO Universal Adjustable Ceiling Projector Mount offers excellent tilt and swivel adjustments, making it ideal for vaulted ceilings. Its sturdy steel construction and broad projector compatibility simplify installation and image alignment.
Best for: Home theaters, media rooms, and gaming setups with moderately sloped ceilings.
- Universal Projector Mount: Fits most projectors on the market, including…
- Compatibility: Distance between mounting holes on back of projector must be…
- Fully Adjustable: Features +15° to -15° tilt, +15° to -15° swivel, and…
QualGear PRB-717-WHT Universal Projector Ceiling Mount
Why I picked it
This mount provides extensive pitch, roll, and yaw adjustments that help compensate for angled ceilings. The quick-release design also allows convenient maintenance and projector repositioning whenever necessary.

- Heavy gauge cold-rolled steel material; Durable construction
- Universal design fits most projector brands; Weight capacity: 30 lbs…
- Low profile flush mount; Holds projector at 6″ from the ceiling
Best for: Dedicated home cinemas and installations requiring precise projector positioning.
WALI Projector Ceiling Mount Kit
Why I picked it
The WALI Projector Ceiling Mount Kit is affordable, durable, and easy to install. Its adjustable extension arm accommodates various ceiling heights and helps achieve proper projection angles on sloped surfaces.

- Compatibility: Universal Projector Mount Bracket for Both Ceiling and Wall…
- Heavy Duty: Made of high-grade steel, support up to 44lbs. Regular concrete…
- Fully Adjustable: Tilt +/- 15 degrees and swivel +/- 8 degrees. Low profile…
Best for: Budget-conscious homeowners, classrooms, and multipurpose entertainment spaces.
Using an adjustable mount and proper installation accessories greatly improves projector performance and minimizes image distortion on vaulted ceilings.
Why Vaulted Ceilings Require a Different Projector Mounting Approach
Vaulted ceilings create unique installation challenges because they are angled rather than flat. A standard projector mount designed for level ceilings often cannot compensate for the slope. As a result, the projector may point too high or too low, causing image distortion, uneven focus, and poor screen alignment.
The primary goal when mounting a projector is to position the lens perpendicular to the projection screen. On a vaulted ceiling, this usually requires an adjustable mount with tilt and swivel capabilities. These adjustments allow you to fine-tune the projector’s position and achieve a rectangular, properly centered image.
Several factors make vaulted ceiling installations different:
- Ceiling angle: Steeper slopes require greater adjustment ranges.
- Projection distance: The projector must remain within the recommended throw distance.
- Mounting height: High ceilings may require extension poles.
- Image alignment: Incorrect positioning can create trapezoidal images.
- Cable routing: Sloped ceilings often need additional cable management planning.
Another consideration is structural support. Because projectors can be relatively heavy, the mount should always be attached to ceiling joists rather than drywall alone. Securing the mount properly reduces vibration and prevents safety hazards.
Planning is equally important. Before drilling any holes, measure the ceiling height, determine the screen location, and calculate the projector’s throw distance. Many modern projectors include lens shift and keystone correction features that help fine-tune image positioning, but these should supplement proper installation rather than replace it.
A well-planned vaulted ceiling installation not only delivers a better viewing experience but also protects your equipment and makes future maintenance much easier.
Tools and Materials Needed to Mount a Projector on a Vaulted Ceiling
Installing a projector on a vaulted ceiling becomes much easier when you have the right tools and accessories ready before starting. Because sloped ceilings require precise positioning and secure attachment, preparation is essential for achieving a professional-looking installation.
The most important item is an adjustable projector mount specifically designed for angled ceilings. Unlike standard mounts, these models provide tilt, swivel, and extension adjustments that allow you to align the projector correctly despite the ceiling’s slope.
Essential Tools
- Adjustable projector ceiling mount
- Stud finder
- Measuring tape
- Pencil or marking tool
- Cordless drill and drill bits
- Screwdriver set
- Level
- Ladder or step stool
- Socket wrench set
Recommended Materials
- Mounting screws and anchors
- Extension pole (for high ceilings)
- HDMI cables
- Power extension cable
- Cable raceways or cable covers
- Zip ties or cable clips
- Surge protector
A stud finder deserves special attention because projector mounts should always be secured directly into ceiling joists. Drywall alone cannot safely support the weight of a projector and mount over time. Locating structural supports beforehand significantly reduces installation risks.
Measuring tools are equally important. Before mounting, determine:
- Screen size and placement
- Projector throw distance
- Ceiling slope angle
- Desired projector height
- Cable routing path
Many homeowners also benefit from using cable management accessories. Vaulted ceilings often expose wires more visibly than flat ceilings, making raceways and clips useful for maintaining a clean, organized appearance.
If your ceiling is particularly high, an extension pole may be necessary. Lowering the projector slightly can improve image alignment and simplify future maintenance tasks such as cleaning filters or replacing bulbs.
Taking time to gather the proper tools and materials beforehand prevents interruptions during installation and greatly improves the chances of achieving a secure, perfectly aligned projector setup.
Step-by-Step Guide: How to Mount a Projector on a Vaulted Ceiling
Mounting a projector on a vaulted ceiling requires careful planning and precise adjustments. Following a systematic approach helps you achieve proper image alignment while ensuring the projector remains safely secured.
Step 1: Determine the Screen Location
Begin by deciding where your projection screen will be placed. The screen should be positioned on a wall that provides comfortable viewing angles and enough distance for the projector’s throw requirements.
Measure the screen dimensions and mark its center point. This centerline will guide the placement of the projector.
Step 2: Calculate the Projector Position
Consult your projector’s manual or projection calculator to determine the recommended throw distance. Measure the distance from the screen to the ceiling mounting point.
Consider:
- Screen size
- Projector throw ratio
- Ceiling height
- Ceiling slope angle
- Viewing position
Mark the approximate mounting location with a pencil.
Step 3: Locate Ceiling Joists
Use a stud finder to identify ceiling joists within the marked installation area. Projector mounts should always be attached directly to structural framing.
Once located, mark the joist positions clearly. If a joist is not available at the ideal spot, consider using a mounting plate designed for projector installations.
Step 4: Install the Ceiling Mount
Position the mounting bracket over the joist markings and drill pilot holes. Secure the mount using the supplied screws and hardware.
Ensure the mount:
- Sits firmly against the ceiling
- Supports the projector’s weight capacity
- Allows sufficient tilt and swivel adjustments
- Remains level and stable
Step 5: Attach and Align the Projector
Secure the projector to the mounting plate according to the manufacturer’s instructions. Adjust the mount’s tilt and rotation until the projected image appears centered and rectangular.
Fine-tune the image by:
- Adjusting projector height
- Setting the correct tilt angle
- Centering the image horizontally
- Using lens shift if available
- Applying keystone correction only when necessary
Finally, route power and HDMI cables neatly using cable raceways or clips. Test the projector with various content and make minor adjustments until the picture fills the screen evenly and remains sharp from edge to edge.
A careful installation process not only produces a better viewing experience but also protects your equipment and makes future maintenance considerably easier.
Common Mistakes to Avoid When Mounting a Projector on a Vaulted Ceiling
Mounting a projector on a vaulted ceiling can transform your entertainment space, but several common mistakes can lead to poor image quality, difficult adjustments, and even safety hazards. Understanding these pitfalls before installation can save both time and money.
Using a Standard Ceiling Mount
One of the biggest mistakes is purchasing a projector mount designed only for flat ceilings. Vaulted ceilings require adjustable mounts that can tilt, swivel, and sometimes extend downward.
A standard mount may leave the projector pointing at the wrong angle, resulting in a distorted or off-center image.
Ignoring the Projector’s Throw Distance
Many people mount their projector based solely on where it looks visually appealing. However, every projector has a recommended throw distance that determines the image size and clarity.
Installing the projector too close or too far from the screen can cause:
- An image that is too large or too small
- Difficulty focusing the picture
- Reduced brightness and sharpness
- Limited adjustment options
Always check the manufacturer’s specifications before drilling any holes.
Mounting into Drywall Instead of Joists
A projector and its mounting hardware can place significant stress on the ceiling. Attaching the mount directly to drywall is unsafe and may eventually lead to equipment failure or damage.
For maximum stability:
- Locate ceiling joists with a stud finder
- Use the recommended mounting hardware
- Verify the weight capacity of the mount
- Double-check all fasteners before use
Relying Too Much on Keystone Correction
Keystone correction is useful for minor adjustments, but it should not compensate for poor installation. Excessive digital correction can reduce image resolution and introduce artifacts.
Whenever possible, physically align the projector so the lens faces the screen squarely.
Neglecting Cable Management
Loose cables hanging from a vaulted ceiling can make an otherwise beautiful installation look unfinished. Exposed cables can also create maintenance challenges and accidental snagging hazards.
Use cable raceways, clips, or in-wall cable routing methods to keep wires organized and protected.
Avoiding these common mistakes will help you achieve a safer installation, a cleaner appearance, and a brighter, properly aligned image that enhances your home theater experience.
Conclusion
Mounting a projector on a vaulted ceiling may seem complicated at first, but it becomes manageable with the right planning and equipment. The key is to use an adjustable projector mount, accurately calculate the throw distance, and securely attach the mount to ceiling joists. Taking the time to properly align the projector minimizes image distortion and reduces the need for excessive keystone correction.
Cable management and careful positioning also contribute to a cleaner, more professional installation. By avoiding common mistakes such as using an incompatible mount or relying solely on digital image adjustments, you can create a home theater setup that delivers excellent picture quality and long-term reliability.
For even better results, consult your projector’s installation guide and consider using manufacturer-provided projection calculators to determine the ideal mounting location. A properly installed projector will provide years of immersive viewing and entertainment.
Frequently Asked Questions About How to Mount a Projector on a Vaulted Ceiling
Can you mount a projector on a sloped or vaulted ceiling?
Yes. Most projectors can be mounted on a vaulted ceiling using an adjustable projector mount designed to accommodate angled surfaces. These mounts typically offer tilt, swivel, and rotation adjustments that help align the projector with the projection screen. The key is ensuring the mount is compatible with both your projector model and the degree of the ceiling slope.
Do I need a special projector mount for a vaulted ceiling?
In most cases, yes. Standard ceiling mounts are intended for flat ceilings and may not provide enough adjustment for sloped installations. An adjustable mount specifically designed for vaulted ceilings makes it much easier to position the projector correctly and achieve a rectangular image.
How do I know where to mount my projector?
The ideal mounting position depends on your projector’s throw ratio, screen size, and ceiling height. Consult your projector’s user manual or use a projection calculator to determine the recommended distance between the projector and the screen. Mark the centerline of the screen and align the projector accordingly.
Should I use keystone correction?
Keystone correction should be used sparingly. While it can help correct minor image distortion, excessive keystone adjustment may reduce image quality and sharpness. Proper physical alignment of the projector is always the preferred solution.
Is it safe to mount a projector directly to drywall?
No. Projector mounts should be secured directly into ceiling joists or other structural supports. Drywall alone is generally not strong enough to safely support the combined weight of the projector and mounting hardware over time.
How can I hide cables on a vaulted ceiling?
You can use cable raceways, cable covers, clips, or in-wall wiring solutions to keep cables organized and maintain a clean appearance. Proper cable management also protects wires from accidental damage and makes your installation look more professional.
Can a Projector Get a Virus?why you need to know
This website is a participant in the Amazon Services LLC Associates Program, an affiliate advertising program designed to provide a means for us to earn fees by linking to Amazon.com and affiliated sites.